Page 150 of 642

3-52
Emergency liftgate safetyrelease
Your vehicle is equipped with the
emergency liftgate safety release
lever located on the bottom of the lift-
gate. To unlock and open the liftgate
manually from inside the luggage
compartment, perform the followingsteps:
1. Remove the cover.
2. Push the release lever to the right.
3. Push up the liftgate.
Power liftgate (if equipped)
Power liftgate button
When the ignition switch is in the ON
position and the shift lever is in Park
(P), the power liftgate can be opened
by using the console button on thedash.
Before using the power liftgate, make
sure the power liftgate option isselected in the User Setting Modes
in the cluster LCD display.
For more details, refer to "LCD
Display" in this chapter.
Convenient features of your vehicle
OTL045038
For emergencies, be fully
aware of the location of the
emergency liftgate safety
release lever in this vehicle
and how to open the liftgate if
you are accidentally locked in
the luggage compartment.
No one should be allowed to
occupy the luggage compart-
ment of the vehicle at any time.
The luggage compartment is a
very dangerous location in the
event of a crash.
Use the release lever for
emergencies only. Use
extreme caution, especially
while the vehicle is in motion.
WARNING
OTL045039
Page 163 of 642
3-65
Convenient features of your vehicle
3
Gauges
Speedometer
The speedometer indicates the
speed of the vehicle and is calibratedin miles per hour (mph) and/or kilo-meters per hour (km/h).
Tachometer
The tachometer indicates the
approximate number of engine revo-
lutions per minute (rpm). Use the tachometer to select the cor-
rect shift points and to prevent lug-
ging and/or over-revving the engine. Do not operate the engine within
the tachometer’s RED ZONE. This
may cause severe engine damage.
Engine Coolant TemperatureGauge
This gauge indicates the tempera-ture of the engine coolant when the
ignition switch or Engine Start/Stop
button is ON.
NOTICE
OTLE045103
OTLE045107
OTL045107
Page 171 of 642
3-73
Convenient features of your vehicle
3
Information Mode
Service Interval
Service in
If the remaining mileage or time reaches 900 miles (1,500 km) or 30
days, "Service in" message is dis-
played for several seconds each time
you set the ignition switch or Engine
Start/Stop button to the ON position.
For the setting of the service inter-
val, refer to "User Settings Mode"
of the LCD display.
Service required
If you exceed the specified service
interval, a message indicating,
"Service required" will be displayed
each time you turn ON the vehicle.
To reset the service interval, press the
OK button for more than 1 second.
Service in OFF
If the service interval is not set,
"Service in OFF" message is dis-
played.OTLA045181/OTLA045182
■Type A ■Type B
OTLA045296/OTLA045297
■Type A ■Type B
OLF044457N/OLF044456N
■Type A ■Type B
Page 174 of 642

3-76
Convenient features of your vehicle
Door / Liftgate
ItemsExplanation
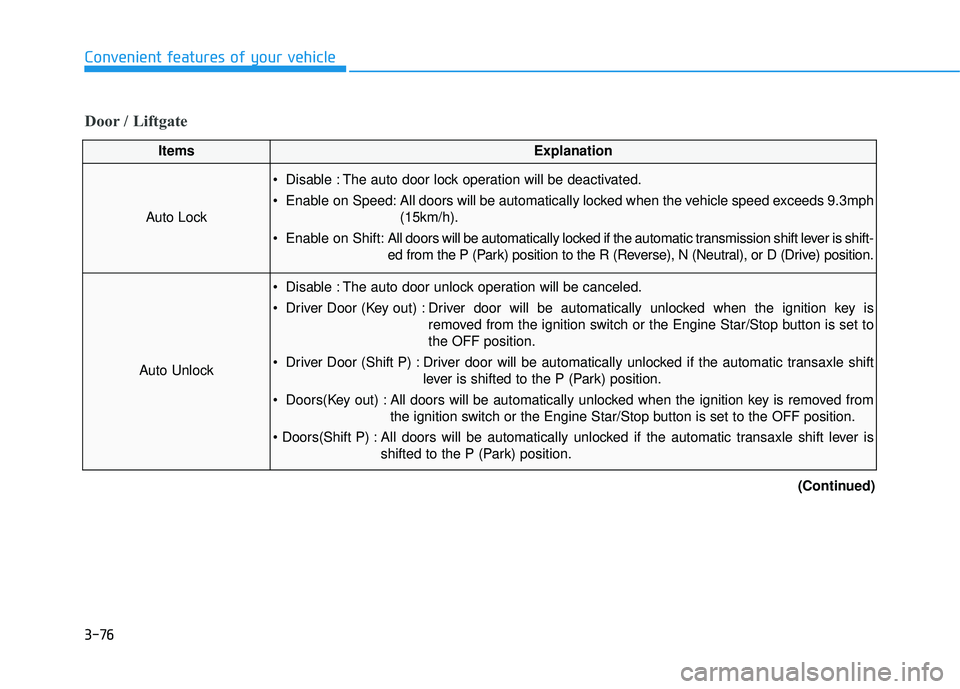
Auto Lock
Disable : The auto door lock operation will be deactivated.
Enable on Speed: All doors will be automatically locked when the vehicle speed exceeds 9.3mph(15km/h).
Enable on Shift: All doors will be automatically locked if the automatic transmission shift lever is shift-
ed from the P (Park) position to the R (Reverse), N (Neutral), or D (Drive) position.
Auto Unlock
Disable : The auto door unlock operation will be canceled.
Driver Door (Key out) : Driver door will be automatically unlocked when the ignition key is
removed from the ignition switch or the Engine Star/Stop button is set to the OFF position.
Driver Door (Shift P) : Driver door will be automatically unlocked if the automatic transaxle shift lever is shifted to the P (Park) position.
Doors(Key out) : All doors will be automatically unlocked when the ignition key is removed from the ignition switch or the Engine Star/Stop button is set to the OFF position.
All doors will be automatically unlocked if the automatic transaxle shift lever is shifted to the P (Park) position.
(Continued)
Page 188 of 642

3-90
Convenient features of your vehicle
Trip A/B
Information
If you press and hold the OK button
when viewing the tripmeter, the
mileage, the average vehicle speed,
and the timer will be reset simultane-
ously.
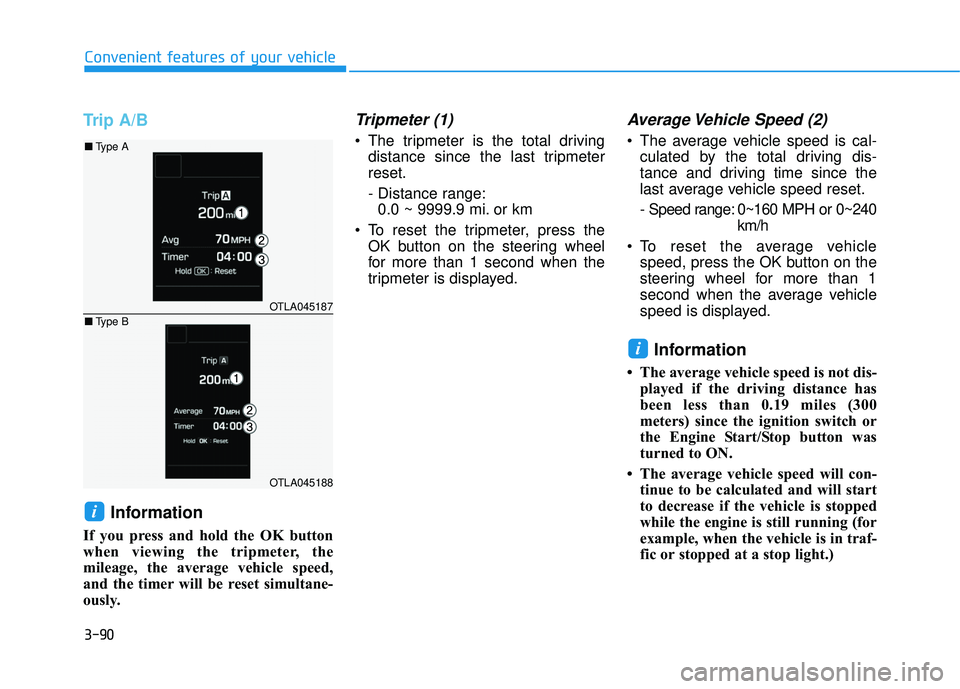
Tripmeter (1)
The tripmeter is the total drivingdistance since the last tripmeterreset.
- Distance range:0.0 ~ 9999.9 mi. or km
To reset the tripmeter, press the OK button on the steering wheel
for more than 1 second when the
tripmeter is displayed.
Average Vehicle Speed (2)
The average vehicle speed is cal-culated by the total driving dis-
tance and driving time since the
last average vehicle speed reset.
- Speed range: 0~160 MPH or 0~240 km/h
To reset the average vehicle speed, press the OK button on the
steering wheel for more than 1
second when the average vehicle
speed is displayed.
Information
The average vehicle speed is not dis-played if the driving distance has
been less than 0.19 miles (300
meters) since the ignition switch or
the Engine Start/Stop button was
turned to ON.
The average vehicle speed will con- tinue to be calculated and will start
to decrease if the vehicle is stopped
while the engine is still running (for
example, when the vehicle is in traf-
fic or stopped at a stop light.)
i
i
OTLA045187
OTLA045188
■Type A
■ Type B
Page 190 of 642

3-92
Convenient features of your vehicle
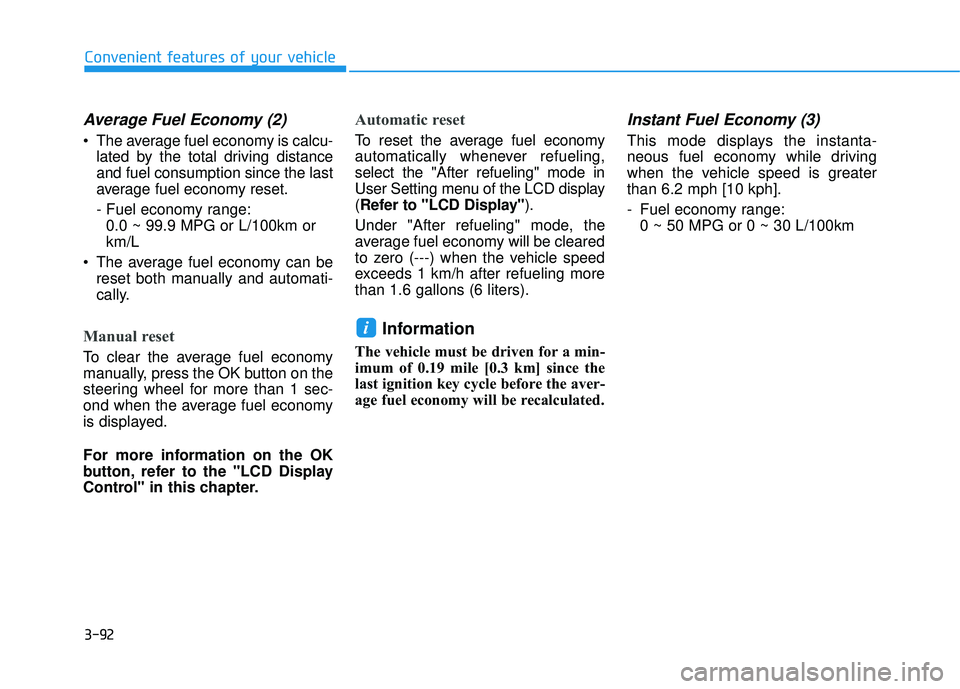
Average Fuel Economy (2)
The average fuel economy is calcu-lated by the total driving distance and fuel consumption since the last
average fuel economy reset.
- Fuel economy range:0.0 ~ 99.9 MPG or L/100km or km/L
The average fuel economy can be reset both manually and automati-
cally.
Manual reset
To clear the average fuel economy
manually, press the OK button on the
steering wheel for more than 1 sec-
ond when the average fuel economy
is displayed.
For more information on the OK
button, refer to the "LCD Display
Control" in this chapter.
Automatic reset
To reset the average fuel economy
automatically whenever refueling,select the "After refueling" mode in
User Setting menu of the LCD display(Refer to "LCD Display" ).
Under "After refueling" mode, the
average fuel economy will be cleared
to zero (---) when the vehicle speed
exceeds 1 km/h after refueling morethan 1.6 gallons (6 liters).
Information
The vehicle must be driven for a min-
imum of 0.19 mile [0.3 km] since the
last ignition key cycle before the aver-
age fuel economy will be recalculated.
Instant Fuel Economy (3)
This mode displays the instanta-
neous fuel economy while driving
when the vehicle speed is greaterthan 6.2 mph [10 kph].
- Fuel economy range: 0 ~ 50 MPG or 0 ~ 30 L/100km
i
Page 191 of 642
3-93
Convenient features of your vehicle
3
Digital Speedometer
This message shows the speed of
the vehicle (in mph.).
Driving Info Display
At the end of each driving cycle, the
Driving Info message is displayed.
This display shows the trip distance,
the average fuel economy, and the
remaining vehicle range.
This information is displayed for a
few seconds when you turn off theignition, and then goes off automati-
cally. The information is calculated
for each ignition cycle.
If the estimated remaining vehicle
range is below 1 mile (1.6 km), the
range will display as "- - -" and a
"Low Fuel" warning message will be
displayed.
Information
If "Sunroof Open" warning message
is displayed in the cluster, the Driving
Information message may not be dis-
played.
i
OTLA045193/OTLA045194
■Type A■Type A
OTLE045266
Page 192 of 642
3-94
WWAARRNN IINN GG AA NN DD IINN DDIICC AA TTOO RR LL IIGG HH TTSS
Convenient features of your vehicle
Warning Lights
Information
Make sure that all warning lights are
OFF after starting the engine. If any
light is still ON, this indicates a situa-
tion that needs attention.
Supplemental Restraint
System Warning Light
This warning light illuminates:
Once you set the ignition switch or the Engine Start/Stop button to the ON position.
- It illuminates for approximately 6seconds and then goes off.
When there is a malfunction with the SRS.
In this case, have your vehicle
inspected by an authorized
HYUNDAI dealer.
Seat Belt Warning Light
This warning light informs the driver
that the seat belt is not fastened.
For more information, refer to the
"Seat Belts" in chapter 2.
i