2016 Hyundai Santa Fe turn signal bulb
[x] Cancel search: turn signal bulbPage 213 of 759
Features of your vehicle
116
4
To signal a lane change, move the
turn signal lever slightly and hold it in
position (B). The lever will return to
the OFF position when released.
If an indicator stays on and does not
flash or if it flashes abnormally, one of
the turn signal bulbs may be burned
out and will require replacement.
One-touch triple turn signal
(One Touch Turn Signal)
To activate the one-touch lane
change function, move the turn sig-
nal lever slightly and then release it.
The lane change signals will blink 3
(5 or 7, if equipped) times.
You can activate/deactivate the One
Touch Turn Signal function or choose
the number of blinking (3, 5, or 7)
from the User Settings Mode on the
LCD display (if equipped).
✽ ✽ NOTICE
If an indicator flash is abnormally
quick or slow, a bulb may be burned
out or have a poor electrical connec-
tion in the circuit.
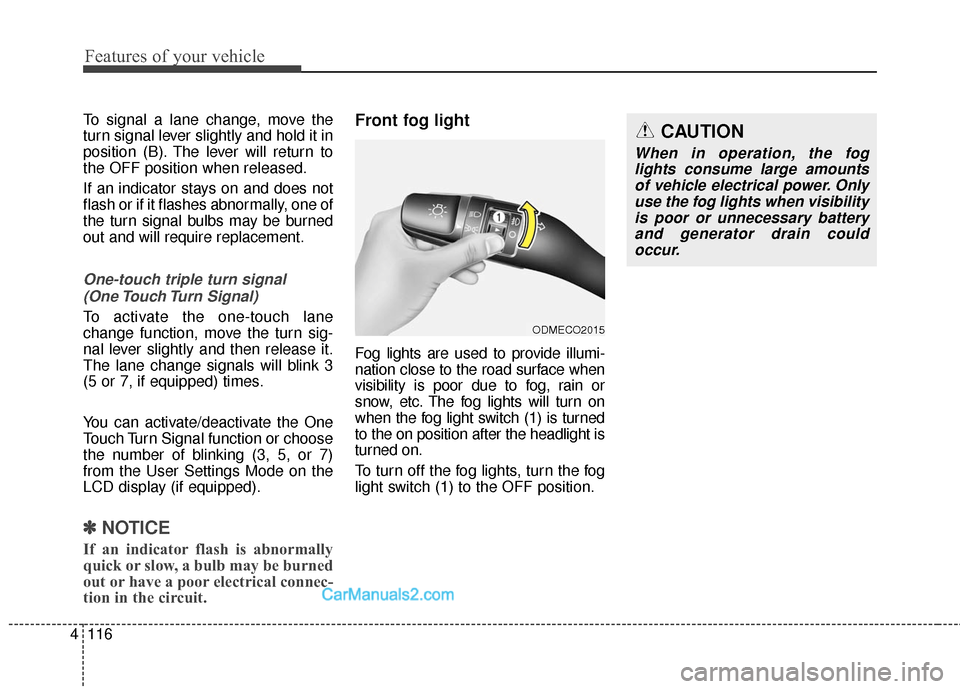
Front fog light
Fog lights are used to provide illumi-
nation close to the road surface when
visibility is poor due to fog, rain or
snow, etc. The fog lights will turn on
when the fog light switch (1) is turned
to the on position after the headlight is
turned on.
To turn off the fog lights, turn the fog
light switch (1) to the OFF position.
ODMECO2015
CAUTION
When in operation, the fog
lights consume large amountsof vehicle electrical power. Onlyuse the fog lights when visibilityis poor or unnecessary batteryand generator drain couldoccur.
Page 598 of 759
573
Driving your vehicle
Turn signals when towing a trailer
When you tow a trailer, your vehicle
has to have a different turn signal
flasher and extra wiring. The green
arrows on your instrument panel will
flash whenever you signal a turn or
lane change. Properly connected,
the trailer lights will also flash to alert
other drivers you’re about to turn,
change lanes, or stop.
When towing a trailer, the green
arrows on your instrument panel will
flash for turns even if the bulbs on the
trailer are burned out. Thus, you may
think drivers behind you are seeing
your signals when, in fact, they are
not. It’s important to check occasion-
ally to be sure the trailer bulbs are still
working. You must also check the
lights every time you disconnect and
then reconnect the wires.
Do not connect a trailer lighting sys-
tem directly to your vehicle’s lighting
system. Use only an approved trailer
wiring harness.
An authorized HYUNDAI dealer can
assist you in installing the wiring har-
ness.
Driving on grades
Reduce speed and shift to a lower
gear before you start down a long or
steep downgrade. If you don’t shift
down, you might have to use your
brakes so much that they would get
hot and no longer operate efficiently.
On a long uphill grade, shift down
and reduce your speed to around 45
mph (70 km/h) to reduce the possi-
bility of engine and transaxle over-
heating.
Operating your vehicle in D (Drive)
when towing a trailer will minimize
heat build up and extend the life of
your transaxle.WARNING
Failure to use an approved trail-
er wiring harness could result
in damage to the vehicle electri-
cal system and/or personal
injury.
Page 717 of 759

775
Maintenance
Headlamp, Front position
lamp, Front turn signal lamp,
Front fog lamp bulb replace-
ment
(1) Headlamp (High)
(2) Headlamp (Low)
(3) Front position lamp (LED)
(4) Front turn signal lamp
(5) Front side marker
(6) Front fog lamp (if equipped)
Headlamp bulb
ONCNMC2017
OHD076046
WARNING- Halogenbulbs
Halogen bulbs contain pres-
surized gas that will produce
flying pieces of glass if bro-
ken.
(Continued)
(Continued)
Always handle them carefully,and avoid scratches and abra-
sions. If the bulbs are lit, avoid
contact with liquids. Never
touch the glass with bare
hands. Residual oil may cause
the bulb to overheat and burst
when lit. A bulb should be
operated only when installed
in a headlamp.
If a bulb becomes damaged or cracked, replace it immediate-
ly and carefully dispose of it.
Wear eye protection when changing a bulb. Allow the
bulb to cool down before han-
dling it.
Page 719 of 759
777
Maintenance
Side marker lamp/Turn signal lamp
1. Remove the socket from theassembly by turning the socket
counterclockwise until the tabs on
the socket align with the slots on
the assembly.
2. Remove the bulb from the socket by pressing it in and rotating it
counterclockwise until the tabs on
the bulb align with the slots in the
socket. Pull the bulb out of the
socket
3. Insert a new bulb by inserting it into the socket and rotating it until
it locks into place.
4. Install the socket in the assembly by aligning the tabs on the socket
with the slots in the assembly.
Push the socket into the assembly
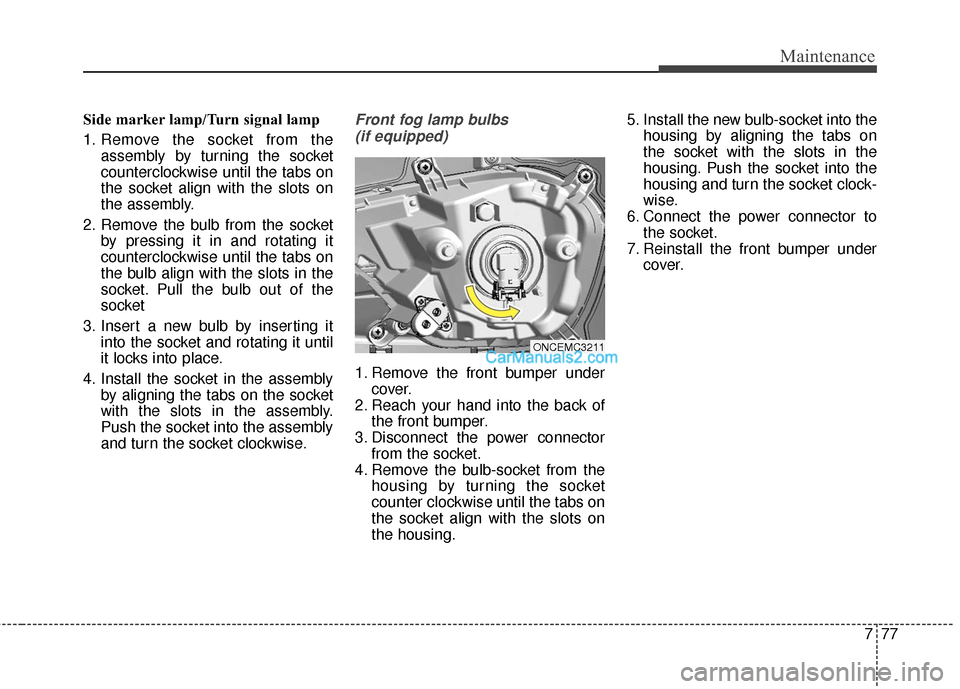
and turn the socket clockwise.Front fog lamp bulbs
(if equipped)
1. Remove the front bumper under cover.
2. Reach your hand into the back of the front bumper.
3. Disconnect the power connector from the socket.
4. Remove the bulb-socket from the housing by turning the socket
counter clockwise until the tabs on
the socket align with the slots on
the housing. 5. Install the new bulb-socket into the
housing by aligning the tabs on
the socket with the slots in the
housing. Push the socket into the
housing and turn the socket clock-
wise.
6. Connect the power connector to the socket.
7. Reinstall the front bumper under cover.
ONCEMC3211
Page 720 of 759

Maintenance
78
7
Headlamp (HID type), position
(LED), turn signal, and front foglamp bulb replacement
If the lamp bulb does not operate,
have the vehicle checked by an
authorized HYUNDAI dealer.
✽ ✽ NOTICE
A skilled technician should check or
repair the LED light. Otherwise, it
may damage related parts.
✽ ✽NOTICE
HID lamps have superior perform-
ance vs. halogen bulbs. HID lamps
are estimated by the manufacturer
to last twice as long or longer than
halogen bulbs depending on their
frequency of use. They will probably
require replacement at some point
in the life of the vehicle. Cycling the
headlamps on and off more than
typical use will shorten HID lamps
life. HID lamps do not fail in the
same manner as halogen incandes-
cent lamps. If a headlamp goes out
after a period of operation but will
immediately relight when the head-
lamp switch is cycled it is likely the
HID lamp needs to be replaced. HID
lighting components are more com-
plex than conventional halogen
bulbs thus have higher replacement
cost.
Side repeater lamp
replacement
If the lamp bulb does not operate,
have the vehicle checked by an
authorized HYUNDAI dealer.
✽ ✽NOTICE
A skilled technician should check or
repair the side repeater lamp.
Otherwise, it may damage related
parts (ex. outside mirror).
WARNING - HID
Headlamp low beam
(if equipped)
Do not attempt to replace or
inspect the low beam (XENON
bulb) due to electric shock dan-
ger. If the low beam (XENON
bulb) is not working, have your
vehicle checked by an author-
ized HYUNDAI Dealer.
ONCEMC3214
Page 721 of 759
779
Maintenance
Rear combination lamp bulb
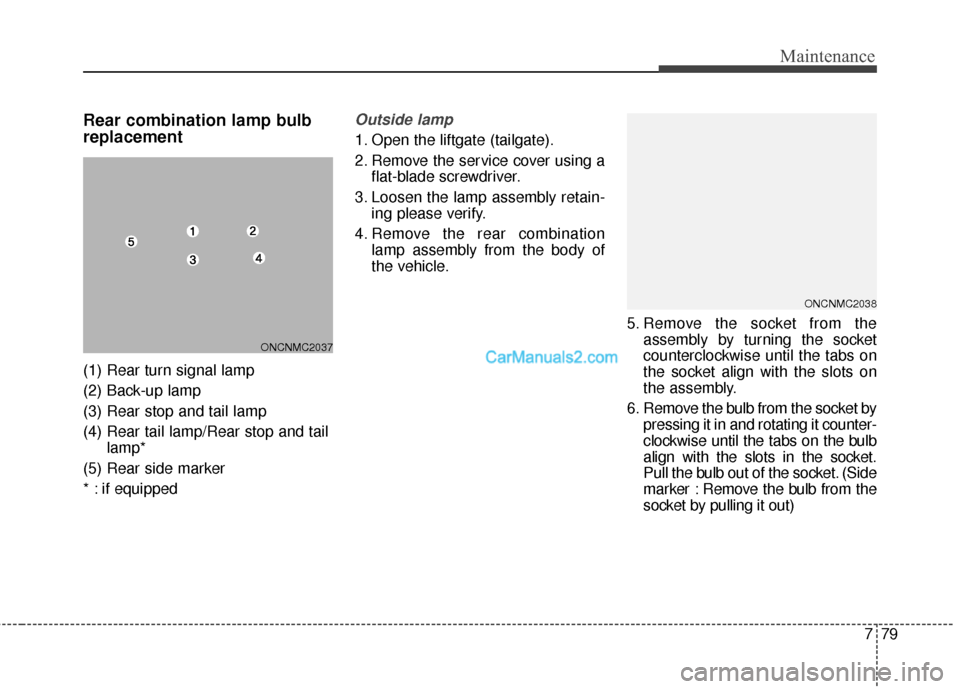
replacement
(1) Rear turn signal lamp
(2) Back-up lamp
(3) Rear stop and tail lamp
(4) Rear tail lamp/Rear stop and taillamp*
(5) Rear side marker
* : if equipped
Outside lamp
1. Open the liftgate (tailgate).
2. Remove the service cover using a flat-blade screwdriver.
3. Loosen the lamp assembly retain- ing please verify.
4. Remove the rear combination lamp assembly from the body of
the vehicle.
5. Remove the socket from theassembly by turning the socket
counterclockwise until the tabs on
the socket align with the slots on
the assembly.
6. Remove the bulb from the socket by pressing it in and rotating it counter-
clockwise until the tabs on the bulb
align with the slots in the socket.
Pull the bulb out of the socket. (Side
marker : Remove the bulb from the
socket by pulling it out)
ONCNMC2037
ONCNMC2038
Page 740 of 759
83
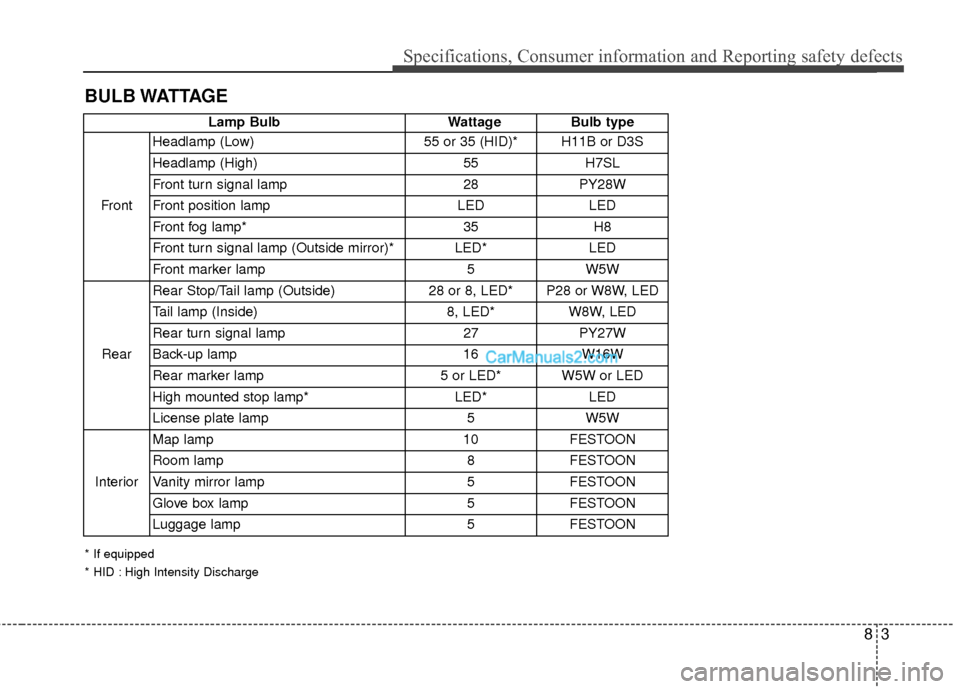
Specifications, Consumer information and Reporting safety defects
BULB WATTAGE
Lamp BulbWattageBulb type
Front Headlamp (Low)
55 or 35 (HID)* H11B or D3S
Headlamp (High) 55H7SL
Front turn signal lamp 28PY28W
Front position lamp LEDLED
Front fog lamp* 35H8
Front turn signal lamp (Outside mirror)* LED* LED
Front marker lamp 5W5W
Rear Rear Stop/Tail lamp (Outside)
28 or 8, LED* P28 or W8W, LED
Tail lamp (Inside) 8, LED*W8W, LED
Rear turn signal lamp 27PY27W
Back-up lamp 16W16W
Rear marker lamp 5 or LED* W5W or LED
High mounted stop lamp* LED*LED
License plate lamp 5W5W
Interior Map lamp
10FESTOON
Room lamp 8FESTOON
Vanity mirror lamp 5FESTOON
Glove box lamp 5FESTOON
Luggage lamp 5FESTOON
* If equipped
* HID : High Intensity Discharge
Page 755 of 759
I7
Index
LCD display..................................................................4-77A/V Mode..................................................................4-82
LCD modes ...............................................................4-77
Service Mode ............................................................4-78
Turn By Turn Mode ..................................................4-82
User Settings Mode ...................................................4-79
Warning Messages.....................................................4-82
LCD Display Control ...................................................4-72
LCD modes ...................................................................4-77
Liftgate (Tailgate) .........................................................4-26 Emergency liftgate (tailgate) safety release ..............4-35
Non-Powered liftgate (tailgate).................................4-26
Power liftgate (Power tailgate) .................................4-27
Smart Liftgate (Smart Tailgate) ................................4-32
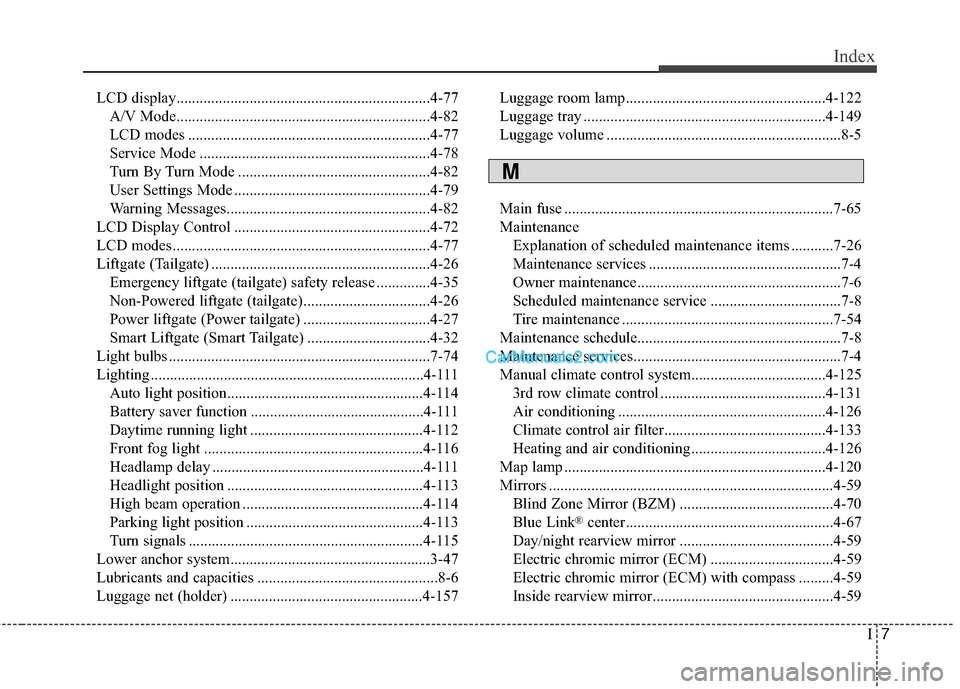
Light bulbs ....................................................................7-74\
Lighting .......................................................................4\
-111 Auto light position...................................................4-114
Battery saver function .............................................4-111
Daytime running light .............................................4-112
Front fog light .........................................................4-116
Headlamp delay .......................................................4-111
Headlight position ...................................................4-113
High beam operation ...............................................4-114
Parking light position ..............................................4-113
Turn signals .............................................................4-115
Lower anchor system....................................................3-47
Lubricants and capacities ...............................................8-6
Luggage net (holder) ..................................................4-157 Luggage room lamp....................................................4-122
Luggage tray ...............................................................4-149
Luggage volume .............................................................8-5
Main fuse ......................................................................7-\
65
Maintenance
Explanation of scheduled maintenance items ...........7-26
Maintenance services ..................................................7-4
Owner maintenance.....................................................7-6
Scheduled maintenance service ..................................7-8
Tire maintenance .......................................................7-54
Maintenance schedule.....................................................7-8
Maintenance services......................................................7-4
Manual climate control system...................................4-125 3rd row climate control ...........................................4-131
Air conditioning ......................................................4-126
Climate control air filter..........................................4-133
Heating and air conditioning...................................4-126
Map lamp ....................................................................4-12\
0
Mirrors ........................................................................\
..4-59 Blind Zone Mirror (BZM) ........................................4-70
Blue Link
®center......................................................4-67
Day/night rearview mirror ........................................4-59
Electric chromic mirror (ECM) ................................4-59
Electric chromic mirror (ECM) with compass .........4-59
Inside rearview mirror...............................................4-59
M