Page 599 of 699
• Tyre sidewall labeling . . . . . . . . . . . . . . . . . . . . . . . . . 7-41
• Low aspect ratio tyre . . . . . . . . . . . . . . . . . . . . . . . . . 7-46
Fuses . . . . . . . . . . . . . . . . . . . . . . . . . . . . . . . . . . . . 7-47
• Fuse/relay panel description. . . . . . . . . . . . . . . . . . . . 7-51
Light bulbs . . . . . . . . . . . . . . . . . . . . . . . . . . . . . . . 7-64
• Front lamp replacement . . . . . . . . . . . . . . . . . . . . . . . 7-65
• Side repeater lamp bulb replacement . . . . . . . . . . . . 7-74
• Rear combination lamp bulb replacement . . . . . . . . 7-74
• High mounted stop lamp bulb replacement . . . . . . . 7-77
• License plate lamp bulb replacement . . . . . . . . . . . . 7-78
• Interior lamp bulb replacement. . . . . . . . . . . . . . . . . 7-79
Appearance care . . . . . . . . . . . . . . . . . . . . . . . . . . . 7-80
• Exterior care . . . . . . . . . . . . . . . . . . . . . . . . . . . . . . . . 7-80
• Interior care . . . . . . . . . . . . . . . . . . . . . . . . . . . . . . . . . 7-85
Emission control system . . . . . . . . . . . . . . . . . . . . 7-87
7
Page 662 of 699
765
Maintenance
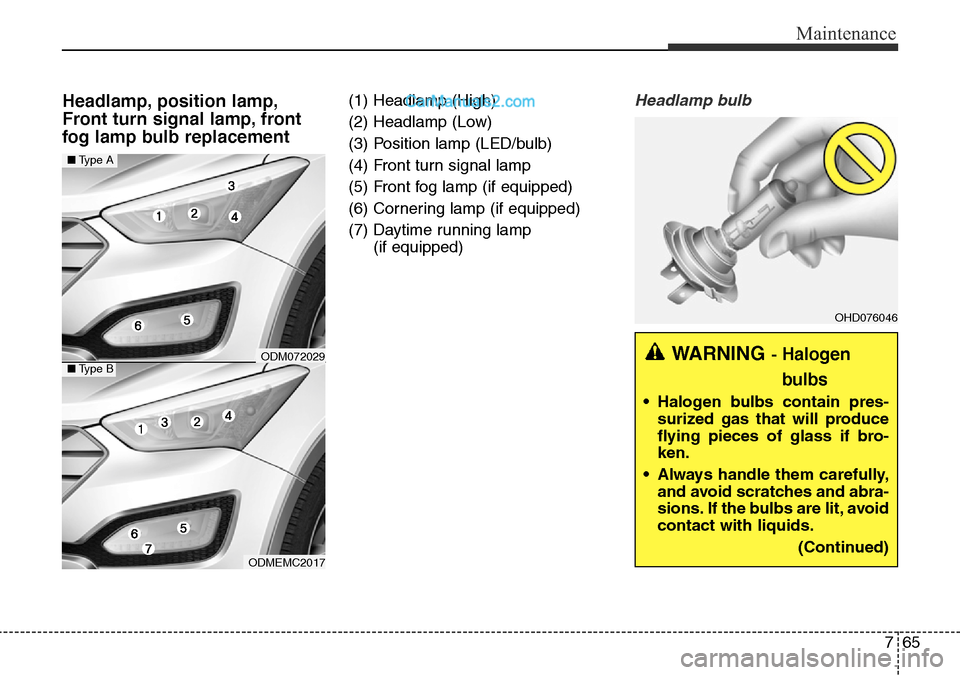
Headlamp, position lamp,
Front turn signal lamp, front
fog lamp bulb replacement(1) Headlamp (High)
(2) Headlamp (Low)
(3) Position lamp (LED/bulb)
(4) Front turn signal lamp
(5) Front fog lamp (if equipped)
(6) Cornering lamp (if equipped)
(7) Daytime running lamp
(if equipped)Headlamp bulb
OHD076046
WARNING- Halogen
bulbs
• Halogen bulbs contain pres-
surized gas that will produce
flying pieces of glass if bro-
ken.
• Always handle them carefully,
and avoid scratches and abra-
sions. If the bulbs are lit, avoid
contact with liquids.
(Continued)
ODMEMC2017
■Type A
■Type BODM072029
Page 665 of 699
Maintenance
68 7
5. Install the new bulb-socket into the
housing by aligning the tabs on
the socket with the slots in the
housing. Push the socket into the
housing and turn the socket clock-
wise.
6. Connect the power connector to
the socket.
7. Reinstall the front bumper under
cover.Headlamp (HID type), position
(LED), turn signal, and front fog
lamp bulb, daytime running,
cornering lamp replacement
If the light bulb does not operate, we
recommend that the system be
checked by a HYUNDAI authorised
repairer.
✽NOTICE
HID lamps have superior perform-
ance vs. halogen bulbs. HID lamps
are estimated by the manufacturer
to last twice as long or longer than
halogen bulbs depending on their
frequency of use. They will probably
require replacement at some point
in the life of the vehicle. Cycling the
headlamps on and off more than
typical use will shorten HID lamps
life. HID lamps do not fail in the
same manner as halogen incandes-
cent lamps. If a headlamp goes out
after a period of operation but will
immediately relight when the head-
lamp switch is cycled it is likely the
HID lamp needs to be replaced. HID
lighting components are more com-
plex than conventional halogen
bulbs thus have higher replacement
cost.
WARNING - HID
Headlamp low beam
(if equipped)
Do not attempt to replace or
inspect the low beam (XENON
bulb) due to electric shock dan-
ger. If the low beam (XENON
bulb) is not working, if the light
bulb does not operate, we rec-
ommend that the system be
checked by a HYUNDAI autho-
rised repairer.
Page 671 of 699
Maintenance
74 7
Side repeater lamp replace-
ment
If the light bulb does not operate, we
recommend that the system be
checked by a HYUNDAI authorised
repairer.
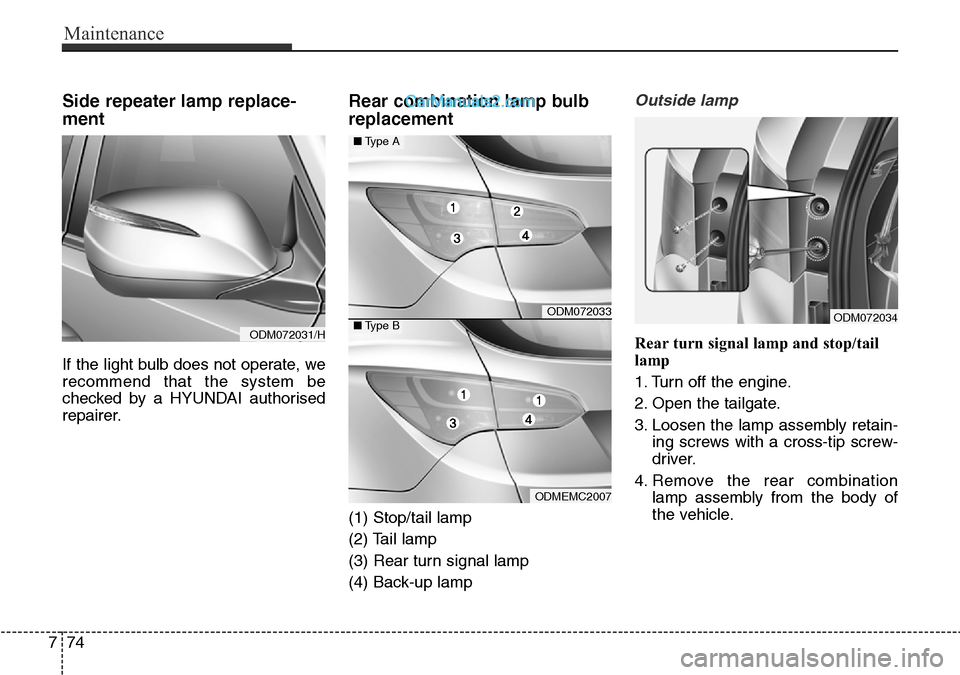
Rear combination lamp bulb
replacement
(1) Stop/tail lamp
(2) Tail lamp
(3) Rear turn signal lamp
(4) Back-up lamp
Outside lamp
Rear turn signal lamp and stop/tail
lamp
1. Turn off the engine.
2. Open the tailgate.
3. Loosen the lamp assembly retain-
ing screws with a cross-tip screw-
driver.
4. Remove the rear combination
lamp assembly from the body of
the vehicle.
ODM072033
ODMEMC2007
■Type A
■Type BODM072034
ODM072031/H
Page 675 of 699
Maintenance
78 7
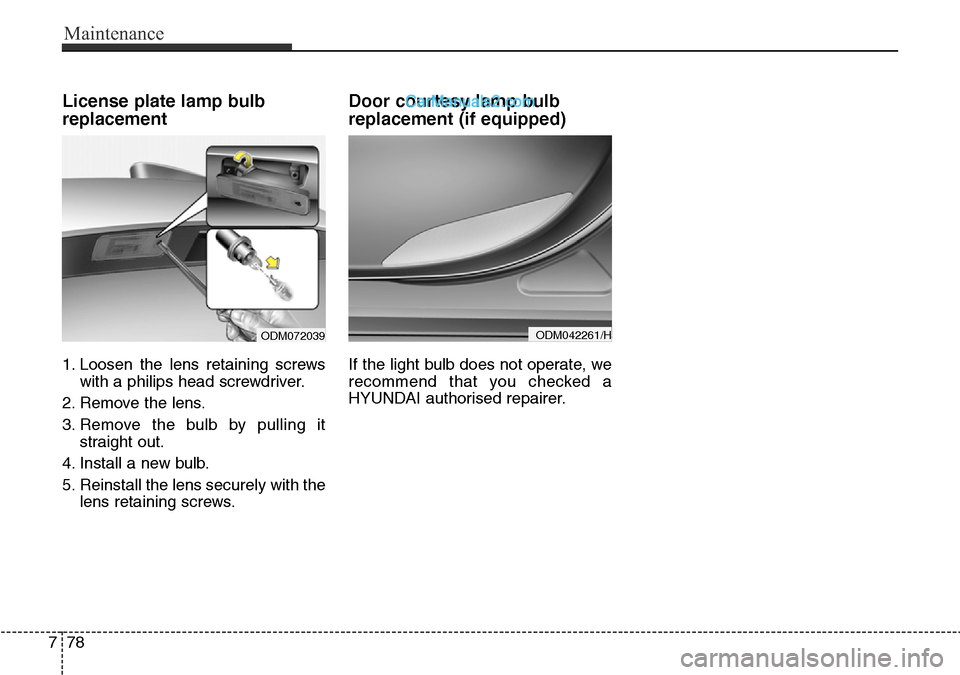
License plate lamp bulb
replacement
1. Loosen the lens retaining screws
with a philips head screwdriver.
2. Remove the lens.
3. Remove the bulb by pulling it
straight out.
4. Install a new bulb.
5. Reinstall the lens securely with the
lens retaining screws.
Door courtesy lamp bulb
replacement (if equipped)
If the light bulb does not operate, we
recommend that you checked a
HYUNDAI authorised repairer.
ODM042261/HODM072039
Page 676 of 699
779
Maintenance
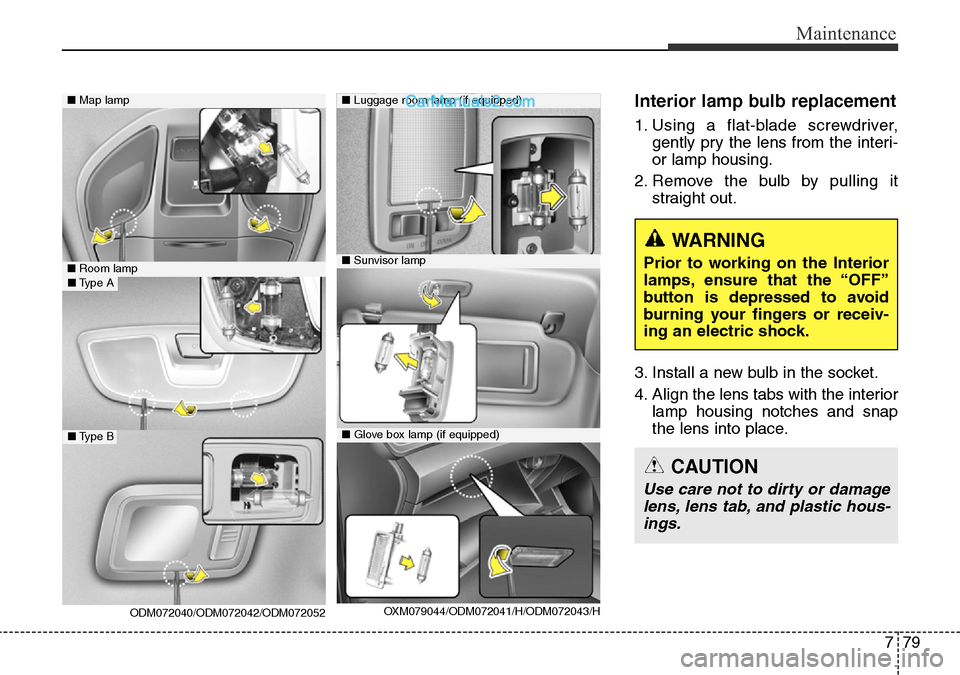
Interior lamp bulb replacement
1. Using a flat-blade screwdriver,
gently pry the lens from the interi-
or lamp housing.
2. Remove the bulb by pulling it
straight out.
3. Install a new bulb in the socket.
4. Align the lens tabs with the interior
lamp housing notches and snap
the lens into place.
■Map lamp
OXM079044/ODM072041/H/ODM072043/H
■Glove box lamp (if equipped)
■Luggage room lamp (if equipped)
■Sunvisor lamp■Room lamp
ODM072040/ODM072042/ODM072052■Type A
■Type B
WARNING
Prior to working on the Interior
lamps, ensure that the “OFF”
button is depressed to avoid
burning your fingers or receiv-
ing an electric shock.
CAUTION
Use care not to dirty or damage
lens, lens tab, and plastic hous-
ings.