Page 2 of 699

F2
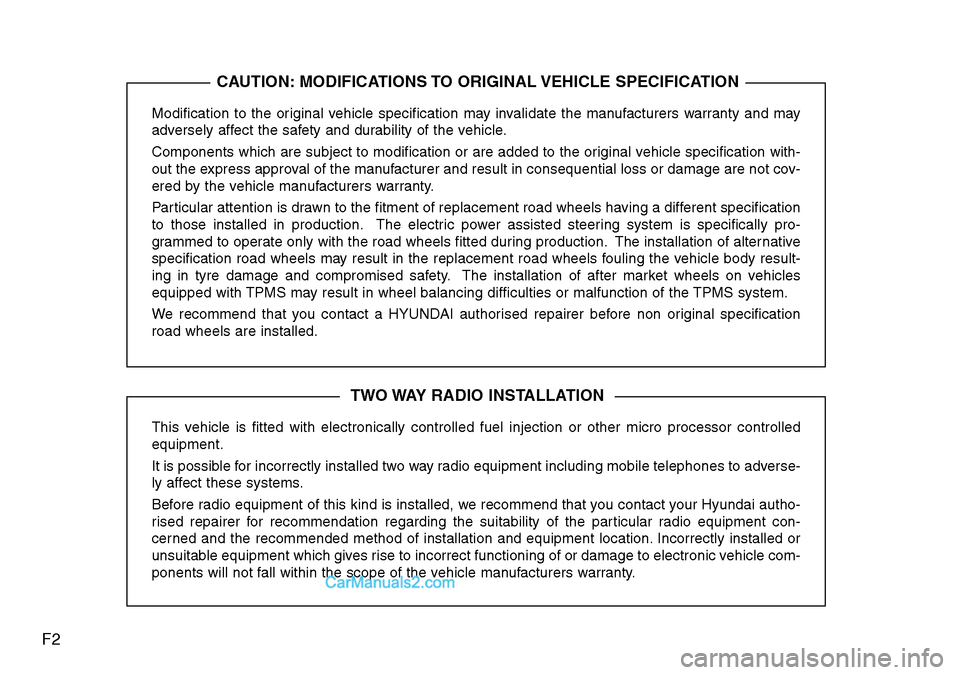
Modification to the original vehicle specification may invalidate the manufacturers warranty and may
adversely affect the safety and durability of the vehicle.
Components which are subject to modification or are added to the original vehicle specification with-
out the express approval of the manufacturer and result in consequential loss or damage are not cov-
ered by the vehicle manufacturers warranty.
Particular attention is drawn to the fitment of replacement road wheels having a different specification
to those installed in production. The electric power assisted steering system is specifically pro-
grammed to operate only with the road wheels fitted during production. The installation of alternative
specification road wheels may result in the replacement road wheels fouling the vehicle body result-
ing in tyre damage and compromised safety. The installation of after market wheels on vehicles
equipped with TPMS may result in wheel balancing difficulties or malfunction of the TPMS system.
We recommend that you contact a HYUNDAI authorised repairer before non original specification
road wheels are installed.
This vehicle is fitted with electronically controlled fuel injection or other micro processor controlled
equipment.
It is possible for incorrectly installed two way radio equipment including mobile telephones to adverse-
ly affect these systems.
Before radio equipment of this kind is installed, we recommend that you contact your Hyundai autho-
rised repairer for recommendation regarding the suitability of the particular radio equipment con-
cerned and the recommended method of installation and equipment location. Incorrectly installed or
unsuitable equipment which gives rise to incorrect functioning of or damage to electronic vehicle com-
ponents will not fall within the scope of the vehicle manufacturers warranty.
CAUTION: MODIFICATIONS TO ORIGINAL VEHICLE SPECIFICATION
TWO WAY RADIO INSTALLATION
Page 36 of 699

Safety features of your vehicle
16 3
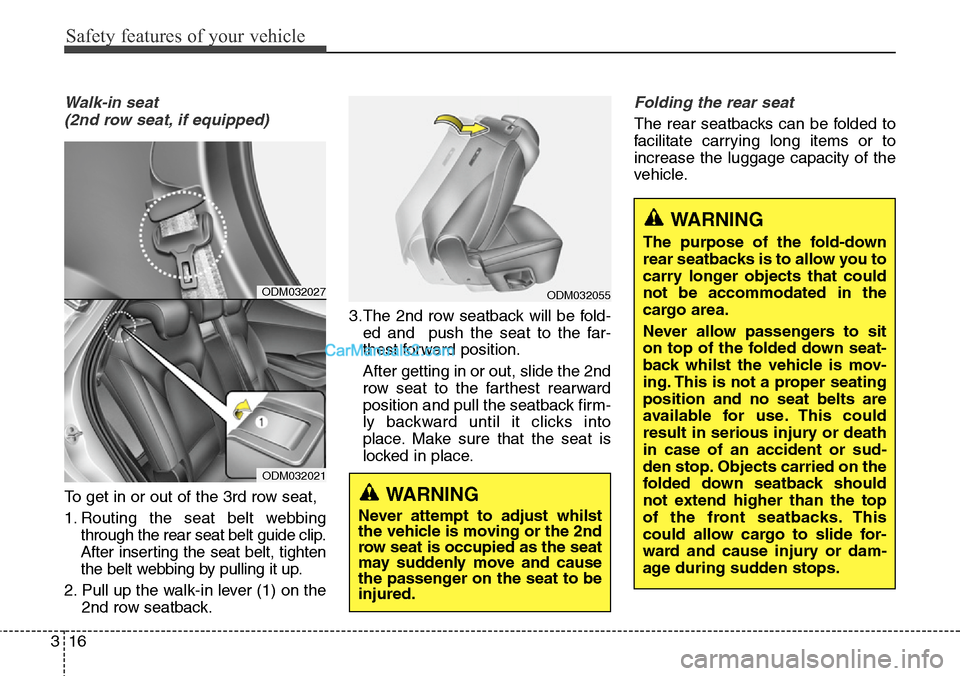
Walk-in seat
(2nd row seat, if equipped)
To get in or out of the 3rd row seat,
1. Routing the seat belt webbing
through the rear seat belt guide clip.
After inserting the seat belt, tighten
the belt webbing by pulling it up.
2. Pull up the walk-in lever (1) on the
2nd row seatback.3.The 2nd row seatback will be fold-
ed and push the seat to the far-
thest forward position.
After getting in or out, slide the 2nd
row seat to the farthest rearward
position and pull the seatback firm-
ly backward until it clicks into
place. Make sure that the seat is
locked in place.
Folding the rear seat
The rear seatbacks can be folded to
facilitate carrying long items or to
increase the luggage capacity of the
vehicle.
ODM032055
WARNING
The purpose of the fold-down
rear seatbacks is to allow you to
carry longer objects that could
not be accommodated in the
cargo area.
Never allow passengers to sit
on top of the folded down seat-
back whilst the vehicle is mov-
ing. This is not a proper seating
position and no seat belts are
available for use. This could
result in serious injury or death
in case of an accident or sud-
den stop. Objects carried on the
folded down seatback should
not extend higher than the top
of the front seatbacks. This
could allow cargo to slide for-
ward and cause injury or dam-
age during sudden stops.
WARNING
Never attempt to adjust whilst
the vehicle is moving or the 2nd
row seat is occupied as the seat
may suddenly move and cause
the passenger on the seat to be
injured.
ODM032027
ODM032021
Page 321 of 699
4223
Features of your vehicle
Clock Settings
Press the key Select
[Clock] through TUNE knob or
key Select menu through
TUNE knob
Clock Settings
This menu is used to set the time.
Select [Clock Settings] Set through
TUNE knob Press TUNE knob
❈ Adjust the number currently in
focus to set the [hour] and press
the tune knob to set the [minute].
Day Settings
This menu is used to set the date
(DD/MM/YYYY).
Select [Day Settings] Set through
TUNE knob Press TUNE knob
❈ Adjust the number currently in
focus to make the settings and
press the tune knob to move to the
next setting. (Set in order of
Year/Month/Day)
3
SETUPCLOCK
Page 322 of 699
Features of your vehicle
224 4
Time Format
This function is used to set the 12/24
hour time format of the audio system.
Select [Time Format] Set 12Hr /
24Hr through TUNE knob
Clock Display when Power is
OFF
Select [Clock Disp.(Pwr Off) Set
/ through TUNE knob
• : Displays time/date on screen
• : Turn off.
Automatic RDS Time
This option is used to automatically
set the time by synchronizing with
RDS.
Select [Automatic RDS Time] Set
/ through TUNE knob
• : Turn on Automatic Time
• : Turn off.
Off
On
OffOn
Off
On
OffOn
Page 332 of 699
Features of your vehicle
234 4
Calendar Settings
This menu is used to set the date
(DD/MM/YYYY).
Select [Calendar Settings] Set
through TUNE knob Press
TUNE knob
❈ Adjust the number currently in
focus to make the settings and
press the tune knob to move to the
next setting. (Set in order of
Year/Month/Day)
Clock Display when Power is
OFF
Select [Clock Disp.(Pwr Off) Set
/ through TUNE knob
• : Displays time/date on screen
• : Turn off.
Off
On
OffOn
Page 367 of 699
4269
Features of your vehicle
8.
• Turns the monitor display on/off.
9. CLOCK
Displays the time/date/day.10.
• Radio Mode :
- Short key : TA On/Off
- Long key : previews all receivable
broadcasts for 5 seconds each.
• Media (CD/USB/iPod/My Music)
modes : previews each song (file)
for 10 seconds each.
11.
Converts to Setup mode.
12. TUNE knob
• Radio mode : turn to change
broadcast frequencies.
• Media (CD/USB/iPod/My Music)
modes : turn to search tracks/chan-
nels/files.13. DISC-IN LED
• LED that indicates whether a disc is
inserted.
14. RESET
• Forced system termination and
system restart.
SETUP
TA/SCAN
Page 371 of 699
4273
Features of your vehicle
8.
• Turns the monitor display on/off.
9. CLOCK
Displays the time/date/day.
10.
• Radio Mode : previews all receiv-
able broadcasts for 5 seconds each
• Media (CD/USB/iPod/My Music)
modes : previews each song (file)
for 10 seconds each.11.
Converts to Setup mode.
12. TUNE knob
• Radio mode : turn to change broad-
cast frequencies.
• Media (CD/USB/iPod/My Music)
modes : turn to search tracks/chan-
nels/files.
13. DISC-IN LED
• LED that indicates whether a disc is
inserted.
14. RESET
• Forced system termination and
system restart.
Audio Head Unit
15.
• Converts to FM mode.
• Each time the key is pressed, the
mode changed in order of FM1 ➟
FM2.
16.
• Converts to AM mode.
17.
• Start Media mode
• Each time the key is pressed, the
mode is changed in order of CD,
USB(iPod), AUX, My Music.
MEDIA
AM
FM
SETUP
SCAN
DISP
Page 458 of 699
Features of your vehicle
360 4
APPENDIX
Name Description
12hr 12 HOUR
24hr 24 HOUR
AST(A.Store) AUTO STORE
AMA AM RADIO (AUTO STORE)
FMA FM RADIO (AUTO STORE)
AUX External Audio mode
BASS BASS
TREBLE TREBLE
BT Bluetooth
PRESET PRESET
RDS Search Radio Data System Search
TA Traffic Announcement
Radio Radio
FM/AM/USB FM/AM/USB
Max MAXIMUM
Min minimum
Low Low
Mid Middle
On On
Off Off
PowerBass PowerBass
Setting Setting
OK OK
MENU MENU
PowerTreble PowerTreble
SDVC Speed Dependent
VolumeControl
Name DescriptionSetup Setup
CURRENT CURRENT
Current/Total Current/Total
DEVICE NAME DEVICE NAME
NAME NAME
NAME HERE NAME HERE
NUMBER NUMBER
PHONE NAME PHONE NAME
Received Date Received Date
Received Received Message
Message
Received Time Received Time
TIME TIME
AST AUTO STORE
AM AM RADIO
CD COMPACT DISC
FM FM RADIO(AUTO STORE)
L=R LEFT=RIGHT
Middle Middle
My Music My Music
Track Track
USB USB
Phone Phone
Engineering Mode Engineering Mode
SEEK SEEK
Icon Icon