2016 Hyundai Santa Fe light
[x] Cancel search: lightPage 631 of 699
Maintenance
34 7
Battery recharging
Your vehicle has a maintenance-free,
calcium-based battery.
• If the battery becomes discharged
in a short time (because, for exam-
ple, the headlights or interior lights
were left on whilst the vehicle was
not in use), recharge it by slow
charging (trickle) for 10 hours.
• If the battery gradually discharges
because of high electric load whilst
the vehicle is being used, recharge
it at 20-30A for two hours.
Reset items
Items should be reset after the bat-
tery has been discharged or the bat-
tery has been disconnected.
• Auto up/down window
(See section 4)
• Sunroof (See section 4)
• Trip computer (See section 4)
• Climate control system
(See section 4)
• Clock (See section 4)
• Audio (See section 4)
(Continued)
• Watch the battery during
charging, and stop or reduce
the charging rate if the battery
cells begin gassing (boiling)
violently or if the temperature
of the electrolyte of any cell
exceeds 49°C (120°F).
• Wear eye protection when
checking the battery during
charging.
• Disconnect the battery charg-
er in the following order.
1. Turn off the battery charger
main switch.
2. Unhook the negative clamp
from the negative battery
terminal.
3. Unhook the positive clamp
from the positive battery
terminal.
(Continued)
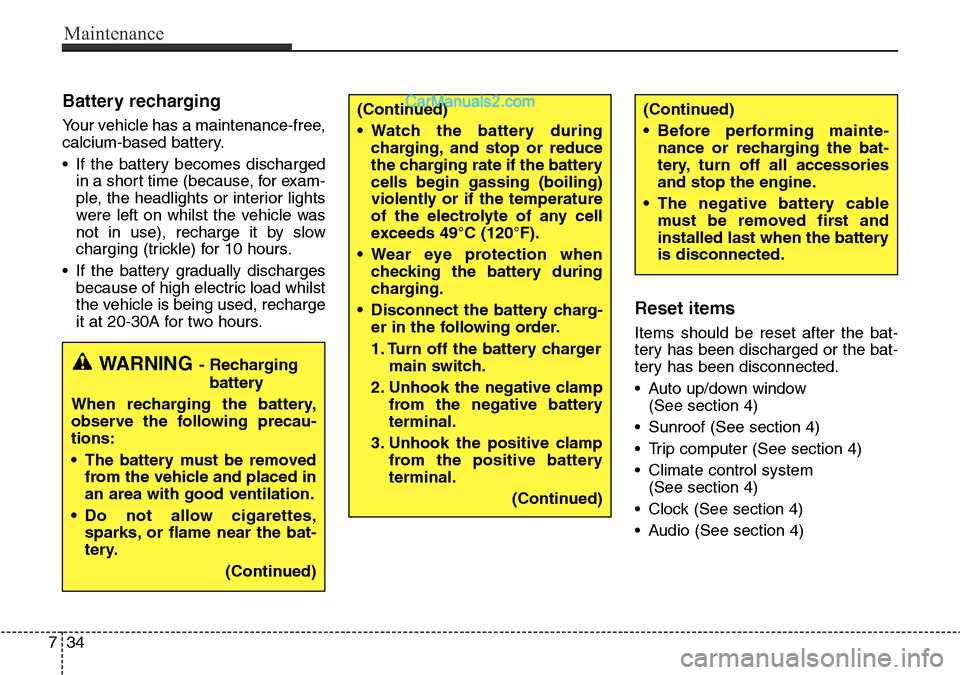
WARNING- Recharging
battery
When recharging the battery,
observe the following precau-
tions:
• The battery must be removed
from the vehicle and placed in
an area with good ventilation.
• Do not allow cigarettes,
sparks, or flame near the bat-
tery.
(Continued)
(Continued)
• Before performing mainte-
nance or recharging the bat-
tery, turn off all accessories
and stop the engine.
• The negative battery cable
must be removed first and
installed last when the battery
is disconnected.
Page 638 of 699
741
Maintenance
Wheel replacement
When replacing the metal wheels for
any reason, make sure the new
wheels are equivalent to the original
factory units in diameter, rim width
and offset.
Tyre traction
Tyre traction can be reduced if you
drive on worn tyres, tyres that are
improperly inflated or on slippery
road surfaces. Tyres should be
replaced when tread wear indicators
appear. To reduce the possibility of
losing control, slow down whenever
there is rain, snow or ice on the road.
Tyre maintenance
In addition to proper inflation, correct
wheel alignment helps to decrease
tyre wear. If you find a tyre is worn
unevenly, have your dealer check the
wheel alignment.
When you have new tyres installed,
make sure they are balanced. This
will increase vehicle ride comfort and
tyre life. Additionally, a tyre should
always be rebalanced if it is removed
from the wheel.
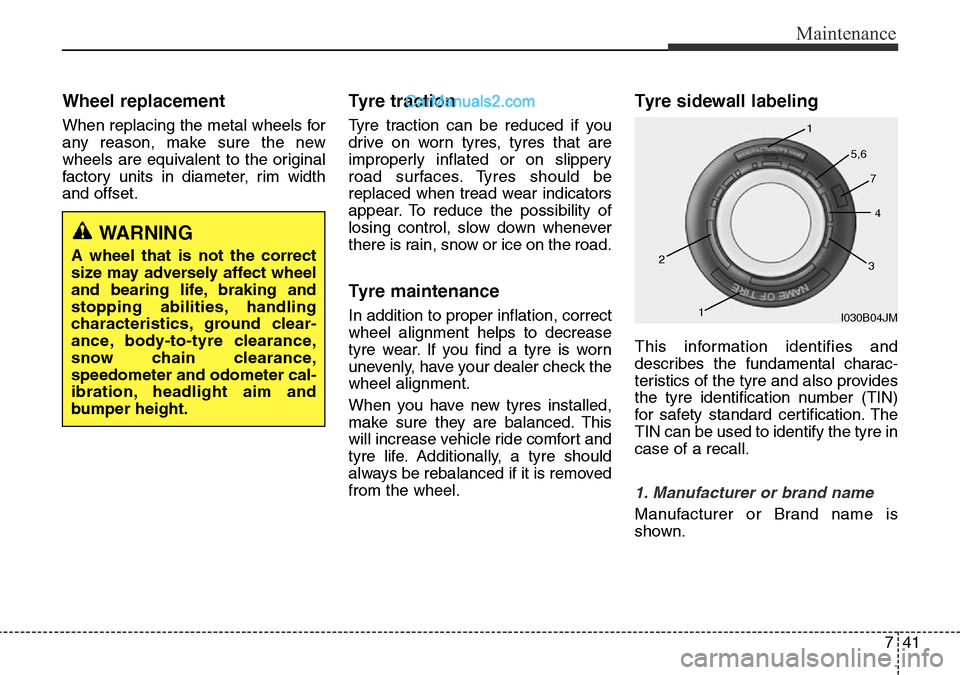
Tyre sidewall labeling
This information identifies and
describes the fundamental charac-
teristics of the tyre and also provides
the tyre identification number (TIN)
for safety standard certification. The
TIN can be used to identify the tyre in
case of a recall.
1. Manufacturer or brand name
Manufacturer or Brand name is
shown.
I030B04JM 1
1 2
34 5,6
7
WARNING
A wheel that is not the correct
size may adversely affect wheel
and bearing life, braking and
stopping abilities, handling
characteristics, ground clear-
ance, body-to-tyre clearance,
snow chain clearance,
speedometer and odometer cal-
ibration, headlight aim and
bumper height.
Page 639 of 699
Maintenance
42 7
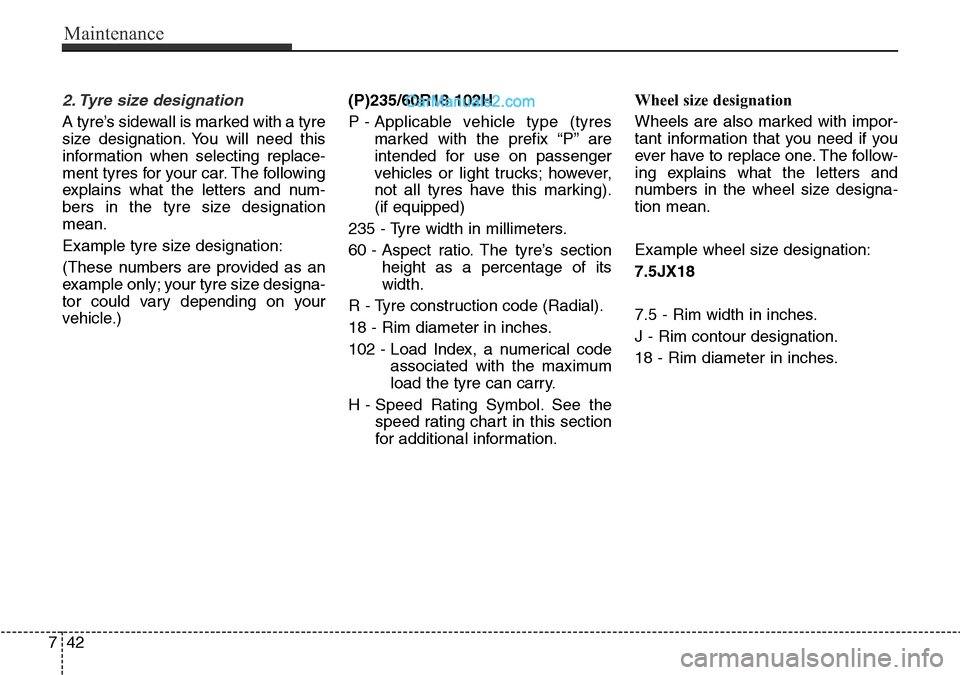
2. Tyre size designation
A tyre’s sidewall is marked with a tyre
size designation. You will need this
information when selecting replace-
ment tyres for your car. The following
explains what the letters and num-
bers in the tyre size designation
mean.
Example tyre size designation:
(These numbers are provided as an
example only; your tyre size designa-
tor could vary depending on your
vehicle.)(P)235/60R18 102H
P - Applicable vehicle type (tyres
marked with the prefix “P’’ are
intended for use on passenger
vehicles or light trucks; however,
not all tyres have this marking).
(if equipped)
235 - Tyre width in millimeters.
60 - Aspect ratio. The tyre’s section
height as a percentage of its
width.
R - Tyre construction code (Radial).
18 - Rim diameter in inches.
102 - Load Index, a numerical code
associated with the maximum
load the tyre can carry.
H - Speed Rating Symbol. See the
speed rating chart in this section
for additional information.Wheel size designation
Wheels are also marked with impor-
tant information that you need if you
ever have to replace one. The follow-
ing explains what the letters and
numbers in the wheel size designa-
tion mean.
Example wheel size designation:
7.5JX18
7.5 - Rim width in inches.
J - Rim contour designation.
18 - Rim diameter in inches.
Page 643 of 699
Maintenance
46 7
Low aspect ratio tyre
(if equipped)
Low aspect ratio tyres, whose aspect
ratio is lower than 50, are provided
for sporty looks.
Because the low aspect ratio tyres
are optimized for handling and brak-
ing, it may be more uncomfortable to
ride in and there is more noise com-
pare with normal tyres.
CAUTION
Because the sidewall of the low
aspect ratio tyre is shorter than
the normal, the wheel and tyre
of the low aspect ratio tyre is
easier to be damaged. So, follow
the instructions below.
- When driving on a rough road
or off road, drive cautiously
because tyres and wheels may
be damaged. And after driving,
inspect tyres and wheels.
- When passing over a pothole,
speed bump, manhole, or curb
stone, drive slowly so that the
tyres and wheels are not dam-
aged.
- If the tyre is impacted, we rec-
ommend that you inspect the
tyre condition or contact a
HYUNDAI authorised repairer.
- To prevent damage to the tyre,
inspect the tyre condition and
pressure every 3,000km.
CAUTION
• It is not easy to recognize the
tyre damage with your own
eyes. But if there is the slight-
est hint of tyre damage, even
though you cannot see the
tyre damage with your own
eyes, have the tyre checked or
replaced because the tyre
damage may cause air leak-
age from the tyre.
• If the tyre is damaged by driv-
ing on a rough road, off road,
pothole, manhole, or curb
stone, it will not be covered by
the warranty.
• You can find out the tyre infor-
mation on the tyre sidewall.
Page 644 of 699
747
Maintenance
FUSES
A vehicle’s electrical system is pro-
tected from electrical overload dam-
age by fuses.
This vehicle has 2 (or 3) fuse panels,
one located in the driver’s side panel
bolster, the other in the engine com-
partment near the battery.
If any of your vehicle’s lights, acces-
sories, or controls do not work, check
the appropriate circuit fuse. If a fuse
has blown, the element inside the
fuse will be melted.
If the electrical system does not
work, first check the driver’s side
fuse panel.
Before replacing a blown fuse, dis-
connect the negative battery cable.
Always replace a blown fuse with
one of the same rating.
If the replacement fuse blows, this
indicates an electrical problem. Avoid
using the system involved and imme-
diately consult a HYUNDAI autho-
rised repairer.
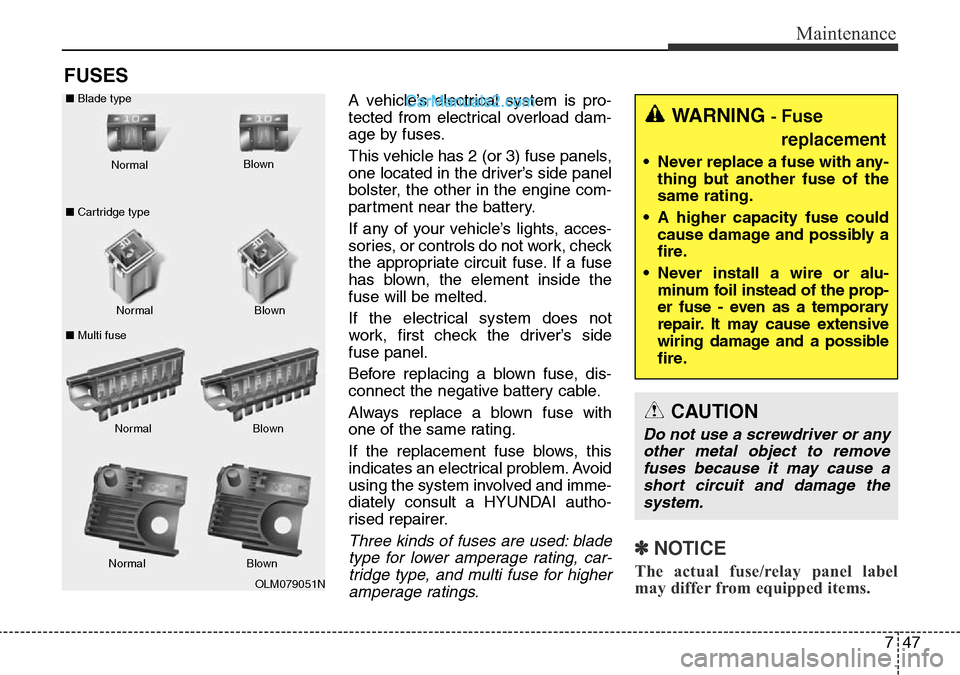
Three kinds of fuses are used: blade
type for lower amperage rating, car-
tridge type, and multi fuse for higher
amperage ratings.✽NOTICE
The actual fuse/relay panel label
may differ from equipped items.
WARNING - Fuse
replacement
• Never replace a fuse with any-
thing but another fuse of the
same rating.
• A higher capacity fuse could
cause damage and possibly a
fire.
• Never install a wire or alu-
minum foil instead of the prop-
er fuse - even as a temporary
repair. It may cause extensive
wiring damage and a possible
fire.
CAUTION
Do not use a screwdriver or any
other metal object to remove
fuses because it may cause a
short circuit and damage the
system.
OLM079051N Normal Normal ■Blade type
■Cartridge type
■Multi fuseBlown
Blown
Normal Blown
Normal Blown
Page 645 of 699
Maintenance
48 7
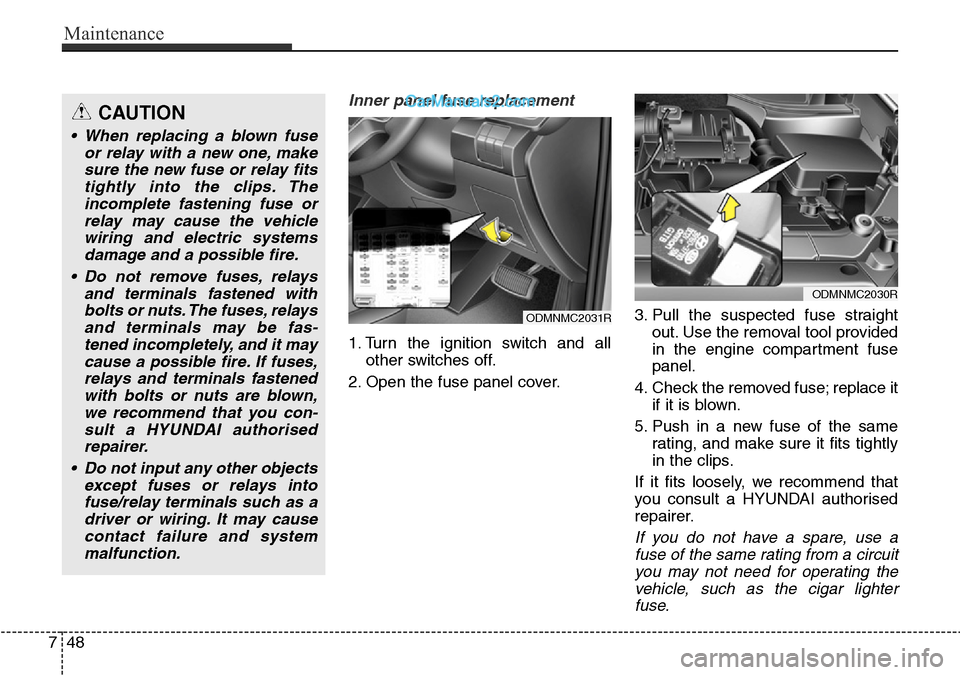
Inner panel fuse replacement
1. Turn the ignition switch and all
other switches off.
2. Open the fuse panel cover.3. Pull the suspected fuse straight
out. Use the removal tool provided
in the engine compartment fuse
panel.
4. Check the removed fuse; replace it
if it is blown.
5. Push in a new fuse of the same
rating, and make sure it fits tightly
in the clips.
If it fits loosely, we recommend that
you consult a HYUNDAI authorised
repairer.
If you do not have a spare, use a
fuse of the same rating from a circuit
you may not need for operating the
vehicle, such as the cigar lighter
fuse.
ODMNMC2031R
ODMNMC2030R
CAUTION
• When replacing a blown fuse
or relay with a new one, make
sure the new fuse or relay fits
tightly into the clips. The
incomplete fastening fuse or
relay may cause the vehicle
wiring and electric systems
damage and a possible fire.
• Do not remove fuses, relays
and terminals fastened with
bolts or nuts. The fuses, relays
and terminals may be fas-
tened incompletely, and it may
cause a possible fire. If fuses,
relays and terminals fastened
with bolts or nuts are blown,
we recommend that you con-
sult a HYUNDAI authorised
repairer.
• Do not input any other objects
except fuses or relays into
fuse/relay terminals such as a
driver or wiring. It may cause
contact failure and system
malfunction.
Page 646 of 699
749
Maintenance
If the headlights or other electrical
components do not work and the
fuses are OK, check the fuse block in
the engine compartment. If a fuse is
blown, it must be replaced.Fuse switch
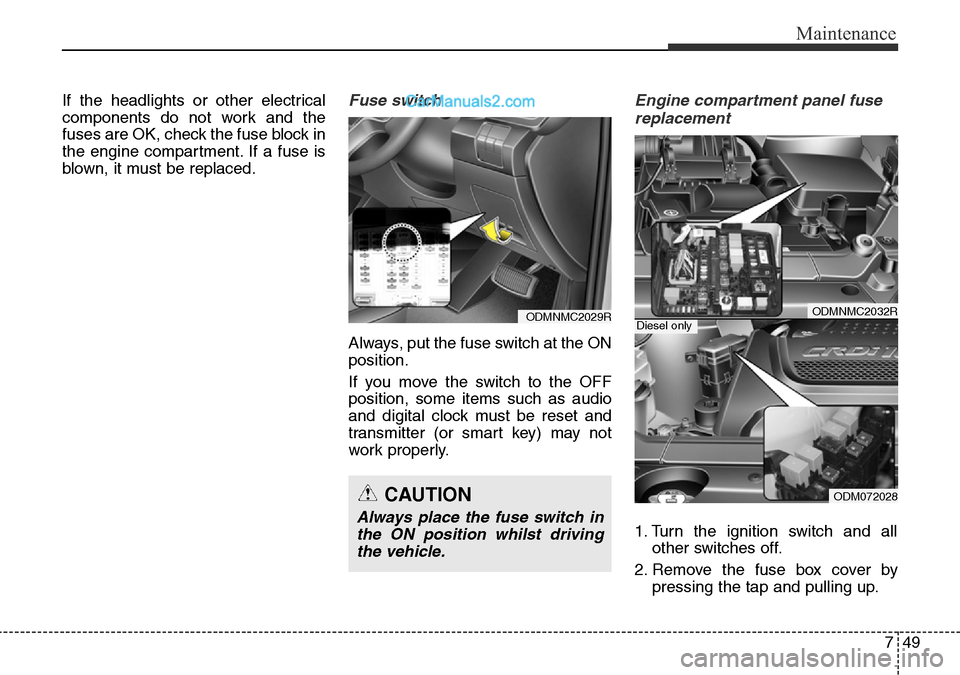
Always, put the fuse switch at the ON
position.
If you move the switch to the OFF
position, some items such as audio
and digital clock must be reset and
transmitter (or smart key) may not
work properly.
Engine compartment panel fuse
replacement
1. Turn the ignition switch and all
other switches off.
2. Remove the fuse box cover by
pressing the tap and pulling up.
ODMNMC2029R
CAUTION
Always place the fuse switch in
the ON position whilst driving
the vehicle.
ODMNMC2032R
ODM072028
Diesel only
Page 649 of 699
Maintenance
52 7
DescriptionSymbol Fuse ratingProtected Component
A/BAG IND10AInstrument Cluster
A/BAG15ASRS Control Module, A/C Control Module
MODULE 57.5A
Rain Sensor, Sunroof, Smart Key Control Module, BCM, Parking Guide System, AC,
Inverter Module, ICM Relay Box (Cornering Lamp Relay LH/RH, Rear Blower Relay),
Rear Seat Warmer LH/RH, Driver/Passenger Climate Control Seat Control Module,
Driver/Passenger Seat Warmer Module
MODULE 17.5ASport Mode Switch, Key Solenoid, Console Switch LH/RH, Front Console Switch,
Rear Power Window Switch LH/RH
REAR FOG LAMP10AICM Relay Box (Rear Fog Lamp Relay)
MEMORY 210ABCM, Tyre Pressure Monitoring Module, Driver IMS Module, Driver/Passenger Door
Module, Auto Light & Photo Sensor, Data Link Connector, A/C Control Module,
Instrument Cluster
SMART KEY 27.5ASmart Key Control Module, Immobiliser Module
MODULE 310A
BCM, Instrument Cluster, Tyre Pressure Monitoring Module, AMP, Smart Parking Assist
Control Module, Electro Chromic Mirror, Lane Departure Warning Module, Steering
Angle Sensor, A/C Control Module, A/V & Navigation Head Unit, 4WD ECM
ATM Shift Lever Indicator, Rear Parking Assist Sensor LH/RH, Rear Seat Warmer
LH/RH, Driver/Passenger Climate Control Seat Control Module, Driver/Passenger Seat
Warmer Module, Driver IMS Module, Console Switch LH/RH, Rear Console Switch,
Rear Parking Assist Sensor (Centre) LH/RH, Driver/Passenger Door Module, Electric
Parking Brake Module
SMART KEY 410AStart/Stop Button Switch, Immobiliser Module