2016 HYUNDAI IX35 reset
[x] Cancel search: resetPage 23 of 550
Safety features of your vehicle43
WARNING
- Rear seatbacks
The rear seatback must besecurely latched. If not, passen-
gers and objects could be thrown
forward resulting in serious
injury or death in the event of a
sudden stop or collision.
Luggage and other cargo should be laid flat in the cargo area. If
objects are large, heavy, or must
be piled, they must be secured.
Under no circumstances should
cargo be piled higher than the
seatbacks. Failure to follow these
warnings could result in serious
injury or death in the event of a
sudden stop, collision or rollover.
No passenger should ride in the cargo area or sit or lie on folded
seatbacks whilst the vehicle is
moving. All passengers must be
properly seated in seats and
restrained properly whilst riding.
When resetting the seatback to the upright position, make sure it
is securely latched by pushing it
forward and reverse.
WARNING
After adjusting the seat, always
check that it is securely locked into
place by attempting to move the
seat forward or reverse without
using the lock release lever.
Sudden or unexpected movement
of the driver's seat could cause you
to lose control of the vehicle result-
ing in an accident.
WARNING
Do not adjust the seat whilstwearing seat belts. Moving the
seat cushion forward may cause
strong pressure on the abdomen.
Use extreme caution so that hands or other objects are not
caught in the seat mechanisms
whilst the seat is moving.
Do not put a cigarette lighter on the floor or seat. When you oper-
ate the seat, gas may gush out of
the lighter and cause fire.
If there are occupants in the rear seats, be careful whilst adjusting
the front seat position.
Use extreme caution when pick- ing small objects trapped under
the seats or between the seat and
the centre console. Your hands
might be cut or injured by the
sharp edges of the seats mecha-
nism.
EL(FL) UK 3.QXP 12/16/2014 8:54 PM Page 4
Page 86 of 550

Features of your vehicleKeys . . . . . . . . . . . . . . . . . . . . . . . . . . . . . . . . . . . . \
. . 4-4• Record your key number . . . . . . . . . . . . . . . . . . . . . . . 4-4
• Key operations . . . . . . . . . . . . . . . . . . . . . . . . . . . . . . . . 4-4
• Immobiliser system . . . . . . . . . . . . . . . . . . . . . . . . . . . . 4-5Remote keyless entry . . . . . . . . . . . . . . . . . . . . . . . 4-7• Remote keyless entry system operations . . . . . . . . . . . 4-7
• Transmitter precautions . . . . . . . . . . . . . . . . . . . . . . . . 4-8
• Battery replacement . . . . . . . . . . . . . . . . . . . . . . . . . . . 4-9Smart key . . . . . . . . . . . . . . . . . . . . . . . . . . . . . . . . 4-10• Smart key functions . . . . . . . . . . . . . . . . . . . . . . . . . . 4-10
• Smart key precautions . . . . . . . . . . . . . . . . . . . . . . . . 4-12
• Door lock/unlock in an emergency situation . . . . . . 4-12Theft-alarm system . . . . . . . . . . . . . . . . . . . . . . . . 4-13• Theft-alarm stage . . . . . . . . . . . . . . . . . . . . . . . . . . . . 4-14
• Disarmed stage. . . . . . . . . . . . . . . . . . . . . . . . . . . . . . . 4-14Door locks . . . . . . . . . . . . . . . . . . . . . . . . . . . . . . . 4-15• Operating door locks from outside the vehicle . . . . 4-15
• Operating door locks from inside the vehicle . . . . . . 4-16
• Deadlocks . . . . . . . . . . . . . . . . . . . . . . . . . . . . . . . . . . 4-17\
• Speed sensing door lock system . . . . . . . . . . . . . . . . 4-18
• Child-protector rear door lock. . . . . . . . . . . . . . . . . . 4-18Tailgate . . . . . . . . . . . . . . . . . . . . . . . . . . . . . . . . . . 4-19\
• Opening the tailgate . . . . . . . . . . . . . . . . . . . . . . . . . . 4-19
• Closing the tailgate . . . . . . . . . . . . . . . . . . . . . . . . . . . 4-19
Windows . . . . . . . . . . . . . . . . . . . . . . . . . . . . . . . . . 4-21• Power windows . . . . . . . . . . . . . . . . . . . . . . . . . . . . . . 4-22Bonnet . . . . . . . . . . . . . . . . . . . . . . . . . . . . . . . . . . . 4-\
25• Opening the bonnet . . . . . . . . . . . . . . . . . . . . . . . . . . 4-25
• Closing the bonnet . . . . . . . . . . . . . . . . . . . . . . . . . . . . 4-26Fuel filler lid . . . . . . . . . . . . . . . . . . . . . . . . . . . . . 4-27• Opening the fuel filler lid . . . . . . . . . . . . . . . . . . . . . . 4-27
• Closing the fuel filler lid . . . . . . . . . . . . . . . . . . . . . . . 4-27Panorama sunroof . . . . . . . . . . . . . . . . . . . . . . . . . 4-30• Sunroof open warning . . . . . . . . . . . . . . . . . . . . . . . . 4-30
• Tilting the sunroof . . . . . . . . . . . . . . . . . . . . . . . . . . . 4-32
• Resetting the sunroof . . . . . . . . . . . . . . . . . . . . . . . . . 4-33Steering wheel . . . . . . . . . . . . . . . . . . . . . . . . . . . . . 4-34• Electric power steering . . . . . . . . . . . . . . . . . . . . . . . 4-34
• Heated steering wheel . . . . . . . . . . . . . . . . . . . . . . . . 4-35
• Horn . . . . . . . . . . . . . . . . . . . . . . . . . . . . . . . . . . . . \
. . . 4-36
• Flex steering wheel . . . . . . . . . . . . . . . . . . . . . . . . . . . 4-37Mirrors . . . . . . . . . . . . . . . . . . . . . . . . . . . . . . . . . . 4-39\
• Inside rearview mirror . . . . . . . . . . . . . . . . . . . . . . . . 4-39
• Outside rearview mirror . . . . . . . . . . . . . . . . . . . . . . 4-43Instrument cluster . . . . . . . . . . . . . . . . . . . . . . . . . 4-46• Instrument panel illumination . . . . . . . . . . . . . . . . . 4-47
• LCD Display Control . . . . . . . . . . . . . . . . . . . . . . . . . 4-47
• Gauges . . . . . . . . . . . . . . . . . . . . . . . . . . . . . . . . . . . . \
. 4-48
• Transaxle Shift Indicator . . . . . . . . . . . . . . . . . . . . . . 4-52
4
EL(FL) UK 4A.QXP 2/9/2015 9:02 PM Page 1
Page 108 of 550
423
Features of your vehicle
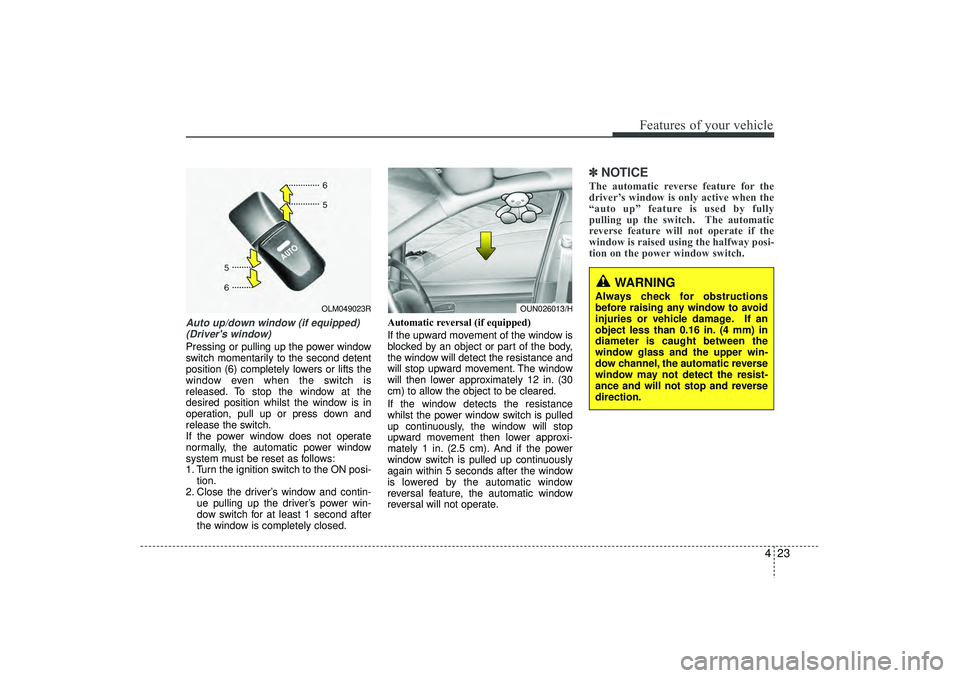
Auto up/down window (if equipped)(Driver's window) Pressing or pulling up the power window
switch momentarily to the second detent
position (6) completely lowers or lifts the
window even when the switch is
released. To stop the window at the
desired position whilst the window is in
operation, pull up or press down and
release the switch.
If the power window does not operate
normally, the automatic power window
system must be reset as follows:
1. Turn the ignition switch to the ON posi- tion.
2. Close the driver’s window and contin- ue pulling up the driver’s power win-
dow switch for at least 1 second after
the window is completely closed. Automatic reversal (if equipped)
If the upward movement of the window is
blocked by an object or part of the body,
the window will detect the resistance and
will stop upward movement. The window
will then lower approximately 12 in. (30
cm) to allow the object to be cleared.
If the window detects the resistance
whilst the power window switch is pulled
up continuously, the window will stop
upward movement then lower approxi-
mately 1 in. (2.5 cm). And if the power
window switch is pulled up continuously
again within 5 seconds after the window
is lowered by the automatic window
reversal feature, the automatic window
reversal will not operate.
✽ ✽
NOTICEThe automatic reverse feature for the
driver’s window is only active when the
“auto up” feature is used by fully
pulling up the switch. The automatic
reverse feature will not operate if the
window is raised using the halfway posi-
tion on the power window switch.
OLM049023R
OUN026013/H
WARNING
Always check for obstructions
before raising any window to avoid
injuries or vehicle damage. If an
object less than 0.16 in. (4 mm) in
diameter is caught between the
window glass and the upper win-
dow channel, the automatic reverse
window may not detect the resist-
ance and will not stop and reverse
direction.
EL(FL) UK 4A.QXP 2/9/2015 9:03 PM Page 23
Page 118 of 550
433
Features of your vehicle
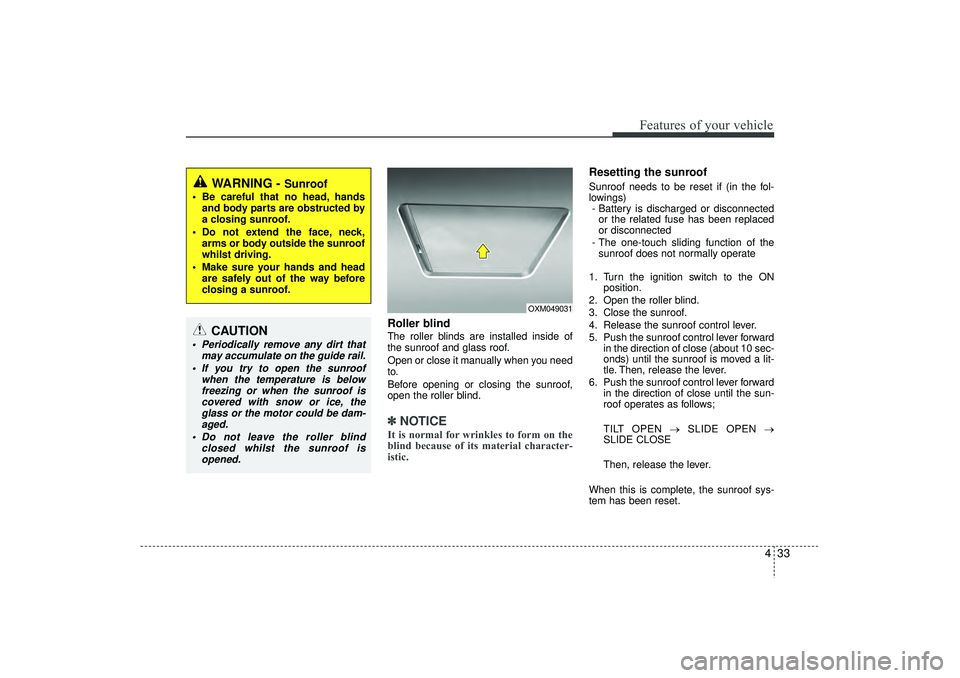
Roller blind The roller blinds are installed inside of
the sunroof and glass roof.
Open or close it manually when you need
to.
Before opening or closing the sunroof,
open the roller blind.✽ ✽NOTICEIt is normal for wrinkles to form on the
blind because of its material character-
istic.
Resetting the sunroofSunroof needs to be reset if (in the fol-
lowings)
- Battery is discharged or disconnected or the related fuse has been replaced
or disconnected
- The one-touch sliding function of the sunroof does not normally operate
1. Turn the ignition switch to the ON position.
2. Open the roller blind.
3. Close the sunroof.
4. Release the sunroof control lever.
5. Push the sunroof control lever forward in the direction of close (about 10 sec-
onds) until the sunroof is moved a lit-
tle. Then, release the lever.
6. Push the sunroof control lever forward in the direction of close until the sun-
roof operates as follows;
TILT OPEN → SLIDE OPEN →
SLIDE CLOSE
Then, release the lever.
When this is complete, the sunroof sys-
tem has been reset.
OXM049031
WARNING -
Sunroof
Be careful that no head, hands and body parts are obstructed by
a closing sunroof.
Do not extend the face, neck, arms or body outside the sunroof
whilst driving.
Make sure your hands and head are safely out of the way before
closing a sunroof.
CAUTION
Periodically remove any dirt that may accumulate on the guide rail.
If you try to open the sunroof when the temperature is belowfreezing or when the sunroof iscovered with snow or ice, the glass or the motor could be dam-aged.
Do not leave the roller blind closed whilst the sunroof isopened.
EL(FL) UK 4A.QXP 2/9/2015 9:04 PM Page 33
Page 132 of 550
447
Features of your vehicle
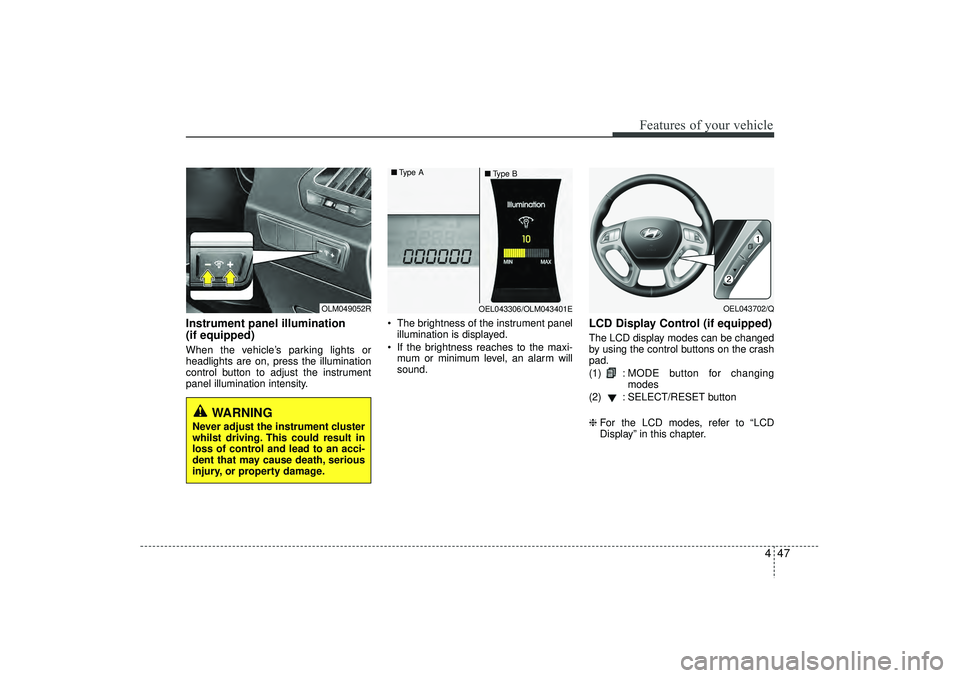
Instrument panel illumination
(if equipped)When the vehicle’s parking lights or
headlights are on, press the illumination
control button to adjust the instrument
panel illumination intensity. The brightness of the instrument panel
illumination is displayed.
If the brightness reaches to the maxi- mum or minimum level, an alarm will
sound.
LCD Display Control (if equipped)The LCD display modes can be changed
by using the control buttons on the crash
pad.
(1) : MODE button for changing
modes
(2) : SELECT/RESET button
❈ For the LCD modes, refer to “LCD
Display” in this chapter.
OLM049052R
OEL043306/OLM043401E
■
Type A
■Type B
OEL043702/Q
WARNING
Never adjust the instrument cluster
whilst driving. This could result in
loss of control and lead to an acci-
dent that may cause death, serious
injury, or property damage.
EL(FL) UK 4A.QXP 2/9/2015 9:04 PM Page 47
Page 140 of 550
455
Features of your vehicle
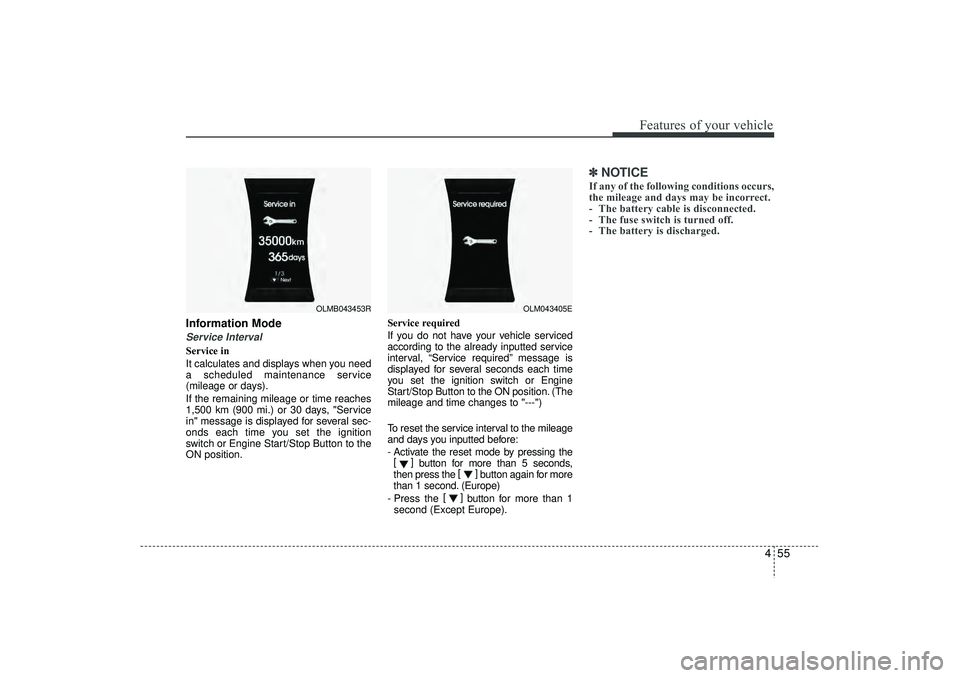
Information ModeService IntervalService in
It calculates and displays when you need
a scheduled maintenance service
(mileage or days).
If the remaining mileage or time reaches
1,500 km (900 mi.) or 30 days, "Service
in" message is displayed for several sec-
onds each time you set the ignition
switch or Engine Start/Stop Button to the
ON position.Service required
If you do not have your vehicle serviced
according to the already inputted service
interval, “Service required” message is
displayed for several seconds each time
you set the ignition switch or Engine
Start/Stop Button to the ON position. (The
mileage and time changes to "---")
To reset the service interval to the mileage
and days you inputted before:
- Activate the reset mode by pressing the
[] button for more than 5 seconds,
then press the []
button again for more
than 1 second. (Europe)
- Press the []
button for more than 1
second (Except Europe).
✽ ✽ NOTICEIf any of the following conditions occurs,
the mileage and days may be incorrect.
- The battery cable is disconnected.
- The fuse switch is turned off.
- The battery is discharged.
OLM043405E
OLMB043453R
EL(FL) UK 4A.QXP 2/9/2015 9:04 PM Page 55
Page 142 of 550
457
Features of your vehicle
Horn Feedback (if equipped)
If this item is checked, the horn feedback
operation will be activated.
After locking the door by pressing the
lock button on the transmitter, if you
press the lock button again within 4 sec-
onds, the warning sound will operate
once to indicate that all doors are locked.
LampHead Lamp Delay (if equipped)
If this item is checked, the headlamp
delay and headlamp welcome function
will be activated.SettingsLanguage (if equipped)
Choose the language you prefer within
the LCD display.
SPAS Voice (if equipped)
Adjust the volume of SPAS voice infor-
mation.
Temperature Unit
Convert the temperature unit from °C to
°F or from °F to °C.AVG Fuel Eco Reset
Auto Reset:
The average fuel economy will reset
automatically when refuelling.
Manual Reset: The average fuel economy will not
reset automatically whenever refu-
elling.
For more details, refer to “Trip Computer”
in this chapter.
EL(FL) UK 4A.QXP 2/9/2015 9:04 PM Page 57
Page 149 of 550
Features of your vehicle64
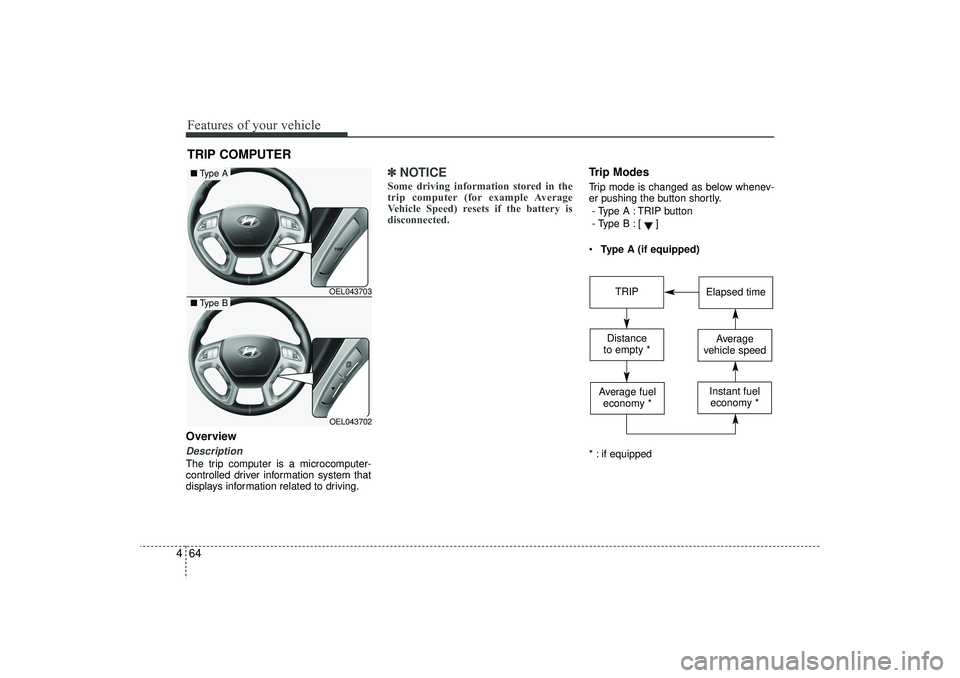
4OverviewDescriptionThe trip computer is a microcomputer-
controlled driver information system that
displays information related to driving.
✽ ✽
NOTICESome driving information stored in the
trip computer (for example Average
Vehicle Speed) resets if the battery is
disconnected.
Trip ModesTrip mode is changed as below whenev-
er pushing the button shortly.
- Type A : TRIP button
- Type B :
[]
Type A (if equipped)
* : if equipped
TRIP COMPUTER
OEL043703OEL043702
■ Type A■Type B
TRIP
Elapsed time
Distance
to empty *
Average
vehicle speed
Average fuel economy *
Instant fueleconomy *
EL(FL) UK 4A.QXP 2/9/2015 9:05 PM Page 64