Page 155 of 473

3-93
Convenient features of your vehicle
3
Types of warning sound
When driving forward
When an object is 100 cm to 61 cm (39 in. to 24 in.) from the bumper:
Buzzer beeps intermittently.
When an object is 60 cm to 31 cm (23 in. to 12 in.) from the bumper:
Buzzer beeps more frequently.
When an object is within 30 cm (11 in.) of the bumper:
Buzzer sounds continuously.
When driving rearward
When an object is 120 cm to 61 cm(47.2 in. to 24 in.) from the bumper:
Buzzer beeps intermittently.
When an object is 60 cm to 31 cm (23 in. to 12 in.) from the bumper:
Buzzer beeps more frequently.
When an object is within 30 cm (11 in.) of the bumper:
Buzzer sounds continuously.
This system can only sense
objects within the range and
location of the sensors; It can not detect objects in
other areas where sensors are
not installed. Also, small or
slim objects, such as poles orobjects located between sen-
sors may not be detected by
the sensors.
Always visually check front or
behind the vehicle when get-
ting forward or backing up.
Be sure to inform any drivers
of the vehicle that may beunfamiliar with the system
regarding the systems capa-bilities and limitations.
CAUTION
Page 156 of 473

3-94
Convenient features of your vehicle
Self-diagnosis
When the front/rear parking assist
system has a malfunction, if you
operate the system, the warning
sound sounds 3 times. In this time,
the indicator on switch will blink and
the warning on the cluster will blink.
However, the warning regardingobject will not sound.
In this time, we recommend that the
system be checked by an authorized
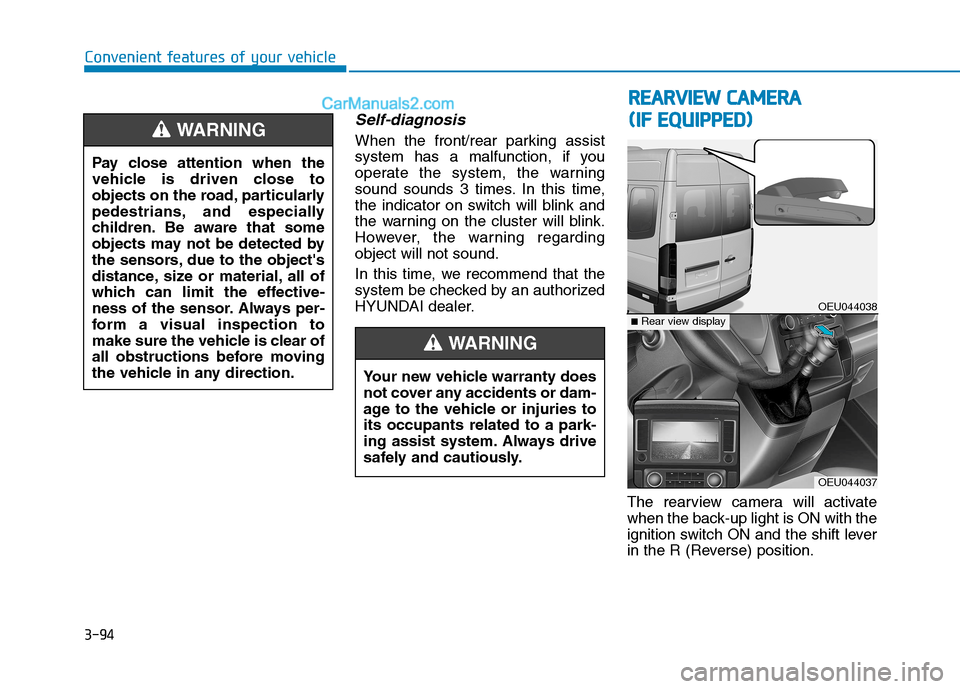
HYUNDAI dealer.The rearview camera will activate
when the back-up light is ON with the
ignition switch ON and the shift lever
in the R (Reverse) position.
Pay close attention when the
vehicle is driven close to
objects on the road, particularly
pedestrians, and especially
children. Be aware that some
objects may not be detected by
the sensors, due to the object's
distance, size or material, all of
which can limit the effective-
ness of the sensor. Always per-
form a visual inspection to
make sure the vehicle is clear of
all obstructions before moving
the vehicle in any direction.WARNING
RR
EEAA RRVV IIEE WW CC AA MM EERR AA
(
( IIFF EE QQ UUIIPP PPEEDD ))
OEU044038
OEU044037
■Rear view display
Your new vehicle warranty does
not cover any accidents or dam-
age to the vehicle or injuries toits occupants related to a park-
ing assist system. Always drive
safely and cautiously.
WARNING
Page 157 of 473

3-95
Convenient features of your vehicle
3
This system is a supplemental sys-
tem that shows behind the vehicle
through the rearview display mirror
while backing-up.The hazard warning flasher should
be used whenever you find it neces-
sary to stop the vehicle in a haz-
ardous location. When you must
make such an emergency stop,
always pull off the road as far as pos-
sible.
The hazard warning lights are turned
on by pushing in the hazard switch.
This causes all turn signal lights to
blink. The hazard warning lights will
operate even though the key is not in
the ignition switch.
To turn the hazard warning lights off,
push the switch a second time.Battery saver function
The purpose of this feature is toprevent the battery from being dis-
charged. The system automatically
turns off the parking lights when
the driver removes the ignition key
and opens the driver- side door.
With this feature, the parking lights will be turned off automatically if
the driver parks on the side of roadat night.
If necessary, to keep the lights on
when the ignition key is removed,
perform the following :
1) Open the driver-side door.
2) Turn the parking lights OFF and ON again using the light switch
on the steering column.
This system is a supplemen-
tary function only. It is theresponsibility of the driver to
always check the inside/out-
side rearview mirror and the
area behind the vehicle before
and while backing up becausethere is a dead zone that can't
see through the camera.
Always keep the camera lens
clean. If lens is covered with
foreign matter, the camera
may not operate normally.
WARNING
HHAAZZAA RRDD WW AARRNN IINN GG FF LLAA SSHH EERR
OEU044191
LLIIGG HH TTIINN GG
Page 165 of 473

3-103
Convenient features of your vehicle
3
1 (LO) : Normal wiper speed
2 (HI) : Fast wiper speed
If there is heavy accumulation ofsnow or ice on the windshield,
defrost the windshield for about
10 minutes, or until the snow
and/or ice is removed before
using the windshield wipers to
ensure proper operation.
If you do not remove the snow
and/or ice before using the
wiper and washer, it may dam-
age the wiper and washer sys-tem.
When the wipers do not properly wipe out the front windshield,
they may be worn out or
cracked. In this case, replace the
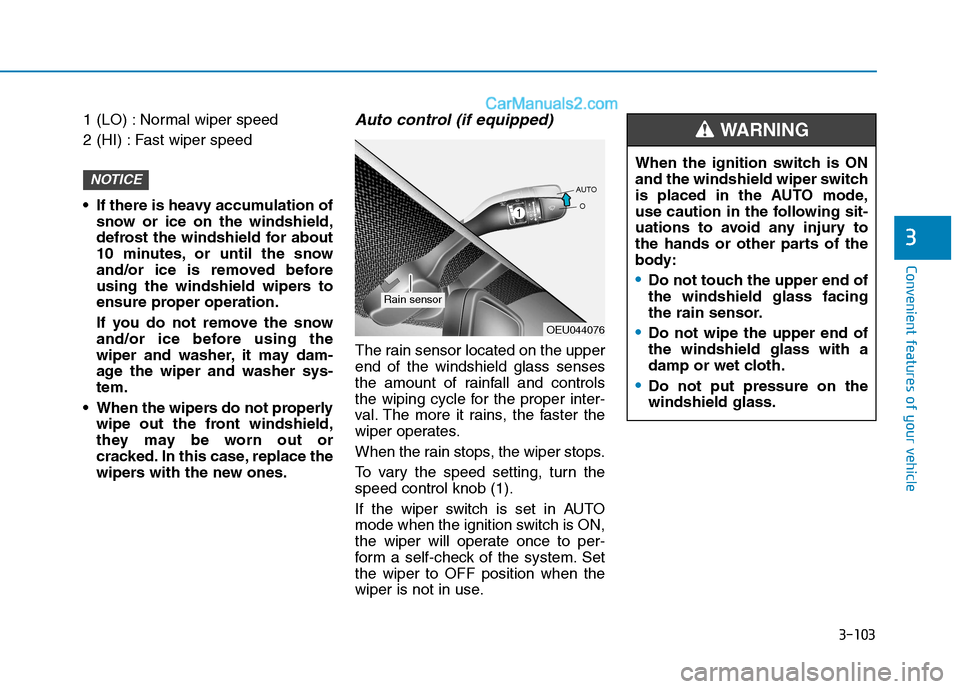
wipers with the new ones.Auto control (if equipped)
The rain sensor located on the upperend of the windshield glass senses
the amount of rainfall and controls
the wiping cycle for the proper inter-
val. The more it rains, the faster the
wiper operates.
When the rain stops, the wiper stops.
To vary the speed setting, turn the speed control knob (1).
If the wiper switch is set in AUTO
mode when the ignition switch is ON,
the wiper will operate once to per-
form a self-check of the system. Setthe wiper to OFF position when the
wiper is not in use.
NOTICE
When the ignition switch is ON
and the windshield wiper switch
is placed in the AUTO mode,
use caution in the following sit-
uations to avoid any injury to
the hands or other parts of the
body:
Do not touch the upper end of the windshield glass facing
the rain sensor.
Do not wipe the upper end of the windshield glass with a
damp or wet cloth.
Do not put pressure on the windshield glass.
WARNING
OEU044076
Rain sensor
Page 167 of 473

3-105
Convenient features of your vehicle
3
Windshield washers
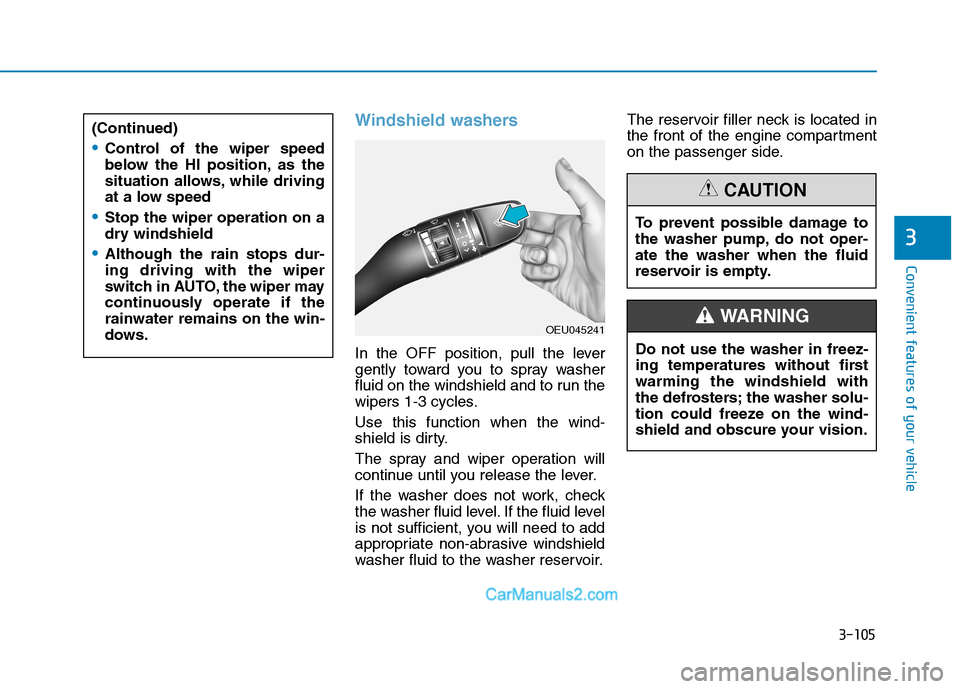
In the OFF position, pull the lever
gently toward you to spray washer
fluid on the windshield and to run the
wipers 1-3 cycles. Use this function when the wind-
shield is dirty.
The spray and wiper operation will
continue until you release the lever.
If the washer does not work, check
the washer fluid level. If the fluid level
is not sufficient, you will need to add
appropriate non-abrasive windshield
washer fluid to the washer reservoir.The reservoir filler neck is located in
the front of the engine compartment
on the passenger side.
(Continued)
Control of the wiper speed
below the HI position, as the
situation allows, while driving
at a low speed
Stop the wiper operation on a
dry windshield
Although the rain stops dur- ing driving with the wiper
switch in AUTO, the wiper may
continuously operate if therainwater remains on the win-
dows.
To prevent possible damage to
the washer pump, do not oper-ate the washer when the fluid
reservoir is empty.
CAUTION
Do not use the washer in freez-
ing temperatures without firstwarming the windshield with
the defrosters; the washer solu-
tion could freeze on the wind-
shield and obscure your vision.
WARNING OEU045241
Page 182 of 473

3-120
Convenient features of your vehicle
Replace the filter according tothe Maintenance Schedule.
If the vehicle is being driven in
severe conditions such as dusty
or rough roads, more frequentair conditioner filter inspections
and changes are required.
When the air flow rate suddenly decreases, we recommend that
the system be checked by an
authorized HYUNDAI dealer.
Checking the amount of air
conditioner refrigerant andcompressor lubricant
When the amount of refrigerant is
low, the performance of the air con-
ditioning is reduced. Overfilling also
has a negative impact on the air con-ditioning system.
Therefore, we recommend that the
system be inspected by an author-
ized HYUNDAI dealer.
It is important when servicing the air conditioning system that thecorrect type and amount of oil and
refrigerant is used. Otherwise,
damage to the compressor and
abnormal system operation may
occur.
NOTICE
NOTICE
Improper service may cause
serious injury to the person per-
forming the service. For more
detailed information, we recom-
mend that you contact an
authorized HYUNDAI dealer.
WARNING
Page 232 of 473
![Hyundai H350 2016 Owners Manual 4-40
Multimedia System
Delete All
Press the key Set [ Del.All]
through the TUNE knob or
key. Deletes all songs of My Music.
Delete Selection
Press the key Set [
Del.Sel] through the TUNE knob
o Hyundai H350 2016 Owners Manual 4-40
Multimedia System
Delete All
Press the key Set [ Del.All]
through the TUNE knob or
key. Deletes all songs of My Music.
Delete Selection
Press the key Set [
Del.Sel] through the TUNE knob
o](/manual-img/35/14880/w960_14880-231.png)
4-40
Multimedia System
Delete All
Press the key Set [ Del.All]
through the TUNE knob or
key. Deletes all songs of My Music.
Delete Selection
Press the key Set [
Del.Sel] through the TUNE knob
or key. Songs within My Music are selected and deleted. ➀Select the songs you wish to
delete from the list. ➁
After selecting, press the
key and select the delete menu.
Information - Using the My Music
Even if memory is available, a maxi- mum of 6,000 songs can be stored.
The same song can be copied up to 1,000 times.
Memory info can be checked in the System menu of Setup.
AUX
AUX is used to play external MEDIA
currently connected with the AUX
terminal.
AUX mode will automatically start
when an external device is connect-
ed with the AUX terminal.
If an external device is connected,
you can also press the key to
change to AUX mode. ❈ AUX mode cannot be started
unless there is an external device
connected to the AUX terminal.
Information
- Using the AUX
Fully insert the AUX cable into the
AUX terminal for use.
i
MEDIAi
MENU
6
MENU
5
MENU
Page 266 of 473
![Hyundai H350 2016 Owners Manual 4-74
Multimedia System
Delete All
Press the key Set [
Del.All] through the TUNE knob orkey.
Deletes all songs of My Music.
Delete Selection
Press the key Set [
Del.Sel] through the TUNE knob
or Hyundai H350 2016 Owners Manual 4-74
Multimedia System
Delete All
Press the key Set [
Del.All] through the TUNE knob orkey.
Deletes all songs of My Music.
Delete Selection
Press the key Set [
Del.Sel] through the TUNE knob
or](/manual-img/35/14880/w960_14880-265.png)
4-74
Multimedia System
Delete All
Press the key Set [
Del.All] through the TUNE knob orkey.
Deletes all songs of My Music.
Delete Selection
Press the key Set [
Del.Sel] through the TUNE knob
or key. Songs within My Music are selected and deleted. ➀ Select the songs you wish to
delete from the list. ➁
After selecting, press the
key and select the delete menu.
Information - Using the My Music
Even if memory is available, a max- imum of 6,000 songs can be stored.
The same song can be copied up to 1,000 times.
Memory info can be checked in the System menu of Setup.
AUX
AUX is used to play external MEDIA
currently connected with the AUX
terminal.
AUX mode will automatically start
when an external device is connect-
ed with the AUX terminal.
If an external device is connected,
you can also press the key to
change to AUX mode. ❈ AUX mode cannot be started
unless there is an external device
connected to the AUX terminal.
Information
- using THE AUX
Fully insert the AUX cable into the
AUX terminal for use.
i
MEDIAi
MENU
6
MENU
5
MENU