Page 403 of 473

7-40
Maintenance
Battery capacity label
❈The actual battery label in the vehicle
may differ from the illustration.
1. CMF100L-DIN : The HYUNDAI model name of battery
2. 12V : The nominal voltage
3. 100Ah(20HR) : The nominal
capacity (in Ampere hours)
4. 190RC : The nominal reserve
capacity (in min.)
5. 780CCA (SAE) : The cold-test cur- rent in amperes by SAE
6. 625A (EN) : The cold-test current in amperes by EN
Battery recharging
Your vehicle has a maintenance-free,
calcium-based battery.
If the battery becomes dischargedin a short time (because, for exam-
ple, the headlights or interior lights
were left on while the vehicle was
not in use), recharge it by slow
charging (trickle) for 10 hours.
If the battery gradually discharges because of high electric load while
the vehicle is being used, recharge
it at 20-30A for two hours. For the vehicle equipped with
ISG system (AGM battery), be
careful not to damage the bat-
tery sensor when the battery is
replaced or recharged.
1) When replacing the battery, it
should be same one (type, capacity and brand) that is
originally installed on your
vehicle. If a battery of a dif-
ferent type is replaced, bat-
tery sensor may recognize
the battery to be abnormal.
2) When installing the ground cable on the negative post of
battery, tighten the clamp
with specified torque of 4.0 ~
6.0 N.m (0.4 ~ 0.6 kgf.m, 3.0 ~
4.41 lb-ft). An excessive tight-
ening torque can damage the
PCB internal circuit.
3) When recharging the battery, ground the negative terminal
of the booster battery to the
vehicle body.CAUTION
OEU074074
■
Example
Page 410 of 473

7-47
7
Maintenance
Wheel replacement
When replacing the metal wheels for
any reason, make sure the new
wheels are equivalent to the original
factory units in diameter, rim widthand offset.
Tire traction
Tire traction can be reduced if you
drive on worn tires, tires that are
improperly inflated or on slippery
road surfaces. Tires should be
replaced when tread wear indicators
appear. To reduce the possibility of
losing control, slow down whenever
there is rain, snow or ice on the road.
Tire maintenance
In addition to proper inflation, correct wheel alignment helps to decrease
tire wear. If you find a tire is worn
unevenly, have your dealer or otherrepair shops that use qualified tech-
nicians check the wheel alignment.
When you have new tires installed,
make sure they are balanced. This
will increase vehicle ride comfort and
tire life. Additionally, a tire should
always be rebalanced if it is removedfrom the wheel.
A wheel that is not the correct
size may adversely affect wheel
and bearing life, braking and
stopping abilities, handling
characteristics, ground clear-
ance, body-to-tire clearance,
snow chain clearance,speedometer and odometer cal-
ibration, headlight aim and
bumper height.
WARNING
(Continued)
The use of any other tire size
or type may seriously affect
ride, handling, ground clear-
ance, stopping distance, body
to tire clearance, snow tire
clearance, and speedometer
reliability.
It is best to replace all four
tires at the same time. If that
is not possible, or necessary,
then replace the two front or
two rear tires as a pair.Replacing just one tire can
seriously affect your vehicle’shandling.
The ABS works by comparing
the speed of the wheels. Tire
size can affect wheel speed.
When replacing tires, all 4
tires must use the same size
originally supplied with the
vehicle. Using tires of a differ-
ent size can cause the ABS
(Anti-lock Brake System) and
ESP (Electronic Stability
Program) (if equipped) to
work irregularly.
Page 416 of 473
7-53
7
Maintenance
If the headlights or other electrical
components do not work and the
fuses are OK, check the fuse block in
the engine compartment. If a fuse is
blown, it must be replaced.Engine compartment panel fusereplacement
1.Turn the ignition switch and all other switches off.
2.Remove the fuse box cover by pressing the tap and pulling up.
3.Check the removed fuse; replace it if it is blown. To remove or insert
the fuse, use the fuse puller in the
engine compartment fuse panel.
4.Push in a new fuse of the same rat- ing, and make sure it fits tightly in
the clips.
If it fits loosely, we recommend that
you consult an authorized
HYUNDAI dealer.
OEU074029 After checking the fuse box in
the engine compartment,
securely install the fuse box
cover. If not, electrical failures
may occur from water leakingin.
CAUTION
Page 430 of 473

7-67
7
MaintenanceUse only the bulbs of the specifiedwattage.
After heavy, driving rain or wash-
ing, headlight and taillight lenses
could appear frosty. This condi-
tion is caused by the temperature
difference between the lamp
inside and outside. This is similar
to the condensation on your win-
dows inside your vehicle duringthe rain and doesn’t indicate a
problem with your vehicle. If
water leaks into the lamp bulb cir-
cuitry, we recommend that the
system be checked by an author-
ized HYUNDAI dealer.
NOTICE
LL IIGG HH TT BB UU LLBB SS
Working on the lights
Prior to working on the light,
firmly apply the parking brake,
ensure that the ignition switch
is turned to the “LOCK” position
and turn off the lights to avoid
sudden movement of the vehi-
cle and burning your fingers or
receiving an electric shock.
WARNING
Be sure to replace the burned-
out bulb with one of the same
wattage rating. Otherwise, it
may cause damage to the fuseor electric wiring system.
CAUTION
If you don’t have necessary
tools, the correct bulbs and the
expertise, we recommend that
you consult an authorized
HYUNDAI dealer. In many cases,
it is difficult to replace vehicle
light bulbs because other parts
of the vehicle must be removed
before you can get to the bulb.
This is especially true if you
have to remove the headlight
assembly to get to the bulb(s).
Removing/installing the head-
light assembly can result in
damage to the vehicle.
CAUTION
Page 431 of 473
7-68
Maintenance
Headlight, position light, turn
signal light, front fog light bulbreplacement(1) Front turn signal light
(2) Headlight (Low)(3) Headlight (High)(4) Position light and DRL (LED)
(if equipped)
(5) Front fog light (if equipped)Headlight (Replacement)
MFR type (High / Low) and projec-
tion type (High)
1.Open the hood.
2.Remove the headlight bulb cover by turning it counterclockwise.
3.Disconnect the headlight bulb socket-connector.
4.Unsnap the headlight bulb retain- ing wire by depressing the end and
pushing it upward.
5.Remove the bulb from the head- light assembly.
OEU074048
OEU074047
OEU074070
■■MFR type
■■Projection type
Page 432 of 473

7-69
7
Maintenance
6.Install a new headlight bulb andsnap the headlight bulb retaining
wire into position by aligning the
wire with the groove on the bulb.
7.Connect the headlight bulb socket- connector.
8.Install the headlight bulb cover by turning it clockwise.
Projection type (Low)
1.Open the hood.
2.Remove the headlight bulb coverby turning it counterclockwise.
3.Remove the bulb socket by turning it counterclockwise and remove by
pulling the bulb.
4.Install is the reverse order of removal.
We recommend that the headlightaiming be adjusted after an acci-dent or after the headlight assem-
bly is reinstalled at an authorized
HYUNDAI dealer.
NOTICE
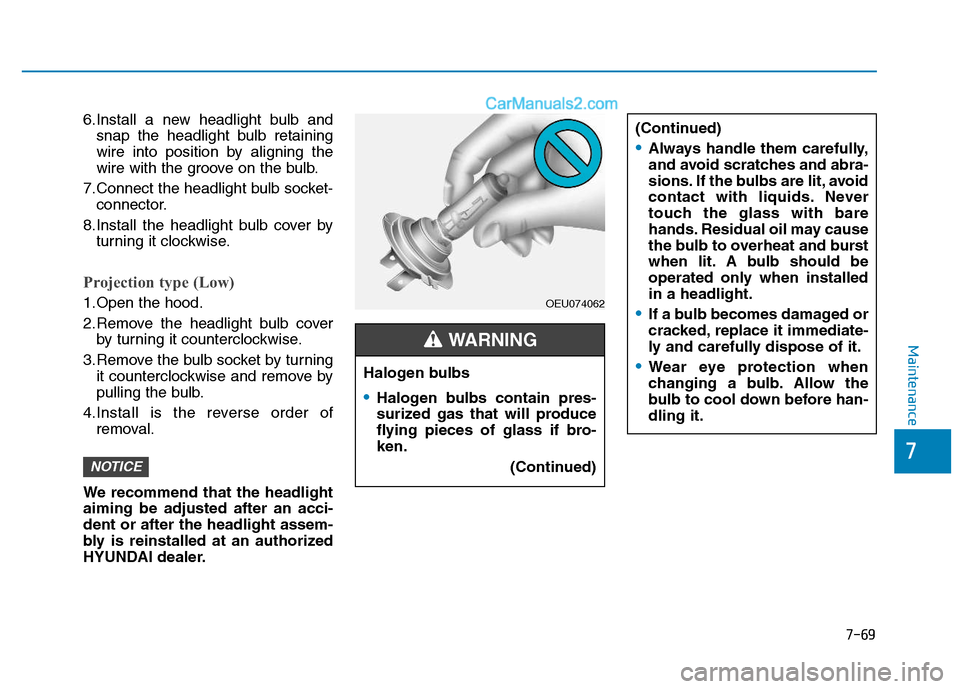
Halogen bulbs
Halogen bulbs contain pres-
surized gas that will produce
flying pieces of glass if bro-ken. (Continued)
(Continued)
Always handle them carefully,
and avoid scratches and abra-
sions. If the bulbs are lit, avoid
contact with liquids. Never
touch the glass with bare
hands. Residual oil may cause
the bulb to overheat and burst
when lit. A bulb should be
operated only when installedin a headlight.
If a bulb becomes damaged or
cracked, replace it immediate-
ly and carefully dispose of it.
Wear eye protection when
changing a bulb. Allow the
bulb to cool down before han-dling it.
WARNING
OEU074062
Page 433 of 473

7-70
Maintenance
Turn signal light/Position light
Turn signal light
1.Turn off the engine and open thehood.
2.Remove the socket from the assembly by turning the socket
counterclockwise until the tabs on
the socket align with the slots on
the assembly.
3.Remove the bulb from the socket by pressing it in and rotating it
counterclockwise until the tabs on
the bulb align with the slots in the
socket. Pull the bulb out of the
socket
4.Insert a new bulb by inserting it into the socket and rotating it until it
locks into place.
5.Install the socket in the assembly by aligning the tabs on the socket
with the slots in the assembly.
Push the socket into the assembly
and turn the socket clockwise.
Position light
If the light bulb does not operate, we recommend that the system be
checked by an authorized HYUNDAI
dealer.
Front fog light bulbs
(if equipped)
1.Remove the front bumper under cover.
2.Reach your hand into the back of the front bumper.
3.Disconnect the power connector from the socket.
4.Remove the bulb-socket from the housing by turning the socket
counter clockwise until the tabs on
the socket align with the slots onthe housing.
5.Install the new bulb-socket into the housing by aligning the tabs on the
socket with the slots in the hous-
ing. Push the socket into the hous-
ing and turn the socket clockwise.
6.Connect the power connector to the socket.
7.Reinstall the front bumper under cover.
Headlight and front fog light
aiming (for Europe)
Headlight aiming
1.Inflate the tires to the specified
pressure and remove any loads
from the vehicle except the driver,
spare tire, and tools.
OEU074061
OEU074049■■Projection type
■■MFR type
Page 457 of 473
8-4
Specifications & Consumer informationB
B UU LLBB WW AATTTTAA GG EE
* If equipped
Light BulbWattage
MFRProjection
Headlights (Low/High)55
Front fog lights*35
Front turn signal lights2121
Front position lights5LED
DRL lights*21LED
Side repeaterLED
Side marker lights*5
Rear stop / tail lamp21/5
Back up lamp16
Rear turn signal lamp21
Rear fog lights21
License plate light5
High mounted stop lightLED
Over head console lamps10
Room lamps*LED (if equipped)10
Step lamp*5
Cargo lamps*10
Reading lamps*LED