Page 165 of 475
Features of your vehicle
82
4
Battery saver function
The purpose of this feature is to
prevent the battery from being dis-
charged. The system automatically
turns off the exterior lights when
the driver removes the ignition key
(smart key : turns off the engine)
and opens the driver-side door. (in
that order)
With this feature, the parking lights will be turned off automatically if
the driver parks on the side of road
at night.
If necessary, to keep the lights on
when the ignition key is removed
(smart key : turns off the engine),
perform the following:
1) Open the driver-side door.
2) Turn the parking lights OFF and ON again using the light switch
on the steering column.
Headlight escort function
(if equipped)
If you turn the ignition switch to the
ACC or OFF position with the head-
lights ON, the headlights (and/or tail
lights) remain on for about 5 minutes.
However, if the driver’s door is
opened and closed, the headlights
are turned off after 15 seconds.
The headlights can be turned off by
pressing the lock button on the trans-
mitter (or smart key) twice or turning
the light switch to the OFF or Auto
position.
However, if you turn the light switch to
the Auto position when it is dark outside,
the headlights will not be turned off.
Headlamp welcome function
(if equipped)
When the headlight switch is in the
ON or AUTO position and all doors
(and trunk) are closed and locked, if
you press the door unlock button on
the transmitter (or the smart key), the
parking light will come on for about
15 seconds. At this time, if you press
the door lock button on the transmit-
ter (or smart key) the parking light
will turn off immediately.
LIGHTING
CAUTION
If the driver gets out of the vehi-cle through other doors (exceptdriver’s door), the battery saverfunction does not operate andthe headlight escort functiondoes not turn off automatically.Therefore, it causes the batteryto be discharged. In this case,make sure to turn off the lampbefore getting out of the vehicle.
Page 168 of 475
485
Features of your vehicle
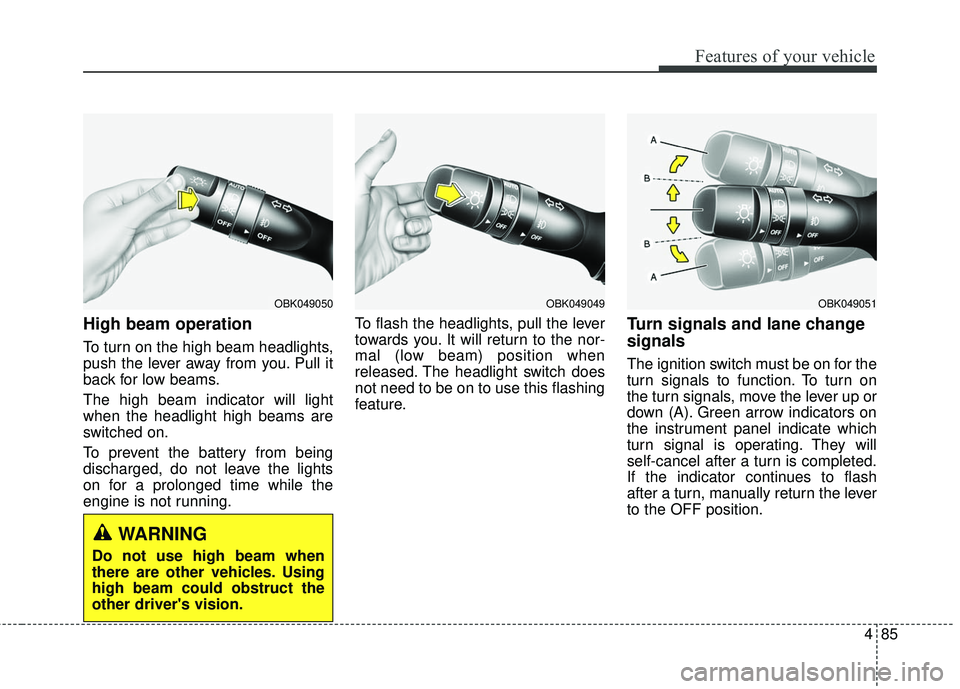
High beam operation
To turn on the high beam headlights,
push the lever away from you. Pull it
back for low beams.
The high beam indicator will light
when the headlight high beams are
switched on.
To prevent the battery from being
discharged, do not leave the lights
on for a prolonged time while the
engine is not running.To flash the headlights, pull the lever
towards you. It will return to the nor-
mal (low beam) position when
released. The headlight switch does
not need to be on to use this flashing
feature.
Turn signals and lane change
signals
The ignition switch must be on for the
turn signals to function. To turn on
the turn signals, move the lever up or
down (A). Green arrow indicators on
the instrument panel indicate which
turn signal is operating. They will
self-cancel after a turn is completed.
If the indicator continues to flash
after a turn, manually return the lever
to the OFF position.
OBK049051OBK049049OBK049050
WARNING
Do not use high beam when
there are other vehicles. Using
high beam could obstruct the
other driver's vision.
Page 172 of 475
489
Features of your vehicle
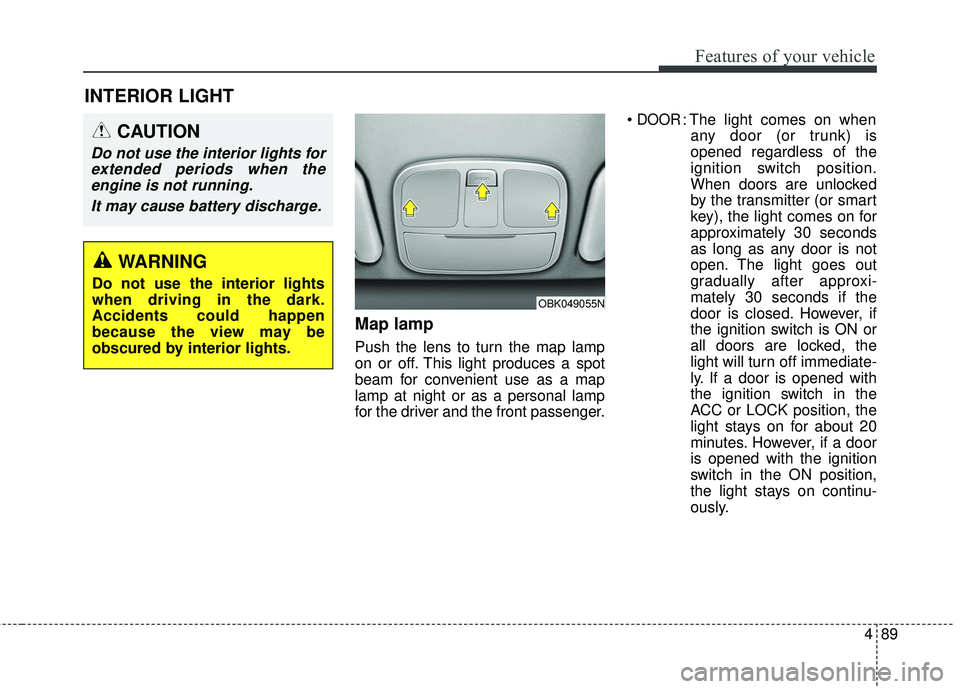
Map lamp
Push the lens to turn the map lamp
on or off. This light produces a spot
beam for convenient use as a map
lamp at night or as a personal lamp
for the driver and the front passenger.
DOOR: The light comes on when
any door (or trunk) is
opened regardless of the
ignition switch position.
When doors are unlocked
by the transmitter (or smart
key), the light comes on for
approximately 30 seconds
as long as any door is not
open. The light goes out
gradually after approxi-
mately 30 seconds if the
door is closed. However, if
the ignition switch is ON or
all doors are locked, the
light will turn off immediate-
ly. If a door is opened with
the ignition switch in the
ACC or LOCK position, the
light stays on for about 20
minutes. However, if a door
is opened with the ignition
switch in the ON position,
the light stays on continu-
ously.
INTERIOR LIGHT
CAUTION
Do not use the interior lights forextended periods when theengine is not running.
It may cause battery discharge.
OBK049055N
WARNING
Do not use the interior lights
when driving in the dark.
Accidents could happen
because the view may be
obscured by interior lights.
Page 179 of 475
Features of your vehicle
96
4
Temperature unit conversion
You can switch the temperature mode
between Centigrade to Fahrenheit as
follows:
While pressing the OFF button, press
the MAX A/C button for 4 seconds or
more.
The display will change from
Centigrade to Fahrenheit, or from
Fahrenheit to Centigrade.
If the battery has been discharged or
disconnected, the temperature mode
display will reset to Centigrade.
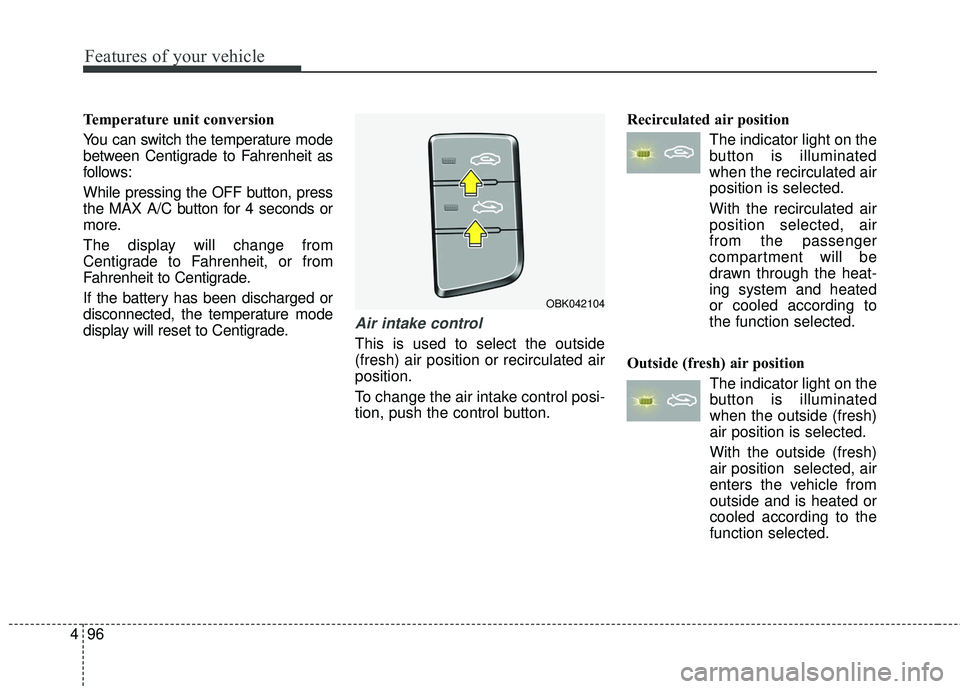
Air intake control
This is used to select the outside
(fresh) air position or recirculated air
position.
To change the air intake control posi-
tion, push the control button. Recirculated air position
The indicator light on the
button is illuminated
when the recirculated air
position is selected.
With the recirculated air position selected, air
from the passenger
compartment will be
drawn through the heat-
ing system and heated
or cooled according to
the function selected.
Outside (fresh) air position The indicator light on the
button is illuminated
when the outside (fresh)
air position is selected.
With the outside (fresh)
air position selected, air
enters the vehicle from
outside and is heated or
cooled according to the
function selected.
OBK042104
Page 190 of 475
4107
Features of your vehicle
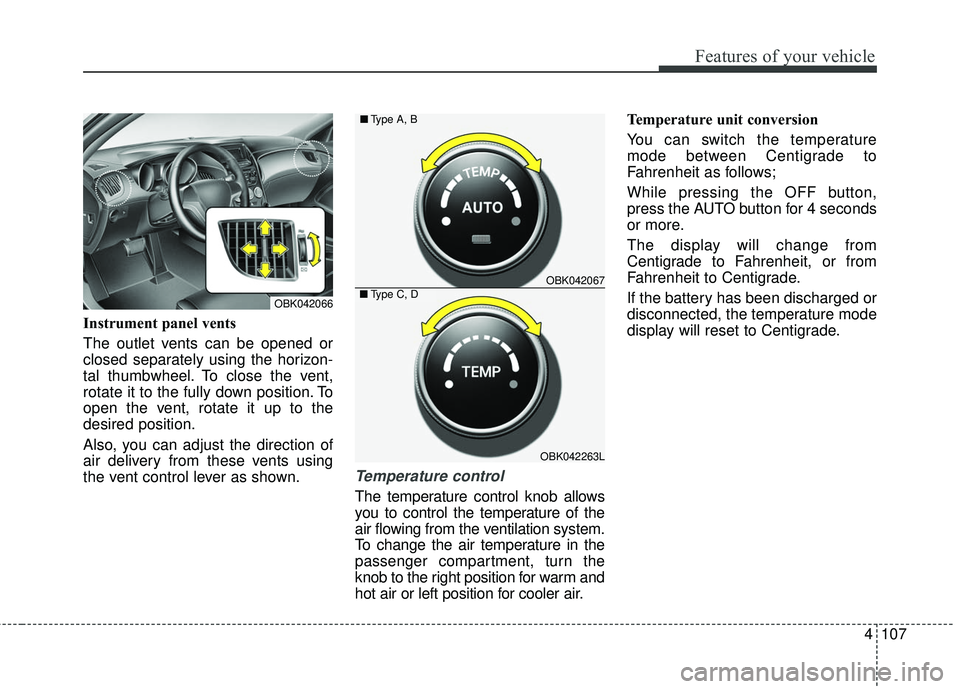
Instrument panel vents
The outlet vents can be opened or
closed separately using the horizon-
tal thumbwheel. To close the vent,
rotate it to the fully down position. To
open the vent, rotate it up to the
desired position.
Also, you can adjust the direction of
air delivery from these vents using
the vent control lever as shown.
Temperature control
The temperature control knob allows
you to control the temperature of the
air flowing from the ventilation system.
To change the air temperature in the
passenger compartment, turn the
knob to the right position for warm and
hot air or left position for cooler air.Temperature unit conversion
You can switch the temperature
mode between Centigrade to
Fahrenheit as follows;
While pressing the OFF button,
press the AUTO button for 4 seconds
or more.
The display will change from
Centigrade to Fahrenheit, or from
Fahrenheit to Centigrade.
If the battery has been discharged or
disconnected, the temperature mode
display will reset to Centigrade.
OBK042067
OBK042263L
■
Type A, B
■Type C, DOBK042066
Page 201 of 475
Features of your vehicle
118
4
3. While holding the air conditioning
button (A/C) pressed, press the air
intake control button at least 5
times within 3 seconds.
The A/C display blinks 3 times with
0.5 second of interval. It indicates
that the defogging logic is canceled
or returned to the programmed sta-
tus.
If the battery has been discharged or
disconnected, it resets to the defog
logic status.
Automatic climate control system
1. Turn the ignition switch to the ON position.
2. Press the defrost button ( ). 3. While holding the air conditioning
button (A/C) pressed, press the air
intake control button at least 5
times within 3 seconds.
The A/C display blinks 3 times with
0.5 second of interval. It indicates
that the defogging logic is canceled
or returned to the programmed sta-
tus.
If the battery has been discharged or
disconnected, it resets to the defog
logic status.
OBK042109L
OBK042274L
■
Type A, B
■ Type C, D
Page 202 of 475

4119
Features of your vehicle
Auto defogging system (Only for automatic climate con-trol system, if equipped)
Auto defogging reduces the possibil-
ity of fogging up the inside of the
windshield by automatically sensing
the moisture of inside the windshield.
The auto defogging system operates
when the climate control system is
on. This indicator illuminates
when the auto defogging
system senses the mois-
ture of inside the wind-
shield and operates.
If more moisture is in the vehicle,
higher steps operate as follow.
Step 1 : Operating the air condition- ing
Step 2 : Outside air position
Step 3 : Blowing air flow toward the windshield
Step 4 : Increasing air flow toward the windshield
If your vehicle is equipped with the
auto defogging system, it is automat-
ically activated when the conditions
are met. However, if you would like to
cancel the auto defogging system,
press the front defroster button 4
times within 2 seconds while press-
ing the AUTO button. The indicator
will blink 3 times to notify you that the
system is cancelled. To use the auto
defogging system again, follow the
procedures mentioned above. If the battery has been disconnected
or discharged, it resets to the auto
defogging status.
✽ ✽
NOTICE
If the A/C off is manually selected
while the auto defogging system is
on, the auto defogging indicator will
blink 3 times to give notice that the
A/C off can not be selected.
OBK042235
CAUTION
Do not remove the sensor cover
located on the upper end of thedriver side windshield glass.Damage to the system partscould occur and may not be cov-ered by your vehicle warranty.
Page 207 of 475

Features of your vehicle
124
4
Power outlet
The power outlet is designed to pro-
vide power for mobile telephones or
other devices designed to operate
with vehicle electrical systems. The
devices should draw less than 10
amps with the engine running.
Digital clock
Whenever the battery terminals or
related fuses are disconnected, you
must reset the time.
WARNING
Do not adjust the clock while
driving. You may lose your
steering control and cause an
accident that results in severe
personal injury or death.
OBK042111OBK049080
CAUTION
Use the power outlet only when
the engine is running andremove the accessory plugafter use. Using the accessoryplug for prolonged periods oftime with the engine off couldcause the battery to discharge.
(Continued)
(Continued) Only use 12V electric acces- sories which are less than 10Ain electric capacity.
Adjust the air-conditioner or heater to the lowest operatinglevel when using the poweroutlet.
Close the cover when not in use.
Some electronic devices can cause electronic interferencewhen plugged into a vehicle’spower outlet. These devicesmay cause excessive audiostatic and malfunctions inother electronic systems ordevices used in your vehicle.
WARNING
Do not put a finger or foreign
elements (pin, etc.) into a power
outlet and do not touch with a
wet hand. You may get an elec-
tric shock.