2016 Hyundai Elantra tyre pressure
[x] Cancel search: tyre pressurePage 337 of 498
533
Driving your vehicle
Anti-lock Brake System (ABS)
(if equipped)
ABS is an electronic braking system
that helps prevent a braking skid.
ABS allows the driver to steer and
brake at the same time.
Using ABS
To obtain the maximum benefit from
your ABS in an emergency situation,
do not attempt to modulate your
brake pressure and do not try to
pump your brakes. Press your brake
pedal as hard as possible.
When you apply your brakes under
conditions which may lock the
wheels, you may hear sounds from
the brakes, or feel a corresponding
sensation in the brake pedal. This is
normal and it means your ABS is
active.
ABS does not reduce the time or dis-
tance it takes to stop the vehicle.
Always maintain a safe distance from
the vehicle in front of you.
ABS will not prevent a skid that
results from sudden changes in
direction, such as trying to take a
corner too fast or making a sudden
lane change. Always drive at a safe
speed for the road and weather con-
ditions.(Continued)
Drive your vehicle at reduced
speeds during the following
conditions:
• Rough, gravel or snow-cov-
ered roads.
• On roads where the road sur-
face is pitted or has different
surface height.
• Tyre chains are installed on
your vehicle.
The safety features of an ABS
or ESC equipped vehicle should
not be tested by high speed
driving or cornering. This could
endanger the safety of yourself
or others.
WARNING
An Anti-Lock Braking System
(ABS) or an Electronic Stability
Control (ESC) system will not
prevent accidents due to
improper or dangerous driving
manoeuvres. Even though vehi-
cle control is improved during
emergency braking, always
maintain a safe distance
between you and objects ahead
of you. Vehicle speeds should
always be reduced during
extreme road conditions. The
braking distance for vehicles
equipped with ABS or ESC may
be longer than for those without
these systems in the following
road conditions.
(Continued)
Page 345 of 498
541
Driving your vehicle
Good braking practices Wet brakes can be dangerous! The
brakes may get wet if the vehicle is
driven through standing water or if it
is washed. Your vehicle will not stop
as quickly if the brakes are wet. Wet
brakes may cause the vehicle to pull
to one side.
To dry the brakes, apply the brakes
lightly until the braking action returns
to normal, taking care to keep the
vehicle under control at all times. If
the braking action does not return to
normal, stop as soon as it is safe to
do so and we recommend that you
call an authorised HYUNDAI dealer
for assistance.
DO NOT drive with your foot resting
on the brake pedal. Even light, but
constant pedal pressure can result in
the brakes overheating, brake wear,
and possibly even brake failure.If a tyre goes flat whilst you are driv-
ing, apply the brakes gently and
keep the vehicle pointed straight
ahead whilst you slow down. When
you are moving slowly enough for it
to be safe to do so, pull off the road
and stop in a safe location.
Keep your foot firmly on the brake
pedal when the vehicle is stopped to
prevent the vehicle from rolling for-
ward.
WARNING
Whenever leaving the vehicle or
parking, always come to a com-
plete stop and continue to press
the brake pedal. Move the shift
lever into the 1st gear (for man-
ual transaxle vehicle) or P (Park,
for automatic transaxle vehicle)
position, then apply the parking
brake, and place the ignition
switch in the LOCK/OFF posi-
tion.
Vehicles with the parking brake
not fully engaged are at risk of
moving inadvertently and caus-
ing injury to yourself or others.
Page 390 of 498
What to do in an emergency
14 6
If you have a tyre gauge, check the
tyre pressure (see “Tyres and
Wheels” in chapter 8 for tyre pres-
sure instructions.). If the pressure is
lower or higher than recommended,
drive slowly to the nearest service
station and adjust it to the recom-
mended pressure. Always reinstall
the valve cap after checking or
adjusting tyre pressure. If the cap is
not replaced, air may leak from the
tyre. If you lose a valve cap, buy
another and install it as soon as pos-
sible. After changing tyres, secure
the flat tyre and return the jack and
tools to their correct storage loca-
tions.
✽NOTICE
Check the tyre pressure as soon as
possible after installing a spare tyre.
Adjust it to the recommended pres-
sure.
If any of the equipment such as the
jack, wheel nuts, studs, or other
equipment is damaged or in poor
condition, do not attempt to change
the tyre and call for assistance.
Use of compact spare tyres
(if equipped)
Compact spare tyres are designed
for emergency use only. Drive care-
fully on the compact spare tyre and
always follow the safety precautions.
CAUTION
Your vehicle has metric threads
on the studs and wheel nuts.
Make certain during tyre chang-
ing that the same nuts that were
removed are reinstalled. If you
have to replace your wheel nuts
make sure they have metric
threads to avoid damaging the
studs and ensure the wheel is
properly secured to the hub. We
recommend that you consult an
authorised HYUNDAI dealer for
assistance.
WARNING
To prevent compact spare tyre
failure and loss of control pos-
sibly resulting in an accident:
• Use the compact spare tyre
only in an emergency.
• NEVER operate your vehicle
over 80 km/h.
• Do not exceed the vehicle’s
maximum load rating or the
load carrying capacity shown
on the sidewall of the com-
pact spare tyre.
• Do not use the compact spare
tyre continuously. Repair or
replace the original tyre as
soon as possible to avoid fail-
ure of the compact spare tyre.
Page 391 of 498
615
What to do in an emergency
When driving with the compact spare
tyre mounted to your vehicle:
• Check the tyre pressure after
installing the compact spare tyre.
The compact spare tyre should be
inflated to 420 kPa (60 psi).
• Do not take this vehicle through an
automatic car wash whilst the com-
pact spare tyre is installed.
• Do not use the compact spare tyre
on any other vehicle because this
tyre has been designed especially
for your vehicle.
• The compact spare tyre’s tread life
is shorter than a regular tyre.
Inspect your compact spare tyre
regularly and replace worn com-
pact spare tyres with the same size
and design, mounted on the same
wheel.
• Do not use more than one compact
spare tyre at a time.
• Do not tow a trailer whilst the com-
pact spare tyre is installed.✽NOTICE
When the original tyre and wheel
are repaired and reinstalled on the
vehicle, the wheel nut torque must
be set correctly to prevent wheel
vibration. The correct wheel nut
tightening torque is 9-11 kg.m (65-79
lb.ft).CAUTION
To prevent damaging the com-
pact spare tyre and your vehi-
cle:
• Drive slowly enough for the
road conditions to avoid all
hazards, such as a potholes or
debris.
• Avoid driving over obstacles.
The compact spare tyre diam-
eter is smaller than the diame-
ter of a conventional tyre and
reduces the ground clearance
approximately 25 mm.
• Do not use tyre chains on the
compact spare tyre. Because
of the smaller size, a tyre
chain will not fit properly.
• Do not use the compact spare
tyre on any other wheels, nor
should standard tyres, snow
tyres, wheel covers or trim
rings be used with the com-
pact spare wheel.
Page 396 of 498
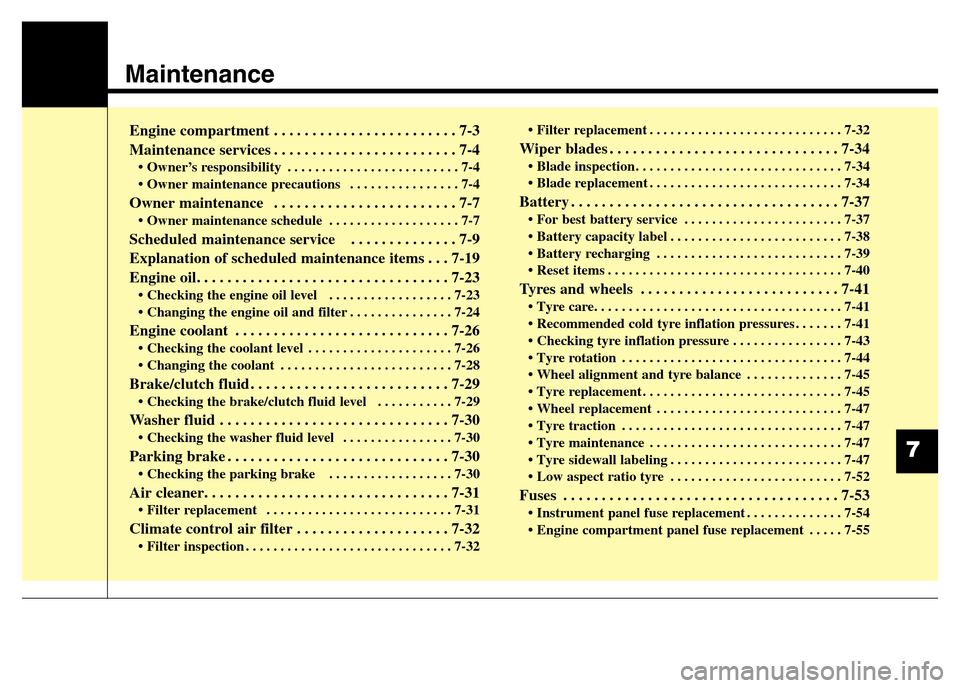
Maintenance
Engine compartment . . . . . . . . . . . . . . . . . . . . . . . . 7-3
Maintenance services . . . . . . . . . . . . . . . . . . . . . . . . 7-4
• Owner’s responsibility . . . . . . . . . . . . . . . . . . . . . . . . . 7-4
• Owner maintenance precautions . . . . . . . . . . . . . . . . 7-4
Owner maintenance . . . . . . . . . . . . . . . . . . . . . . . . 7-7
• Owner maintenance schedule . . . . . . . . . . . . . . . . . . . 7-7
Scheduled maintenance service . . . . . . . . . . . . . . 7-9
Explanation of scheduled maintenance items . . . 7-19
Engine oil. . . . . . . . . . . . . . . . . . . . . . . . . . . . . . . . . 7-23
• Checking the engine oil level . . . . . . . . . . . . . . . . . . 7-23
• Changing the engine oil and filter . . . . . . . . . . . . . . . 7-24
Engine coolant . . . . . . . . . . . . . . . . . . . . . . . . . . . . 7-26
• Checking the coolant level . . . . . . . . . . . . . . . . . . . . . 7-26
• Changing the coolant . . . . . . . . . . . . . . . . . . . . . . . . . 7-28
Brake/clutch fluid . . . . . . . . . . . . . . . . . . . . . . . . . . 7-29
• Checking the brake/clutch fluid level . . . . . . . . . . . 7-29
Washer fluid . . . . . . . . . . . . . . . . . . . . . . . . . . . . . . 7-30
• Checking the washer fluid level . . . . . . . . . . . . . . . . 7-30
Parking brake . . . . . . . . . . . . . . . . . . . . . . . . . . . . . 7-30
• Checking the parking brake . . . . . . . . . . . . . . . . . . 7-30
Air cleaner. . . . . . . . . . . . . . . . . . . . . . . . . . . . . . . . 7-31
• Filter replacement . . . . . . . . . . . . . . . . . . . . . . . . . . . 7-31
Climate control air filter . . . . . . . . . . . . . . . . . . . . 7-32
• Filter inspection . . . . . . . . . . . . . . . . . . . . . . . . . . . . . . 7-32• Filter replacement . . . . . . . . . . . . . . . . . . . . . . . . . . . . 7-32
Wiper blades . . . . . . . . . . . . . . . . . . . . . . . . . . . . . . 7-34
• Blade inspection . . . . . . . . . . . . . . . . . . . . . . . . . . . . . . 7-34
• Blade replacement . . . . . . . . . . . . . . . . . . . . . . . . . . . . 7-34
Battery . . . . . . . . . . . . . . . . . . . . . . . . . . . . . . . . . . . 7-37
• For best battery service . . . . . . . . . . . . . . . . . . . . . . . 7-37
• Battery capacity label . . . . . . . . . . . . . . . . . . . . . . . . . 7-38
• Battery recharging . . . . . . . . . . . . . . . . . . . . . . . . . . . 7-39
• Reset items . . . . . . . . . . . . . . . . . . . . . . . . . . . . . . . . . . 7-40
Tyres and wheels . . . . . . . . . . . . . . . . . . . . . . . . . . 7-41
• Tyre care. . . . . . . . . . . . . . . . . . . . . . . . . . . . . . . . . . . . 7-41
• Recommended cold tyre inflation pressures . . . . . . . 7-41
• Checking tyre inflation pressure . . . . . . . . . . . . . . . . 7-43
• Tyre rotation . . . . . . . . . . . . . . . . . . . . . . . . . . . . . . . . 7-44
• Wheel alignment and tyre balance . . . . . . . . . . . . . . 7-45
• Tyre replacement . . . . . . . . . . . . . . . . . . . . . . . . . . . . . 7-45
• Wheel replacement . . . . . . . . . . . . . . . . . . . . . . . . . . . 7-47
• Tyre traction . . . . . . . . . . . . . . . . . . . . . . . . . . . . . . . . 7-47
• Tyre maintenance . . . . . . . . . . . . . . . . . . . . . . . . . . . . 7-47
• Tyre sidewall labeling . . . . . . . . . . . . . . . . . . . . . . . . . 7-47
• Low aspect ratio tyre . . . . . . . . . . . . . . . . . . . . . . . . . 7-52
Fuses . . . . . . . . . . . . . . . . . . . . . . . . . . . . . . . . . . . . 7-53
• Instrument panel fuse replacement . . . . . . . . . . . . . . 7-54
• Engine compartment panel fuse replacement . . . . . 7-55
7
Page 402 of 498
77
Maintenance
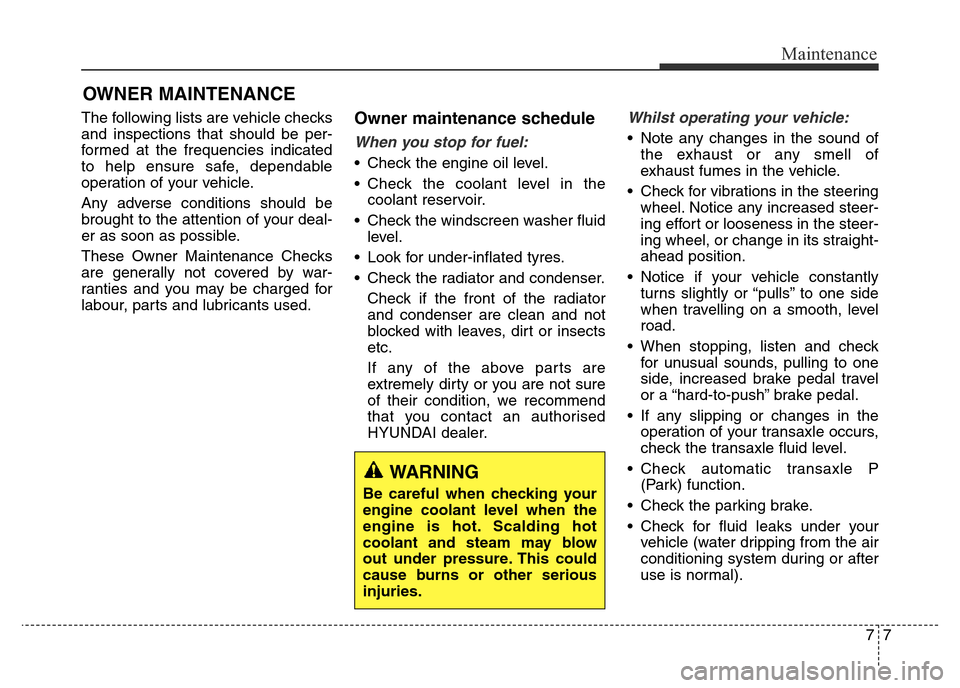
OWNER MAINTENANCE
The following lists are vehicle checks
and inspections that should be per-
formed at the frequencies indicated
to help ensure safe, dependable
operation of your vehicle.
Any adverse conditions should be
brought to the attention of your deal-
er as soon as possible.
These Owner Maintenance Checks
are generally not covered by war-
ranties and you may be charged for
labour, parts and lubricants used.Owner maintenance schedule
When you stop for fuel:
• Check the engine oil level.
• Check the coolant level in the
coolant reservoir.
• Check the windscreen washer fluid
level.
• Look for under-inflated tyres.
• Check the radiator and condenser.
Check if the front of the radiator
and condenser are clean and not
blocked with leaves, dirt or insects
etc.
If any of the above parts are
extremely dirty or you are not sure
of their condition, we recommend
that you contact an authorised
HYUNDAI dealer.
Whilst operating your vehicle:
• Note any changes in the sound of
the exhaust or any smell of
exhaust fumes in the vehicle.
• Check for vibrations in the steering
wheel. Notice any increased steer-
ing effort or looseness in the steer-
ing wheel, or change in its straight-
ahead position.
• Notice if your vehicle constantly
turns slightly or “pulls” to one side
when travelling on a smooth, level
road.
• When stopping, listen and check
for unusual sounds, pulling to one
side, increased brake pedal travel
or a “hard-to-push” brake pedal.
• If any slipping or changes in the
operation of your transaxle occurs,
check the transaxle fluid level.
• Check automatic transaxle P
(Park) function.
• Check the parking brake.
• Check for fluid leaks under your
vehicle (water dripping from the air
conditioning system during or after
use is normal).
WARNING
Be careful when checking your
engine coolant level when the
engine is hot. Scalding hot
coolant and steam may blow
out under pressure. This could
cause burns or other serious
injuries.
Page 403 of 498
Maintenance
8 7
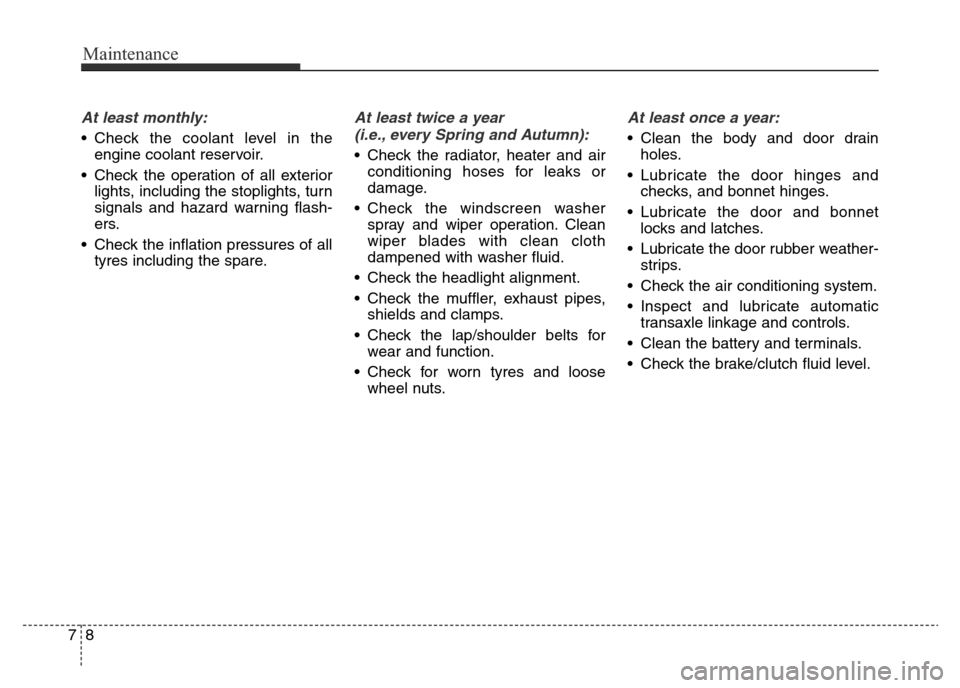
At least monthly:
• Check the coolant level in the
engine coolant reservoir.
• Check the operation of all exterior
lights, including the stoplights, turn
signals and hazard warning flash-
ers.
• Check the inflation pressures of all
tyres including the spare.
At least twice a year
(i.e., every Spring and Autumn):
• Check the radiator, heater and air
conditioning hoses for leaks or
damage.
• Check the windscreen washer
spray and wiper operation. Clean
wiper blades with clean cloth
dampened with washer fluid.
• Check the headlight alignment.
• Check the muffler, exhaust pipes,
shields and clamps.
• Check the lap/shoulder belts for
wear and function.
• Check for worn tyres and loose
wheel nuts.
At least once a year:
• Clean the body and door drain
holes.
• Lubricate the door hinges and
checks, and bonnet hinges.
• Lubricate the door and bonnet
locks and latches.
• Lubricate the door rubber weather-
strips.
• Check the air conditioning system.
• Inspect and lubricate automatic
transaxle linkage and controls.
• Clean the battery and terminals.
• Check the brake/clutch fluid level.
Page 406 of 498
711
Maintenance
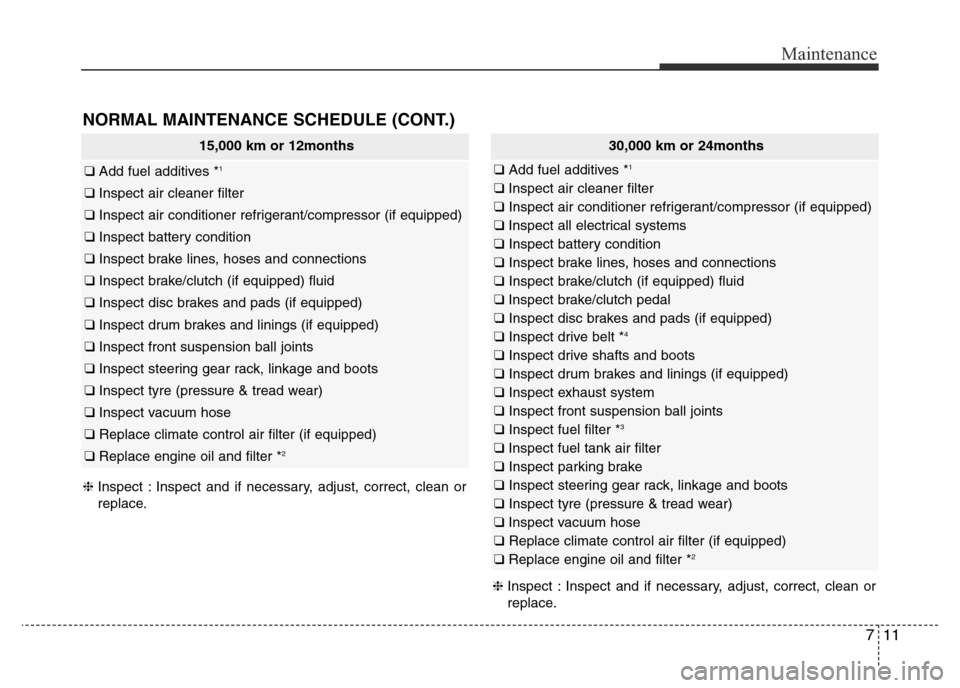
NORMAL MAINTENANCE SCHEDULE (CONT.)
15,000 km or 12months
❑ Add fuel additives *1
❑ Inspect air cleaner filter
❑ Inspect air conditioner refrigerant/compressor (if equipped)
❑ Inspect battery condition
❑ Inspect brake lines, hoses and connections
❑ Inspect brake/clutch (if equipped) fluid
❑ Inspect disc brakes and pads (if equipped)
❑ Inspect drum brakes and linings (if equipped)
❑ Inspect front suspension ball joints
❑ Inspect steering gear rack, linkage and boots
❑ Inspect tyre (pressure & tread wear)
❑ Inspect vacuum hose
❑ Replace climate control air filter (if equipped)
❑ Replace engine oil and filter *2
❈Inspect : Inspect and if necessary, adjust, correct, clean or
replace.
❈Inspect : Inspect and if necessary, adjust, correct, clean or
replace.
30,000 km or 24months
❑ Add fuel additives *1
❑ Inspect air cleaner filter
❑ Inspect air conditioner refrigerant/compressor (if equipped)
❑ Inspect all electrical systems
❑ Inspect battery condition
❑ Inspect brake lines, hoses and connections
❑ Inspect brake/clutch (if equipped) fluid
❑ Inspect brake/clutch pedal
❑ Inspect disc brakes and pads (if equipped)
❑ Inspect drive belt *
4
❑ Inspect drive shafts and boots
❑ Inspect drum brakes and linings (if equipped)
❑ Inspect exhaust system
❑ Inspect front suspension ball joints
❑ Inspect fuel filter *
3
❑ Inspect fuel tank air filter
❑ Inspect parking brake
❑ Inspect steering gear rack, linkage and boots
❑ Inspect tyre (pressure & tread wear)
❑ Inspect vacuum hose
❑ Replace climate control air filter (if equipped)
❑ Replace engine oil and filter *
2