2016 Hyundai Azera check
[x] Cancel search: checkPage 10 of 521
13
Introduction
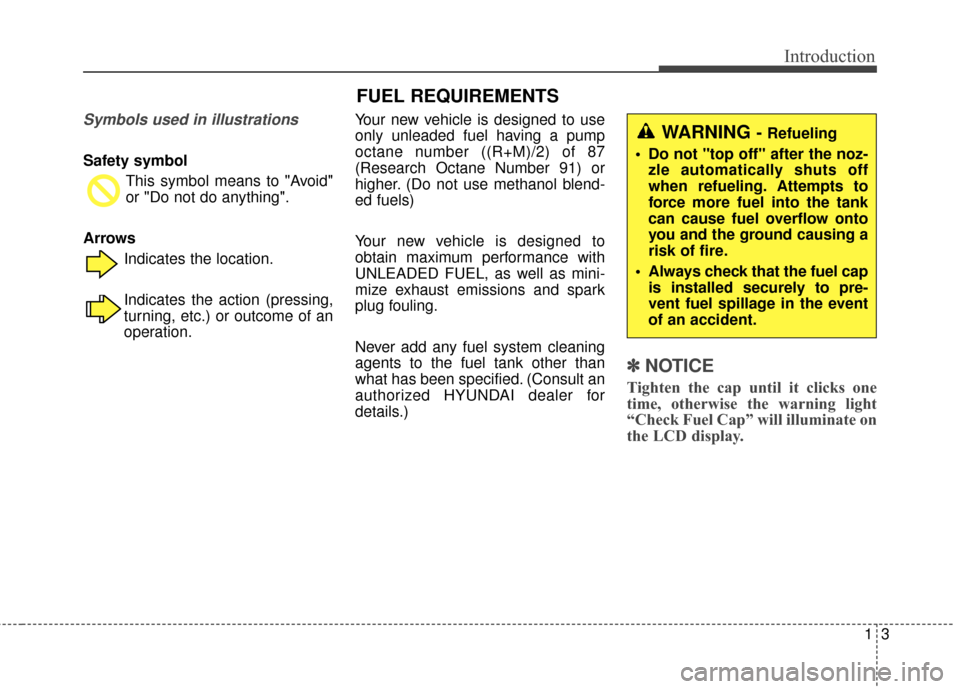
Symbols used in illustrations
Safety symbol This symbol means to "Avoid"
or "Do not do anything".
Arrows Indicates the location.
Indicates the action (pressing,
turning, etc.) or outcome of an
operation. Your new vehicle is designed to use
only unleaded fuel having a pump
octane number ((R+M)/2) of 87
(Research Octane Number 91) or
higher. (Do not use methanol blend-
ed fuels)
Your new vehicle is designed to
obtain maximum performance with
UNLEADED FUEL, as well as mini-
mize exhaust emissions and spark
plug fouling.
Never add any fuel system cleaning
agents to the fuel tank other than
what has been specified. (Consult an
authorized HYUNDAI dealer for
details.)
✽ ✽
NOTICE
Tighten the cap until it clicks one
time, otherwise the warning light
“Check Fuel Cap” will illuminate on
the LCD display.
FUEL REQUIREMENTS
WARNING - Refueling
• Do not "top off" after the noz- zle automatically shuts off
when refueling. Attempts to
force more fuel into the tank
can cause fuel overflow onto
you and the ground causing a
risk of fire.
Always check that the fuel cap is installed securely to pre-
vent fuel spillage in the event
of an accident.
Page 42 of 521
Safety features of your vehicle
22
3
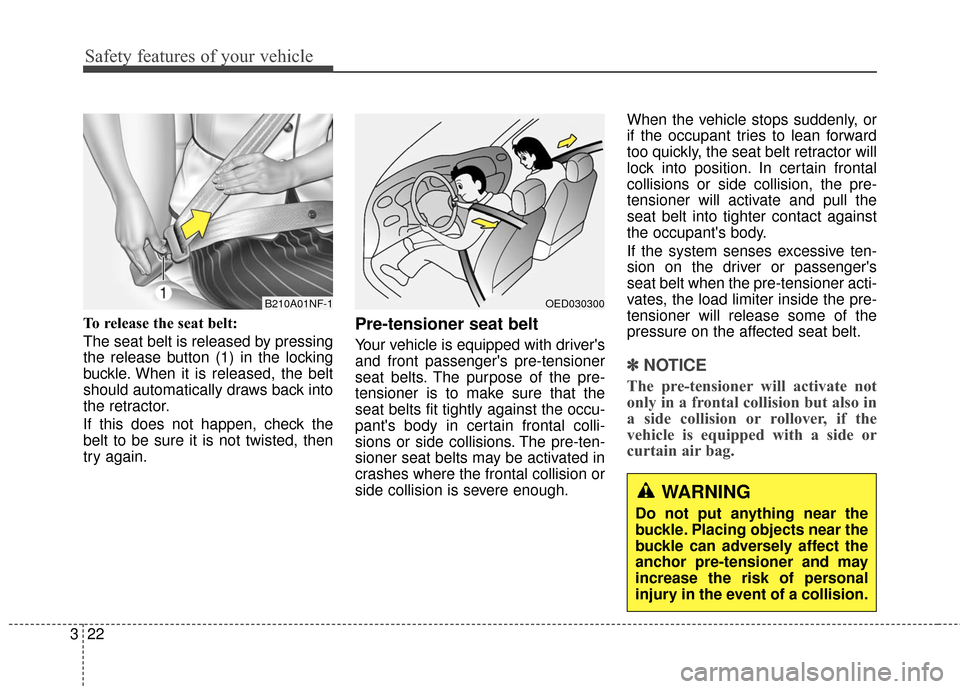
To release the seat belt:
The seat belt is released by pressing
the release button (1) in the locking
buckle. When it is released, the belt
should automatically draws back into
the retractor.
If this does not happen, check the
belt to be sure it is not twisted, then
try again.Pre-tensioner seat belt
Your vehicle is equipped with driver's
and front passenger's pre-tensioner
seat belts. The purpose of the pre-
tensioner is to make sure that the
seat belts fit tightly against the occu-
pant's body in certain frontal colli-
sions or side collisions. The pre-ten-
sioner seat belts may be activated in
crashes where the frontal collision or
side collision is severe enough. When the vehicle stops suddenly, or
if the occupant tries to lean forward
too quickly, the seat belt retractor will
lock into position. In certain frontal
collisions or side collision, the pre-
tensioner will activate and pull the
seat belt into tighter contact against
the occupant's body.
If the system senses excessive ten-
sion on the driver or passenger's
seat belt when the pre-tensioner acti-
vates, the load limiter inside the pre-
tensioner will release some of the
pressure on the affected seat belt.
✽ ✽
NOTICE
The pre-tensioner will activate not
only in a frontal collision but also in
a side collision or rollover, if the
vehicle is equipped with a side or
curtain air bag.
B210A01NF-1OED030300
WARNING
Do not put anything near the
buckle. Placing objects near the
buckle can adversely affect the
anchor pre-tensioner and may
increase the risk of personal
injury in the event of a collision.
Page 45 of 521
325
Safety features of your vehicle
Infant or small child
All 50 states have child restraint laws.
You should be aware of the specific
requirements in your state. Child
and/or infant seats must be properly
placed and installed in the rear seat.
For more information about the use of
these restraints, refer to “Child
restraint system” in this section.
✽ ✽NOTICE
Small children are best protected
from injury in an accident when
properly restrained in the rear seat
by a child restraint system that meets
the requirements of the Federal
Motor Vehicle Safety Standards.
Before buying any child restraint sys-
tem, make sure that it has a label cer-
tifying that it meets Federal Motor
Vehicle Safety Standard 213. The
restraint must be appropriate for
your child's height and weight.
Check the label on the child restraint
for this information. Refer to “Child
restraint system” in this section.
Larger children
Children who are too large for child
restraint systems should always
occupy the rear seat and use the
available lap/shoulder belts. The lap
portion should be fastened snug on
the hips and as low as possible.
Check if the belt fits periodically. A
child's squirming could put the belt
out of position. Children are given the
most safety in the event of an acci-
dent when they are restrained by a
proper restraint system in the rear
seat. If a larger child (over age 12)
must be seated in the front seat, the
child should be securely restrained
by the available lap/shoulder belt and
the seat should be placed in the rear-
most position. Children age 12 and
under should be restrained securely
in the rear seat. NEVER place a child
age 12 and under in the front seat.
NEVER place a rear facing child seat
in the front seat of a vehicle.
WARNING
Every person in your vehicle
needs to be properly restrained
at all times, including infants
and children. Never hold a child
in your arms or lap when riding
in a vehicle. The violent forces
created during a crash will tear
the child from your arms and
throw the child against the inte-
rior. Always use a child restraint
appropriate for your child's
height and weight.
Page 48 of 521
Safety features of your vehicle
28
3
CHILD RESTRAINT SYSTEM
Children riding in the vehicle should
sit in the rear seat and must always
be properly restrained to minimize
the risk of injury in an accident, sud-
den stop or sudden maneuver.
According to accident statistics, chil-
dren are safer when properly
restrained in the rear seats than in
the front seat. Larger children not in
a child restraint should use one of
the seat belts provided.
You should be aware of the specific
requirements in your state. Child
and/or infant safety seats must be
properly placed and installed in the
rear seat. You must use a commercial-
ly available child restraint system that
meets the requirements of the Federal
Motor Vehicle Safety Standards
(FMVSS).
Child restraint systems are designed
to be secured in vehicle seats by lap
belts or the lap belt portion of a
lap/shoulder belt, or by a LATCH sys-
tem. Children could be injured or killed in
a crash if their restraints are not
properly secured. For small children
and babies, a child seat or infant seat
must be used.
Before buying a particular child
restraint system, make sure it fits your
car seat, seat belts and your child.
Follow all the instructions provided
by the manufacturer when installing
the child restraint system.
When the child restraint system is
not in use, store it in the luggage
area or fasten it with a seat belt so
that it will not be thrown forward in
case of a sudden stop or an acci-
dent.
WARNING - Restraint
location
Never install a child or infant
seat on the front passenger's
seat. A child riding in the front
passenger seat can be forceful-
ly struck by an inflating airbag
and severely injured or killed.
WARNING - Hot child
restraint
A child restraint system can
become very hot if it is left in a
closed vehicle on a sunny day.
Be sure to check the seat cover,
buckles and latches before
placing a child in the restraint
system.
Page 50 of 521

Safety features of your vehicle
30
3
For safety reasons, we recommend
that the child restraint system be
used in the rear seats.
Since all passenger seat belts move
freely under normal conditions and
only lock under extreme or emer-
gency conditions (emergency locking
mode), you must manually change
these seat belts to the automatic lock-
ing mode to secure a child restraint.
If the seat belt does not operate as
described in this section, have the
system checked immediately by your
authorized HYUNDAI dealer.
Placing a passenger seat belt
into the automatic locking mode
The automatic locking mode will help
prevent the normal movement of the
child in the vehicle from causing the
seat belt to loosen and compromise
the child restraint system. To secure
a child restraint system, use the fol-
lowing procedure.
WARNING - Child seat
installation
Always follow the instructions provided by the child restraint
system manufacturer. Child
restraint system manufactur-
ers know their products best.
Failure to observe this manu- al's instructions regarding
child restraint system and the
instructions provided with the
child restraint system could
result in the improper installa-
tion of the child restraint sys-
tem which may reduce the
protection to your child in a
crash or a sudden stop. This
could increase the chance
and/or severity of injury in an
accident.
If the vehicle headrest pre- vents proper installation of a
child seat (as described in the
child seat system manual), the
headrest of the respective
seating position shall be read-
justed or entirely removed.
E2MS103005
Page 52 of 521
Safety features of your vehicle
32
3
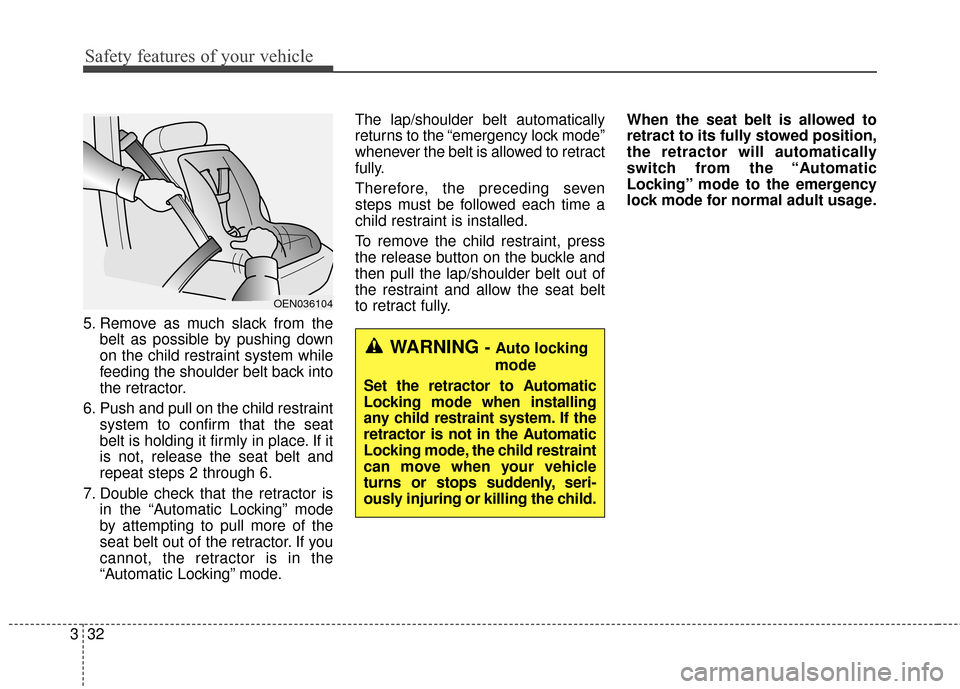
5. Remove as much slack from the
belt as possible by pushing down
on the child restraint system while
feeding the shoulder belt back into
the retractor.
6. Push and pull on the child restraint system to confirm that the seat
belt is holding it firmly in place. If it
is not, release the seat belt and
repeat steps 2 through 6.
7. Double check that the retractor is in the “Automatic Locking” mode
by attempting to pull more of the
seat belt out of the retractor. If you
cannot, the retractor is in the
“Automatic Locking” mode. The lap/shoulder belt automatically
returns to the “emergency lock mode”
whenever the belt is allowed to retract
fully.
Therefore, the preceding seven
steps must be followed each time a
child restraint is installed.
To remove the child restraint, press
the release button on the buckle and
then pull the lap/shoulder belt out of
the restraint and allow the seat belt
to retract fully.
When the seat belt is allowed to
retract to its fully stowed position,
the retractor will automatically
switch from the “Automatic
Locking” mode to the emergency
lock mode for normal adult usage.
OEN036104
WARNING - Auto locking
mode
Set the retractor to Automatic
Locking mode when installing
any child restraint system. If the
retractor is not in the Automatic
Locking mode, the child restraint
can move when your vehicle
turns or stops suddenly, seri-
ously injuring or killing the child.
Page 53 of 521
333
Safety features of your vehicle
Securing a child restraint seatwith “Tether Anchor” system
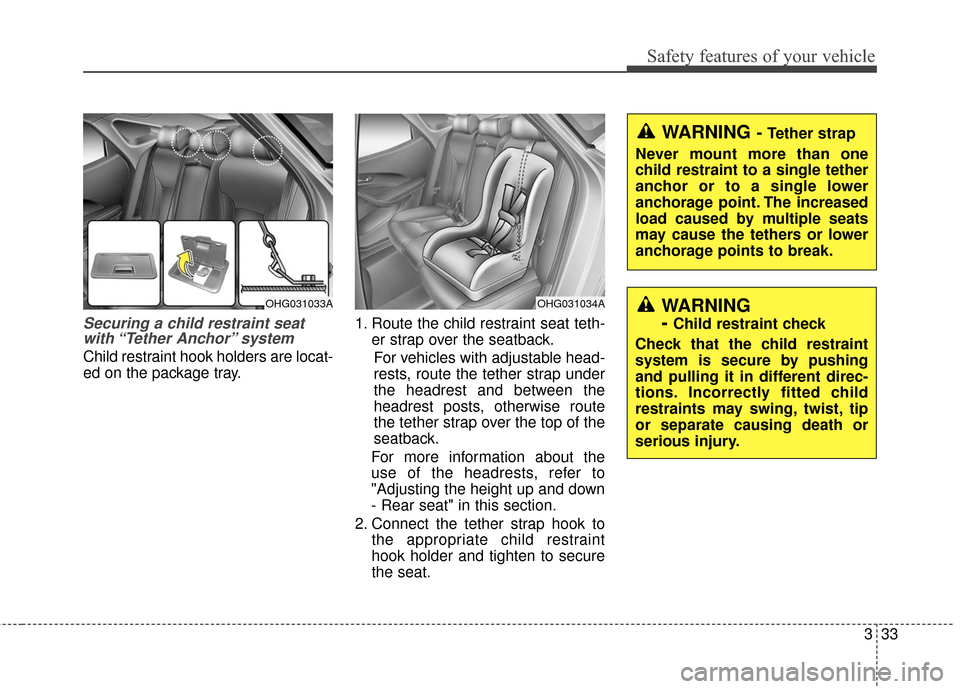
Child restraint hook holders are locat-
ed on the package tray. 1. Route the child restraint seat teth-
er strap over the seatback.
For vehicles with adjustable head-
rests, route the tether strap under
the headrest and between the
headrest posts, otherwise route
the tether strap over the top of the
seatback.
For more information about the
use of the headrests, refer to
"Adjusting the height up and down
- Rear seat" in this section.
2. Connect the tether strap hook to the appropriate child restraint
hook holder and tighten to secure
the seat.
OHG031034A
WARNING - Tether strap
Never mount more than one
child restraint to a single tether
anchor or to a single lower
anchorage point. The increased
load caused by multiple seats
may cause the tethers or lower
anchorage points to break.
WARNING
-
Child restraint check
Check that the child restraint
system is secure by pushing
and pulling it in different direc-
tions. Incorrectly fitted child
restraints may swing, twist, tip
or separate causing death or
serious injury.
OHG031033A
Page 55 of 521
335
Safety features of your vehicle
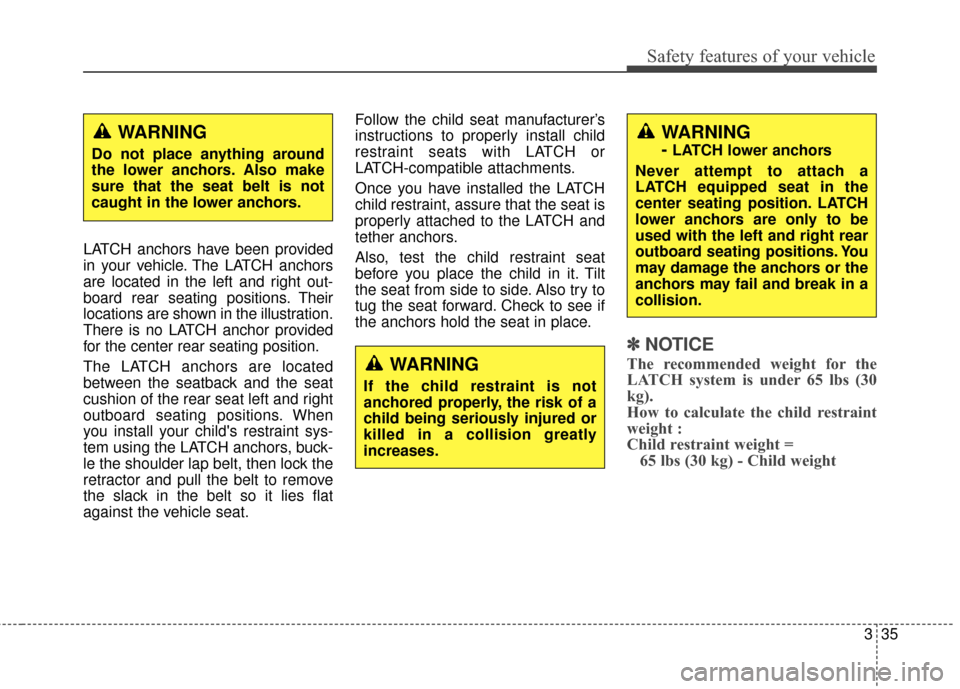
LATCH anchors have been provided
in your vehicle. The LATCH anchors
are located in the left and right out-
board rear seating positions. Their
locations are shown in the illustration.
There is no LATCH anchor provided
for the center rear seating position.
The LATCH anchors are located
between the seatback and the seat
cushion of the rear seat left and right
outboard seating positions. When
you install your child's restraint sys-
tem using the LATCH anchors, buck-
le the shoulder lap belt, then lock the
retractor and pull the belt to remove
the slack in the belt so it lies flat
against the vehicle seat.Follow the child seat manufacturer’s
instructions to properly install child
restraint seats with LATCH or
LATCH-compatible attachments.
Once you have installed the LATCH
child restraint, assure that the seat is
properly attached to the LATCH and
tether anchors.
Also, test the child restraint seat
before you place the child in it. Tilt
the seat from side to side. Also try to
tug the seat forward. Check to see if
the anchors hold the seat in place.
✽ ✽
NOTICE
The recommended weight for the
LATCH system is under 65 lbs (30
kg).
How to calculate the child restraint
weight :
Child restraint weight =
65 lbs (30 kg) - Child weightWARNING
If the child restraint is not
anchored properly, the risk of a
child being seriously injured or
killed in a collision greatly
increases.
WARNING
- LATCH lower anchors
Never attempt to attach a
LATCH equipped seat in the
center seating position. LATCH
lower anchors are only to be
used with the left and right rear
outboard seating positions. You
may damage the anchors or the
anchors may fail and break in a
collision.
WARNING
Do not place anything around
the lower anchors. Also make
sure that the seat belt is not
caught in the lower anchors.