2016 Hyundai Azera warning
[x] Cancel search: warningPage 74 of 521
Safety features of your vehicle
54
3
Problems may arise if the sensor
installation angles are changed
due to the deformation of the front
bumper, body or B/C pillars or front
door where side collision sensors
are installed. Have the vehicle
checked and repaired by an
authorized HYUNDAI dealer.
Installing aftermarket bumper guards or replacing a bumper with
non-genuine parts may adversely
affect your vehicle’s collision and
air bag deployment performance.
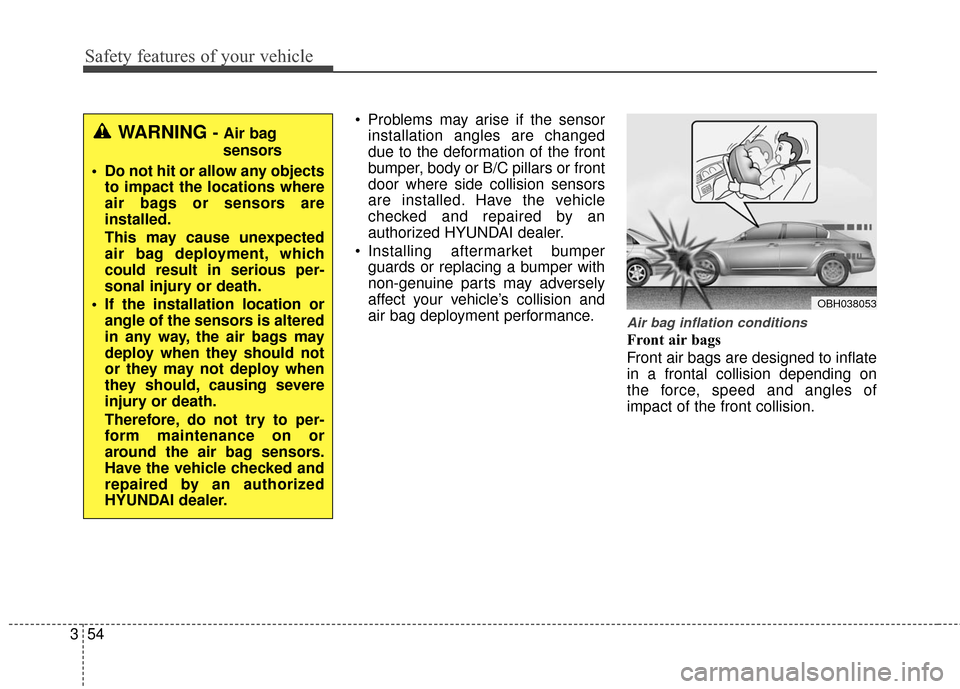
Air bag inflation conditions
Front air bags
Front air bags are designed to inflate
in a frontal collision depending on
the force, speed and angles of
impact of the front collision.
OBH038053
WARNING - Air bag
sensors
Do not hit or allow any objects to impact the locations where
air bags or sensors are
installed.
This may cause unexpected
air bag deployment, which
could result in serious per-
sonal injury or death.
If the installation location or angle of the sensors is altered
in any way, the air bags may
deploy when they should not
or they may not deploy when
they should, causing severe
injury or death.
Therefore, do not try to per-
form maintenance on or
around the air bag sensors.
Have the vehicle checked and
repaired by an authorized
HYUNDAI dealer.
Page 78 of 521
Safety features of your vehicle
58
3
SRS Care
The SRS is virtually maintenance-free
and so there are no parts you can
safely service by yourself. If the SRS
air bag warning light ( ) does not illu-
minate when you turn the ignition ON,
or if it continuously remains on, have
your vehicle immediately inspected by
an authorized HYUNDAI dealer.
Any work on the SRS system, such
as removing, installing, repairing, or
any work on the steering wheel, the
front passenger's panel, front seats
and roof rails must be performed by
an authorized HYUNDAI dealer.
Improper handling of the SRS system
may result in serious personal injury.
For cleaning the air bag pad covers,
use only a soft, dry cloth or one which
has been moistened with plain water.
Solvents or cleaners could adversely
affect the air bag covers and proper
deployment of the system.
✽ ✽
NOTICE
• If the air bags inflate, they must
be replaced by an authorized
HYUNDAI dealer.
• If your vehicle was flooded and has soaked carpeting or water on the
flooring, you should not try to start
the engine; have the vehicle towed
to an authorized HYUNDAI dealer.
If components of the air bag system
must be discarded, or if the vehicle
must be scrapped, certain safety
precautions must be observed. An
authorized HYUNDAI dealer knows
these precautions and can give you
the necessary information. Failure to
follow these precautions and proce-
dures could increase the risk of per-
sonal injury.
WARNING
Modification to SRS compo-
nents or wiring, including the
addition of any kind of badges
to the pad covers or modifica-
tions to the body structure, can
adversely affect SRS perform-
ance and lead to possible injury.
No objects should be placed over or near the air bag mod-
ules on the steering wheel,
instrument panel, and the
front passenger's panel above
the glove box, because any
such object could cause harm
if the vehicle is in a crash
severe enough to cause the
air bags to inflate.
WARNING - Tampering
with SRS
Do not tamper with or discon-
nect SRS wiring, or other com-
ponents of the SRS system.
Doing so could result in the
accidental inflation of the air
bags or render the SRS inoper-
ative and lead to possible seri-
ous injury.
Page 80 of 521
Adding equipment to or modi-
fying your air bag-equipped
vehicle
If you modify your vehicle by chang-
ing your vehicle's frame, bumper sys-
tem, front end or side sheet metal or
ride height, this may affect the oper-
ation of your vehicle's air bag sys-
tem.
OHG030052
OHG030053
■ Side (front)
■ Side (rear)
■Front
OHG031051A
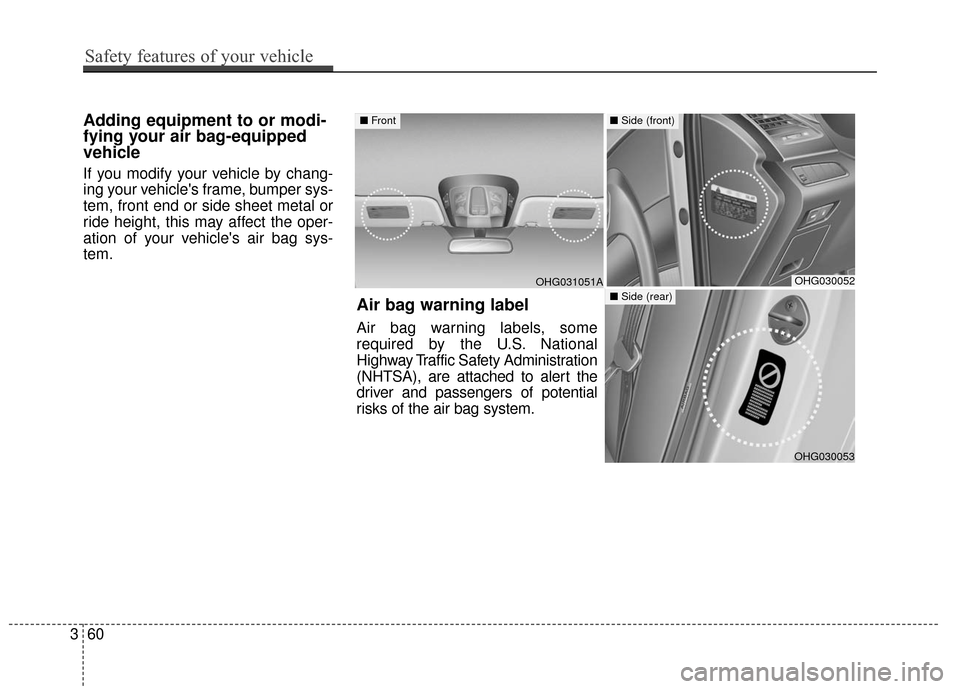
Air bag warning label
Air bag warning labels, some
required by the U.S. National
Highway Traffic Safety Administration
(NHTSA), are attached to alert the
driver and passengers of potential
risks of the air bag system.
360
Safety features of your vehicle
Page 81 of 521

Features of your vehicle
Keys . . . . . . . . . . . . . . . . . . . . . . . . . . . . . . . . . . . . \
. . 4-3
• Record your key number . . . . . . . . . . . . . . . . . . . . . . . 4-3
. . . . . . . . . . . . . . . . . . . . . . . . . . . . 4-4
Smart key . . . . . . . . . . . . . . . . . . . . . . . . . . . . . . . . . 4-6
. . . . . . . . . . . . . . . . . . . . . . . . . . . 4-6
. . . . . . . . . . . 4-8
. . . . . . . . . . . . . . . . . . . . . . . . . 4-9
. . . . . . . . . . . . . . . . . . . . . . . . . . 4-10
. . . . . . . . . . . . . . . . . . . . . . . . . . . . . . . . . 4-12
Theft-alarm system . . . . . . . . . . . . . . . . . . . . . . . . 4-12
Door locks . . . . . . . . . . . . . . . . . . . . . . . . . . . . . . . 4-15
. . . . 4-15
. . . . . . . . . . . . . . . . . 4-18
Trunk . . . . . . . . . . . . . . . . . . . . . . . . . . . . . . . . . . . . \
4-19
Smart trunk . . . . . . . . . . . . . . . . . . . . . . . . . . . . . . 4-21
Windows . . . . . . . . . . . . . . . . . . . . . . . . . . . . . . . . . 4-25
Hood. . . . . . . . . . . . . . . . . . . . . . . . . . . . . . . . . . . . \
. 4-29
Fuel filler lid . . . . . . . . . . . . . . . . . . . . . . . . . . . . . . 4-31
Panoramic sunroof . . . . . . . . . . . . . . . . . . . . . . . . . 4-35
Driver position memory system . . . . . . . . . . . . . . 4-40Steering wheel . . . . . . . . . . . . . . . . . . . . . . . . . . . . . 4-43
. . . . . . . . . . . . . . . . . . . . 4-44
. . . . . . . . . . . . . . . . . . . . . . . . . . . . . . . . . . . . \
. . . 4-45
Mirrors . . . . . . . . . . . . . . . . . . . . . . . . . . . . . . . . . . 4-46\
. . . . . . . . . . . . . . . . . . . . . . . . 4-46
. . . . . . . . . . . . . . . . . . . . . . . 4-54
. . . . . . . . . . . . . . . . . . . 4-57
Instrument cluster . . . . . . . . . . . . . . . . . . . . . . . . . 4-58
. . . . . . . . . . . . . . . . . . 4-59
. . . . . . . . . . . . . . . . . . . . . . . . . . . . . . . . . . . . \
. 4-59
. . . . . . . . . . . . . . . . . . . . . . . . . . 4-62
LCD display . . . . . . . . . . . . . . . . . . . . . . . . . . . . . . 4-63
. . . . . . . . . . . . . . . . . . . . . . . . . . 4-64
Trip computer . . . . . . . . . . . . . . . . . . . . . . . . . . . . . 4-73
Warnings and indicators (lnstrument cluster) . . 4-77
Rear parking assist system . . . . . . . . . . . . . . . . . . 4-95
Rearview camera . . . . . . . . . . . . . . . . . . . . . . . . . . 4-99
Hazard warning flasher . . . . . . . . . . . . . . . . . . . . 4-100
Lighting . . . . . . . . . . . . . . . . . . . . . . . . . . . . . . . . 4-100
. . . . . . . . . . 4-101
. . . . . . . . 4-101
. . . . . . . . . . . . . . . . . . . . . . . 4-101
. . . . . . . . . . . . . . . . . . . . . . . . . . . . . 4-102
4
Page 83 of 521

43
Features of your vehicle
Record your key number
The key code number
is stamped or printed
on the key code tag
attached to the key
set. Should you lose your keys, con-
tact an authorized HYUNDAI dealer.
Remove the key code tag and store it
in a safe place. Also, record the key
code number and keep it in a safe
and handy place, but not in the vehi-
cle. Key operations
• Used to start the engine.
Used to lock and unlock the doors.
Used to lock and unlock the glove
box.
To remove the mechanical key, press
and hold the release button(1) and
remove the mechanical key(2).
To reinstall the mechanical key, put
the key into the hole and push it until
a click sound is heard.
KEYS
WARNING - Aftermarket
keys
Use only HYUNDAI original
parts for the ignition key in your
vehicle. If an aftermarket key is
used, the ignition switch may
not return to ON after START. If
this happens, the starter will
continue to operate causing
possible fire due to excessive
current in the wiring.
WARNING - Smart key
Leaving children unattended in a
vehicle with the smart key is dan-
gerous even if the ENGINE
START/STOP button is in the
ACC or ON position. Children
copy adults and they could press
the ENGINE START/STOP button.
The smart key would enable chil-
dren to operate power windows
or other controls, or even make
the vehicle move, which could
result in serious bodily injury or
even death. Never leave the keys
in your vehicle with unsuper-
vised children, when the Engine
is running.
OHG045004
Page 86 of 521
Features of your vehicle
64
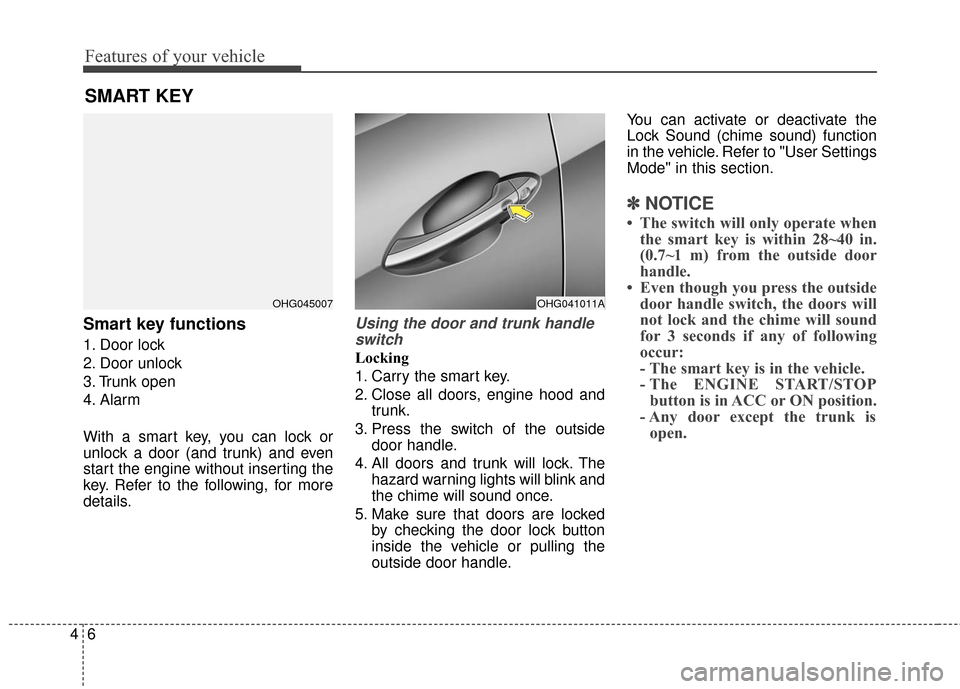
Smart key functions
1. Door lock
2. Door unlock
3. Trunk open
4. Alarm
With a smart key, you can lock or
unlock a door (and trunk) and even
start the engine without inserting the
key. Refer to the following, for more
details.
Using the door and trunk handleswitch
Locking
1. Carry the smart key.
2. Close all doors, engine hood and trunk.
3. Press the switch of the outside door handle.
4. All doors and trunk will lock. The hazard warning lights will blink and
the chime will sound once.
5. Make sure that doors are locked by checking the door lock button
inside the vehicle or pulling the
outside door handle. You can activate or deactivate the
Lock Sound (chime sound) function
in the vehicle. Refer to "User Settings
Mode" in this section.
✽ ✽
NOTICE
• The switch will only operate when
the smart key is within 28~40 in.
(0.7~1 m) from the outside door
handle.
• Even though you press the outside door handle switch, the doors will
not lock and the chime will sound
for 3 seconds if any of following
occur:
- The smart key is in the vehicle.
- The ENGINE START/STOPbutton is in ACC or ON position.
- Any door except the trunk is open.
SMART KEY
OHG045007OHG041011A
Page 87 of 521
47
Features of your vehicle
Unlocking
1.Press the switch of the driver's out-side door handle.
2.The driver’s door will unlock. The hazard warning lights will blink and
the chime will sound twice.
3.Press the button once more within 4 seconds.
4.All doors and trunk will unlock and the hazard warning lights will blink
and the chime will sound twice.
You can activate or deactivate the
Two Turn Unlock and Unlock Sound
(chime sound) function in the vehi-
cle. Refer to "User Settings Mode" in
this section.✽ ✽ NOTICE
• The switch will only operate when
the smart key is within 28~40 in.
(0.7~1 m) from the outside door
handle.
• When the smart key is recognized in the area of 0.7~1 m (28~40 in.)
from the front outside door handle,
other people can also open the door
without possession of the smart key.
• After unlocking all doors, the doors will lock automatically
unless a door is opened.
Trunk open
1.Carry the smart key.
2.Press the trunk handle switch.
3.The trunk will open.
✽ ✽ NOTICE
Once the trunk is opened and then
closed, the trunk will lock automat-
ically when all doors are locked.
The switch will only operate when the smart key is within 0.7 m (28 in.)
from the trunk handle.
Start-up
You can start the engine without
inserting the key. For detailed informa-
tion refer to “ENGINE START/STOP
button” in section 5.
Page 88 of 521

Features of your vehicle
84
Remote keyless entry system
operations
Lock (1)
1. Carry the smart key.
2. Close all doors, engine hood andtrunk.
3. Press the lock button(1).
4. All doors and trunk will lock. The hazard warning lights will blink and
the chime will sound once.
5. Make sure that doors are locked by checking the door lock button inside
or pulling the outside door handle. If any door, trunk or engine hood
remains open, the hazard warning
lights will not operate. If all doors,
trunk and engine hood are closed
after the lock button is pressed, the
hazard warning lights will blink once.
You can activate or deactivate the
Lock Sound (chime sound) function in
the vehicle. Refer to "User Settings
Mode" in this section.
Unlock (2)
1. Press the unlock button(2).
2. The driver’s door will unlock. The
hazard warning lights will blink and
the chime will sound twice.
3. Press the unlock button(2) once more within 4 seconds.
4. All doors and trunk will unlock. The hazard warning lights will blink and
the chime will sound twice.
You can activate or deactivate the Two
Turn Unlock and Unlock Sound (chime
sound) function in the vehicle. Refer to
"User Settings Mode" in this section.
✽ ✽ NOTICE
• The button will only operate when
the smart key is within 28~40 in.
(0.7~1 m) from the outside door
handle.
• After unlocking the driver’s door or all doors, the door(s) will lock
automatically unless a door is
opened.
Trunk open (3)
1.Press the trunk open button(3) for
more than 1 second.
2.The trunk will open. The hazard warning light will blink twice to indi-
cate the trunk is opened.
✽ ✽ NOTICE
• Once the trunk is opened and
closed, the trunk will lock automat-
ically when all doors are locked.
• The switch/button will only oper- ate when the smart key is within
28~40 in. (0.7~1m) from the trunk
handle.
OHG045007