Page 97 of 521
417
Features of your vehicle
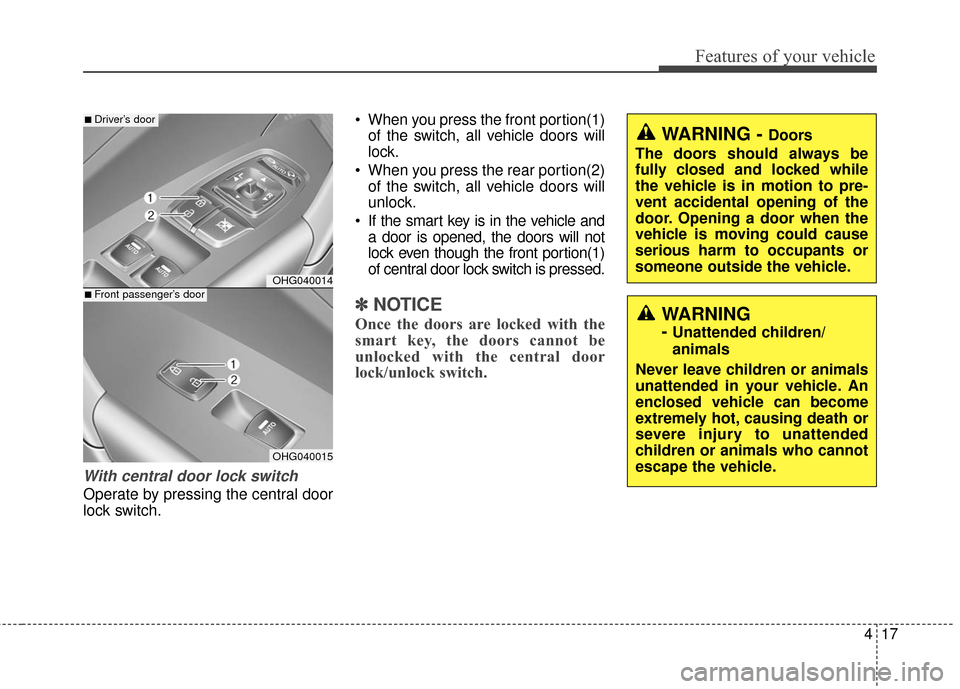
With central door lock switch
Operate by pressing the central door
lock switch. When you press the front portion(1)
of the switch, all vehicle doors will
lock.
When you press the rear portion(2) of the switch, all vehicle doors will
unlock.
If the smart key is in the vehicle and a door is opened, the doors will not
lock even though the front portion(1)
of central door lock switch is pressed.
✽ ✽ NOTICE
Once the doors are locked with the
smart key, the doors cannot be
unlocked with the central door
lock/unlock switch.
WARNING - Doors
The doors should always be
fully closed and locked while
the vehicle is in motion to pre-
vent accidental opening of the
door. Opening a door when the
vehicle is moving could cause
serious harm to occupants or
someone outside the vehicle.
WARNING
- Unattended children/
animals
Never leave children or animals
unattended in your vehicle. An
enclosed vehicle can become
extremely hot, causing death or
severe injury to unattended
children or animals who cannot
escape the vehicle.
OHG040014
OHG040015
■ Driver’s door
■ Front passenger’s door
Page 98 of 521
Features of your vehicle
18
4
Door lock/unlock features
Impact sensing door unlock sys-
tem
All doors will automatically unlock
when an impact causes the air bags
to deploy.
Shift lever door lock/unlock system
All doors will automatically lock when the shift lever is moved out of
P (Park).
All doors will automatically unlock when the shift lever is moved into P
(Park).
You can activate or deactivate the
Auto Door Lock/Unlock features in
the vehicle. Refer to "User Settings
Mode" in this section.
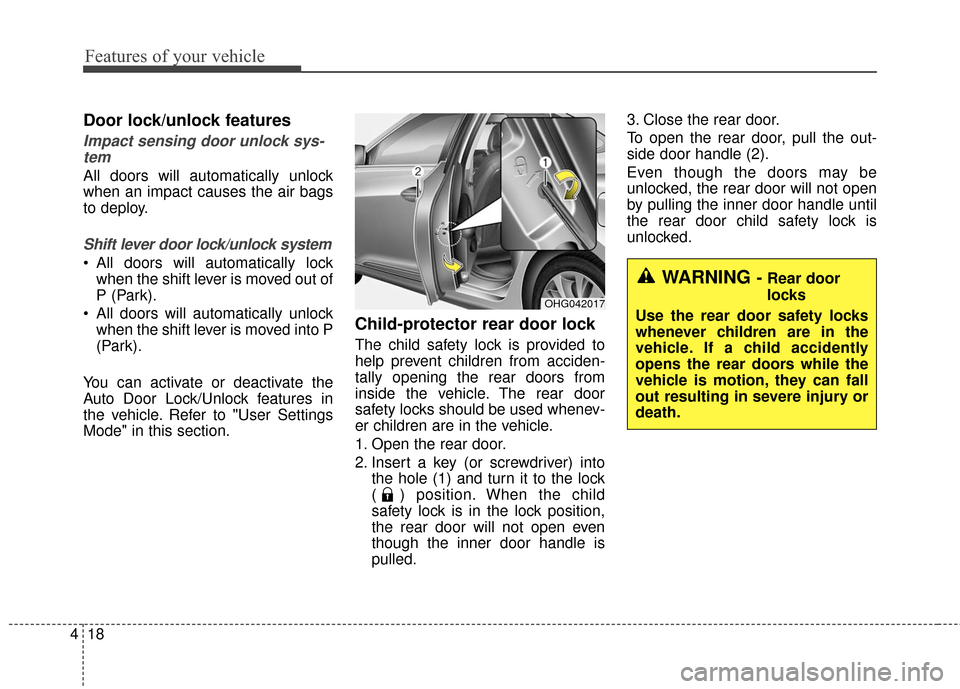
Child-protector rear door lock
The child safety lock is provided to
help prevent children from acciden-
tally opening the rear doors from
inside the vehicle. The rear door
safety locks should be used whenev-
er children are in the vehicle.
1. Open the rear door.
2. Insert a key (or screwdriver) into the hole (1) and turn it to the lock
( ) position. When the child
safety lock is in the lock position,
the rear door will not open even
though the inner door handle is
pulled. 3. Close the rear door.
To open the rear door, pull the out-
side door handle (2).
Even though the doors may be
unlocked, the rear door will not open
by pulling the inner door handle until
the rear door child safety lock is
unlocked.
OHG042017
WARNING - Rear door
locks
Use the rear door safety locks
whenever children are in the
vehicle. If a child accidently
opens the rear doors while the
vehicle is motion, they can fall
out resulting in severe injury or
death.
Page 101 of 521

421
Features of your vehicle
On a vehicle equipped with a smart
key, the trunk can be opened with
no-touch activation using the Smart
Trunk system.
How to use the Smart Trunk
The trunk can be opened with no-
touch activation satisfying all the
conditions below.
After 15 seconds when all doorsare closed and locked
Positioned in the detecting area for more than 3 seconds.
✽ ✽ NOTICE
• The Smart Trunk does not operate
when:
- The smart key is detected within15 seconds after the doors are
closed and locked, and is contin-
uously detected.
- The smart key is detected within 15 seconds after the doors are
closed and locked, and 60 in.
(1.5 m) from the front door han-
dles. (for vehicles equipped with
Welcome Light)
- A door is not locked or closed.
- The smart key is in the vehicle.
1. Setting
To activate the Smart Trunk, go to
User Settings Mode and select
Smart Trunk on the LCD display.
For more details, refer to "LCD
Display" in this chapter.
SMART TRUNK (IF EQUIPPED)
OHG045532NOHG045526N
Page 103 of 521
423
Features of your vehicle
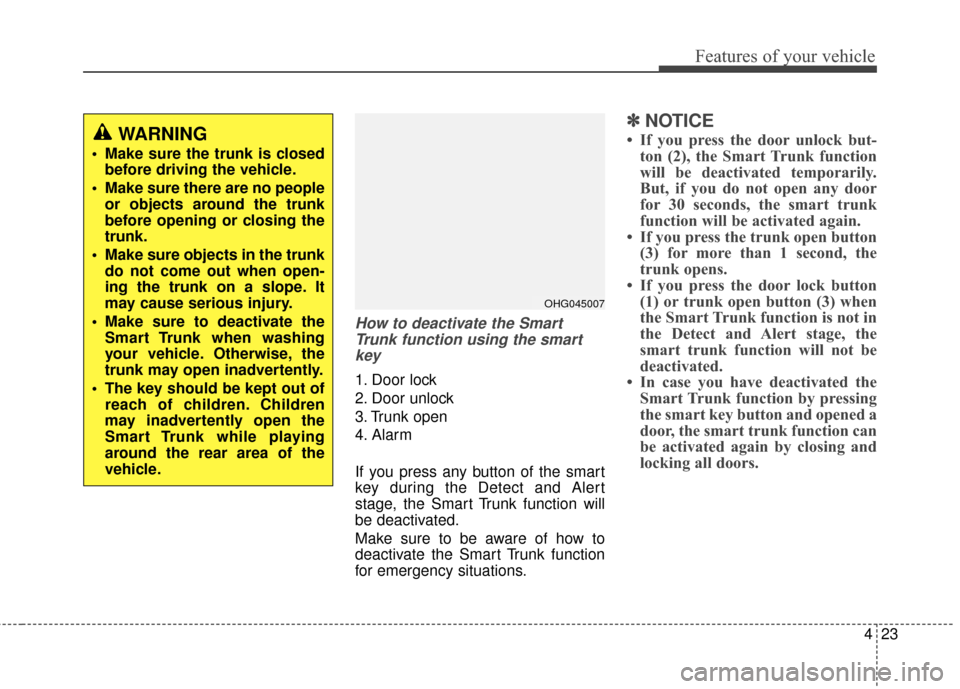
How to deactivate the SmartTrunk function using the smartkey
1. Door lock
2. Door unlock
3. Trunk open
4. Alarm
If you press any button of the smart
key during the Detect and Alert
stage, the Smart Trunk function will
be deactivated.
Make sure to be aware of how to
deactivate the Smart Trunk function
for emergency situations.
✽ ✽ NOTICE
• If you press the door unlock but-
ton (2), the Smart Trunk function
will be deactivated temporarily.
But, if you do not open any door
for 30 seconds, the smart trunk
function will be activated again.
• If you press the trunk open button (3) for more than 1 second, the
trunk opens.
• If you press the door lock button (1) or trunk open button (3) when
the Smart Trunk function is not in
the Detect and Alert stage, the
smart trunk function will not be
deactivated.
• In case you have deactivated the Smart Trunk function by pressing
the smart key button and opened a
door, the smart trunk function can
be activated again by closing and
locking all doors.WARNING
Make sure the trunk is closed
before driving the vehicle.
Make sure there are no people or objects around the trunk
before opening or closing the
trunk.
Make sure objects in the trunk do not come out when open-
ing the trunk on a slope. It
may cause serious injury.
Make sure to deactivate the Smart Trunk when washing
your vehicle. Otherwise, the
trunk may open inadvertently.
The key should be kept out of reach of children. Children
may inadvertently open the
Smart Trunk while playing
around the rear area of the
vehicle.
OHG045007
Page 105 of 521
425
Features of your vehicle
(1) Driver’s door power windowswitch
(2) Front passenger’s door power window switch
(3) Rear door (left) power window switch
(4) Rear door (right) power window switch
(5) Window opening and closing
(6) Automatic power window up/down
(7) Power window lock switch
WINDOWS
OHG040020
Page 106 of 521

Features of your vehicle
26
4
Power windows
The ignition switch must be in the ON
position for power windows to operate.
Each door has a power window
switch that controls the door's win-
dow. The driver’s door has a master
power window switch that controls all
the windows in the vehicle. Also, the
driver has a power window lock
switch which can block the operation
of passenger windows.
The power windows can be operated
for approximately 30 seconds after
the ignition key is in the ACC or OFF
position. However, if the front doors
are opened, the power windows can-
not be operated within the 30 second
period.
✽ ✽
NOTICE
While driving with the rear windows
down or with the sunroof (if
equipped) in an open (or partially
open position), your vehicle may
demonstrate a wind buffeting or
pulsation noise. This noise is a nor-
mal occurrence and can be reduced
or eliminated by taking the follow-
ing actions. If the noise occurs with
one or both of the rear windows
down, partially lower both front
windows approximately one inch.
If you experience the noise with the
sunroof open, slightly reduce the
size of the sunroof opening.
Window opening and closing
To open or close a window, press
down or pull up the front portion of
the corresponding switch to the first
detent position(5).
OHG040021
Page 108 of 521
Features of your vehicle
28
4
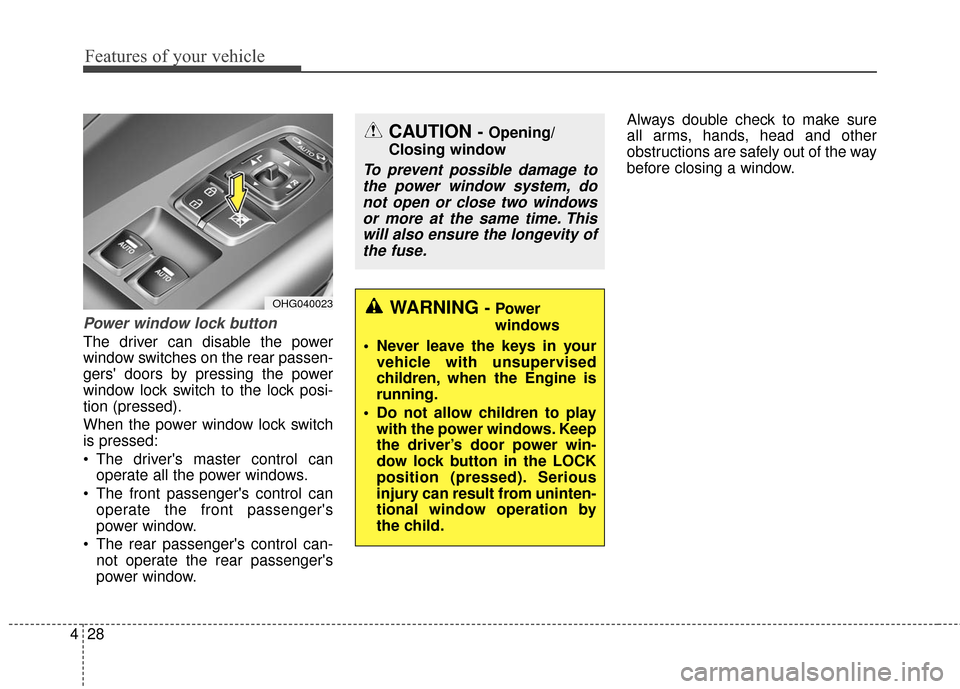
Power window lock button
The driver can disable the power
window switches on the rear passen-
gers' doors by pressing the power
window lock switch to the lock posi-
tion (pressed).
When the power window lock switch
is pressed:
The driver's master control can
operate all the power windows.
The front passenger's control can operate the front passenger's
power window.
The rear passenger's control can- not operate the rear passenger's
power window. Always double check to make sure
all arms, hands, head and other
obstructions are safely out of the way
before closing a window.
OHG040023
CAUTION - Opening/
Closing window
To prevent possible damage to the power window system, donot open or close two windowsor more at the same time. Thiswill also ensure the longevity ofthe fuse.
WARNING - Power
windows
Never leave the keys in your vehicle with unsupervised
children, when the Engine is
running.
Do not allow children to play with the power windows. Keep
the driver’s door power win-
dow lock button in the LOCK
position (pressed). Serious
injury can result from uninten-
tional window operation by
the child.
Page 129 of 521
449
Features of your vehicle
To adjust the Zone setting:
1. Determine the desired ZoneNumber based upon your current
location on the Zone Map.
2. Press and hold the button for 6 seconds, the current Zone
Number will appear on the display.
3. Pressing and holding the button again will cause the numbers to
increment (Note: they will repeat
…13, 14, 15, 1, 2, …). Releasing
the button when the desired Zone
Number appears on the display
will set the new Zone.
4. Within about 5 seconds the com- pass will start displaying a com-
pass heading again. There are some conditions that can
cause changes to the vehicle mag-
nets, such as installing a ski rack or
a CB antenna. Body repair work on
the vehicle can also cause changes
to the vehicle's magnetic field. In
these situations, the compass will
need to be re-calibrated to quickly
correct these changes. To re-cali-
brate the compass:
1. Press and hold the button for
more than 9 seconds. When the
compass memory is cleared a "C"
will appear in the display.
2. To calibrate the compass, drive the vehicle in 2 complete circles at
less than 5 mph (8 km/h). Integrated HomeLink®Wireless
Control System
The HomeLink
®Wireless Control
System provides a convenient way to
replace up to three hand-held radio-
frequency (RF) transmitters with a
single built-in device. This innovative
feature will learn the radio frequency
codes of most current transmitters to
operate devices such as gate opera-
tors, garage door openers, entry
door locks, security systems, even
home lighting. Both standard and
rolling code-equipped transmitters
can be programmed by following the
outlined procedures. Additional
HomeLink
®information can be found
at: www.homelink.com or by calling
1-800-355-3515.