2016 HONDA ODYSSEY ECO mode
[x] Cancel search: ECO modePage 428 of 565

427
uuWhen Driving uVehicle Stability Assist (VSA ®), aka Electronic Stability Control (ESC), System
Driving
This button is on the driver side control panel.
To turn the VSA ® system on and off, press and
hold it until you hear a beep.
VSA ® will stop and the indicator will come on.
To turn it on again, press the (VSA ® OFF)
button until you hear a beep.
VSA ® is turned on every time you start the
engine, even if you turned it off the last time
you drove the vehicle.
■VSA ® On and Off1 Vehicle Stability Assist (VSA ®), aka Electronic Stability Control
(ESC), System
Without VSA ®, your vehicle will have normal braking
and cornering ability, bu t it will not have VSA®
traction and stability enhancement.
In certain unusual conditions when your vehicle gets
stuck in shallow mud or fr esh snow, it may be easier
to free it with the VSA ® temporarily switched off.
When the VSA ® system is off, the traction control
system is also off. You should only atte mpt to free
your vehicle with the VSA ® off if you ar e not able to
free it when the VSA ® is on.
Immediately after freeing your vehicle, be sure to
switch VSA ® on again. We do not recommend driving
your vehicle with the VSA ® and traction control
systems switched off.
If the low tire pressure/TPMS, low tire pressure, or
TPMS indicator comes on or blinks, the VSA ® system
comes on automatically. In this case, you cannot turn
the system off by pressing the button.
You may hear a motor sound coming from the
engine compartment while system checks are being
performed immediately after starting the engine or
while driving. This is normal.
VSA ® OFF
Indicator
Models
with
LDWModels
without
LDW
16 US ODYSSEY-31TK86500.book 427 ページ 2015年6月24日 水曜日 午後3時0分
Page 429 of 565

428
uuWhen Driving uTire Pressure Monitoring System (TPMS)
Driving
Tire Pressure Monitoring System (TPMS)
Monitors the tire pressure while you are
driving. If your vehicle's tire pressure becomes
significantly low, the low tire pressure
indicator comes on.
Monitors the tire pressure while you are
driving. If your vehicle's tire pressure becomes
significantly low, the low tire pressure/TPMS
indicator comes on and a message appears on
the multi-information display.
CHECK TIRE PRESSURE is displayed when a
tire has significan tly low pressure.
1Tire Pressure Monitoring System (TPMS)
Conditions such as low ambient temperature and
altitude change directly affect tire pressure and can
trigger the low tire pressure indicator to come on.
2 If the Low Tire Pressure Indicator Comes
On P. 531
Tire pressure checked and inflated in:
•Warm weather can beco me under-inflated in
colder weather.
•Cold weather can become over-inflated in warmer
weather.
The low tire pressure indica tor will not come on as a
result of over inflation.
Conditions such as low ambient temperature and
altitude change directly affect tire pressure and can
trigger the low tire pressure/TPMS indicator to come
on. 2 If the Low Tire Pressure/TPMS Indicator
Comes On or Blinks P. 532
Tire pressure checked and inflated in:
•Warm weather can beco me under-inflated in
colder weather.
•Cold weather can become over-inflated in warmer
weather.
The low tire pressure/TPMS indicator will not come
on as a result of over inflation.
Models with information display
Models with multi-information display
Models with info rmation display
Models with multi- information display
16 US ODYSSEY-31TK86500.book 428 ページ 2015年6月24日 水曜日 午後3時0分
Page 433 of 565
432
uuWhen Driving uBlind Spot Information (BSI) System*
Driving
Blind Spot Information (BSI) System*
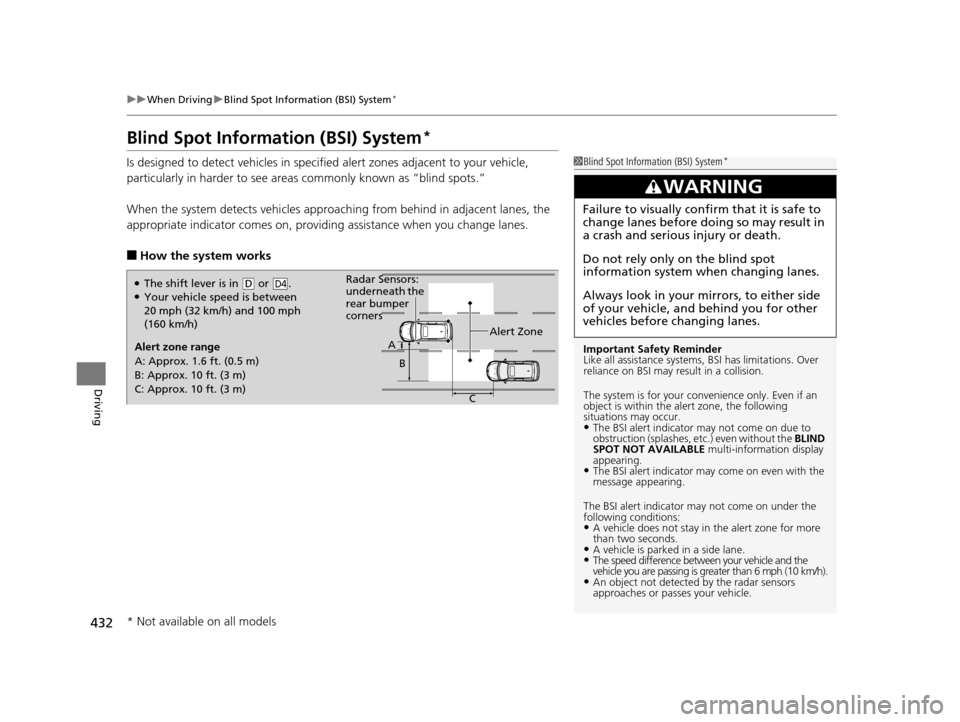
Is designed to detect vehicles in specified alert zones adjacent to your vehicle,
particularly in harder to see areas commonly known as “blind spots.”
When the system detects vehi cles approaching from behind in adjacent lanes, the
appropriate indicator comes on, providi ng assistance when you change lanes.
■How the system works
1Blind Spot Inform ation (BSI) System*
Important Safety Reminder
Like all assistance systems, BSI has limitations. Over
reliance on BSI may result in a collision.
The system is for your convenience only. Even if an
object is within the alert zone, the following
situations may occur.
•The BSI alert indicator may not come on due to
obstruction (splashes, et c.) even without the BLIND
SPOT NOT AVAILABLE multi-information display
appearing.
•The BSI alert indicator may come on even with the
message appearing.
The BSI alert i ndicator may not come on under the
following conditions:
•A vehicle does not stay in the alert zone for more
than two seconds.
•A vehicle is parked in a side lane.•The speed difference betw een your vehicle and the
vehicle you are passing is gr eater than 6 mph (10 km/h).
•An object not detected by the radar sensors
approaches or passes your vehicle.
3WARNING
Failure to visually confirm that it is safe to
change lanes before doing so may result in
a crash and serious injury or death.
Do not rely only on the blind spot
information system wh en changing lanes.
Always look in your mirrors, to either side
of your vehicle, and behind you for other
vehicles before changing lanes.
●The shift lever is in ( D or .●Your vehicle speed is between
20 mph (32 km/h) and 100 mph
(160 km/h)D4
Alert zone range
A: Approx. 1.6 ft. (0.5 m)
B: Approx. 10 ft. (3 m)
C: Approx. 10 ft. (3 m) Alert Zone
Radar Sensors:
underneath the
rear bumper
cornersA
B
C
* Not available on all models
16 US ODYSSEY-31TK86500.book 432 ページ 2015年6月24日 水曜日 午後3時0分
Page 445 of 565
uuParking Your Vehicle uParking Sensor System*
444
Driving
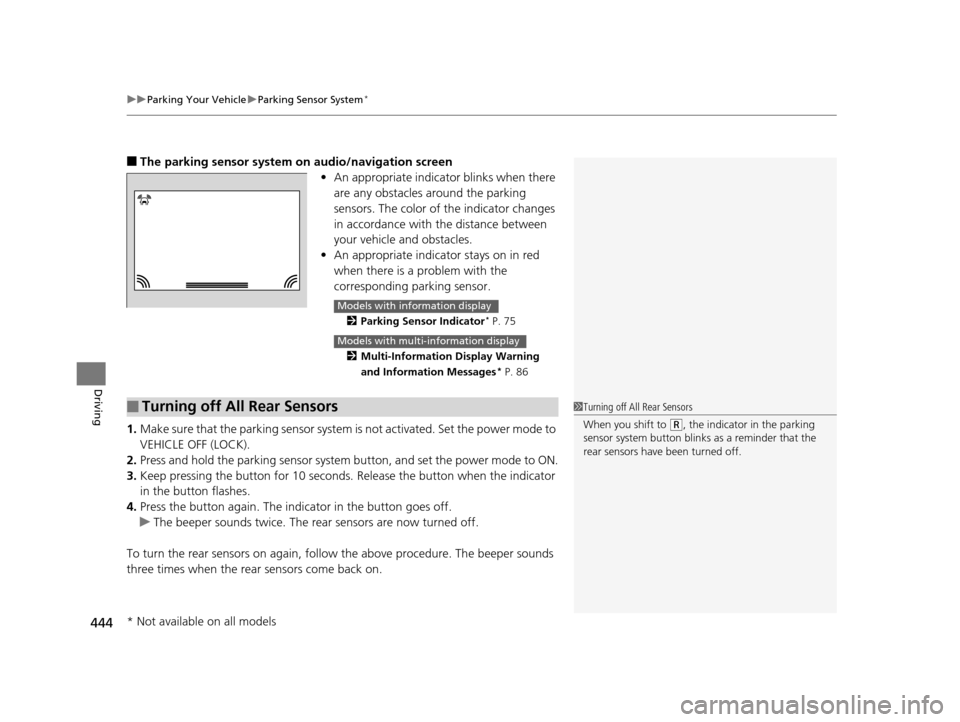
■The parking sensor system on audio/navigation screen
•An appropriate indicato r blinks when there
are any obstacles around the parking
sensors. The color of the indicator changes
in accordance with the distance between
your vehicle and obstacles.
• An appropriate indicator stays on in red
when there is a problem with the
corresponding parking sensor.
2 Parking Sensor Indicator* P. 75
2 Multi-Information Display Warning
and Information Messages
* P. 86
1.Make sure that the parking sensor system is not activated. Set the power mode to
VEHICLE OFF (LOCK).
2. Press and hold the parking sensor system button, and set the power mode to ON.
3. Keep pressing the button for 10 seconds. Release the button when the indicator
in the button flashes.
4. Press the button again. The indi cator in the button goes off.
u The beeper sounds twice. The re ar sensors are now turned off.
To turn the rear sensors on again, follow the above procedure. The beeper sounds
three times when the rear sensors come back on.
Models with info rmation display
Models with multi- information display
■Turning off All Rear Sensors1Turning off All Rear Sensors
When you shift to
(R, the indicator in the parking
sensor system button blinks as a reminder that the
rear sensors have been turned off.
* Not available on all models
16 US ODYSSEY-31TK86500.book 444 ページ 2015年6月24日 水曜日 午後3時0分
Page 450 of 565
449
Driving
Fuel Economy
Improving Fuel Economy
Fuel economy depends on several conditions, including driving conditions, your
driving habits, the condition of your vehicle, and loading. Depending on these and
other conditions, you may or may not achieve the rated fuel economy of this vehicle.
You can optimize your fuel economy with proper maintenance of your vehicle.
Always maintain your vehicle in accordance with the messages displayed on the
information display
*/multi-information display*.
• Use the recommended viscosity engine oil, displaying the API Certification Seal.
• Maintain the specified tire pressure.
• Do not load the vehicle with excess cargo.
• Keep your vehicle clean. A buildup of snow or mud on your vehicle's underside
adds weight and increases wind resistance.
■Maintenance and Fuel Economy
1Improving Fuel Economy
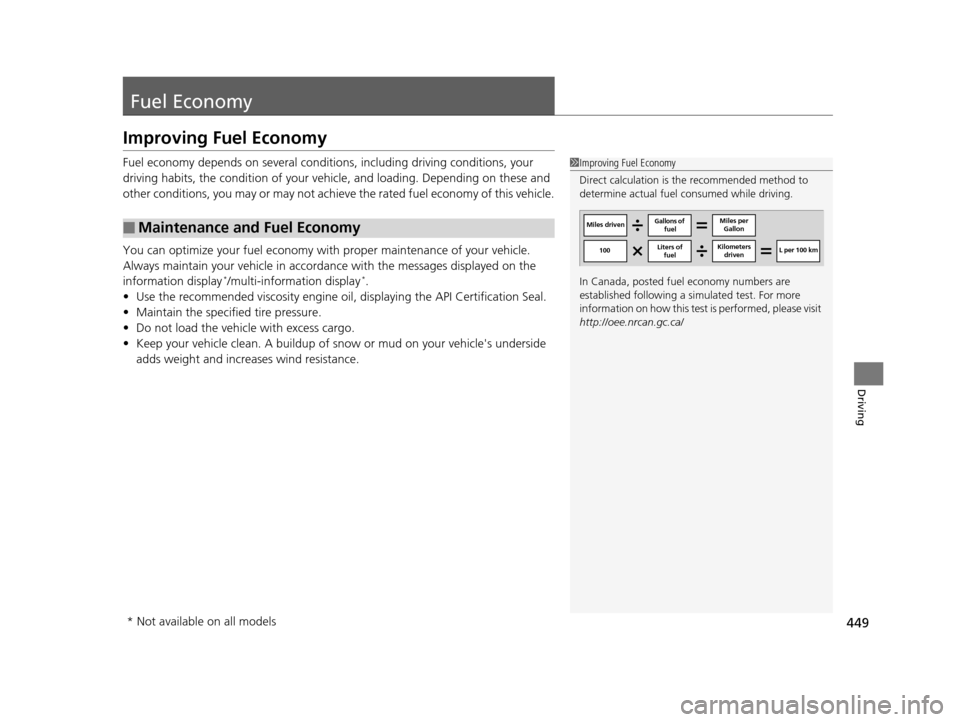
Direct calculation is the recommended method to
determine actual fuel consumed while driving.
In Canada, posted fuel economy numbers are
established following a simulated test. For more
information on how this test is performed, please visit
http://oee.nrcan.gc.ca/
Miles driven Gallons of
fuel Miles per
Gallon
100 L per 100 km
Liters of
fuel Kilometers
driven
* Not available on all models
16 US ODYSSEY-31TK86500.book 449 ページ 2015年6月24日 水曜日 午後3時0分
Page 452 of 565
451
Maintenance
This chapter discusses basic maintenance.
Before Performing MaintenanceInspection and Maintenance ............ 452
Safety When Performing Maintenance..... 453Parts and Fluids Used in Maintenance Service ........................................... 454
Maintenance Minder
TM..................... 455
Maintenance Under the Hood
Maintenance Items Under the Hood ..... 463Opening the Hood ........................... 464
Recommended Engine Oil ................ 465
Oil Check ......................................... 466
Adding Engine Oil ............................ 467
Changing the Engine Oil and Oil Filter ..... 468
Engine Coolant ................................ 470
Transmission Fluid ............................ 472
Brake Fluid ....................................... 473
Power Steering Fluid Check.............. 474
Refilling Window Wa sher Fluid......... 474
Replacing Light Bulbs ....................... 475
Checking and Maintaining Wiper Blades.... 486Checking and Maintaining Tires
Checking Tires ................................. 490
Tire and Loading Information Label ...... 491Tire Labeling .................................... 491DOT Tire Quality Grading (U.S. Vehicles)....... 493Wear Indicators................................ 495 Tire Service Life ................................ 495
Tire and Wheel Replacement ........... 496
Tire Rotation .................................... 497
Winter Tires ..................................... 498
Battery ............................................... 499
Remote Transmitter Care ................. 500
Remote Control and Wireless Headphone Care
*........................... 502
Heating and Cooling System*/Climate
Control System* Maintenance ....... 504
Cleaning Interior Care .................................... 505
Exterior Care.................................... 507
* Not available on all models
16 US ODYSSEY-31TK86500.book 451 ページ 2015年6月24日 水曜日 午後3時0分
Page 453 of 565
452
Maintenance
Before Performing Maintenance
Inspection and Maintenance
For your safety, perform all listed inspections and maintenance to keep your vehicle
in good condition. If you become aware of any abnormality (noise, smell, insufficient
brake fluid, oil residue on the ground, etc.), have your vehicle inspected by a dealer.
(Note, however, that service at a dealer is not mandatory to keep your warranties in
effect.)
■Daily inspections
Perform inspections before long distance tri ps, when washing the vehicle, or when
refueling.
■Periodic inspections
• Check the brake fluid level monthly.
2 Brake Fluid P. 473
•Check the tire pressure monthly. Examin e the tread for wear and foreign objects.
2Checking and Maintaining Tires P. 490
•Check the operation of the exterior lights monthly.
2 Replacing Light Bulbs P. 475
•Check the condition of the wiper bl ades at least every six months.
2Checking and Maintaining Wiper Blades P. 486
■Types of Inspection and Maintenance
1Inspection and Maintenance
Maintenance, replacement, or repair of
emissions control devices and systems may be
done by any automotive repair establishment or
individuals using parts that are “certified” to
EPA standards.
According to state and fede ral regulations, failure to
perform maintenance on the maintenance main
items marked with # will not void your emissions
warranties. However, all ma intenance services should
be performed in accordan ce with the intervals
indicated by the information display
*/multi-
information display*.
2 Maintenance Service Items P. 457, 461
If you want to perform complex maintenance tasks
that require more skills a nd tools, you can purchase a
subscription to the Service Express website at
www.techinfo.honda.com.
2 Authorized Manuals P. 551
If you want to perform ma intenance yourself, make
sure that you have the necessary tools and skills first.
After performing ma intenance, update the records in
the separate maintenance booklet.
U.S. models
* Not available on all models
16 US ODYSSEY-31TK86500.book 452 ページ 2015年6月24日 水曜日 午後3時0分
Page 456 of 565
455Continued
Maintenance
Maintenance MinderTM
If the engine oil life is less than 15%, you will see the Maintenance Minder messages
appear on the information display* or the multi-information display* every time you
turn the ignition switch to ON
(w*1. The messages notify you when to change the
engine oil, or when to bring your vehi cle to a dealer for indicated maintenance
services.
To Use Maintenance MinderTM
1. Turn the ignition switch to ON (w*1.
2. Press the (Select/Reset) knob repeatedly
until the engine oil life appears on the
information display.
The Maintenance Minder indicator ( ) stays
on in the instrument panel after the engine oil
life becomes 0% . Have the indicated
maintenance done by a dealer immediately.
*1: Models with the smart entry system have an ENGINE START/STOP button instead of an
ignition switch.
■Displaying the Engine Oil Life
Models with info rmation display
1Displaying the Engine Oil Life
Based on the engine ope rating conditions, the
remaining engine oi l life is calculated and displayed
as a percentage.
Displayed Engine Oil Life (%)Calculated Engine Oil Life (%)
100 100 to 91
9090 to 81
80 80 to 71
7070 to 61
60 60 to 51
5050 to 41
40 40 to 31
3030 to 21
20 20 to 16
1515 to 11
10 10 to 6
55 to 1
0 0
* Not available on all models
16 US ODYSSEY-31TK86500.book 455 ページ 2015年6月24日 水曜日 午後3時0分