2016 HONDA ODYSSEY ECO mode
[x] Cancel search: ECO modePage 322 of 565
321
uuCustomized Features u
Continued
Features
*1:Default Setting
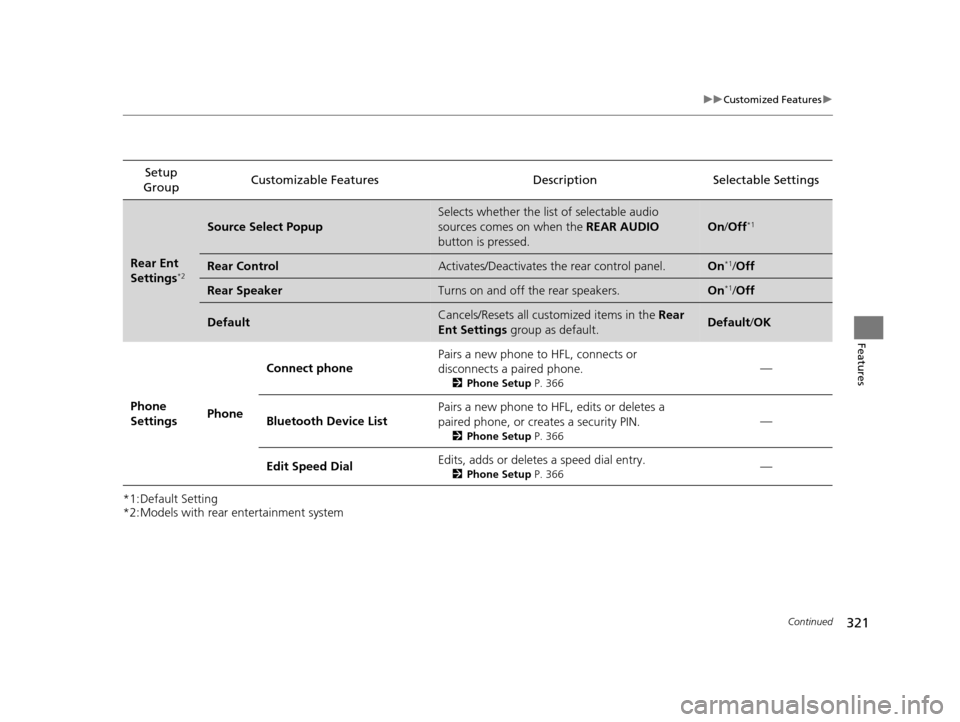
*2:Models with rear entertainment systemSetup
Group Customizable Features Description Selectable Settings
Rear Ent
Settings*2
Source Select Popup
Selects whether the list of selectable audio
sources comes on when the
REAR AUDIO
button is pressed.
On /Off*1
Rear ControlActivates/Deactivates the rear control panel.On*1/Off
Rear SpeakerTurns on and off the rear speakers.On*1/Off
DefaultCancels/Resets all customized items in the Rear
Ent Settings group as default.Default/OK
Phone
Settings PhoneConnect phone
Pairs a new phone to HFL, connects or
disconnects a paired phone.
2
Phone Setup P. 366
—
Bluetooth Device List Pairs a new phone to HFL, edits or deletes a
paired phone, or creates a security PIN.
2
Phone Setup P. 366
—
Edit Speed Dial Edits, adds or deletes a speed dial entry.
2
Phone Setup P. 366—
16 US ODYSSEY-31TK86500.book 321 ページ 2015年6月24日 水曜日 午後3時0分
Page 326 of 565
325Continued
Features
HomeLink® Universal Transceiver*
The HomeLink ® Universal Transceiver can be pr ogrammed to operate up to three
remote controlled devices around your home, such as garage doors, lighting, or
home security systems.
Refer to the safety information that came wi th your garage door opener to test that
the safety features are functioning properly. If you do not have the safety
information, contact the manufacturer.
Before programming HomeLink, make sure th at people and objects are out of the
way of the garage or gate to prevent potential injury or damage.
When programming a garage door opener, park just outside the garage door’s
path.
Training HomeLink
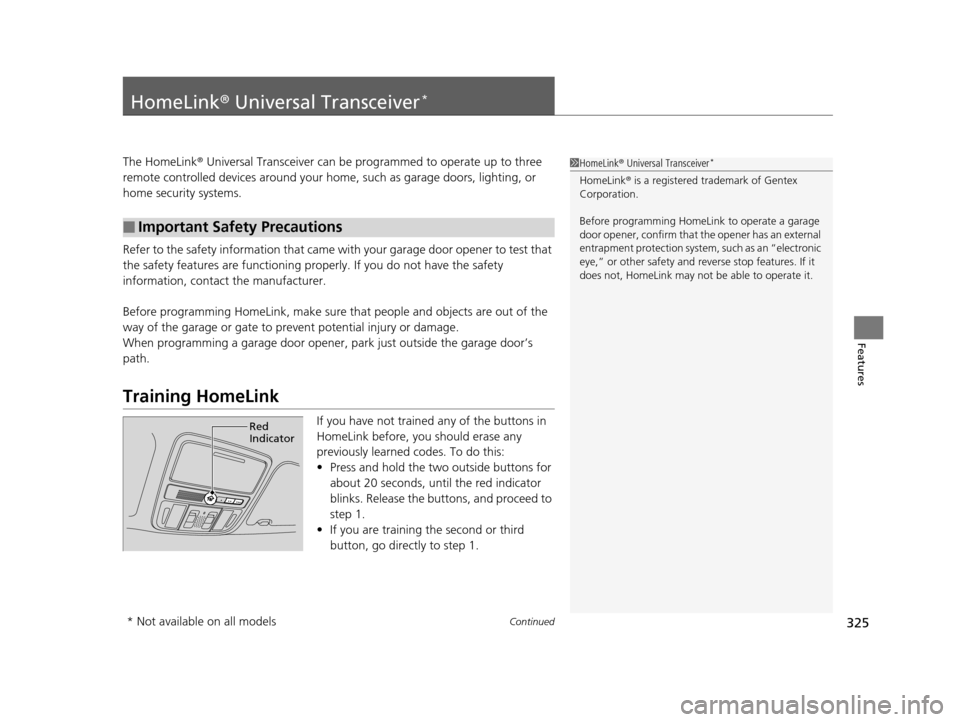
If you have not trained any of the buttons in
HomeLink before, you should erase any
previously learned codes. To do this:
• Press and hold the two outside buttons for
about 20 seconds, until the red indicator
blinks. Release the bu ttons, and proceed to
step 1.
• If you are training the second or third
button, go directly to step 1.
■Important Safety Precautions
1HomeLink ® Universal Transceiver*
HomeLink ® is a registered tra demark of Gentex
Corporation.
Before programming HomeLi nk to operate a garage
door opener, confirm that the opener has an external
entrapment protection system, such as an “electronic
eye,” or other safety and re verse stop features. If it
does not, HomeLink may not be able to operate it.
Red
Indicator
* Not available on all models
16 US ODYSSEY-31TK86500.book 325 ページ 2015年6月24日 水曜日 午後3時0分
Page 361 of 565
360
Features
Bluetooth® HandsFreeLink ®
See the Navigation System Manu al for how to operate the Bluetooth® HandsFreeLink ®.
Bluetooth ® HandsFreeLink ® (HFL) allows you to place and receive phone calls using
your vehicle’s audio system, without handling your cell phone.
Using HFL
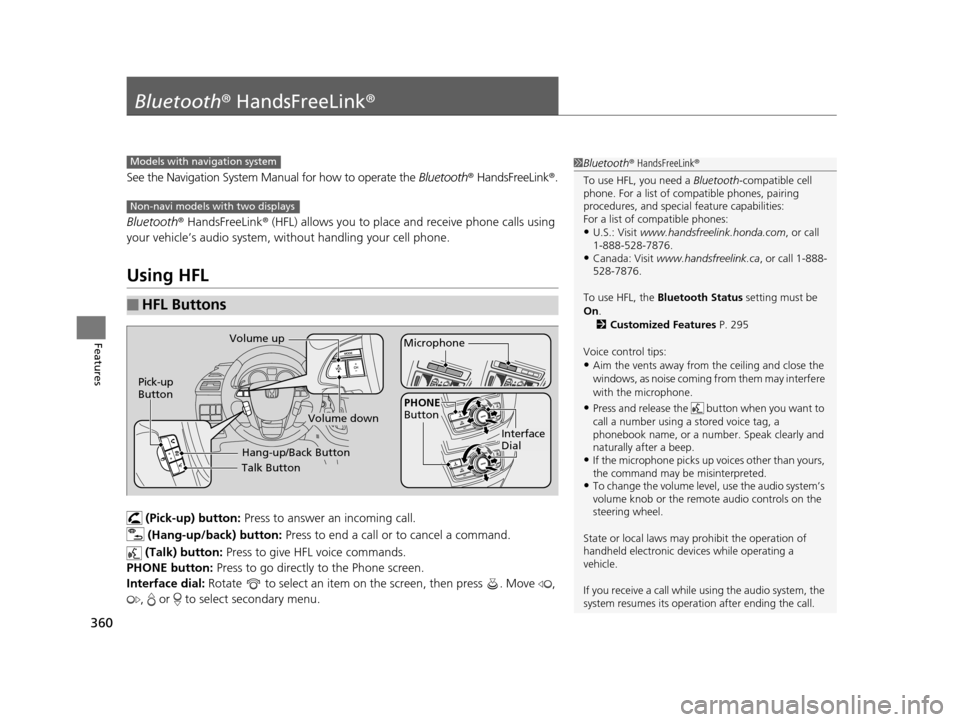
(Pick-up) button: Press to answer an incoming call.
(Hang-up/back) button: Press to end a call or to cancel a command.
(Talk) button: Press to give HFL voice commands.
PHONE button: Press to go directly to the Phone screen.
Interface dial: Rotate to select an item on the screen, then press . Move ,
, or to select secondary menu.
■HFL Buttons
1 Bluetooth ® HandsFreeLink ®
To use HFL, you need a Bluetooth-compatible cell
phone. For a list of compatible phones, pairing
procedures, and special feature capabilities:
For a list of compatible phones:
•U.S.: Visit www.handsfreelink.honda.com , or call
1-888-528-7876.
•Canada: Visit www.handsfreelink.ca , or call 1-888-
528-7876.
To use HFL, the Bluetooth Status setting must be
On .
2 Customized Features P. 295
Voice control tips:
•Aim the vents away from the ceiling and close the
windows, as noise coming fr om them may interfere
with the microphone.
•Press and release the but ton when you want to
call a number using a stored voice tag, a
phonebook name, or a numbe r. Speak clearly and
naturally after a beep.
•If the microphone picks up vo ices other than yours,
the command may be misinterpreted.
•To change the volume level, use the audio system’s
volume knob or the remote audio controls on the
steering wheel.
State or local laws may prohibit the operation of
handheld electronic devices while operating a
vehicle.
If you receive a call while using the audio system, the
system resumes its operati on after ending the call.
Models with navigation system
Non-navi models with two displays
Talk Button
Volume up
Microphone
Hang-up/Back Button
Pick-up
Button
Volume down
Interface
Dial
PHONE
Button
16 US ODYSSEY-31TK86500.book 360 ページ 2015年6月24日 水曜日 午後3時0分
Page 393 of 565
392
Features
Compass*
When you set the power mode to ON, the compass self-calibrates, and the compass
display appears.
Compass Calibration
If the compass indicates the wrong direction, or the CAL indicator blinks, you need
to manually calibrate the system.
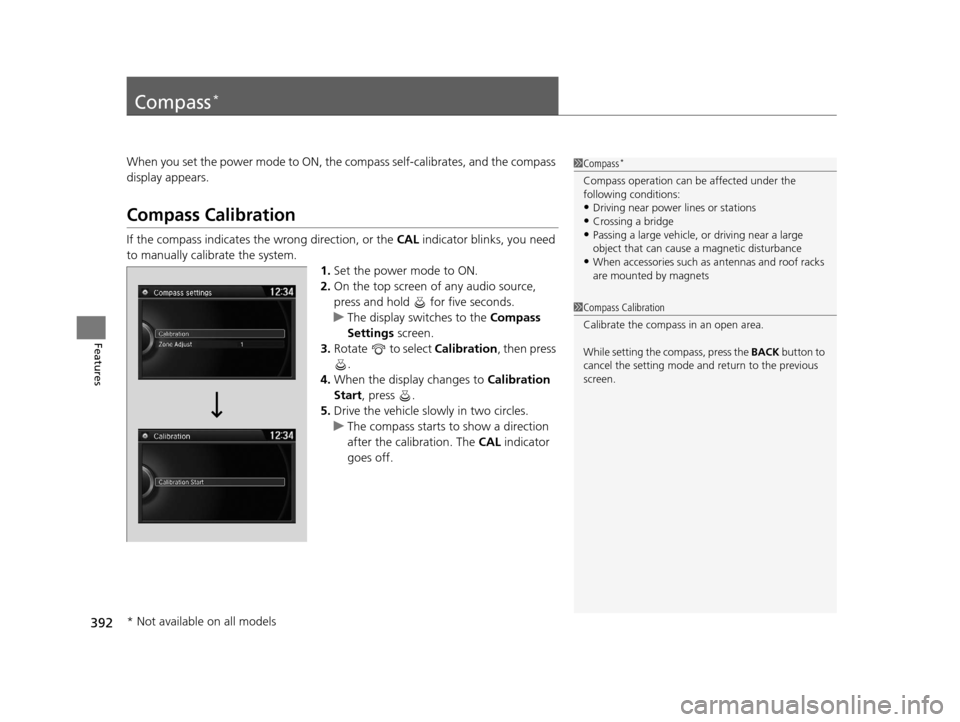
1.Set the power mode to ON.
2. On the top screen of any audio source,
press and hold for five seconds.
u The display switches to the Compass
Settings screen.
3. Rotate to select Calibration , then press
.
4. When the display changes to Calibration
Start, press .
5. Drive the vehicle slowly in two circles.
u The compass starts to show a direction
after the calibration. The CAL indicator
goes off.
1 Compass*
Compass operation can be affected under the
following conditions:
•Driving near power lines or stations•Crossing a bridge
•Passing a large vehicle, or driving near a large
object that can cause a magnetic disturbance
•When accessories such as antennas and roof racks
are mounted by magnets
1 Compass Calibration
Calibrate the compass in an open area.
While setting the compass, press the BACK button to
cancel the setting mode a nd return to the previous
screen.
* Not available on all models
16 US ODYSSEY-31TK86500.book 392 ページ 2015年6月24日 水曜日 午後3時0分
Page 394 of 565
393
uuCompass*uCompass Zone Selection
Features
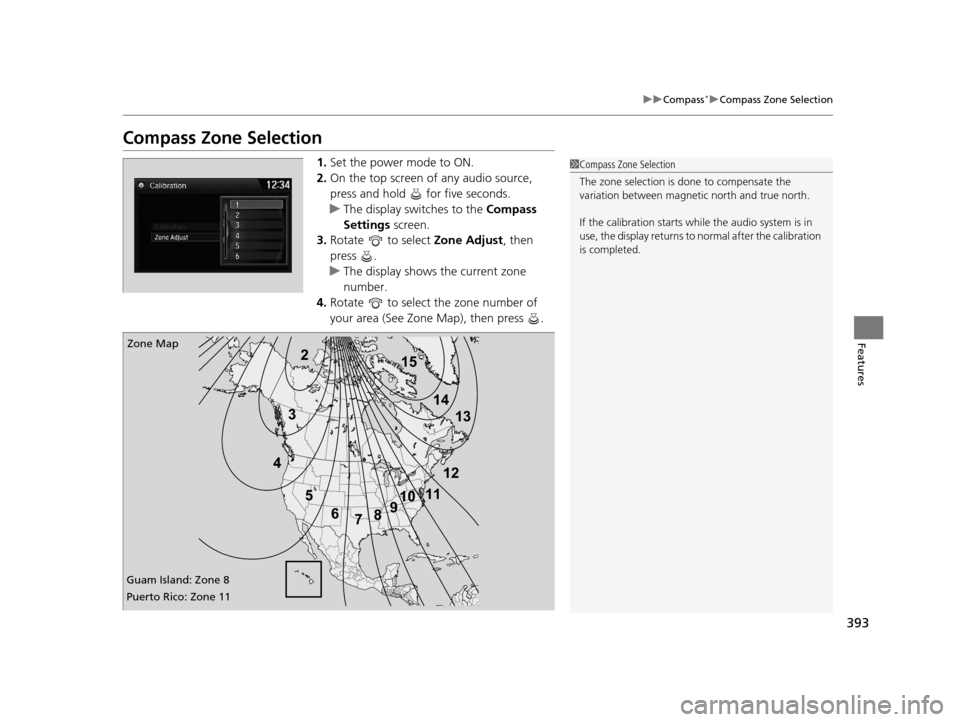
Compass Zone Selection
1. Set the power mode to ON.
2. On the top screen of any audio source,
press and hold for five seconds.
u The display swit ches to the Compass
Settings screen.
3. Rotate to select Zone Adjust, then
press .
u The display shows the current zone
number.
4. Rotate to select the zone number of
your area (See Zone Map), then press .1Compass Zone Selection
The zone selection is done to compensate the
variation between magneti c north and true north.
If the calibration starts while the audio system is in
use, the display returns to normal after the calibration
is completed.
2
3
4 5678910
111213
14
15Zone Map
Guam Island: Zone 8
Puerto Rico: Zone 11
16 US ODYSSEY-31TK86500.book 393 ページ 2015年6月24日 水曜日 午後3時0分
Page 396 of 565

395
Driving
This chapter discusses driving, refueling, and information on items such as accessories.
Before Driving
Driving Preparation .......................... 396
Maximum Load Limit........................ 399
Towing a Trailer Towing Preparation .......................... 401
Driving Safely with a Trailer .............. 405
Towing Your Vehicle ........................ 406
When Driving Starting the Engine .................. 407, 409
Precautions While Driving................. 411
Automatic Transmission ................... 412
Shifting ............................................ 413 Cruise Control ................................. 415
Forward Collision Warning (FCW)*.. 418
Lane Departure Warning (LDW)*..... 422
Vehicle Stability Assist (VSA®), aka Electronic
Stability Control (ESC), System ............... 426
Tire Pressure Monitoring System (TPMS) ... 428
Tire Pressure Monitoring System (TPMS) - Required Federal Explanation ......... 429
Blind Spot Information (BSI) System*.... 432
LaneWatchTM*.................................. 434 Braking
Brake System ................................... 436
Anti-lock Brake System (ABS) ........... 438
Brake Assist System ......................... 439
Parking Your Vehicle When Stopped ................................ 440
Parking Sensor System
*................... 441
Rearview Camera ............................. 445
Refueling Fuel Information .............................. 446
How to Refuel ................................. 447
Fuel Economy .................................... 449
Accessories and Modifications ........ 450
* Not available on all models
16 US ODYSSEY-31TK86500.book 395 ページ 2015年6月24日 水曜日 午後3時0分
Page 420 of 565
Continued419
uuWhen Driving uForward Collision Warning (FCW)*
Driving
1Forward Collision Warning (FCW)*
Never apply a film or attach any objects to the
windshield that could obs truct the FCW camera's
field of vision.
Scratches, nicks, and othe r damage to the windshield
within the FCW camera's fi eld of vision can cause the
system to operate abnormall y. If this occurs, we
recommend that you replac e the windshield with a
genuine Honda replacem ent windshield. Making
even minor repairs within th e camera's field of vision
or installing an aftermarket replacement windshield
may also cause the system to operate abnormally.
After replacing the winds hield, have a dealer
recalibrate the camera. Prop er calibration of the FCW
camera is necessary for the system to operate
properly.
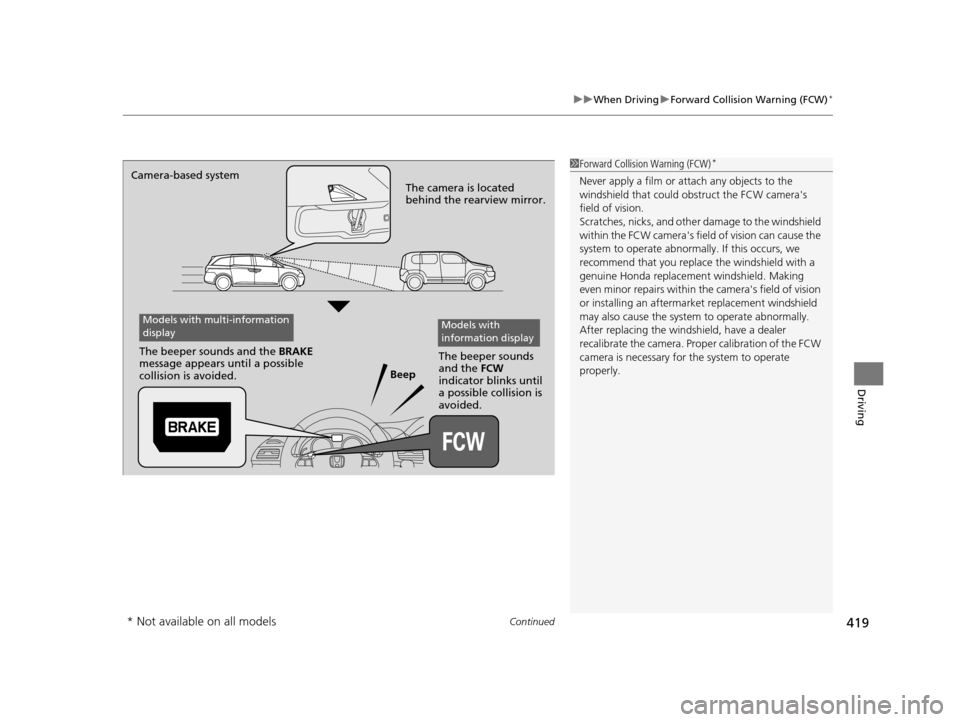
Beep
Camera-based system
The camera is located
behind the rearview mirror.
The beeper sounds
and the FCW
indicator blinks until
a possible collision is
avoided.
The beeper sounds and the
BRAKE
message appears until a possible
collision is avoided.
Models with multi-information
displayModels with
information display
* Not available on all models
16 US ODYSSEY-31TK86500.book 419 ページ 2015年6月24日 水曜日 午後3時0分
Page 425 of 565
uuWhen Driving uLane Departure Warning (LDW)*
424
Driving
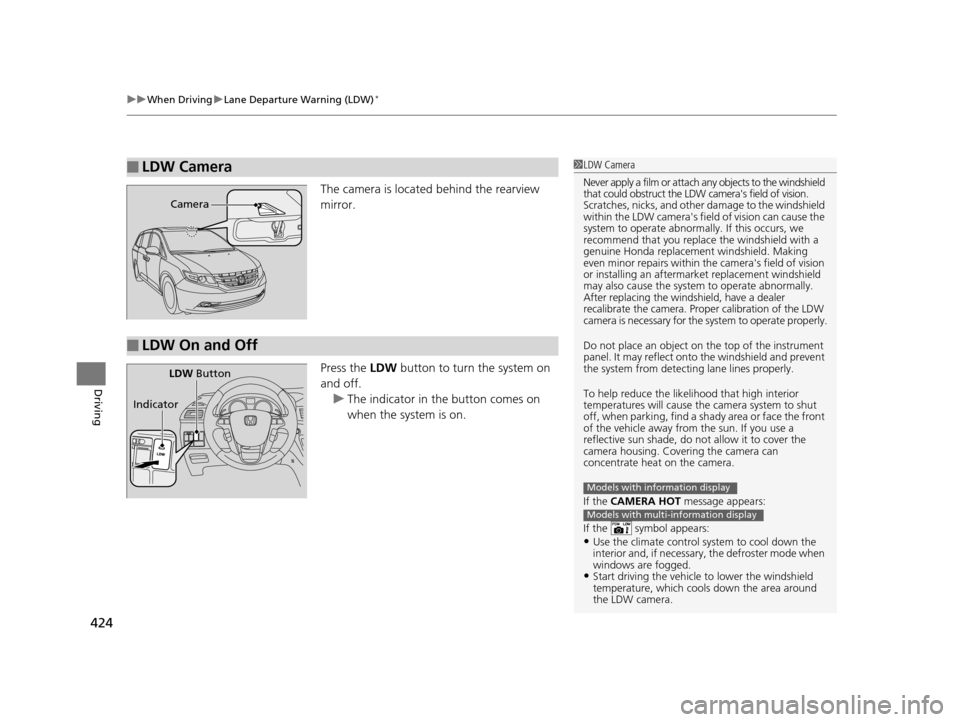
The camera is located behind the rearview
mirror.
Press the LDW button to turn the system on
and off. u The indicator in the button comes on
when the system is on.
■LDW Camera1LDW Camera
Never apply a film or attach any objects to the windshield
that could obstruct the LDW camera's field of vision.
Scratches, nicks, and othe r damage to the windshield
within the LDW camera's fi eld of vision can cause the
system to operate abnormall y. If this occurs, we
recommend that you replac e the windshield with a
genuine Honda replacem ent windshield. Making
even minor repairs within th e camera's field of vision
or installing an aftermarket replacement windshield
may also cause the system to operate abnormally.
After replacing the winds hield, have a dealer
recalibrate the camera. Proper calibration of the LDW
camera is necessary for the system to operate properly.
Do not place an object on the top of the instrument
panel. It may reflect onto the windshield and prevent
the system from detecting lane lines properly.
To help reduce the likel ihood that high interior
temperatures will cause the camera system to shut
off, when parking, find a sh ady area or face the front
of the vehicle away from the sun. If you use a
reflective sun shade, do not allow it to cover the
camera housing. Covering the camera can
concentrate heat on the camera.
If the CAMERA HOT message appears:
If the symbol appears:
•Use the climate control system to cool down the
interior and, if necessary , the defroster mode when
windows are fogged.
•Start driving the vehicle to lower the windshield
temperature, which cool s down the area around
the LDW camera.
Models with information display
Models with multi-information display
Camera
■LDW On and Off
LDW Button
Indicator
16 US ODYSSEY-31TK86500.book 424 ページ 2015年6月24日 水曜日 午後3時0分