Page 225 of 326

GMC Terrain/Terrain Denali Owner Manual (GMNA-Localizing-U.S./Canada/
Mexico-9234776) - 2016 - crc - 10/12/15
224 Vehicle Care
3. Remove the five attachmentnuts (1) securing the taillamp
assembly to the liftgate.
4. Disengage the retaining hook (2) and pull the taillamp
assembly out of the vehicle
liftgate.
5. Disconnect the lamp wiring harness.6. Turn the bulb socketcounterclockwise and pull
it out.
7. Pull the bulb straight out of the socket.
8. Install the new bulb.
9. Push the bulb socket in and turn it clockwise.
10. Reverse Steps 2–5 to reinstall lamp assembly.
Back–Up Lamp
Removal of the lamp assembly is
not required to replace the back-up
lamp bulb.
To replace one of these lamps: 1. Open the liftgate. See
Liftgate 032.
2. Remove the interior trim access panel.
3. Turn the bulb socketcounterclockwise and pull
it out.
4. Pull the bulb straight out of the socket.
5. Install the new bulb.
6. Push the bulb socket in and turn it clockwise.
7. Reinstall the interior trim access panel.
Page 226 of 326

GMC Terrain/Terrain Denali Owner Manual (GMNA-Localizing-U.S./Canada/
Mexico-9234776) - 2016 - crc - 10/12/15
Vehicle Care 225
License Plate Lamp
Lamp Assembly
Bulb Assembly
1. Bulb Socket2. Bulb
3. Lamp Assembly
To replace one of these bulbs:
1. Open the liftgate partway. See Liftgate 032.
2. Push the left end of the lamp assembly toward the right.
3. Pull the lamp assembly down to remove it from the liftgate.
4. Turn the bulb socket (1) counterclockwise to remove it
from the lamp assembly (3).
5. Pull the bulb (2) straight out of the bulb socket (1).
6. Push the replacement bulb straight into the bulb socket
and turn the bulb socket
clockwise to install it into the
lamp assembly.
7. Push the lamp assembly into the liftgate engaging the clip
side first.
8. Push on the lamp side opposite the clip until the lamp assembly
snaps into place.
Replacement Bulbs
Exterior Lamp Bulb
Number
Auxiliary Taillamp 161
Back-Up Lamp 921
License Plate Lamp W5WLL
Taillamp/Turn Signal
Lamp/Stop Lamp/
Sidemarker 3057K RD
For replacement bulbs not listed
here, contact your dealer.
Page 227 of 326

GMC Terrain/Terrain Denali Owner Manual (GMNA-Localizing-U.S./Canada/
Mexico-9234776) - 2016 - crc - 10/12/15
226 Vehicle Care
Electrical System
Fuses
The wiring circuits in the vehicle are
protected from short circuits by
fuses. This greatly reduces the
chance of damage caused by
electrical problems.
Look at the silver-colored band
inside the fuse. If the band is broken
or melted, replace the fuse. Be sure
to replace a bad fuse with a new
one of the identical size and rating.
Replace a bad fuse with a new one
of the identical size and rating.
If there is a problem on the road and
a fuse needs to be replaced, the
same amperage fuse can be
borrowed. Choose some feature of
the vehicle that is not needed to use
and replace it as soon as possible.
There are two fuse blocks in the
vehicle: one in the engine
compartment and one in the
instrument panel.There is a fuse puller located in the
engine compartment fuse block.
See
Engine Compartment Fuse
Block 0226. It can be used to easily
remove fuses from the fuse block.
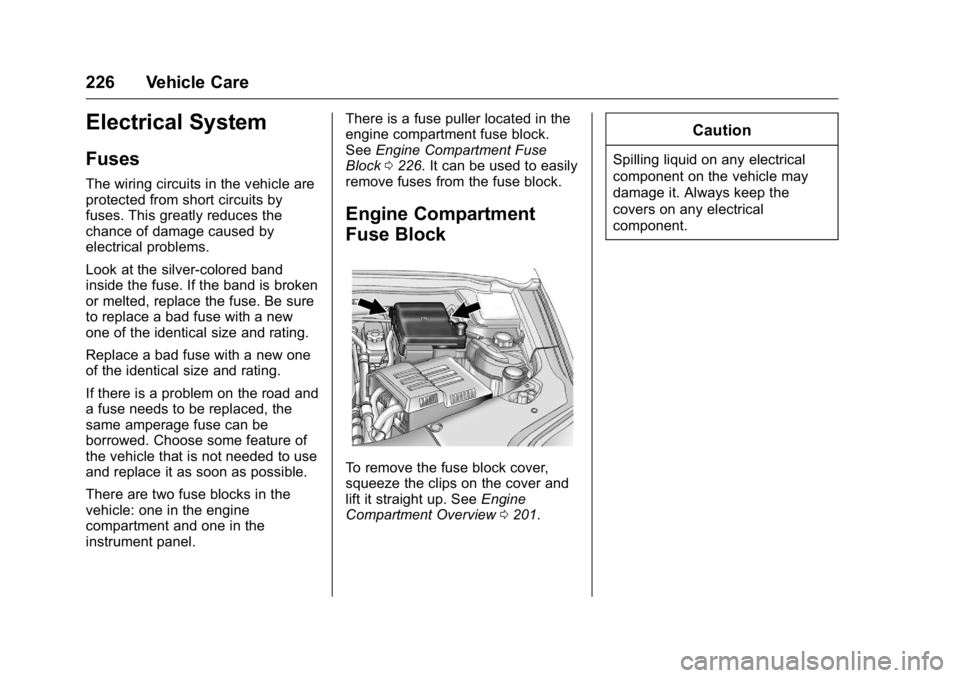
Engine Compartment
Fuse Block
To remove the fuse block cover,
squeeze the clips on the cover and
lift it straight up. See Engine
Compartment Overview 0201.
Caution
Spilling liquid on any electrical
component on the vehicle may
damage it. Always keep the
covers on any electrical
component.
Page 228 of 326
GMC Terrain/Terrain Denali Owner Manual (GMNA-Localizing-U.S./Canada/
Mexico-9234776) - 2016 - crc - 10/12/15
Vehicle Care 227
The vehicle may not be equipped
with all of the fuses, relays, and
features shown.J-CaseFuses Usage
1 Cooling fan 1
2 Cooling fan 2
3 Brake booster
4 Power windows– right J-Case
Fuses Usage
5 Memory seat module
6 Power seat–left
7 Instrument panel fuse block 1
8 Rear defogger
9 Starter
10 AIR pump motor J-Case
Fuses Usage
11 Instrument panel fuse block 2
12 Sunroof
13 Antilock brake system pump
14 Instrument panel fuse block 3
15 Power windows–left
16 Antilock brake system module
17 Transmission control module battery
18 Trailer parking light
19 AIR pump solenoid
20 Engine control module battery
21 Canister vent
22 Trailer–left side (if equipped)
23 Liftgate module
24 Power lumbar
Page 229 of 326

GMC Terrain/Terrain Denali Owner Manual (GMNA-Localizing-U.S./Canada/
Mexico-9234776) - 2016 - crc - 10/12/15
228 Vehicle Care
J-CaseFuses Usage
25 Trailer–right side (if equipped)
26 Rear accessory power outlet
27 Memory mirror module
28 Regulated voltage control battery
sensor
29 Front wiper
30 Rear wiper
31 A/C
32 Rear latch
33 Heated mirrors
34 Horn
35 High-beam headlamp–right
36 High-beam headlamp–left
37 Ignition coil–even
38 Ignition coil–odd
39 Windshield washer J-Case
Fuses Usage
40 Front fog lamps
41 Post catalytic converter O2 sensor
42 Engine control module
43 Pre-catalytic converter O2 sensor
44 Transmission control module
45 Mirror
46 Fuel system control module ignition
47 –
48 Rear drive module
49 Lift gate module logic
50 Instrument panel fuse block ignition
51 Heated seat–front
52 Fuel system control module J-Case
Fuses Usage
53 Engine control module
54 Rear vision camera
55 Electric power steering
56 AIR pump solenoid
57 Brake booster
58 Cooling fan low
59 Headlamp high-beam
60 Cooling fan control
61 Wiper On/Off control
62 A/C
63 Rear defogger
64 Wiper speed
65 Fog lamps
66 Engine control
67 Starter
68 Run/Crank
69 Cooling fan high
Page 230 of 326
GMC Terrain/Terrain Denali Owner Manual (GMNA-Localizing-U.S./Canada/
Mexico-9234776) - 2016 - crc - 10/12/15
Vehicle Care 229
J-CaseFuses Usage
70 AIR pump motor
77 Power seat–right
78 Passenger power lumbar
Instrument Panel Fuse
Block
The instrument panel fuse block is
located on the passenger side panel
of the center console. To access the
fuses, open the fuse panel door
from the passenger side by pulling
it out. To reinstall the door, insert the tabs
on the top of the door into the
console first, then push the door
back into its original location.
The vehicle may not be equipped
with all of the fuses, relays, and
features shown.Instrument Panel Fuse Block
Page 231 of 326

GMC Terrain/Terrain Denali Owner Manual (GMNA-Localizing-U.S./Canada/
Mexico-9234776) - 2016 - crc - 10/12/15
230 Vehicle Care
Mini Fuses Usage1 Steering wheel dimming
2 –
3 –
4 Body control module 1
5 Infotainment
6 Body control module 7
7 Noise control module
8 Body control module 4
9 Radio
10 –
11 Rear parking assist module
12 HVAC/Battery
13 Auxiliary power front
14 HVAC/Ignition
15 Display Mini Fuses Usage
16 Body control module 5
17 Auxiliary power rear
18 Instrument panel ignition
19 Universal garage door opener
20 Body control module 6
21 –
22 Sensing/Diagnostic module ignition
23 Front camera
24 –
25 Transmission gear shift position
indicator
26 –
27 –
28 –
29 Front blower motor
30 Body control module 3 Mini Fuses Usage
31 Amplifier
32 Discrete logic ignition switch
33 Communications integration module
34 Body control module 2
35 Sensing/Diagnostic module battery
36 Data link connect
37 Instrument panel battery
38 Passenger sensing system module
39 –
40 Body control module 8
41 Logistic relay (if equipped)
42 Retained accessory power relay
Page 232 of 326

GMC Terrain/Terrain Denali Owner Manual (GMNA-Localizing-U.S./Canada/
Mexico-9234776) - 2016 - crc - 10/12/15
Vehicle Care 231
Wheels and Tires
Tires
Every new GM vehicle has
high-quality tires made by a
leading tire manufacturer. See
the warranty manual for
information regarding the tire
warranty and where to get
service. For additional
information refer to the tire
manufacturer.
{Warning
.Poorly maintained and
improperly used tires are
dangerous.
.Overloading the tires can
cause overheating as a
result of too much
flexing. There could be a
blowout and a serious
crash. SeeVehicle Load
Limits 0156.
(Continued)
Warning (Continued)
.Underinflated tires pose
the same danger as
overloaded tires. The
resulting crash could
cause serious injury.
Check all tires frequently
to maintain the
recommended pressure.
Tire pressure should be
checked when the tires
are cold.
.Overinflated tires are
more likely to be cut,
punctured, or broken by
a sudden impact —such
as when hitting a pothole.
Keep tires at the
recommended pressure.
.Worn or old tires can
cause a crash. If the
tread is badly worn,
replace them.
(Continued)
Warning (Continued)
.Replace any tires that
have been damaged by
impacts with potholes,
curbs, etc.
.Improperly repaired tires
can cause a crash. Only
the dealer or an
authorized tire service
center should repair,
replace, dismount, and
mount the tires.
.Do not spin the tires in
excess of 56 km/h
(35 mph) on slippery
surfaces such as snow,
mud, ice, etc. Excessive
spinning may cause the
tires to explode.
All-Season Tires
This vehicle may come with
all-season tires. These tires are
designed to provide good overall
performance on most road surfaces