2016 GMC SAVANA lock
[x] Cancel search: lockPage 221 of 343

GMC Savana Owner Manual (GMNA-Localizing-U.S./Canada-9159232) -
2016 - crc - 11/11/15
220 Vehicle Care
If the system is ever reset
accidentally, the oil must be
changed at 5 000 km (3,000 mi)
since the last oil change.
Remember to reset the oil life
system whenever the oil is changed.
How to Reset the Engine Oil
Life System
Reset the system whenever the
engine oil is changed so that the
system can calculate the next
engine oil change. To reset the
system:1. Turn the ignition key to ON/ RUN with the engine off.
2. Fully press and release the accelerator pedal slowly three
times within five seconds.
3. Turn the key to LOCK/OFF.
If the CHANGE ENGINE OIL SOON
message comes back on when the
vehicle is started, the engine oil life
system has not reset. Repeat the
procedure.
Automatic Transmission
Fluid
When to Check and Change
Automatic Transmission Fluid
It is usually not necessary to check
the transmission fluid level. The only
reason for fluid loss is a
transmission leak or overheated
transmission. If a small leak is
suspected, use the following
procedures to check the fluid level.
However, if there is a large leak, it
may be necessary to have the
vehicle towed to a dealer and have
it repaired before driving the vehicle
further.
Change the fluid and filter at the
intervals listed in Maintenance
Schedule 0294, and be sure to use
the transmission fluid listed in
Recommended Fluids and
Lubricants 0302.
How to Check Automatic
Transmission Fluid
Because this operation can be
difficult, it is recommended to have
this check done at your dealer,
which can monitor the transmission
temperature. The transmission fluid
level increases with temperature. To
obtain a highly accurate fluid level
check, the transmission temperature
must be measured.
If it is decided to check the fluid
level, be sure to follow all the
instructions here, or a false reading
on the dipstick may occur.
Caution
Too much or too little fluid can
damage the transmission. Too
much can mean that some of the
fluid could come out and fall on
hot engine parts or exhaust
system parts, starting a fire. Too
little fluid could cause the
transmission to overheat. Be sure
to get an accurate reading if
checking the transmission fluid.
Page 223 of 343

GMC Savana Owner Manual (GMNA-Localizing-U.S./Canada-9159232) -
2016 - crc - 11/11/15
222 Vehicle Care
1. COLD Range
2. WARM Range
3. HOT Range
1. Flip the handle up, pull out thedipstick, and wipe it with a
clean rag or paper towel.
2. Push it back in all the way, wait three seconds, and pull it back
out again.
3. Check both sides of the dipstick, and read the lower
level. The fluid level must be in
the COLD (1) range for a cold
check, transmission
temperature 27 °C to 32 °C
(80 °F to 90 °F); between the
COLD (1) and HOT (3) range
for a WARM (2) check, 50 °C to
60 °C (122 °F to 140 °F); or in
the HOT (3) cross-hatched
range for a hot check, 71 °C to
93 °C (160 °F to 200 °F). Be sure to keep the dipstick
pointed down to get an
accurate reading.
4. If the fluid level is in the acceptable range, push the
dipstick back in all the way;
then flip the handle down to
lock the dipstick in place.
How to Add Automatic
Transmission Fluid
Refer to Recommended Fluids and
Lubricants 0302 to determine what
kind of transmission fluid to use.
1. WARM Range
2. HOT Range
Using a funnel, add fluid down the
transmission dipstick tube only after
checking the transmission fluid
while it is warm or hot. A cold check
is used only as a reference. If the
fluid level is low, add only enough of the proper fluid to bring the level up
to the middle of the WARM (1) or
HOT (2) range depending on the
ambient temperature and prior
driving conditions. Refer to
“How to
Check Automatic Transmission
Fluid” earlier in this section for
instructions on driving to achieve
warm or hot transmission fluid.
It does not take much fluid,
generally less than 0.5 L (1 pt). Do
not overfill.
Caution
Use of the incorrect automatic
transmission fluid may damage
the vehicle, and the damage may
not be covered by the vehicle
warranty. Always use the
automatic transmission fluid listed
in Recommended Fluids and
Lubricants 0302.
. After adding fluid, recheck the
fluid level as described under
“How to Check Automatic
Transmission Fluid,” earlier in
this section.
Page 224 of 343
GMC Savana Owner Manual (GMNA-Localizing-U.S./Canada-9159232) -
2016 - crc - 11/11/15
Vehicle Care 223
.When the correct fluid level is
obtained, push the dipstick back
in all the way; then flip the
handle down to lock the dipstick
in place.
Engine Air Cleaner/Filter
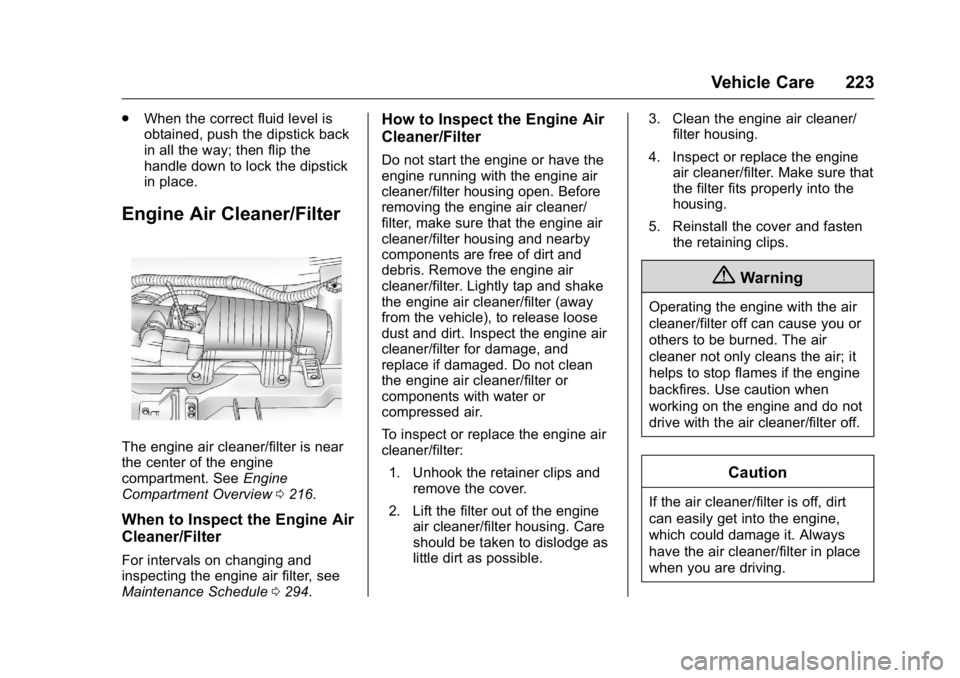
The engine air cleaner/filter is near
the center of the engine
compartment. See Engine
Compartment Overview 0216.
When to Inspect the Engine Air
Cleaner/Filter
For intervals on changing and
inspecting the engine air filter, see
Maintenance Schedule 0294.
How to Inspect the Engine Air
Cleaner/Filter
Do not start the engine or have the
engine running with the engine air
cleaner/filter housing open. Before
removing the engine air cleaner/
filter, make sure that the engine air
cleaner/filter housing and nearby
components are free of dirt and
debris. Remove the engine air
cleaner/filter. Lightly tap and shake
the engine air cleaner/filter (away
from the vehicle), to release loose
dust and dirt. Inspect the engine air
cleaner/filter for damage, and
replace if damaged. Do not clean
the engine air cleaner/filter or
components with water or
compressed air.
To inspect or replace the engine air
cleaner/filter:
1. Unhook the retainer clips and remove the cover.
2. Lift the filter out of the engine air cleaner/filter housing. Care
should be taken to dislodge as
little dirt as possible. 3. Clean the engine air cleaner/
filter housing.
4. Inspect or replace the engine air cleaner/filter. Make sure that
the filter fits properly into the
housing.
5. Reinstall the cover and fasten the retaining clips.
{Warning
Operating the engine with the air
cleaner/filter off can cause you or
others to be burned. The air
cleaner not only cleans the air; it
helps to stop flames if the engine
backfires. Use caution when
working on the engine and do not
drive with the air cleaner/filter off.
Caution
If the air cleaner/filter is off, dirt
can easily get into the engine,
which could damage it. Always
have the air cleaner/filter in place
when you are driving.
Page 227 of 343
GMC Savana Owner Manual (GMNA-Localizing-U.S./Canada-9159232) -
2016 - crc - 11/11/15
226 Vehicle Care
The coolant recovery tank cap has
this symbol on it.
When the engine is cold, the coolant
level should be at or above the
COLD FILL mark. If it is not, there
could be a leak in the cooling
system.
If the coolant is low, add the coolant
or take the vehicle to a dealer for
service.
How to Add Coolant to the
Recovery Tank for Gasoline
Engines
{Warning
You can be burned if you spill
coolant on hot engine parts.
Coolant contains ethylene glycol
and it will burn if the engine parts
are hot enough. Do not spill
coolant on a hot engine.
Caution
This vehicle has a specific
coolant fill procedure. Failure to
follow this procedure could cause
the engine to overheat and be
severely damaged.
If coolant is needed, add the proper
DEX-COOL coolant mixture at the
coolant recovery tank.
How to Add Coolant to the
Radiator
{Warning
Steam and scalding liquids from a
hot cooling system can blow out
and burn you badly. Never turn
the cap when the cooling system,
including the surge tank pressure
cap, is hot. Wait for the cooling
system and surge tank pressure
cap to cool. If coolant is needed, add the proper
mixture directly to the radiator, but
be sure the cooling system is cool
before this is done.
1. Remove the radiator pressure
cap when the cooling system,
including the radiator pressure
cap and upper radiator hose, is
no longer hot. Turn the
pressure cap slowly
counterclockwise until it first
stops. Do not press down while
turning the pressure cap.
If a hiss is heard, wait for that
to stop. A hiss means there is
still some pressure left.
2. Keep turning the pressure cap, but now push down as you turn
it. Remove the pressure cap.
Page 237 of 343

GMC Savana Owner Manual (GMNA-Localizing-U.S./Canada-9159232) -
2016 - crc - 11/11/15
236 Vehicle Care
If the vehicle starts in any other
position, contact your dealer for
service.
Automatic Transmission
Shift Lock Control
Function Check
{Warning
When you are doing this
inspection, the vehicle could
move suddenly. If the vehicle
moves, you or others could be
injured.
1. Before starting this check, be sure there is enough room
around the vehicle. It should be
parked on a level surface.
2. Apply the parking brake. Be ready to apply the regular
brake immediately if the vehicle
begins to move. 3. With the engine off, turn the
ignition on, but do not start the
engine. Without applying the
regular brake, try to move the
shift lever out of P (Park) with
normal effort. If the shift lever
moves out of P (Park), contact
your dealer for service.
Ignition Transmission
Lock Check
While parked and with the parking
brake set, try to turn the ignition to
LOCK/OFF in each shift lever
position.
.The ignition should turn to
LOCK/OFF only when the shift
lever is in P (Park).
. The ignition key should come
out only in LOCK/OFF.
Contact your dealer if service is
required.
Park Brake and P (Park)
Mechanism Check
{Warning
When you are doing this check,
the vehicle could begin to move.
You or others could be injured
and property could be damaged.
Make sure there is room in front
of the vehicle in case it begins to
roll. Be ready to apply the regular
brake at once should the vehicle
begin to move.
Park on a fairly steep hill, with the
vehicle facing downhill. Keeping
your foot on the regular brake, set
the parking brake.
. To check the parking brake's
holding ability: With the engine
running and the transmission in
N (Neutral), slowly remove foot
pressure from the regular brake
pedal. Do this until the vehicle is
held by the parking brake only.
Page 240 of 343
GMC Savana Owner Manual (GMNA-Localizing-U.S./Canada-9159232) -
2016 - crc - 11/11/15
Vehicle Care 239
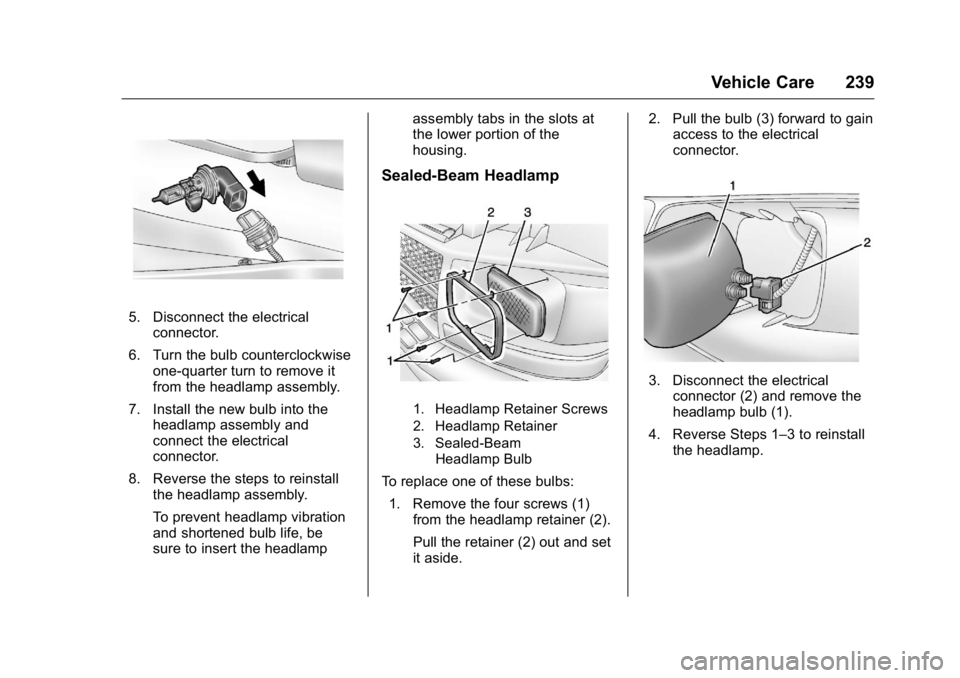
5. Disconnect the electricalconnector.
6. Turn the bulb counterclockwise one-quarter turn to remove it
from the headlamp assembly.
7. Install the new bulb into the headlamp assembly and
connect the electrical
connector.
8. Reverse the steps to reinstall the headlamp assembly.
To prevent headlamp vibration
and shortened bulb life, be
sure to insert the headlamp assembly tabs in the slots at
the lower portion of the
housing.
Sealed-Beam Headlamp
1. Headlamp Retainer Screws
2. Headlamp Retainer
3. Sealed-Beam
Headlamp Bulb
To replace one of these bulbs:
1. Remove the four screws (1) from the headlamp retainer (2).
Pull the retainer (2) out and set
it aside. 2. Pull the bulb (3) forward to gain
access to the electrical
connector.
3. Disconnect the electrical
connector (2) and remove the
headlamp bulb (1).
4. Reverse Steps 1–3 to reinstall the headlamp.
Page 241 of 343
GMC Savana Owner Manual (GMNA-Localizing-U.S./Canada-9159232) -
2016 - crc - 11/11/15
240 Vehicle Care
Front Turn Signal,
Sidemarker, and Parking
Lamps
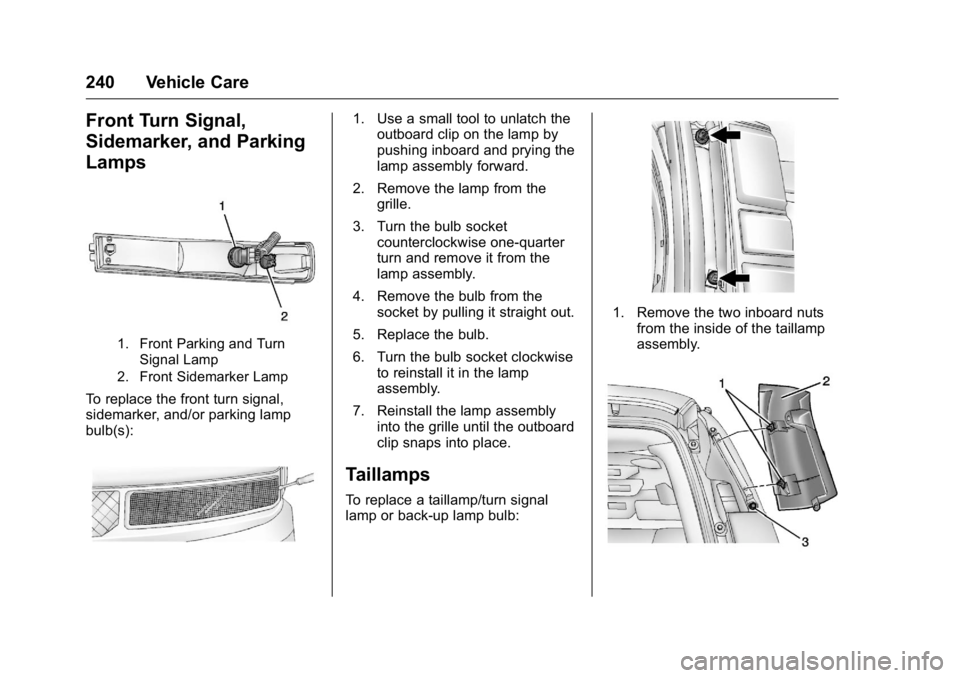
1. Front Parking and TurnSignal Lamp
2. Front Sidemarker Lamp
To replace the front turn signal,
sidemarker, and/or parking lamp
bulb(s):
1. Use a small tool to unlatch the outboard clip on the lamp by
pushing inboard and prying the
lamp assembly forward.
2. Remove the lamp from the grille.
3. Turn the bulb socket counterclockwise one-quarter
turn and remove it from the
lamp assembly.
4. Remove the bulb from the socket by pulling it straight out.
5. Replace the bulb.
6. Turn the bulb socket clockwise to reinstall it in the lamp
assembly.
7. Reinstall the lamp assembly into the grille until the outboard
clip snaps into place.
Taillamps
To replace a taillamp/turn signal
lamp or back-up lamp bulb:
1. Remove the two inboard nutsfrom the inside of the taillamp
assembly.
Page 242 of 343
GMC Savana Owner Manual (GMNA-Localizing-U.S./Canada-9159232) -
2016 - crc - 11/11/15
Vehicle Care 241
2. The third nut (3) is under theapplique piece (2) above the
lamp. Remove the two inboard
applique nuts. Pull the
applique (2) straight rearward
slightly to clear the studs. Then
rotate the applique (2) just far
enough to gain access to the
outer push pins (1).
3. Carefully disconnect the push pins (1) from the applique
bracket.
4. Remove the third nut (3) from the upper outboard side of
the lamp.
5. Remove the taillamp assembly from the vehicle.
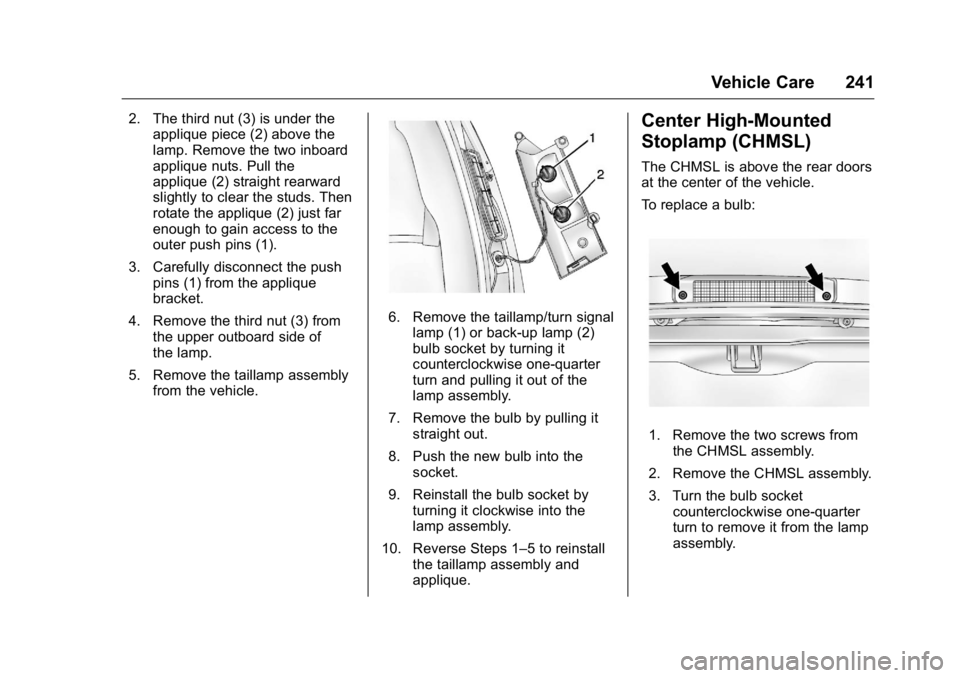
6. Remove the taillamp/turn signal
lamp (1) or back-up lamp (2)
bulb socket by turning it
counterclockwise one-quarter
turn and pulling it out of the
lamp assembly.
7. Remove the bulb by pulling it straight out.
8. Push the new bulb into the socket.
9. Reinstall the bulb socket by turning it clockwise into the
lamp assembly.
10. Reverse Steps 1–5 to reinstall the taillamp assembly and
applique.
Center High-Mounted
Stoplamp (CHMSL)
The CHMSL is above the rear doors
at the center of the vehicle.
To replace a bulb:
1. Remove the two screws fromthe CHMSL assembly.
2. Remove the CHMSL assembly.
3. Turn the bulb socket counterclockwise one-quarter
turn to remove it from the lamp
assembly.