2016 FORD SUPER DUTY warning
[x] Cancel search: warningPage 243 of 510
At this time, you may notice your engine
coolant temperature gauge needle move
toward the H and the POWER REDUCED
TO LOWER TEMP message may appear
in the information display.
You may notice a reduction in the vehicle
’s
speed caused by reduced engine power.
In order to manage the engine fluid
temperatures, your vehicle may enter this
mode if certain high-temperature and
high-load conditions take place. The
amount of speed reduction will depend on
the vehicle loading, towing, grade, ambient
temperature, and other factors. If this
occurs, there is no need to pull off the road.
The vehicle can continue to be driven while
this message is active.
The air conditioning may turn on and off
during severe operating conditions to
protect the engine from overheating. When
the engine coolant temperature decreases
to a more normal operating temperature,
the air conditioning will turn on once again.
If the engine coolant temperature gauge
moves fully into the red (hot) area, or if the
coolant temperature warning or service
engine soon messages appear in your
information display:
1. Stop your vehicle as soon as safely possible and shift the transmission into
park (P).
2. Leave the engine running until the coolant temperature gauge needle
moves away from the H range. After
several minutes, if this does not
happen, follow the remaining steps.
3. Switch the engine off and wait for it to
cool before checking the coolant level.
4. If the coolant level is normal, you may restart your engine and continue on. 5. If the coolant is low, add coolant,
restart the engine and take your vehicle
to an authorized dealer. See Adding
engine coolant in this chapter for more
information. Refer to fail-safe cooling
for additional information.
AUTOMATIC TRANSMISSION
FLUID CHECK
Have an authorized dealer check and
change the transmission fluid and filter at
the correct service interval. See
Scheduled Maintenance (page 456).
Do not use supplemental transmission
fluid additives, treatments or cleaning
agents. The use of these materials may
affect transmission operation and result
in damage to internal transmission
components.
Checking Automatic Transmission
Fluid
For scheduled intervals of the fluid checks
and changes, See
Scheduled
Maintenance (page 456). Your
transmission does not consume fluid.
However, the fluid level should be checked
if the transmission is not working properly,
i.e., if the transmission slips or shifts slowly
or if you notice some sign of fluid leakage.
Automatic transmission fluid expands
when warmed. To obtain an accurate fluid
check, drive the vehicle until it is at normal
operating temperature (approximately
19 mi (30 km)
). Verify that the
transmission fluid temperature gauge,
located on the instrument cluster, is within
normal range.
1. Drive the vehicle
19 mi (30 km)until it
reaches normal operating temperature.
2. Park the vehicle on a level surface and
engage the parking brake.
240
Super Duty (TFA) Canada/United States of America, enUSA, Second Printing Maintenance
Page 247 of 510
BRAKE FLUID CHECK
Fluid levels between the MIN and MAX
lines are within the normal operating range;
there is no need to add fluid. If the fluid
levels are outside of the normal operating
range, the performance of the system
could be compromised; seek service from
your authorized dealer immediately.
POWER STEERING FLUID
CHECK
Check the power steering fluid. See
Scheduled Maintenance
(page 456). If
adding fluid is necessary, use only
MERCON LV ATF
Note: This procedure is for vehicles with
gasoline engines. Vehicles with diesel
engines are similar. See Under Hood
Overview in your diesel supplement.
Check the fluid level when it is at ambient
temperature.
1. Check the fluid level in the reservoir. It should be between the MIN and MAX
range. Do not add fluid if the level is
within this range.
2. If the fluid level is low, add fluid to bring
the fluid level up to between the MIN
and MAX range.
3. Switch the engine on.
4. While the engine idles, turn the steering
wheel left and right several times.
5. Switch the engine off. 6. Recheck the fluid level in the reservoir.
Do not add fluid if the level is between
the MIN and MAX range.
7. If the fluid is low, add fluid in small amounts, continuously checking the
level until it is between the MIN and
MAX range. For proper fluid type, See
Capacities and Specifications (page
303). Be sure to put the cap back on the
reservoir.
WASHER FLUID CHECK WARNING
If you operate your vehicle in
temperatures below 40°F (5°C), use
washer fluid with antifreeze
protection. Failure to use washer fluid with
antifreeze protection in cold weather could
result in impaired windshield vision and
increase the risk of injury or accident. Add fluid to fill the reservoir if the level is
low. Only use a washer fluid that meets
Ford specifications. See
Capacities and
Specifications (page 303).
State or local regulations on volatile
organic compounds may restrict the use
of methanol, a common windshield washer
antifreeze additive. Washer fluids
containing non-methanol antifreeze
agents should be used only if they provide
cold weather protection without damaging
the vehicle ’s paint finish, wiper blades or
washer system.
FUEL FILTER
Your vehicle is equipped with a lifetime
fuel filter that is integrated with the fuel
tank. Regular maintenance or replacement
is not needed.
244
Super Duty (TFA) Canada/United States of America, enUSA, Second Printing Maintenance
Page 248 of 510
CHANGING THE 12V BATTERY
WARNINGS
This vehicle may be equipped with
more than one battery, removal of
cable from only one battery does not
disconnect the vehicle electrical system.
Be sure to disconnect cables from all
batteries when disconnecting power.
Failure to do so may cause serious
personal injury or property damage. Batteries normally produce explosive
gases which can cause personal
injury. Therefore, do not allow
flames, sparks or lighted substances to
come near the battery. When working near
the battery, always shield your face and
protect your eyes. Always provide proper
ventilation. When lifting a plastic-cased battery,
excessive pressure on the end walls
could cause acid to flow through the
vent caps, resulting in personal injury and
damage to the vehicle or battery. Lift the
battery with a battery carrier or with your
hands on opposite corners. Keep batteries out of reach of
children. Batteries contain sulfuric
acid. Avoid contact with skin, eyes or
clothing. Shield your eyes when working
near the battery to protect against possible
splashing of acid solution. In case of acid
contact with skin or eyes, flush
immediately with water for a minimum of
15 minutes and get prompt medical
attention. If acid is swallowed, call a
physician immediately. Note:
If your battery has a cover/shield,
make sure it is reinstalled after the battery
has been cleaned or replaced.
Note: Battery posts, terminals and related
accessories contain lead and lead
compounds. Wash hands after handling. Note:
Electrical or electronic accessories
or components added to the vehicle by the
dealer or the owner may adversely affect
battery performance and durability.
Your vehicle is equipped with a Motorcraft
maintenance-free battery which normally
does not require additional water during
its life of service.
For longer, trouble-free operation, keep the
top of the battery clean and dry. Also,
make certain the battery cables are always
tightly fastened to the battery terminals.
If you see any corrosion on the battery or
terminals, remove the cables from the
terminals and clean with a wire brush. You
can neutralize the acid with a solution of
baking soda and water.
It is recommended that the negative
battery cable terminal be disconnected
from the battery if you plan to store your
vehicle for an extended period of time.
Because your vehicle ’s engine is
electronically controlled by a computer,
some control conditions are maintained
by power from the battery. When the
battery is disconnected or a new battery
is installed, the engine must relearn its idle
and fuel trim strategy for optimum
driveability and performance. Flexible fuel
vehicles (FFV) must also relearn the
ethanol content of the fuel for optimum
driveability and performance. To begin this
process
1. With the vehicle at a complete stop, set the parking brake.
2. Put the gearshift in P, turn off all
accessories.
3. Start the engine. Run the engine until it reaches normal operating
temperature.
4. Allow the engine to idle for at least one
minute.
5. Turn the A/C on and allow the engine to idle for at least one minute.
245
Super Duty (TFA) Canada/United States of America, enUSA, Second Printing Maintenance
Page 252 of 510
REMOVING A HEADLAMP
WARNING
Handle a halogen headlamp bulb
carefully and keep out of children
’s
reach. Grasp the bulb only by its
plastic base and do not touch the glass.
The oil from your hand could cause the
bulb to break the next time the headlamps
are operated. Note:
If the bulb is accidentally touched, it
should be cleaned with rubbing alcohol
before being used.
Note: This procedure is for replacing the
headlamps, park lamps or turn lamps.
1. Make sure the headlamp control is in the off position and open the hood. 2.
Using masking tape or a marker, make
an alignment mark between one of the
grille brackets and the vehicle radiator
support to ensure correct grille
alignment during the installation
procedure. Do not scratch the black
coating from the radiator support.
3. Remove the two grille to headlamp assembly push pins and the four bolts
attaching the top of the grille to the
radiator support.
4. Pull the top of the grille forward to gain
access to the lower grille spring clips. 5. Depress the spring clips through the
lower inner grille access openings using
a flat head screwdriver.
6. Pull the grill straight out to remove. 7. Remove the four bolts from the
headlamp assembly.
8. Pull the assembly straight out disengaging one snap clip from the
fender.
9. Disconnect the electrical connector by
squeezing the release tab and pushing
the connector forward, then pulling it
rearward.
CHANGING A BULB WARNINGS
Switch all of the lamps and the
ignition off. Failure to follow this
warning could result in serious
personal injury. Bulbs become hot when in use. Let
them cool down before you remove
them.
Use the correct specification bulb. See
Bulb Specification Chart (page 252).
Install in the reverse order unless otherwise
stated.
249
Super Duty (TFA) Canada/United States of America, enUSA, Second Printing MaintenanceE163821 E163822
Page 257 of 510
CHANGING THE ENGINE AIR
FILTER
WARNING
To reduce the risk of vehicle damage
and personal burn injuries, do not
start your engine with the air cleaner
removed and do not remove it while the
engine is running. Note:
Failure to use the correct air filter
element may result in severe engine
damage. Resulting component damage
may not be covered by the vehicle Warranty.
When changing the air filter element, use
only the air filter element listed. See
Motorcraft Parts (page 304).
Change the air filter element at the correct
interval. See
Scheduled Maintenance
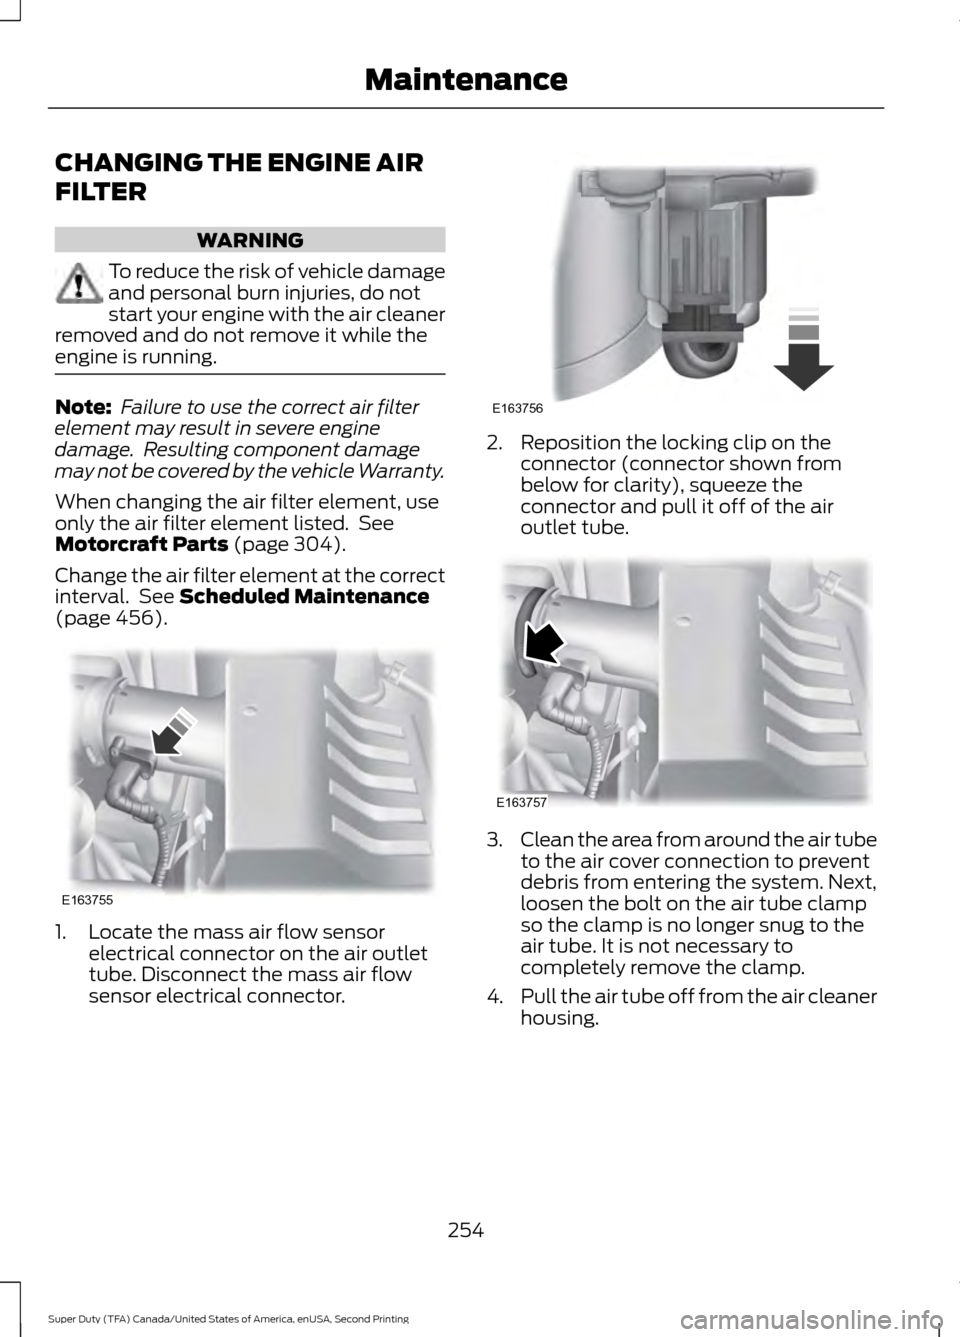
(page 456). 1. Locate the mass air flow sensor
electrical connector on the air outlet
tube. Disconnect the mass air flow
sensor electrical connector. 2. Reposition the locking clip on the
connector (connector shown from
below for clarity), squeeze the
connector and pull it off of the air
outlet tube. 3.
Clean the area from around the air tube
to the air cover connection to prevent
debris from entering the system. Next,
loosen the bolt on the air tube clamp
so the clamp is no longer snug to the
air tube. It is not necessary to
completely remove the clamp.
4. Pull the air tube off from the air cleaner
housing.
254
Super Duty (TFA) Canada/United States of America, enUSA, Second Printing MaintenanceE163755 E163756 E163757
Page 262 of 510
CLEANING THE INTERIOR
WARNINGS
Do not use cleaning solvents, bleach
or dye on the vehicle
’s safety belts,
as these actions may weaken the
belt webbing. On vehicles equipped with
seat-mounted airbags, do not use
chemical solvents or strong
detergents. Such products could
contaminate the side airbag system and
affect performance of the side airbag in a
collision. For fabric, carpets, cloth seats, safety belts
and seats equipped with side airbags:
•
Remove dust and loose dirt with a
vacuum cleaner.
• Remove light stains and soil with
Motorcraft Professional Strength
Carpet & Upholstery Cleaner.
• If grease or tar is present on the
material, spot-clean the area first with
Motorcraft Spot and Stain Remover. In
Canada, use Motorcraft Multi-Purpose
Cleaner.
• If a ring forms on the fabric after spot
cleaning, clean the entire area
immediately (but do not oversaturate)
or the ring will set.
• Do not use household cleaning
products or glass cleaners, which can
stain and discolor the fabric and affect
the flame retardant abilities of the seat
materials. CLEANING THE INSTRUMENT
PANEL AND INSTRUMENT
CLUSTER LENS WARNING
Do not use chemical solvents or
strong detergents when cleaning the
steering wheel or instrument panel
to avoid contamination of the airbag
system. Note:
Follow the same procedure as
cleaning leather seats for cleaning leather
instrument panels and leather interior trim
surfaces. See Cleaning Leather Seats
(page 260).
Clean the instrument panel and cluster
lens with a clean, damp and soft cloth,
then use a clean, dry and soft cloth to dry
these areas.
• Avoid cleaners or polishes that increase
the gloss of the upper portion of the
instrument panel. The dull finish in this
area helps protect you from
undesirable windshield reflection.
• Do not use any household cleaning
products or glass cleaners as these
may damage the finish of the
instrument panel, interior trim and
cluster lens.
• Wash or wipe your hands clean if you
have been in contact with certain
products such as insect repellent and
suntan lotion to avoid possible damage
to the interior painted surfaces.
• Do not allow air fresheners and hand
sanitizers to spill onto interior surfaces.
If a spill occurs, wipe off immediately.
Your warranty may not cover these
damages.
If a staining liquid like coffee or juice has
been spilled on the instrument panel or on
interior trim surfaces:
259
Super Duty (TFA) Canada/United States of America, enUSA, Second Printing Vehicle Care
Page 267 of 510
GENERAL INFORMATION
Use only approved wheel and tire sizes,
using other sizes could damage your
vehicle. If you change the diameter of the
tires from that fitted at the factory, the
speedometer may not display the correct
speed. Take your vehicle to an authorized
Ford dealer to have the system
reprogrammed. If you intend to change the
size of the wheels from that fitted by the
manufacturer, you can check the suitability
with an authorized dealer.
Additional information related to the
functionality and maintenance of your tires
can be found later in this chapter. See Tire
Care (page 267).
The Ford recommended tire inflation
pressures can be found on the Tire Label,
which is located on the B-pillar or the edge
of the driver's door. This information can
also be found on the Safety Compliance
Certification Label (affixed to either the
door hinge pillar, door-latch post, or the
door edge that meets the door last post;
next to the driver ’s seating position).
Ford strongly recommends maintaining
these tire pressures at all times. Failure to
follow the tire pressure recommendations
can cause uneven treadwear patterns,
reduced fuel economy, and adversely
affect the way your vehicle handles.
Note: Check and set the tire pressure at the
ambient temperature in which you are
intending to drive your vehicle and when the
tires are cold.
Note: Check your tire pressures at least
once per month.
Set the pressure for your spare tire to the
highest value given for your vehicle and tire
size combination (if equipped). Notice to utility vehicle and truck
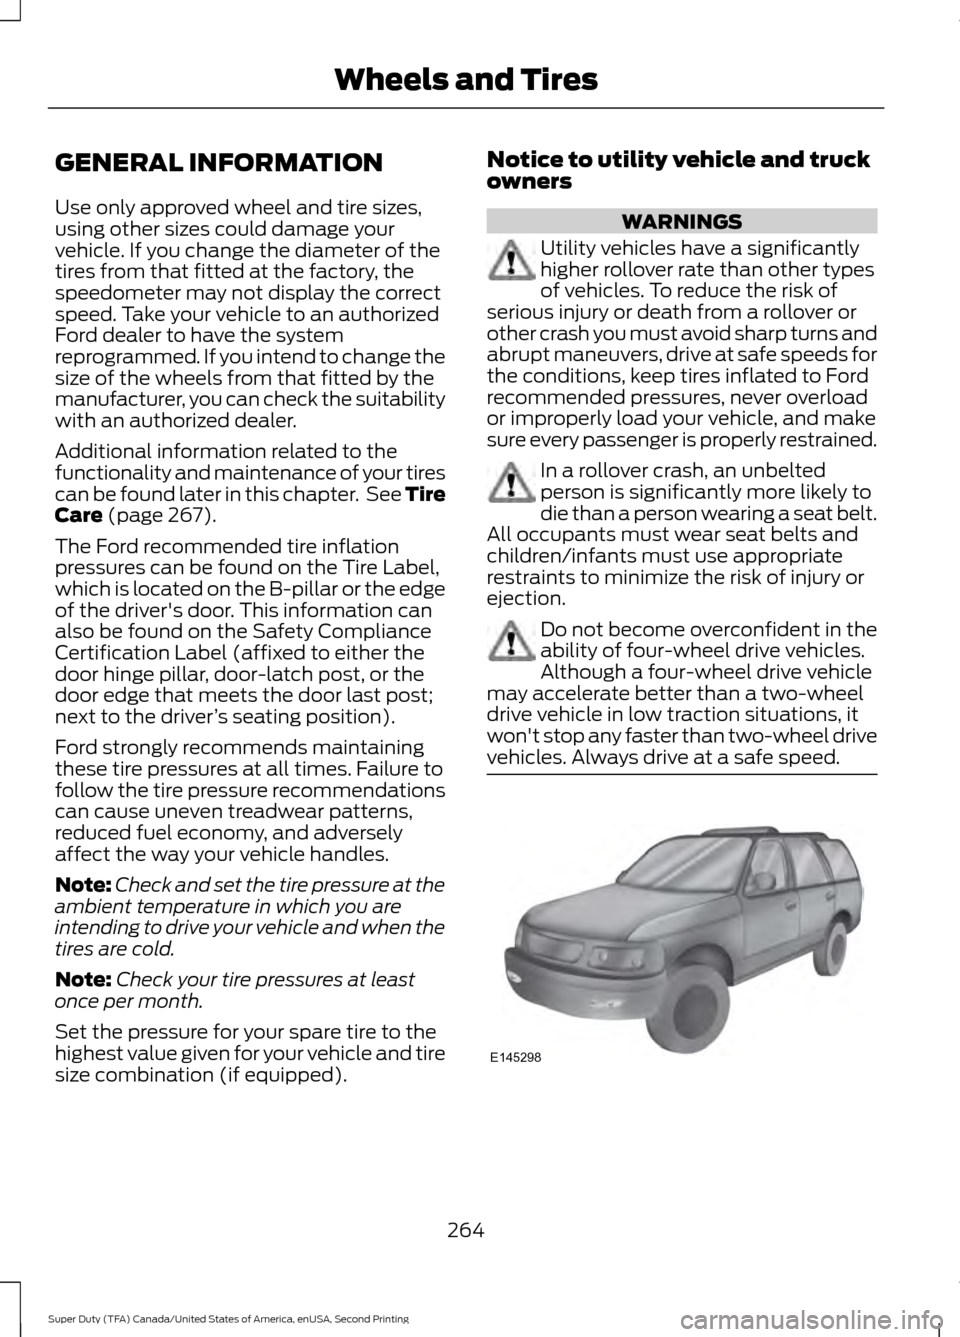
owners WARNINGS
Utility vehicles have a significantly
higher rollover rate than other types
of vehicles. To reduce the risk of
serious injury or death from a rollover or
other crash you must avoid sharp turns and
abrupt maneuvers, drive at safe speeds for
the conditions, keep tires inflated to Ford
recommended pressures, never overload
or improperly load your vehicle, and make
sure every passenger is properly restrained. In a rollover crash, an unbelted
person is significantly more likely to
die than a person wearing a seat belt.
All occupants must wear seat belts and
children/infants must use appropriate
restraints to minimize the risk of injury or
ejection. Do not become overconfident in the
ability of four-wheel drive vehicles.
Although a four-wheel drive vehicle
may accelerate better than a two-wheel
drive vehicle in low traction situations, it
won't stop any faster than two-wheel drive
vehicles. Always drive at a safe speed. 264
Super Duty (TFA) Canada/United States of America, enUSA, Second Printing Wheels and TiresE145298
Page 268 of 510
Utility vehicles and trucks handle
differently than passenger cars in the
various driving conditions that are
encountered on streets, highways and
off-road. Utility vehicles and trucks are not
designed for cornering at speeds as high
as passenger cars any more than low-slung
sports cars are designed to perform
satisfactorily under off-road conditions.
Study your owner's manual and any
supplements for specific information about
equipment features, instructions for safe
driving and additional precautions to
reduce the risk of an accident or serious
injury.
Four-wheel drive system (If Equipped)
WARNING
Do not become overconfident in the
ability of four-wheel drive vehicles.
Although a four-wheel drive vehicle
may accelerate better than a two-wheel
drive vehicle in low traction situations, it
won't stop any faster than two-wheel drive
vehicles. Always drive at a safe speed. A vehicle equipped with four-wheel drive
(when selected) has the ability to use all
four wheels to power itself. This increases
traction which may enable you to safely
drive over terrain and road conditions that
a conventional two-wheel drive vehicle
cannot.
Power is supplied to all four wheels
through a transfer case or power transfer
unit. Four-wheel drive vehicles allow you
to select different modes as necessary. For
information on transfer case operation and
shifting procedures, See
Four-Wheel
Drive (page 156). For information on
transfer case maintenance, See
Maintenance
(page 232). You should
become thoroughly familiar with this
information before you operate your
vehicle. On some four-wheel drive vehicles, the
initial shift from two-wheel to four-wheel
drive while the vehicle is moving can cause
a momentary clunk and ratcheting sound.
These sounds are normal and are not
cause for concern.
For four-wheel drive vehicles, a spare tire
of a different size other than the tire
provided should never be used. A dissimilar
spare tire size (other than the spare tire
provided) or major dissimilar tire sized
between the front and rear axles could
cause the four-wheel drive system to stop
functioning and default to front-wheel
drive. See Using Four-Wheel Drive (page
156
).
How your vehicle differs from
other vehicles
Sport utility vehicles and trucks can differ
from some other vehicles in a few
noticeable ways. Your vehicle may be:
265
Super Duty (TFA) Canada/United States of America, enUSA, Second Printing Wheels and Tires