2016 FORD POLICE INTERCEPTOR UTILITY brake
[x] Cancel search: brakePage 123 of 350

PARKING BRAKE
WARNING
Always set the parking brake fully
and make sure the transmission is
locked in park (P). Failure to set the
parking brake and engage park could result
in vehicle roll-away, property damage or
bodily injury. To set the parking brake, press the parking
brake pedal down to its fullest extent. The
brake warning lamp in the instrument
cluster will illuminate and remains
illuminated until the parking brake is
released.
To release the parking brake, press the
parking brake pedal down again.
If you are parking your vehicle on a grade
or with a trailer, press and hold the brake
pedal down, then set the parking brake.
There may be a little vehicle movement as
the parking brake sets to hold the vehicle's
weight. This is normal and should be no
reason for concern. If needed, press and
hold the service brake pedal down, then
try reapplying the parking brake. Chock the
wheels if required. If the parking brake
cannot hold the weight of the vehicle, the
parking brake may need to be serviced or
the vehicle may be overloaded.
120
Explorer (TUB), enUSA, Edition date: 03/2015, First Printing Brakes
Page 124 of 350

PRINCIPLE OF OPERATION
The traction control system helps avoid
drive wheel spin and loss of traction.
If your vehicle begins to slide, the system
applies the brakes to individual wheels
and, when needed, reduces engine power
at the same time. If the wheels spin when
accelerating on slippery or loose surfaces,
the system reduces engine power in order
to increase traction.
USING TRACTION CONTROL
WARNING
The stability and traction control
light illuminates steadily if the
system detects a failure. Make sure
you did not manually disable the traction
control system using the information
display controls or the switch. If the
stability control and traction control light
is still illuminating steadily, have the
system serviced by an authorized dealer
immediately. Operating your vehicle with
the traction control disabled could lead to
an increased risk of loss of vehicle control,
vehicle rollover, personal injury and death. The system automatically turns on each
time you switch the ignition on.
If your vehicle is stuck in mud or snow,
switching traction control off may be
beneficial as this allows the wheels to spin.
Note:
When you switch traction control off,
stability control remains fully active.
Switching the System Off
When you switch the system off or on, a
message appears in the information
display showing system status.
You can switch the system off by either
using the information display controls or
the switch. Using the Information Display
Controls
You can switch this feature off or on in the
information display. See General
Information (page 73).
Using a Switch
(If Equipped)
Use the traction control switch on the
instrument panel to switch the system off
or on.
The switch illuminates when traction
control is off.
System Indicator Lights and
Messages The stability and traction control
light temporarily illuminates on
engine start-up and flashes
when a driving condition activates either
of the systems. The stability and traction control
off light temporarily illuminates
on engine start-up and stays on:
• When you switch the traction control
system off.
• If a problem occurs in either of the
systems.
121
Explorer (TUB), enUSA, Edition date: 03/2015, First Printing Traction ControlE138639
Page 125 of 350

PRINCIPLE OF OPERATION
WARNINGS
Vehicle modifications involving
braking system, aftermarket roof
racks, suspension, steering system,
tire construction and wheel and tire size
may change the handling characteristics
of your vehicle and may adversely affect
the performance of the electronic stability
control system. In addition, installing any
stereo loudspeakers may interfere with
and adversely affect the electronic stability
control system. Install any aftermarket
stereo loudspeaker as far as possible from
the front center console, the tunnel, and
the front seats in order to minimize the risk
of interfering with the electronic stability
control sensors. Reducing the
effectiveness of the electronic stability
control system could lead to an increased
risk of loss of vehicle control, vehicle
rollover, personal injury and death. Remember that even advanced
technology cannot defy the laws of
physics. It’
s always possible to lose
control of a vehicle due to inappropriate
driver input for the conditions. Aggressive
driving on any road condition can cause
you to lose control of your vehicle
increasing the risk of personal injury or
property damage. Activation of the
electronic stability control system is an
indication that at least some of the tires
have exceeded their ability to grip the road;
this could reduce the operator ’s ability to
control the vehicle potentially resulting in
a loss of vehicle control, vehicle rollover,
personal injury and death. If your electronic
stability control system activates, SLOW
DOWN. The system automatically turns on each
time you switch the ignition on. If a driving condition activates either the
stability control or the traction control
system you may experience the following
conditions:
•
The stability and traction control light
flashes.
• Your vehicle slows down.
• Reduced engine power.
• A vibration in the brake pedal.
• The brake pedal is stiffer than usual.
• If the driving condition is severe and
your foot is not on the brake, the brake
pedal may move as the systems
applies higher brake forces.
The stability control system has several
features built into it to help you maintain
control of your vehicle:
Electronic Stability Control
The system enhances your vehicle ’s ability
to prevent skids or lateral slides by
applying brakes to one or more of the
wheels individually and, if necessary,
reducing engine power.
Roll Stability Control
The system enhances your vehicle ’s ability
to prevent rollovers by detecting your
vehicle ’s roll motion and the rate at which
it changes by applying the brakes to one
or more wheels individually.
Traction Control
The system enhances your vehicle ’s ability
to maintain traction of the wheels by
detecting and controlling wheel spin. See
Using Traction Control (page 121).
122
Explorer (TUB), enUSA, Edition date: 03/2015, First Printing Stability Control
Page 127 of 350

PRINCIPLE OF OPERATION
WARNINGS
To help avoid personal injury, please
read and understand the limitations
of the system as contained in this
section. Sensing is only an aid for some
(generally large and fixed) objects when
moving on a flat surface at parking speeds.
Certain objects with surfaces that absorb
ultrasonic waves, surrounding vehicle's
parking aid systems, traffic control
systems, fluorescent lamps, inclement
weather, air brakes, and external motors
and fans may also affect the function of
the sensing system; this may include
reduced performance or a false activation. To help avoid personal injury, always
use caution when in reverse (R) and
when using the sensing system.
This system is not designed to
prevent contact with small or moving
objects. The system is designed to
provide a warning to assist the driver in
detecting large stationary objects to avoid
damaging your vehicle. The system may
not detect smaller objects, particularly
those close to the ground. Certain add-on devices such as large
trailer hitches, bike or surfboard racks
and any device that may block the
normal detection zone of the system, may
create false beeps. Note:
Keep the sensors, located on the
bumper or fascia, free from snow, ice and
large accumulations of dirt. If the sensors
are covered, the system ’s accuracy can be
affected. Do not clean the sensors with
sharp objects.
Note: If your vehicle sustains damage to
the bumper or fascia, leaving it misaligned
or bent, the sensing zone may be altered
causing inaccurate measurement of
obstacles or false alarms. Note:
The sensing system cannot be turned
off when a MyKey is present.
Note: If you attach certain add-on devices
such as a trailer or bike rack, the rear sensing
system may detect that add-on device and
therefore provide warnings. It is suggested
that you disable the rear sensing system
when you attach an add-on device to your
vehicle to prevent these warnings.
The sensing system warns the driver of
obstacles within a certain range of your
vehicle. The system turns on automatically
whenever you switch the ignition on.
The system can be switched off through
the information display menu or from the
pop-up message that appears once you
shift the transmission into reverse (R). See
(page 73).
Note: On vehicles with front parking aid you
can use the parking aid switch to switch the
system off.
If a fault is present in the system, a warning
message appears in the information
display. See
Information Messages
(page 76).
REAR PARKING AID
(If Equipped)
The rear sensors are only active when the
transmission is in reverse (R). As your
vehicle moves closer to the obstacle, the
rate of the audible warning increases.
When the obstacle is less than
12 in
(30 cm) away, the warning sounds
continuously. If the system detects a
stationary or receding object farther than
12 in (30 cm)
from the corners of the
bumper, the tone sounds for only three
seconds. Once the system detects an
object approaching, the warning sounds
again.
124
Explorer (TUB), enUSA, Edition date: 03/2015, First Printing Parking Aids
Page 132 of 350
PRINCIPLE OF OPERATION
Cruise control lets you maintain a set
speed without keeping your foot on the
accelerator pedal. You can use cruise
control when your vehicle speed is greater
than 20 mph (30 km/h).
USING CRUISE CONTROL WARNINGS
Do not use cruise control on winding
roads, in heavy traffic or when the
road surface is slippery. This could
result in loss of vehicle control, serious
injury or death. When you are going downhill, your
vehicle speed may increase above
the set speed. The system will not
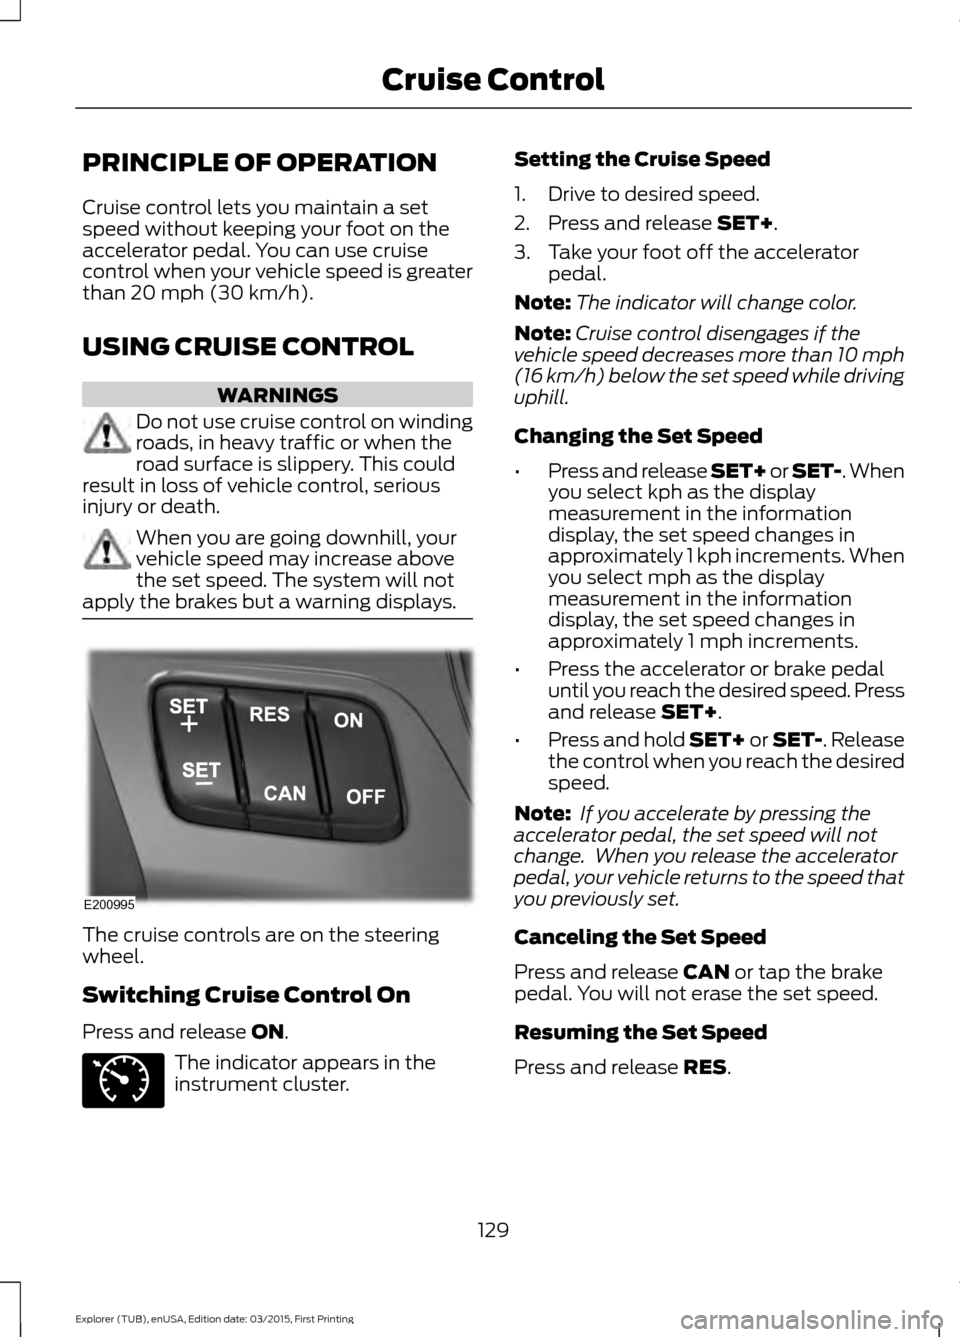
apply the brakes but a warning displays. The cruise controls are on the steering
wheel.
Switching Cruise Control On
Press and release
ON.
The indicator appears in the
instrument cluster. Setting the Cruise Speed
1. Drive to desired speed.
2. Press and release
SET+.
3. Take your foot off the accelerator pedal.
Note: The indicator will change color.
Note: Cruise control disengages if the
vehicle speed decreases more than 10 mph
(16 km/h) below the set speed while driving
uphill.
Changing the Set Speed
• Press and release SET+ or SET-. When
you select kph as the display
measurement in the information
display, the set speed changes in
approximately 1 kph increments. When
you select mph as the display
measurement in the information
display, the set speed changes in
approximately 1 mph increments.
• Press the accelerator or brake pedal
until you reach the desired speed. Press
and release
SET+.
• Press and hold SET+ or SET-. Release
the control when you reach the desired
speed.
Note: If you accelerate by pressing the
accelerator pedal, the set speed will not
change. When you release the accelerator
pedal, your vehicle returns to the speed that
you previously set.
Canceling the Set Speed
Press and release
CAN or tap the brake
pedal. You will not erase the set speed.
Resuming the Set Speed
Press and release
RES.
129
Explorer (TUB), enUSA, Edition date: 03/2015, First Printing Cruise ControlE200995 E71340
Page 139 of 350

Note:
The cross traffic alert system always
switches on whenever the ignition is
switched on and ready to provide
appropriate alerts when the transmission is
in reverse (R). Cross Traffic Alert will not
remember the last selected on or off setting.
You can have cross traffic alert switched
off permanently at an authorized dealer.
Once switched off permanently, the
system can only be switched back on at
an authorized dealer.
STEERING
Electric Power Steering WARNINGS
The electric power steering system
has diagnostic checks that
continuously monitor the system. If
a fault is detected, a message displays in
the information display. Stop your vehicle
as soon as it is safe to do so. Switch the
ignition off. After at least 10 seconds,
switch the ignition on and watch the
information display for a steering system
warning message. If a steering system
warning message returns, have the system
checked by an authorized dealer. If the system detects an error, you
may not feel a difference in the
steering, however a serious condition
may exist. Obtain immediate service from
an authorized dealer, failure to do so may
result in loss of steering control. Your vehicle has an electric power steering
system. There is no fluid reservoir. No
maintenance is required.
If your vehicle loses electrical power while
you are driving, electric power steering
assistance is lost. The steering system still
operates and you can steer your vehicle
manually. Manually steering your vehicle
requires more effort. Extreme continuous steering may increase
the effort required for you to steer your
vehicle. This increased effort prevents
overheating and permanent damage to
the steering system. You do not lose the
ability to steer your vehicle manually.
Typical steering and driving maneuvers
allow the system to cool and return to
normal operation.
Steering Tips
If the steering wanders or pulls, check for:
•
Correct tire pressures.
• Uneven tire wear.
• Loose or worn suspension
components.
• Loose or worn steering components.
• Improper vehicle alignment.
Note: A high crown in the road or high
crosswinds may also make the steering
seem to wander or pull.
Adaptive Learning
The electronic power steering system
adaptive learning helps correct road
irregularities and improves overall handling
and steering feel. It communicates with
the brake system to help operate
advanced stability control and accident
avoidance systems. Additionally, whenever
the battery is disconnected or a new
battery installed, you must drive your
vehicle a short distance before the system
relearns the strategy and reactivates all
systems.
136
Explorer (TUB), enUSA, Edition date: 03/2015, First Printing Driving Aids
Page 145 of 350
WARNING
Exceeding the Safety
Compliance Certification
Label vehicle weight rating limits
could result in substandard
vehicle handling or performance,
engine, transmission and/or
structural damage, serious
damage to the vehicle, loss of
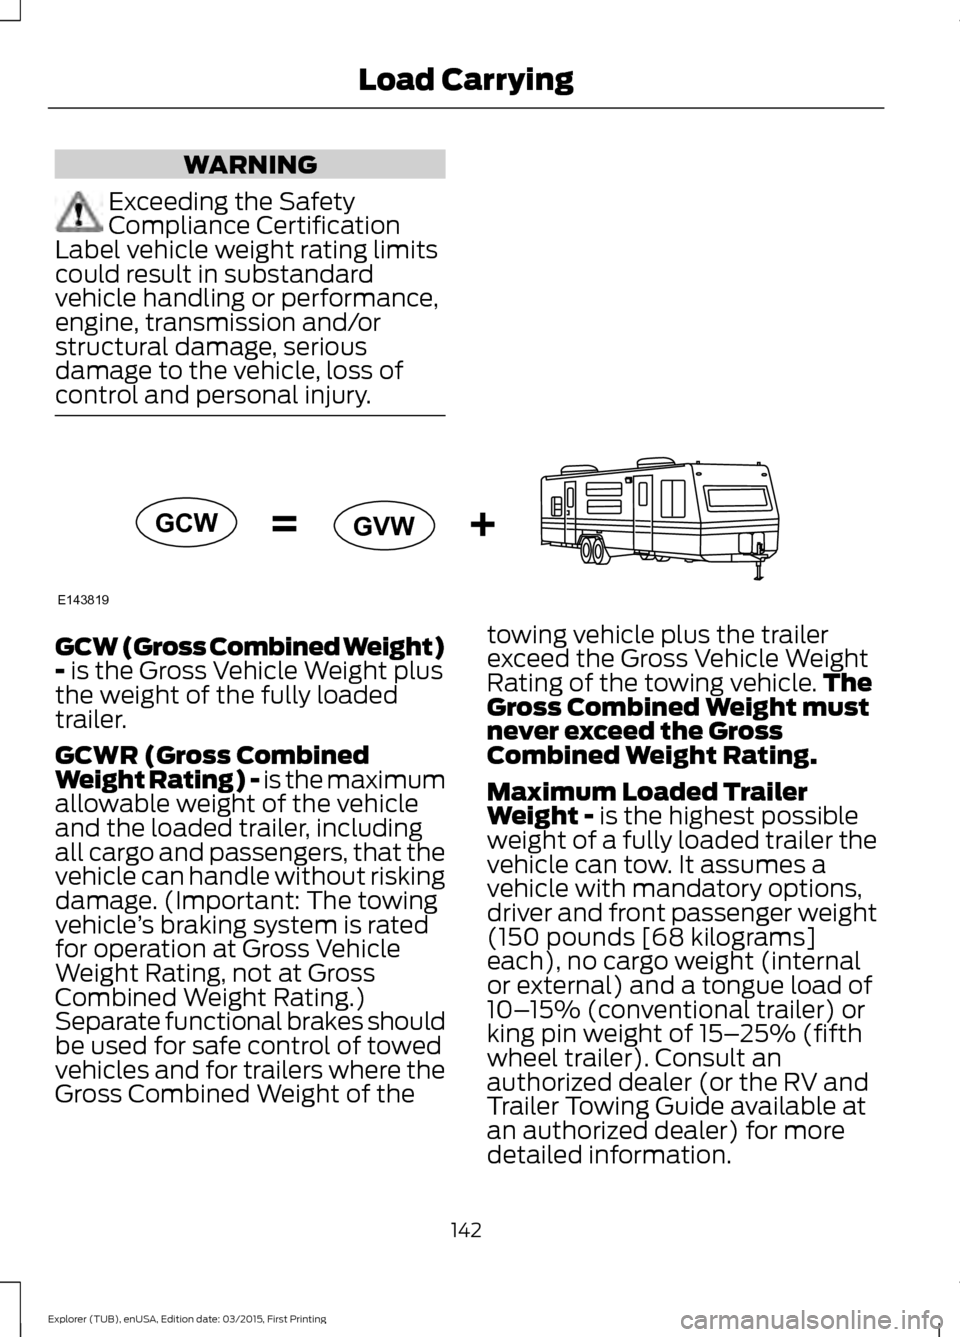
control and personal injury. GCW (Gross Combined Weight)
- is the Gross Vehicle Weight plus
the weight of the fully loaded
trailer.
GCWR (Gross Combined
Weight Rating) - is the maximum
allowable weight of the vehicle
and the loaded trailer, including
all cargo and passengers, that the
vehicle can handle without risking
damage. (Important: The towing
vehicle ’s braking system is rated
for operation at Gross Vehicle
Weight Rating, not at Gross
Combined Weight Rating.)
Separate functional brakes should
be used for safe control of towed
vehicles and for trailers where the
Gross Combined Weight of the towing vehicle plus the trailer
exceed the Gross Vehicle Weight
Rating of the towing vehicle.
The
Gross Combined Weight must
never exceed the Gross
Combined Weight Rating.
Maximum Loaded Trailer
Weight -
is the highest possible
weight of a fully loaded trailer the
vehicle can tow. It assumes a
vehicle with mandatory options,
driver and front passenger weight
(150 pounds [68 kilograms]
each), no cargo weight (internal
or external) and a tongue load of
10– 15% (conventional trailer) or
king pin weight of 15– 25% (fifth
wheel trailer). Consult an
authorized dealer (or the RV and
Trailer Towing Guide available at
an authorized dealer) for more
detailed information.
142
Explorer (TUB), enUSA, Edition date: 03/2015, First Printing Load CarryingE143819GCW
GVW
Page 149 of 350
TOWING A TRAILER
WARNINGS
Do not exceed the GVWR or
the GAWR specified on the
certification label. Towing trailers beyond the
maximum recommended
gross trailer weight exceeds the
limit of the vehicle and could
result in engine damage,
transmission damage, structural
damage, loss of vehicle control,
vehicle rollover and personal
injury. Your vehicle may have electrical
items, such as fuses or relays,
related to towing. See the Fuses
chapter.
Your vehicle's load capacity
designation is by weight, not by
volume, so you cannot necessarily
use all available space when
loading a vehicle or trailer.
Towing a trailer places an extra
load on your vehicle's engine,
transmission, axle, brakes, tires
and suspension. Inspect these
components periodically during,
and after, any towing operation. Load Placement
To help minimize how trailer
movement affects your vehicle
when driving:
•
Load the heaviest items closest
to the trailer floor.
• Load the heaviest items
centered between the left and
right side trailer tires.
• Load the heaviest items above
the trailer axles or just slightly
forward toward the trailer
tongue. Do not allow the final
trailer tongue weight to go
above or below 10-15% of the
loaded trailer weight.
• Select a tow bar with the
correct rise or drop. When both
the loaded vehicle and trailer
are connected, the trailer frame
should be level, or slightly
angled down toward your
vehicle, when viewed from the
side.
When driving with a trailer or
payload, a slight takeoff vibration
or shudder may be present due to
the increased payload weight.
Additional information regarding
proper trailer loading and setting
your vehicle up for towing is
located in another chapter of this
manual. See
Load Limit (page
138).
You can also find information in
the
RV & Trailer Towing Guide
available at your authorized
dealer, or online.
146
Explorer (TUB), enUSA, Edition date: 03/2015, First Printing Towing