2016 FORD POLICE INTERCEPTOR SEDAN trailer
[x] Cancel search: trailerPage 6 of 358
Cruise Control
Principle of Operation..................................121
Using Cruise Control.....................................121
Driving Aids
Blind Spot Information System...............123
Cross Traffic Alert.........................................125
Steering............................................................128
Load Carrying
Rear Loadspace Hatches..........................130
Rear Under Floor Storage
..........................130
Load Limit
.......................................................130
Towing
Towing a Trailer.............................................138
Recommended Towing Weights............139
Essential Towing Checks...........................140
Transporting the Vehicle............................142
Towing the Vehicle on Four Wheels......142
Driving Hints
Breaking-In......................................................144
Economical Driving......................................144
Driving Through Water
................................145
Floor Mats
.......................................................145
Roadside Emergencies
Roadside Assistance...................................147
Hazard Warning Flashers
..........................148
Fuel Shutoff
...................................................148
Jump Starting the Vehicle
.........................149
Customer Assistance
Getting the Services You Need
................152
In California (U.S. Only)..............................153
The Better Business Bureau (BBB) Auto Line Program (U.S. Only)......................154
Utilizing the Mediation/Arbitration Program (Canada Only)........................155 Getting Assistance Outside the U.S. and
Canada.........................................................155
Ordering Additional Owner's Literature.....................................................156
Reporting Safety Defects (U.S. Only)..............................................................157
Reporting Safety Defects (Canada Only)..............................................................157
Fuses
Fuse Specification Chart...........................159
Changing a Fuse
...........................................168
Maintenance
General Information
....................................170
Opening and Closing the Hood
...............170
Under Hood Overview - 2.0L EcoBoost™.................................................172
Under Hood Overview - 3.5L Ecoboost™.................................................173
Under Hood Overview - 3.5L Duratec/ 3.7L.................................................................174
Engine Oil Dipstick - 2.0L EcoBoost™.................................................175
Engine Oil Dipstick - 3.5L Duratec/3.5L Ecoboost™/3.7L.......................................175
Engine Oil Check
...........................................175
Oil Change Indicator Reset.......................176
Engine Coolant Check.................................176
Automatic Transmission Fluid Check - 2.0L EcoBoost™
......................................180
Automatic Transmission Fluid Check - 3.5L Duratec/3.5L Ecoboost™/
3.7L................................................................180
Brake Fluid Check.........................................184
Power Steering Fluid Check.....................184
Washer Fluid Check.....................................184
Fuel Filter
.........................................................185
Changing the 12V Battery..........................185
Checking the Wiper Blades
.......................187
Changing the Wiper Blades
......................187
Adjusting the Headlamps..........................187
3
Police Interceptor (CPH), enUSA, Edition date: 10/2015, First Printing Table of Contents
Page 97 of 358
FUEL QUALITY - GASOLINE
Choosing the Right Fuel
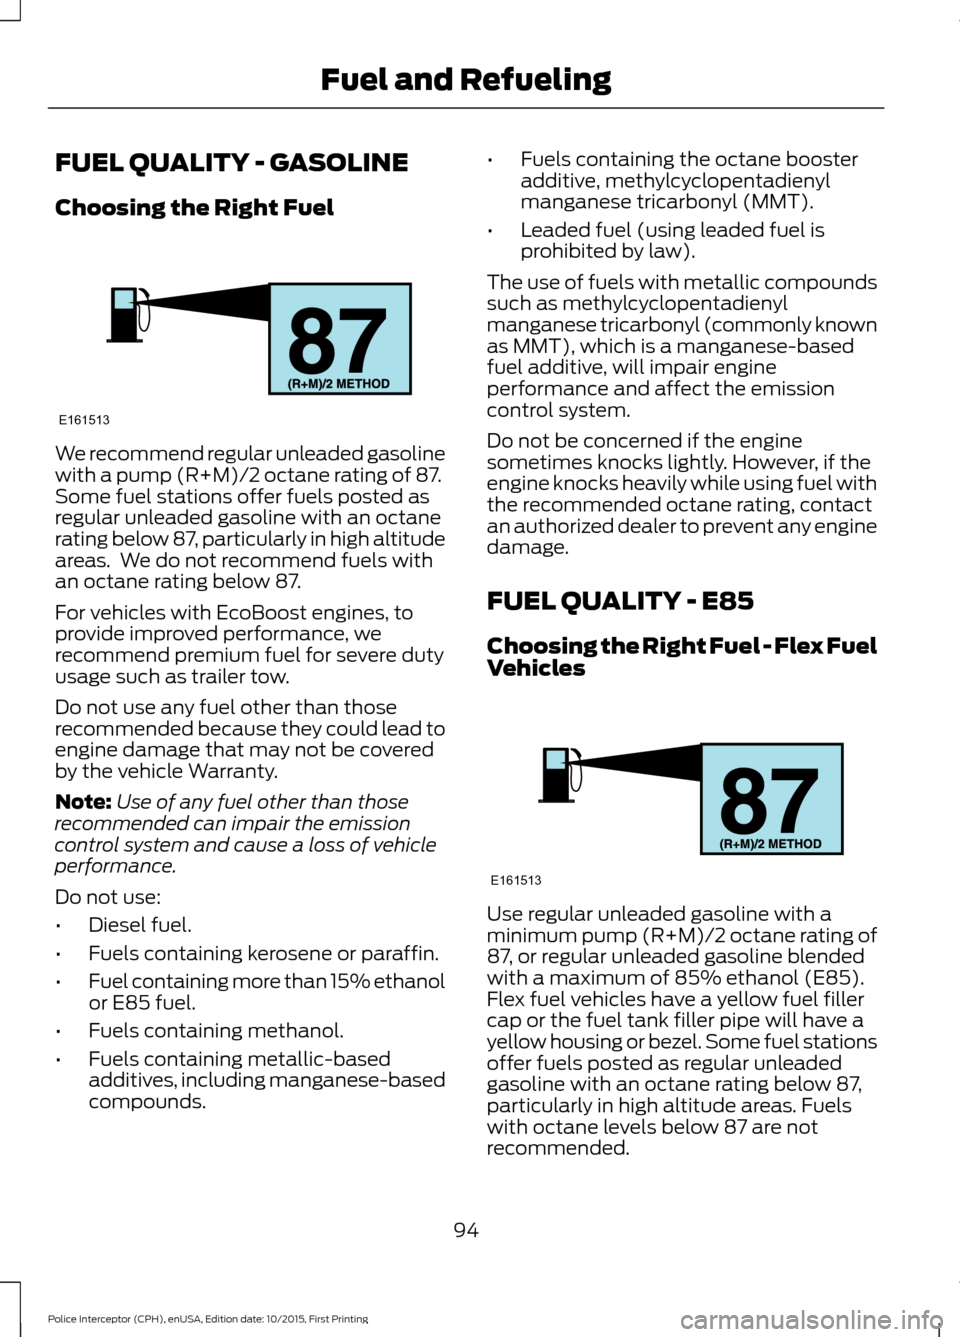
We recommend regular unleaded gasoline
with a pump (R+M)/2 octane rating of 87.
Some fuel stations offer fuels posted as
regular unleaded gasoline with an octane
rating below 87, particularly in high altitude
areas. We do not recommend fuels with
an octane rating below 87.
For vehicles with EcoBoost engines, to
provide improved performance, we
recommend premium fuel for severe duty
usage such as trailer tow.
Do not use any fuel other than those
recommended because they could lead to
engine damage that may not be covered
by the vehicle Warranty.
Note:
Use of any fuel other than those
recommended can impair the emission
control system and cause a loss of vehicle
performance.
Do not use:
• Diesel fuel.
• Fuels containing kerosene or paraffin.
• Fuel containing more than 15% ethanol
or E85 fuel.
• Fuels containing methanol.
• Fuels containing metallic-based
additives, including manganese-based
compounds. •
Fuels containing the octane booster
additive, methylcyclopentadienyl
manganese tricarbonyl (MMT).
• Leaded fuel (using leaded fuel is
prohibited by law).
The use of fuels with metallic compounds
such as methylcyclopentadienyl
manganese tricarbonyl (commonly known
as MMT), which is a manganese-based
fuel additive, will impair engine
performance and affect the emission
control system.
Do not be concerned if the engine
sometimes knocks lightly. However, if the
engine knocks heavily while using fuel with
the recommended octane rating, contact
an authorized dealer to prevent any engine
damage.
FUEL QUALITY - E85
Choosing the Right Fuel - Flex Fuel
Vehicles Use regular unleaded gasoline with a
minimum pump (R+M)/2 octane rating of
87, or regular unleaded gasoline blended
with a maximum of 85% ethanol (E85).
Flex fuel vehicles have a yellow fuel filler
cap or the fuel tank filler pipe will have a
yellow housing or bezel. Some fuel stations
offer fuels posted as regular unleaded
gasoline with an octane rating below 87,
particularly in high altitude areas. Fuels
with octane levels below 87 are not
recommended.
94
Police Interceptor (CPH), enUSA, Edition date: 10/2015, First Printing Fuel and RefuelingE161513 E161513
Page 116 of 358
PARKING BRAKE
WARNING
Always set the parking brake fully
and make sure the transmission is
locked in park (P). Failure to set the
parking brake and engage park could result
in vehicle roll-away, property damage or
bodily injury. To set the parking brake, press the parking
brake pedal down to its fullest extent. The
brake warning lamp in the instrument
cluster will illuminate and remains
illuminated until the parking brake is
released.
To release the parking brake, press the
parking brake pedal down again.
If you are parking your vehicle on a grade
or with a trailer, press and hold the brake
pedal down, then set the parking brake.
There may be a little vehicle movement as
the parking brake sets to hold the vehicle's
weight. This is normal and should be no
reason for concern. If needed, press and
hold the service brake pedal down, then
try reapplying the parking brake. Chock the
wheels if required. If the parking brake
cannot hold the weight of the vehicle, the
parking brake may need to be serviced or
the vehicle may be overloaded.
113
Police Interceptor (CPH), enUSA, Edition date: 10/2015, First Printing Brakes
Page 120 of 358

PRINCIPLE OF OPERATION
WARNINGS
To help avoid personal injury, please
read and understand the limitations
of the system as contained in this
section. Sensing is only an aid for some
(generally large and fixed) objects when
moving on a flat surface at parking speeds.
Certain objects with surfaces that absorb
ultrasonic waves, surrounding vehicle's
parking aid systems, traffic control
systems, fluorescent lamps, inclement
weather, air brakes, and external motors
and fans may also affect the function of
the sensing system; this may include
reduced performance or a false activation. To help avoid personal injury, always
use caution when in reverse (R) and
when using the sensing system.
This system is not designed to
prevent contact with small or moving
objects. The system is designed to
provide a warning to assist the driver in
detecting large stationary objects to avoid
damaging your vehicle. The system may
not detect smaller objects, particularly
those close to the ground. Certain add-on devices such as large
trailer hitches, bike or surfboard racks
and any device that may block the
normal detection zone of the system, may
create false beeps. Note:
Keep the sensors, located on the
bumper or fascia, free from snow, ice and
large accumulations of dirt. If the sensors
are covered, the system ’s accuracy can be
affected. Do not clean the sensors with
sharp objects.
Note: If your vehicle sustains damage to
the bumper or fascia, leaving it misaligned
or bent, the sensing zone may be altered
causing inaccurate measurement of
obstacles or false alarms. Note:
The sensing system cannot be turned
off when a MyKey is present.
Note: If you attach certain add-on devices
such as a trailer or bike rack, the rear sensing
system may detect that add-on device and
therefore provide warnings. It is suggested
that you disable the rear sensing system
when you attach an add-on device to your
vehicle to prevent these warnings.
The sensing system warns the driver of
obstacles within a certain range of your
vehicle. The system turns on automatically
whenever you switch the ignition on.
The system can be switched off through
the information display menu or from the
pop-up message that appears once you
shift the transmission into reverse (R). See
General Information (page 70).
If a fault is present in the system, a warning
message appears in the information
display. See
Information Messages
(page 73).
REAR PARKING AID
The rear sensors are only active when the
transmission is in reverse (R). As your
vehicle moves closer to the obstacle, the
rate of the audible warning increases.
When the obstacle is less than
12 in
(30 cm) away, the warning sounds
continuously. If the system detects a
stationary or receding object farther than
12 in (30 cm)
from the corners of the
bumper, the tone sounds for only three
seconds. Once the system detects an
object approaching, the warning sounds
again.
117
Police Interceptor (CPH), enUSA, Edition date: 10/2015, First Printing Parking Aids
Page 122 of 358
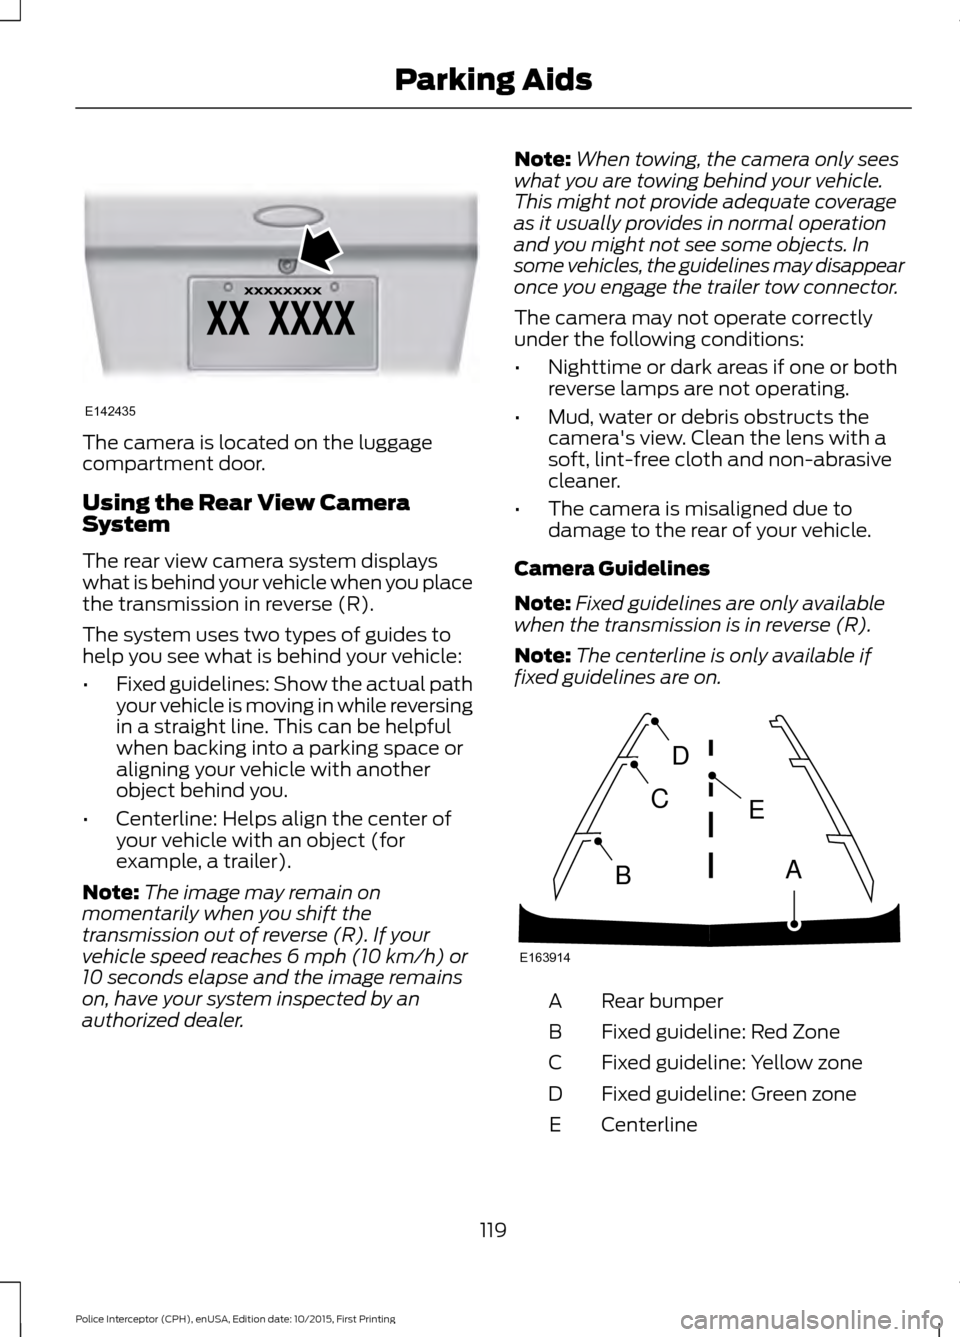
The camera is located on the luggage
compartment door.
Using the Rear View Camera
System
The rear view camera system displays
what is behind your vehicle when you place
the transmission in reverse (R).
The system uses two types of guides to
help you see what is behind your vehicle:
•
Fixed guidelines: Show the actual path
your vehicle is moving in while reversing
in a straight line. This can be helpful
when backing into a parking space or
aligning your vehicle with another
object behind you.
• Centerline: Helps align the center of
your vehicle with an object (for
example, a trailer).
Note: The image may remain on
momentarily when you shift the
transmission out of reverse (R). If your
vehicle speed reaches 6 mph (10 km/h) or
10 seconds elapse and the image remains
on, have your system inspected by an
authorized dealer. Note:
When towing, the camera only sees
what you are towing behind your vehicle.
This might not provide adequate coverage
as it usually provides in normal operation
and you might not see some objects. In
some vehicles, the guidelines may disappear
once you engage the trailer tow connector.
The camera may not operate correctly
under the following conditions:
• Nighttime or dark areas if one or both
reverse lamps are not operating.
• Mud, water or debris obstructs the
camera's view. Clean the lens with a
soft, lint-free cloth and non-abrasive
cleaner.
• The camera is misaligned due to
damage to the rear of your vehicle.
Camera Guidelines
Note: Fixed guidelines are only available
when the transmission is in reverse (R).
Note: The centerline is only available if
fixed guidelines are on. Rear bumper
A
Fixed guideline: Red Zone
B
Fixed guideline: Yellow zone
C
Fixed guideline: Green zone
D
Centerline
E
119
Police Interceptor (CPH), enUSA, Edition date: 10/2015, First Printing Parking AidsE142435 E163914
A
E
D
C
B
Page 127 of 358

System Sensor Blockage
WARNING
To help avoid injuries, NEVER use the
Blind Spot Information System as a
replacement for using the interior
and exterior mirrors or looking over your
shoulder before changing lanes. The Blind
Spot Information System is not a
replacement for careful driving. The system uses radar sensors that are
located behind the bumper fascia on each
side of your vehicle. Any dirt, mud and
snow in front of the sensors and/or driving
in heavy rain can cause system
degradation. Also, other types of
obstructions in front of the sensor can
cause system degradation. This is referred
to as a
‘blocked ’ condition. Note:
Do not apply bumper stickers and/or
repair compound to these areas, this can
cause degraded system performance.
If the system detects a degraded
performance condition, a message warning
of a blocked sensor will appear in the
information display. Also the system alert
indicators will remain ON and the system
will no longer provide any vehicle warnings.
You can clear the information display
warning but the alert indicators will remain
illuminated.
A "blocked" condition can be cleared in
two ways:
• After the blockage in front of the
sensors is removed or the
rainfall/snowfall rate decreases or
stops, drive for a few minutes in traffic
to allow the sensors to detect passing
vehicles.
• By cycling the ignition from ON to OFF
and then back ON.
Note: When towing a trailer, the sensors
may detect the trailer thus causing a false
alert. It may be desirable to turn the Blind
Spot Information System off if the false
alerts become annoying.
System Errors
If the system senses a problem with the
left or right sensor, the telltale will
illuminate and a message will appear in
the information display. See Information
Messages (page 73).
124
Police Interceptor (CPH), enUSA, Edition date: 10/2015, First Printing Driving AidsE205199
Page 131 of 358

The following are other situations that may
limit the Cross Traffic Alert performance:
•
Stationary or slow moving vehicles.
• Pedestrians or objects in the roadway.
• Oncoming vehicles in the same lame.
• Severe weather conditions.
• Debris build-up near or around the
sensor(s).
• Small distance to the vehicle ahead.
Certain conditions may reduce the visibility
of the warning lamp; therefore, it is
recommended to keep the audible warning
on.
If the front end of the vehicle is hit or
damaged, the radar sensing zone may be
altered causing missed or false collision
warnings. See your authorized dealer to
have your collision warning radar checked
for proper coverage and operation.
False Alerts
Note: When towing a trailer, the sensors
may detect the trailer thus causing a false
alert. It may be desirable to turn the Blind
Spot Information System off if the false
alerts become annoying.
There may be certain instances when there
is a false alert by the Cross Traffic Alert
system that illuminates the alert indicator
with no vehicle in the coverage zone. Some
amount of false alerts are normal; they are
temporary and self-correct.
System Errors
If Cross Traffic Alert senses a problem with
the left or right sensor a message will
appear in the information display. See
Information Messages (page 73). Switching the System Off and On
You can temporarily switch Cross Traffic
Alert off in the information display. See
General Information
(page 70). When
you switch Cross Traffic Alert off, you will
not receive alerts and the information
display will display a system off message.
Note: The Cross Traffic Alert switches on
whenever the ignition is switched on and
ready to provide appropriate alerts when
the transmission is in reverse (R). Cross
Traffic Alert will not remember the last
selected on or off setting.
You can also have Cross Traffic Alert
switched off permanently at an authorized
dealer. Once switched off permanently,
the system can only be switched back on
at an authorized dealer.
STEERING
Electric Power Steering WARNINGS
The electric power steering system
has diagnostic checks that
continuously monitor the system. If
a fault is detected, a message displays in
the information display. Stop your vehicle
as soon as it is safe to do so. Switch the
ignition off. After at least 10 seconds,
switch the ignition on and watch the
information display for a steering system
warning message. If a steering system
warning message returns, have the system
checked by an authorized dealer. If the system detects an error, you
may not feel a difference in the
steering, however a serious condition
may exist. Obtain immediate service from
an authorized dealer, failure to do so may
result in loss of steering control. 128
Police Interceptor (CPH), enUSA, Edition date: 10/2015, First Printing Driving Aids
Page 133 of 358
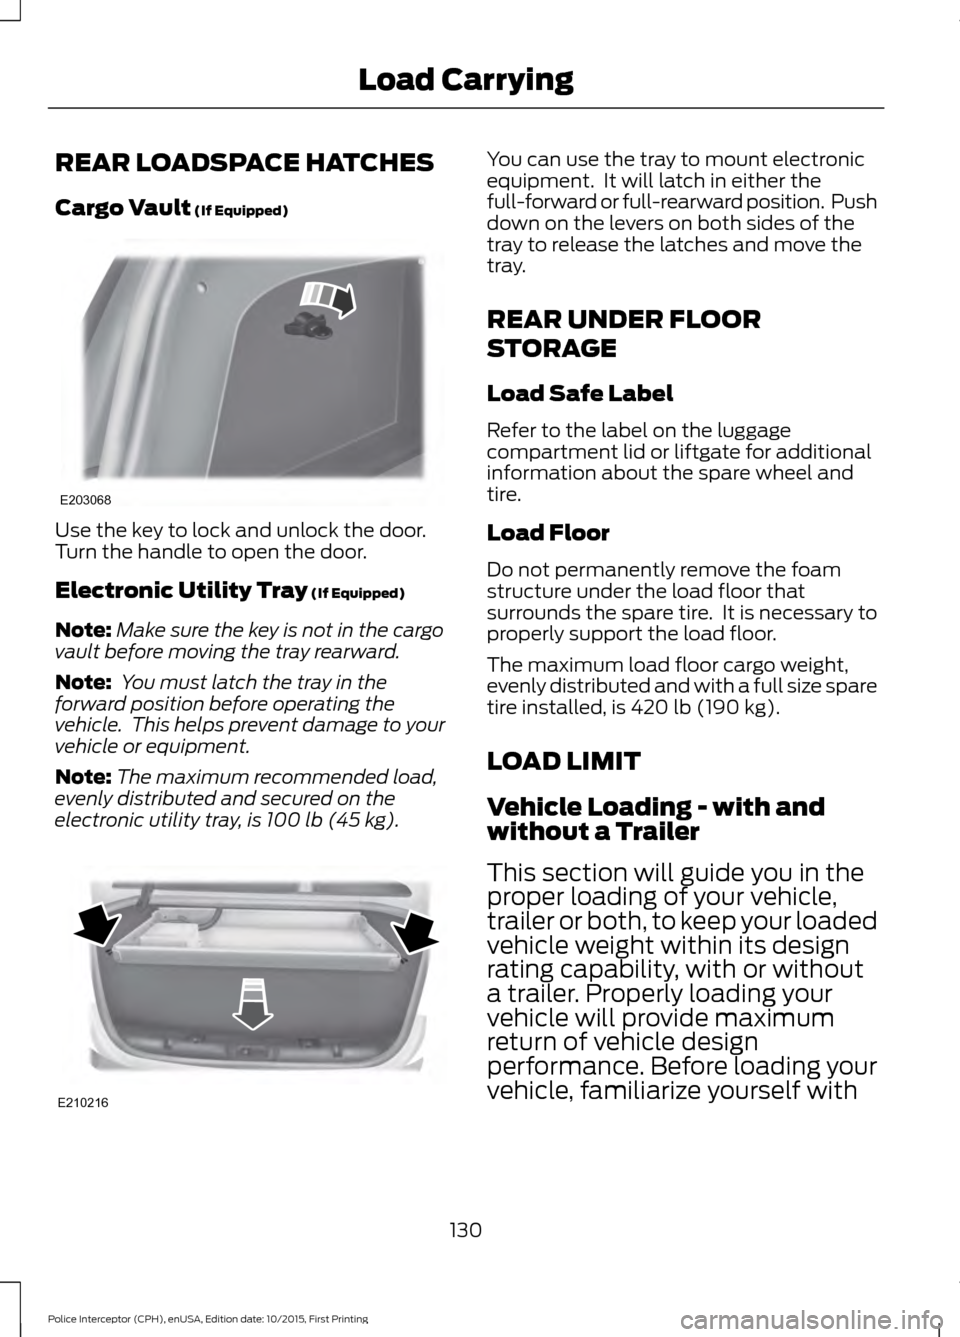
REAR LOADSPACE HATCHES
Cargo Vault (If Equipped)
Use the key to lock and unlock the door.
Turn the handle to open the door.
Electronic Utility Tray
(If Equipped)
Note: Make sure the key is not in the cargo
vault before moving the tray rearward.
Note: You must latch the tray in the
forward position before operating the
vehicle. This helps prevent damage to your
vehicle or equipment.
Note: The maximum recommended load,
evenly distributed and secured on the
electronic utility tray, is
100 lb (45 kg). You can use the tray to mount electronic
equipment. It will latch in either the
full-forward or full-rearward position. Push
down on the levers on both sides of the
tray to release the latches and move the
tray.
REAR UNDER FLOOR
STORAGE
Load Safe Label
Refer to the label on the luggage
compartment lid or liftgate for additional
information about the spare wheel and
tire.
Load Floor
Do not permanently remove the foam
structure under the load floor that
surrounds the spare tire. It is necessary to
properly support the load floor.
The maximum load floor cargo weight,
evenly distributed and with a full size spare
tire installed, is
420 lb (190 kg).
LOAD LIMIT
Vehicle Loading - with and
without a Trailer
This section will guide you in the
proper loading of your vehicle,
trailer or both, to keep your loaded
vehicle weight within its design
rating capability, with or without
a trailer. Properly loading your
vehicle will provide maximum
return of vehicle design
performance. Before loading your
vehicle, familiarize yourself with
130
Police Interceptor (CPH), enUSA, Edition date: 10/2015, First Printing Load CarryingE203068 E210216