2016 FORD FUSION (AMERICAS) transmission
[x] Cancel search: transmissionPage 195 of 518
Disengaging the System
Press the brake pedal or press CNCL. The
last set speed displays in grey but does not
erase.
Overriding the System WARNING
Whenever the driver presses the
accelerator pedal and overrides the
system, the system does not
automatically apply the brakes to maintain
the set distance from any vehicle ahead. Press the accelerator pedal to override the
set speed and gap distance.
When you override the system,
the green indicator light
illuminates and the lead vehicle
graphic does not show in the
information display.
The system resumes operation when you
release the accelerator pedal. The vehicle
speed decreases to the set speed, or a
slower speed if following a slower vehicle.
Changing the Set Speed
• Press and release
SET+ or SET-. The
set speed changes in approximately
1 mph (2 km/h)
increments.
• Press the accelerator or brake pedal
until you reach the desired speed. Press
and release
SET+.
• Press and hold SET+ or SET-. Release
the control when you reach the desired
speed.
The system may apply the brakes to slow
the vehicle to the new set speed. The set
speed displays continuously in the
information display when the system is
active. Canceling the Set Speed
Press the brake pedal or press and release
CNCL
. The last set speed displays with a
strikethrough.
Resuming the Set Speed
Note: Only use resume if you are aware of
the set speed and intend to return to it.
Press and release RES. The vehicle returns
to the previously set speed. The set speed
displays continuously in the information
display while the system is active.
Automatic Cancellation
The system does not operate below
12 mph (20 km/h)
. An audible warning
sounds and the automatic braking releases
if the vehicle drops below this speed.
Automatic cancellation can also occur if:
• The tires lose traction.
• The engine speed is too low.
• You apply the parking brake.
Note: If the engine speed drops too low,
the information display indicates low engine
speed. Shift to a lower gear (manual
transmission only) to avoid automatic
cancellation.
Hilly Condition Usage
Note: An audible alarm sounds and the
system shuts down if it is applying brakes
for an extended period of time. This allows
the brakes to cool. The system functions
normally again when the brakes cool.
Select a lower gear during prolonged
downhill driving on steep slopes, such as
mountainous areas, when the system is
active. In such situations, the system needs
additional engine braking to reduce the
load on the vehicle ’s regular brake system
to prevent the brakes from overheating.
192
Fusion/Mondeo (CC7) Canada/United States of America, enUSA, First Printing Cruise ControlE144529
Page 204 of 518
BLIND SPOT INFORMATION
SYSTEM
Blind Spot Information System
(BLIS
™) with Cross Traffic Alert
(If Equipped) WARNING
To help avoid injuries, NEVER use the
Blind Spot Information System as a
replacement for using the interior
and exterior mirrors and looking over your
shoulder before changing lanes. The Blind
Spot Information System is not a
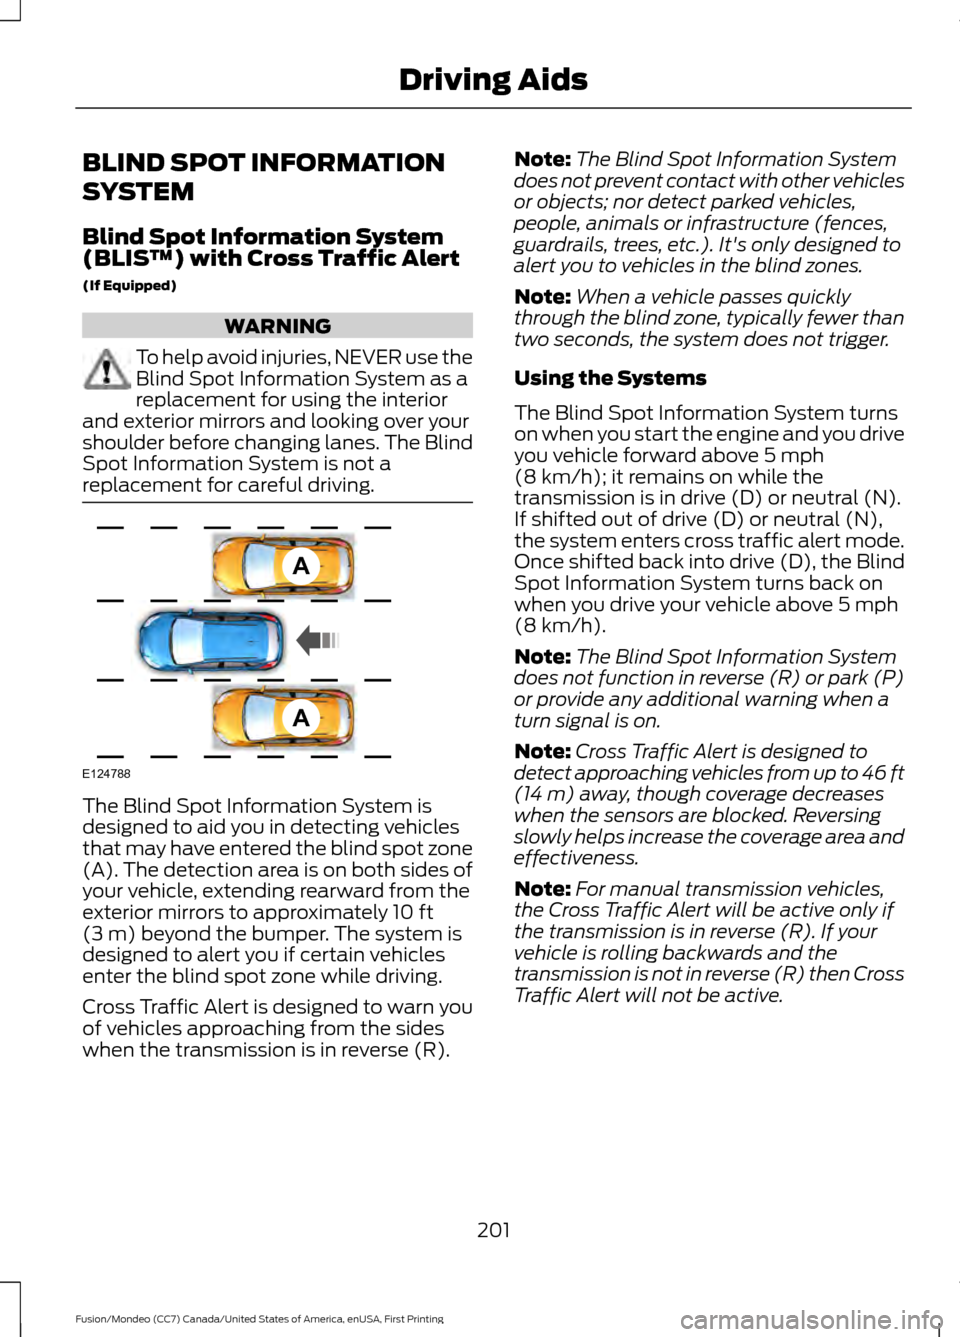
replacement for careful driving. The Blind Spot Information System is
designed to aid you in detecting vehicles
that may have entered the blind spot zone
(A). The detection area is on both sides of
your vehicle, extending rearward from the
exterior mirrors to approximately 10 ft
(3 m) beyond the bumper. The system is
designed to alert you if certain vehicles
enter the blind spot zone while driving.
Cross Traffic Alert is designed to warn you
of vehicles approaching from the sides
when the transmission is in reverse (R). Note:
The Blind Spot Information System
does not prevent contact with other vehicles
or objects; nor detect parked vehicles,
people, animals or infrastructure (fences,
guardrails, trees, etc.). It's only designed to
alert you to vehicles in the blind zones.
Note: When a vehicle passes quickly
through the blind zone, typically fewer than
two seconds, the system does not trigger.
Using the Systems
The Blind Spot Information System turns
on when you start the engine and you drive
you vehicle forward above
5 mph
(8 km/h); it remains on while the
transmission is in drive (D) or neutral (N).
If shifted out of drive (D) or neutral (N),
the system enters cross traffic alert mode.
Once shifted back into drive (D), the Blind
Spot Information System turns back on
when you drive your vehicle above
5 mph
(8 km/h).
Note: The Blind Spot Information System
does not function in reverse (R) or park (P)
or provide any additional warning when a
turn signal is on.
Note: Cross Traffic Alert is designed to
detect approaching vehicles from up to 46 ft
(14 m)
away, though coverage decreases
when the sensors are blocked. Reversing
slowly helps increase the coverage area and
effectiveness.
Note: For manual transmission vehicles,
the Cross Traffic Alert will be active only if
the transmission is in reverse (R). If your
vehicle is rolling backwards and the
transmission is not in reverse (R) then Cross
Traffic Alert will not be active.
201
Fusion/Mondeo (CC7) Canada/United States of America, enUSA, First Printing Driving AidsA
A
E124788
Page 216 of 518
WARNING
Exceeding the Safety
Compliance Certification
Label vehicle weight rating limits
could result in substandard
vehicle handling or performance,
engine, transmission and/or
structural damage, serious
damage to the vehicle, loss of
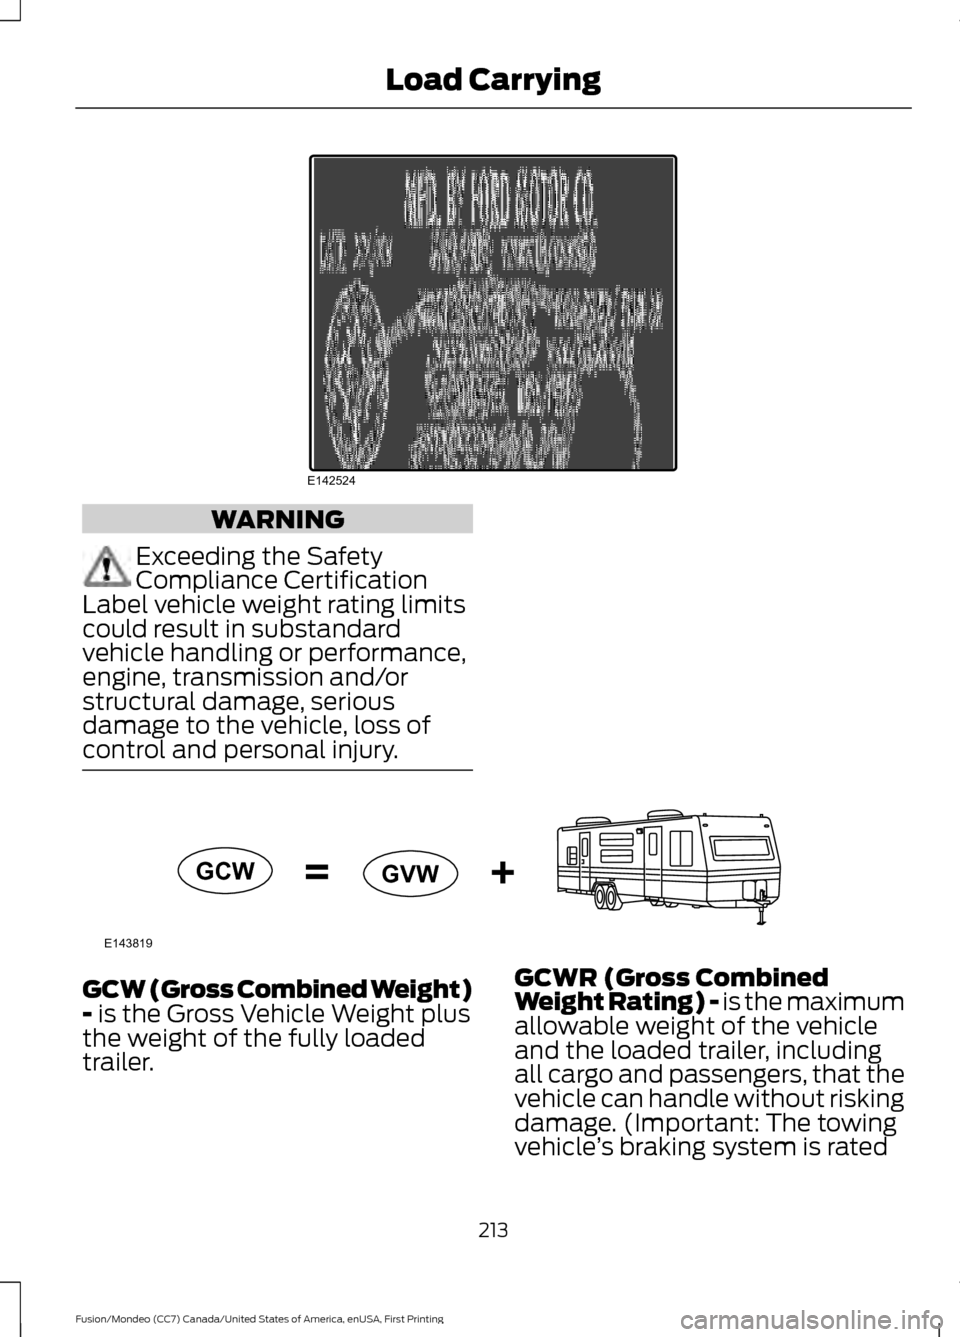
control and personal injury. GCW (Gross Combined Weight)
- is the Gross Vehicle Weight plus
the weight of the fully loaded
trailer. GCWR (Gross Combined
Weight Rating) - is the maximum
allowable weight of the vehicle
and the loaded trailer, including
all cargo and passengers, that the
vehicle can handle without risking
damage. (Important: The towing
vehicle
’s braking system is rated
213
Fusion/Mondeo (CC7) Canada/United States of America, enUSA, First Printing Load CarryingE142524 E143819GCW
GVW
Page 220 of 518

TOWING A TRAILER
WARNINGS
Do not exceed the GVWR or
the GAWR specified on the
certification label. Towing trailers beyond the
maximum recommended
gross trailer weight exceeds the
limit of your vehicle and could
result in engine damage,
transmission damage, structural
damage, loss of vehicle control,
vehicle rollover and personal
injury. Note:
Your vehicle may have
electrical items, such as fuses or
relays, related to towing. See
Fuses (page 237).
Your vehicle's load capacity
designation is by weight, not by
volume, so you cannot necessarily
use all available space when
loading a vehicle.
Towing a trailer places an extra
load on your vehicle's engine,
transmission, axle, brakes, tires
and suspension. Inspect these
components periodically during,
and after, any towing operation. Load Placement
To help minimize how trailer
movement affects your vehicle
when driving:
•
Load the heaviest items closest
to the trailer floor.
• Load the heaviest items
centered between the left and
right side trailer tires.
• Load the heaviest items above
the trailer axles or just slightly
forward toward the trailer
tongue. Do not allow the final
trailer tongue weight to go
above or below 10-15% of the
loaded trailer weight.
• Select a tow bar with the
correct rise or drop. When both
the loaded vehicle and trailer
are connected, the trailer frame
should be level, or slightly
angled down toward your
vehicle, when viewed from the
side.
When driving with a trailer or
payload, a slight takeoff vibration
or shudder may be present due to
the increased payload weight.
Additional information regarding
proper trailer loading and setting
your vehicle up for towing is
located in the Load Carrying
chapter. See
Load Limit (page
209).
You can also find information in
the
RV & Trailer Towing Guide
available at your authorized
dealer, or online.
217
Fusion/Mondeo (CC7) Canada/United States of America, enUSA, First Printing Towing
Page 223 of 518
When Towing a Trailer
•
Do not drive faster than 70 mph (113
km/h) during the first 500 miles (800
kilometers).
• Do not make full-throttle starts.
• Check your hitch, electrical connections
and trailer wheel lug nuts thoroughly
after you have traveled 50 miles (80
kilometers).
• When stopped in congested or heavy
traffic during hot weather, place the
gearshift in position P to aid engine and
transmission cooling and to help A/C
performance.
• Turn off the speed control with heavy
loads or in hilly terrain. The speed
control may turn off automatically
when you are towing on long, steep
grades.
• Shift to a lower gear when driving down
a long or steep hill. Do not apply the
brakes continuously, as they may
overheat and become less effective.
• If your transmission is equipped with a
Grade Assist or Tow/Haul feature, use
this feature when towing. This provides
engine braking and helps eliminate
excessive transmission shifting for
optimum fuel economy and
transmission cooling.
• Allow more distance for stopping with
a trailer attached. Anticipate stops and
brake gradually.
• Avoid parking on a grade. However, if
you must park on a grade:
1. Turn the steering wheel to point your vehicle tires away from traffic flow.
2. Set your vehicle parking brake.
3. Place the automatic transmission in position P.
4. Place wheel chocks in front and back of the trailer wheels. (Chocks not
included with vehicle.) Launching or Retrieving a Boat or
Personal Watercraft (PWC)
Note:
Disconnect the wiring to the trailer
before
backing the trailer into the water.
Note: Reconnect the wiring to the trailer
after
removing the trailer from the water.
When backing down a ramp during boat
launching or retrieval:
• Do not allow the static water level to
rise above the bottom edge of the rear
bumper.
• Do not allow waves to break higher
than 6 inches (15 centimeters) above
the bottom edge of the rear bumper.
Exceeding these limits may allow water to
enter vehicle components:
• Causing internal damage to the
components.
• Affecting driveability, emissions, and
reliability.
Any time the rear axle submerges in water,
replace the rear axle lubricant. Water may
contaminate the rear axle lubricant, which
is not a normal maintenance inspection
item unless there is a possibility of a leak
or other axle repair is required.
TOWING POINTS
Due to local market requirements in some
countries, some vehicles may be equipped
with a recovery hook.
Recovery Hook Location
If your vehicle is equipped with a screw-in
recovery hook, it is located with the spare
tire kit.
Installing the Recovery Hook
There is an installation point for the
recovery hook located behind the fascia.
220
Fusion/Mondeo (CC7) Canada/United States of America, enUSA, First Printing Towing
Page 225 of 518
It is acceptable to have your front-wheel
drive vehicle towed from the front if using
proper wheel lift equipment to raise the
front wheels off the ground. When towing
in this manner, the rear wheels can remain
on the ground.
Front-wheel drive vehicles must have the
front wheels placed on a tow dolly when
towing your vehicle from the rear using
wheel lift equipment. This prevents
damage to the transmission.
Towing an all-wheel drive vehicle requires
that all wheels be off the ground, such as
using a wheel lift and dollies or flatbed
equipment. This prevents damage to the
transmission, all-wheel drive system and
vehicle.
TOWING THE VEHICLE ON
FOUR WHEELS
Emergency Towing
WARNING
If your vehicle has a steering wheel
lock make sure the ignition is in the
accessory or on position when being
towed. If your vehicle becomes inoperable
(without access to wheel dollies,
car-hauling trailer, or flatbed transport
vehicle), it can be flat-towed (all wheels
on the ground, regardless of the powertrain
and transmission configuration) under the
following conditions:
•
Your vehicle is facing forward for
towing in a forward direction.
• Place the transmission in position N. If
you cannot move the transmission into
N
, you may need to override it. See
Transmission (page 163). •
Maximum speed is 35 mph (56 km/h).
• Maximum distance is 50 miles (80
kilometers).
Recreational Towing
Note: Put your climate control system in
recirculated air mode to prevent exhaust
fumes from entering the vehicle. See
Climate Control
(page 120).
Follow these guidelines if you have a need
for recreational (RV) towing. An example
of recreational towing would be towing
your vehicle behind a motorhome. We
designed these guidelines to prevent
damage to your transmission.
Front-wheel Drive Vehicles
Front-wheel drive vehicles
CANNOT be
flat-towed (all wheels on the ground) as
vehicle or transmission damage may occur.
It is recommended to tow your vehicle with
the front wheels off the ground by using a
tow dolly. If you are using a tow dolly,
follow the instructions specified by the
equipment provider.
All-wheel Drive Vehicles
All-wheel drive vehicles
CANNOT be
flat-towed (all wheels on the ground) as
vehicle or transmission damage may occur.
It is recommended to tow your vehicle with
all four (4) wheels off the ground such as
when using a car-hauling trailer. Otherwise,
you cannot recreational tow your vehicle.
222
Fusion/Mondeo (CC7) Canada/United States of America, enUSA, First Printing Towing
Page 231 of 518
3.
Remove your foot from the brake pedal
and press the START/STOP button
to switch off the ignition.
4. You can either attempt to start the engine by pressing the brake pedal and
the
START/STOP button, or switch
on the ignition only by pressing the
START/STOP
button without
pressing the brake pedal. Both ways
re-enable the fuel system.
Note: When you try to restart your vehicle
after a fuel shutoff, the vehicle makes sure
that various systems are safe to restart.
Once your vehicle determines that the
systems are safe, then the vehicle will allow
you to restart.
Note: In the event that your vehicle does
not restart after your third attempt, contact
an authorized dealer.
JUMP STARTING THE VEHICLE WARNINGS
Batteries normally produce explosive
gases which can cause personal
injury. Therefore, do not allow
flames, sparks or lighted substances to
come near the battery. When working near
the battery, always shield your face and
protect your eyes. Always provide correct
ventilation. Keep batteries out of reach of
children. Batteries contain sulfuric
acid. Avoid contact with skin, eyes or
clothing. Shield your eyes when working
near the battery to protect against possible
splashing of acid solution. In case of acid
contact with skin or eyes, flush
immediately with water for a minimum of
15 minutes and get prompt medical
attention. If acid is swallowed, call a
physician immediately. Use only adequately sized cables
with insulated clamps. Preparing Your Vehicle
Do not attempt to push-start your
automatic transmission vehicle.
Note:
Attempting to push-start a vehicle
with an automatic transmission may cause
transmission damage.
Note: Use only a 12-volt supply to start your
vehicle.
Note: Do not disconnect the battery of the
disabled vehicle as this could damage the
vehicle electrical system.
Park the booster vehicle close to the hood
of the disabled vehicle, making sure the
two vehicles do not touch.
Connecting the Jumper Cables WARNINGS
Do not attach the cables to fuel lines,
engine rocker covers, the intake
manifold or electrical components
as grounding points. Stay clear of moving
parts. To avoid reverse polarity
connections, make sure that you correctly
identify the positive (+) and negative (-)
terminals on both the disabled and booster
vehicles before connecting the cables. Do not attach the end of the positive
cable to the studs or L-shaped eyelet
located above the positive (+)
terminal of your vehicle ’s battery. High
current may flow through and cause
damage to the fuses. Do not connect the end of the
second cable to the negative (-)
terminal of the battery to be jumped.
A spark may cause an explosion of the
gases that surround the battery. Note:
In the illustration, the bottom vehicle
represents the booster vehicle.
228
Fusion/Mondeo (CC7) Canada/United States of America, enUSA, First Printing Roadside Emergencies
Page 241 of 518

Protected components
Fuse amp rating
Fuse or relay number
Blower motor relay.
—
4
Power point 3 - Back of console.
20A 3
5
Not used.
—
6
Powertrain control module - vehicle power
1.
20A
1
7
Powertrain control module - vehicle power
2.
20A
1
8
Powertrain control module relay.
—
9
Power point 1 - driver front.
20A 3
10
Powertrain control module - vehicle power
4.
15A
2
11
Powertrain control module - vehicle power
3.
15A
2
12
Powertrain control module - vehicle power
5.
10A
2
13
Powertrain control module - vehicle power
6.
10A
2
14
Run-start relay.
—
15
Power point 2 - console.
20A 3
16
Not used.
—
17
Not used.
—
18
Run-start electronic power assist steering.
10A 1
19
Run/start lighting.
10A 1
20
Run/start transmission control.
15A 1
21
Transmission oil pump start/stop.
Air conditioner clutch solenoid.
10A 1
22
Run-start.
15A 1
23
Blind spot information system.
Rear view camera.
Adaptive cruise control.
238
Fusion/Mondeo (CC7) Canada/United States of America, enUSA, First Printing Fuses