2016 FORD FUSION (AMERICAS) ignition
[x] Cancel search: ignitionPage 72 of 518

You must have two previously
programmed coded keys and the new
unprogrammed key readily accessible. See
an authorized dealer to have the spare key
programmed if two previously
programmed coded keys are not available.
Read and understand the entire procedure
before you begin.
1.
Insert the first previously programmed
coded key into the ignition.
2. Switch the ignition from off to on. Keep
the ignition on for at least three
seconds, but no more than 10 seconds.
3. Switch the ignition off and remove the
first coded key from the ignition.
4. After three seconds but within 10 seconds of switching the ignition off,
insert the second previously coded key
into the ignition.
5. Switch the ignition from off to on. Keep
the ignition on for at least three
seconds, but no more than 10 seconds.
6. Switch the ignition off and remove the
second previously programmed coded
key from the ignition.
7. After three seconds but within 10 seconds of switching the ignition off
and removing the previously
programmed coded key, insert the new
unprogrammed key into the ignition.
8. Switch the ignition from off to on. Keep
the ignition on for at least six seconds.
9. Remove the newly programmed coded
key from the ignition.
If the key has been successfully
programmed it will start your vehicle and
operate the remote entry system (if the
new key is an integrated keyhead
transmitter).
If programming was not successful, wait
10 seconds and repeat Steps 1 through 8.
If you are still unsuccessful, take your
vehicle to an authorized dealer. Programming a Spare Intelligent
Access Key
Note:
You can program a maximum for four
intelligent access keys to your vehicle.
You must have two previously
programmed intelligent access keys inside
your vehicle and the new unprogrammed
intelligent access keys readily accessible.
See an authorized dealer to have the spare
key programmed if two previously
programmed keys are not available.
Make sure that your vehicle is off before
beginning this procedure. Make sure that
you close all the doors before beginning
and that they remain closed throughout
the procedure. Perform all steps within 30
seconds of starting the sequence. Stop
and wait for at least one minute before
starting again if you perform any steps out
of sequence.
Read and understand the entire procedure
before you begin. 1.
Place a programmed intelligent access
key in the backup slot in the center
console. The key ring must be at the
top with the buttons facing toward the
rear.
2. Wait 5 seconds, and then press the START/STOP button.
3. Remove the intelligent access key.
69
Fusion/Mondeo (CC7) Canada/United States of America, enUSA, First Printing SecurityE147165
Page 81 of 518
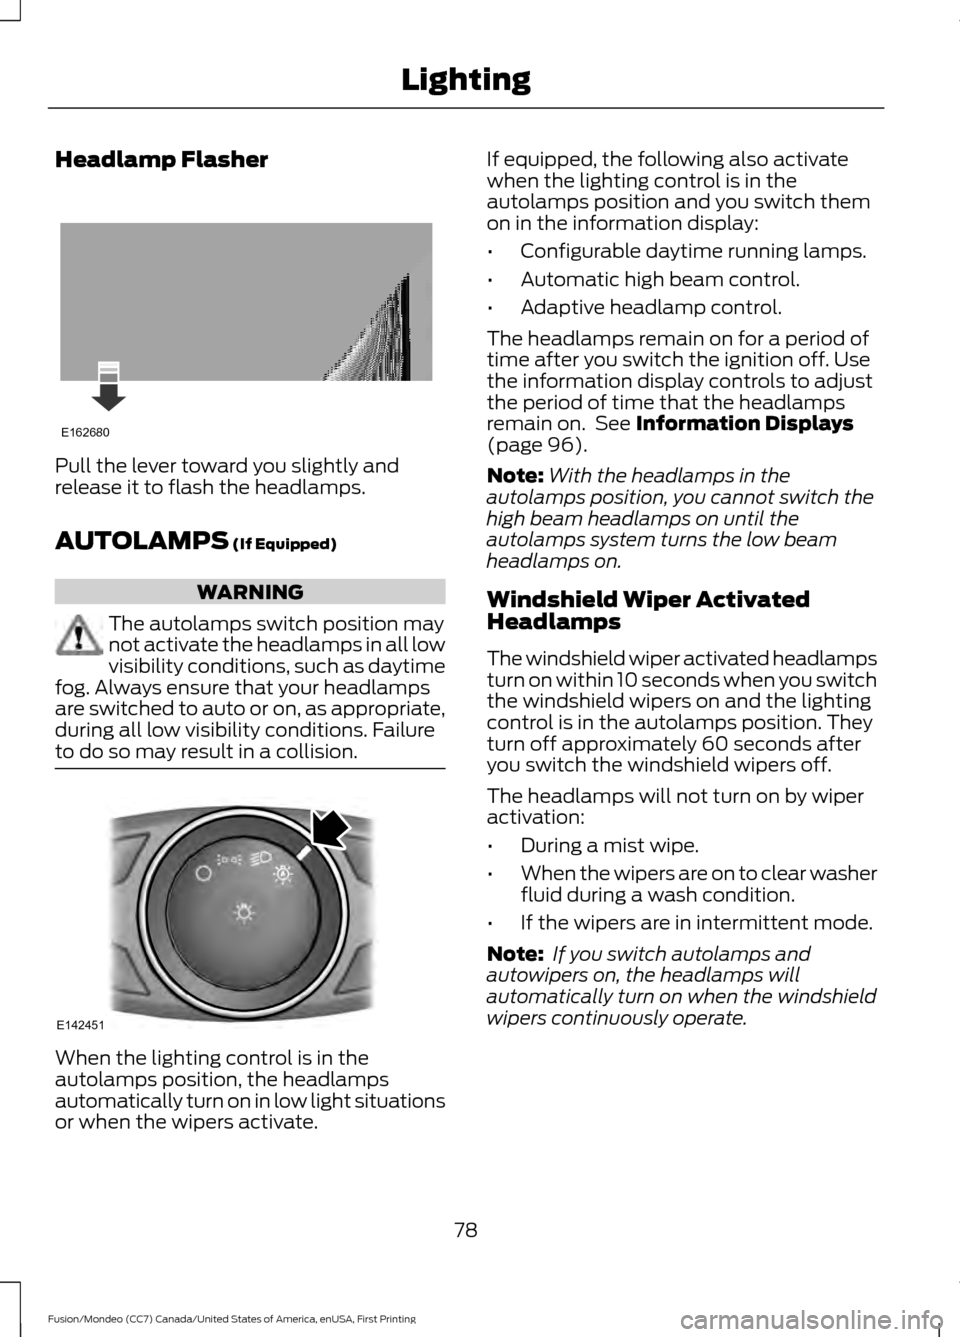
Headlamp Flasher
Pull the lever toward you slightly and
release it to flash the headlamps.
AUTOLAMPS (If Equipped)
WARNING
The autolamps switch position may
not activate the headlamps in all low
visibility conditions, such as daytime
fog. Always ensure that your headlamps
are switched to auto or on, as appropriate,
during all low visibility conditions. Failure
to do so may result in a collision. When the lighting control is in the
autolamps position, the headlamps
automatically turn on in low light situations
or when the wipers activate. If equipped, the following also activate
when the lighting control is in the
autolamps position and you switch them
on in the information display:
•
Configurable daytime running lamps.
• Automatic high beam control.
• Adaptive headlamp control.
The headlamps remain on for a period of
time after you switch the ignition off. Use
the information display controls to adjust
the period of time that the headlamps
remain on. See
Information Displays
(page 96).
Note: With the headlamps in the
autolamps position, you cannot switch the
high beam headlamps on until the
autolamps system turns the low beam
headlamps on.
Windshield Wiper Activated
Headlamps
The windshield wiper activated headlamps
turn on within 10 seconds when you switch
the windshield wipers on and the lighting
control is in the autolamps position. They
turn off approximately 60 seconds after
you switch the windshield wipers off.
The headlamps will not turn on by wiper
activation:
• During a mist wipe.
• When the wipers are on to clear washer
fluid during a wash condition.
• If the wipers are in intermittent mode.
Note: If you switch autolamps and
autowipers on, the headlamps will
automatically turn on when the windshield
wipers continuously operate.
78
Fusion/Mondeo (CC7) Canada/United States of America, enUSA, First Printing LightingE162680 E142451
Page 82 of 518
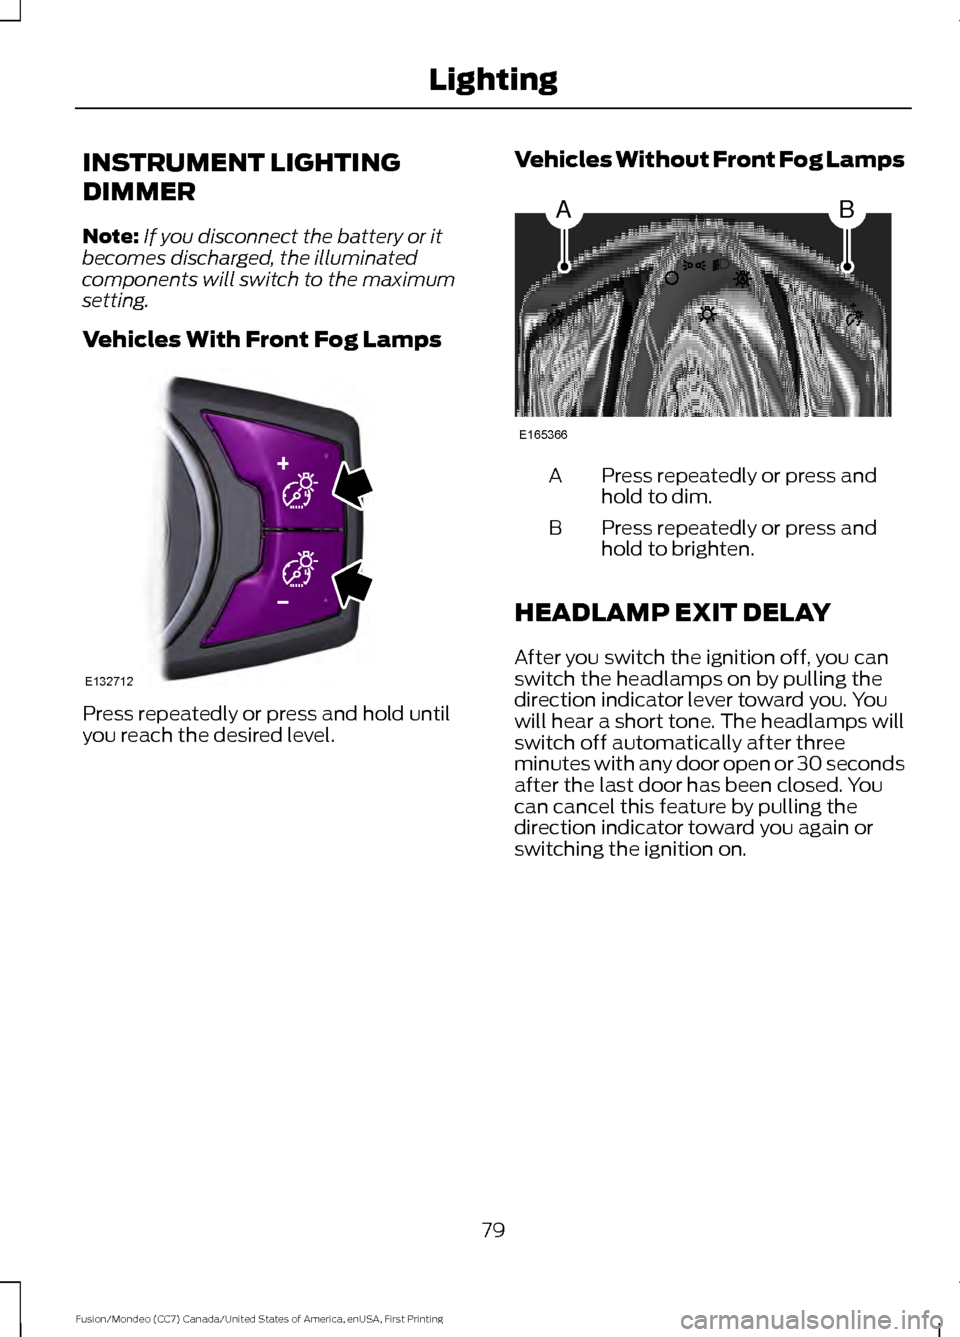
INSTRUMENT LIGHTING
DIMMER
Note:
If you disconnect the battery or it
becomes discharged, the illuminated
components will switch to the maximum
setting.
Vehicles With Front Fog Lamps Press repeatedly or press and hold until
you reach the desired level. Vehicles Without Front Fog Lamps Press repeatedly or press and
hold to dim.
A
Press repeatedly or press and
hold to brighten.
B
HEADLAMP EXIT DELAY
After you switch the ignition off, you can
switch the headlamps on by pulling the
direction indicator lever toward you. You
will hear a short tone. The headlamps will
switch off automatically after three
minutes with any door open or 30 seconds
after the last door has been closed. You
can cancel this feature by pulling the
direction indicator toward you again or
switching the ignition on.
79
Fusion/Mondeo (CC7) Canada/United States of America, enUSA, First Printing LightingE132712 AB
E165366
Page 83 of 518
DAYTIME RUNNING LAMPS (If
Equipped) WARNING
The daytime running lamps system
does not activate the rear lamps and
may not provide adequate lighting
during low visibility driving conditions. Also,
the autolamps switch position may not
activate the headlamps in all low visibility
conditions, such as daytime fog. Make sure
the headlamps are switched to auto or on,
as appropriate, during all low visibility
conditions. Failure to do so may result in a
crash. Type 1 - Conventional (Non-
Configurable)
The daytime running lamps turn on when:
1. The ignition is switched to the on
position.
2. The transmission is not in park (P) for vehicles with automatic transmissions
or the parking brake is released for
vehicles with manual transmissions.
3. The lighting control is in the off, parking
lamp or autolamps positions.
4. The headlamps are off.
Type 2 - Configurable
Switch the daytime running lamps on or
off using the information display controls.
See
Information Displays (page 96).
The daytime running lamps turn on when:
1. They are switched on in the information
display. See
Information Displays
(page 96).
2. The ignition is switched to the on position. 3. The transmission is not in park (P) for
vehicles with automatic transmissions
or the parking brake is released for
vehicles with manual transmissions.
4. The lighting control is in the autolamps
position.
5. The headlamps are off.
The other lighting control switch positions
do not activate the daytime running lamps,
and you can use them to temporarily
override autolamp control.
When switched off in the information
display, the daytime running lamps are off
in all lighting control switch positions.
AUTOMATIC HIGH BEAM
CONTROL
(If Equipped)
The system will automatically turn on your
high beams if it is dark enough and no other
traffic is present. When it detects the
headlights of an approaching vehicle, the
tail lamps of the preceding vehicle or street
lighting, the system will turn off the high
beams before they distract other drivers.
The low beams remain on.
Note: If it appears that automatic control
of the high beams is not functioning
properly, check the windshield in front of
the camera for a blockage. A clear view of
the road is required for proper system
operation. Have any windshield damage in
the area of the camera ’s field-of-view
repaired.
Note: If the system detects a blockage, for
example bird droppings, bug splatter, snow
or ice, the system will go into low beam
mode until you clear the blockage. A
message may also appear in the instrument
cluster display noting the front camera is
blocked.
80
Fusion/Mondeo (CC7) Canada/United States of America, enUSA, First Printing Lighting
Page 87 of 518
POWER WINDOWS
WARNINGS
Do not leave children unattended in
your vehicle and do not let them play
with the power windows. They may
seriously injure themselves. When closing the power windows,
you should verify they are free of
obstructions and make sure that
children and pets are not in the proximity
of the window openings. Note:
You may hear a pulsing noise when
just one of the windows is open. Lower the
opposite window slightly to reduce this
noise.
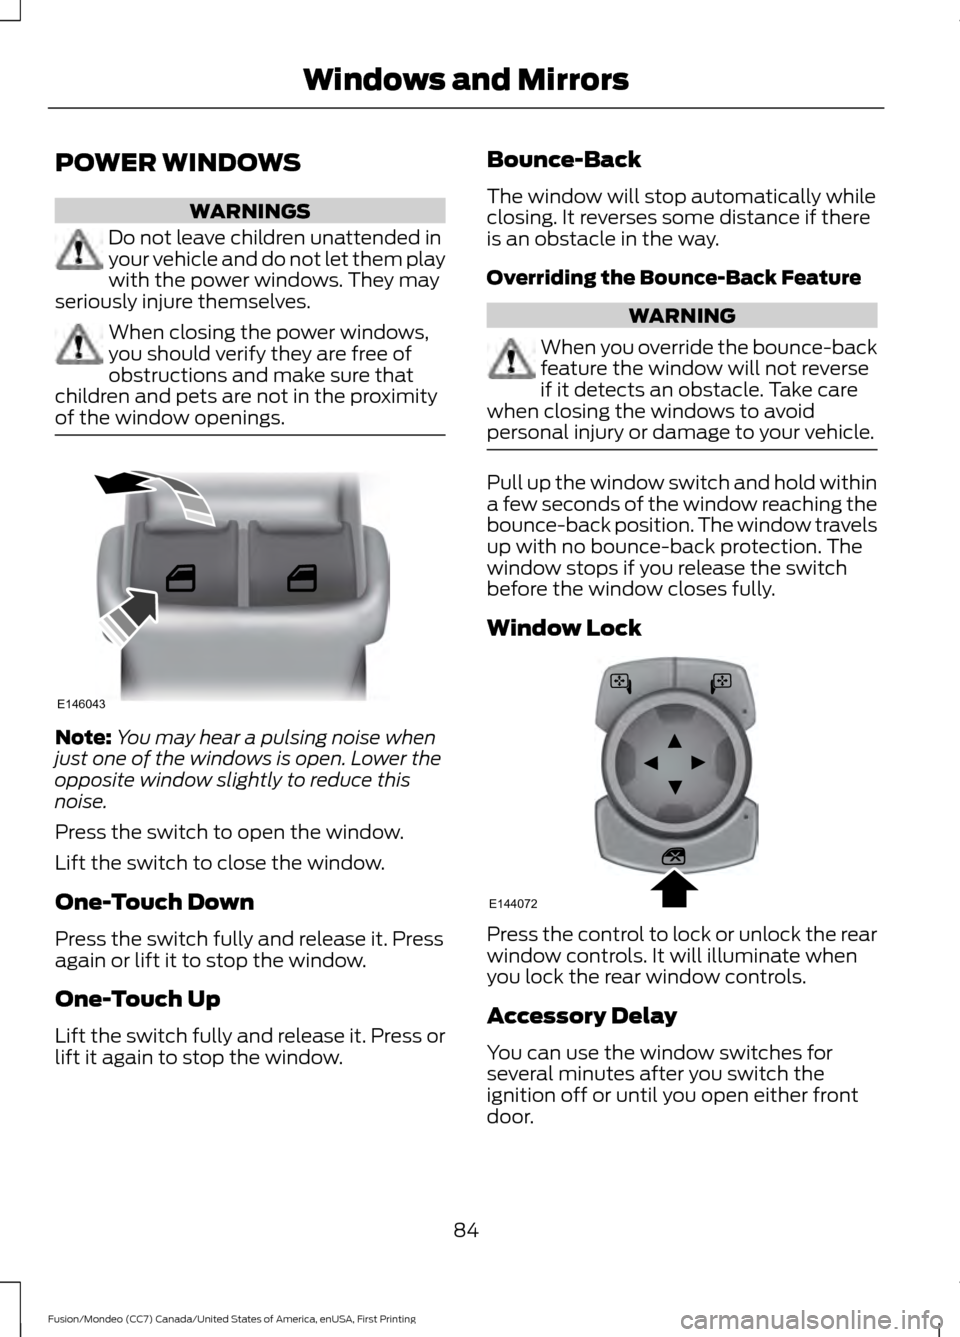
Press the switch to open the window.
Lift the switch to close the window.
One-Touch Down
Press the switch fully and release it. Press
again or lift it to stop the window.
One-Touch Up
Lift the switch fully and release it. Press or
lift it again to stop the window. Bounce-Back
The window will stop automatically while
closing. It reverses some distance if there
is an obstacle in the way.
Overriding the Bounce-Back Feature WARNING
When you override the bounce-back
feature the window will not reverse
if it detects an obstacle. Take care
when closing the windows to avoid
personal injury or damage to your vehicle. Pull up the window switch and hold within
a few seconds of the window reaching the
bounce-back position. The window travels
up with no bounce-back protection. The
window stops if you release the switch
before the window closes fully.
Window Lock
Press the control to lock or unlock the rear
window controls. It will illuminate when
you lock the rear window controls.
Accessory Delay
You can use the window switches for
several minutes after you switch the
ignition off or until you open either front
door.
84
Fusion/Mondeo (CC7) Canada/United States of America, enUSA, First Printing Windows and MirrorsE146043 E144072
Page 88 of 518

GLOBAL OPENING AND
CLOSING
You can use the remote control to operate
the windows with the ignition off.
Note:
You can enable or disable this feature
in the information display or see an
authorized dealer. See (page 96).
Note: To operate this feature, accessory
delay must not be active.
Opening the Windows
You can only open the windows for a short
time after you unlock your vehicle with the
remote control. After you unlock your
vehicle, press and hold the remote control
unlock button to open the windows and
vent the moonroof. Release the button
once movement starts. Press the lock or
unlock button to stop movement.
Closing the Windows WARNING
When closing the windows and
moonroof, you should verify they are
free of obstructions and make sure
that children and pets are not in the
proximity of the window openings. To close the windows and moonroof, press
and hold the remote control lock button.
Release the button once movement starts.
Press the lock or unlock button to stop
movement.
EXTERIOR MIRRORS
Power Exterior Mirrors
WARNING
Do not adjust the mirrors when your
vehicle is moving. Left-hand mirror
A
Adjustment control
B
Right-hand mirror
C
To adjust a mirror:
1. Select the mirror you want to adjust. The control will illuminate.
2. Adjust the position of the mirror.
3. Press the mirror switch again.
Fold-Away Exterior Mirrors
Push the mirror toward the door window
glass. Make sure that you fully engage the
mirror in its support when returning it to its
original position.
Heated Exterior Mirrors
(If Equipped)
See Heated Windows and Mirrors (page
128
).
Memory Mirrors
(If Equipped)
You can save and recall the mirror
positions through the memory function.
See
Memory Function (page 134).
Auto-Dimming Feature
(If Equipped)
The driver exterior mirror automatically
dims when the interior auto-dimming
mirror turns on.
85
Fusion/Mondeo (CC7) Canada/United States of America, enUSA, First Printing Windows and MirrorsE144073
Page 93 of 518
Engine Coolant Temperature
Gauge
Shows the temperature of the engine
coolant. At normal operating temperature,
the needle will remain in the center section.
If the needle enters the red section, the
engine is overheating. Stop the engine,
switch the ignition off and determine the
cause once the engine has cooled down.
Note:
Do not restart the engine until the
cause of overheating has been resolved. WARNING
Never remove the coolant reservoir
cap while the engine is running or hot.
Fuel Gauge
Note:
The fuel gauge may vary slightly
when your vehicle is moving or on a gradient.
Switch the ignition on. The fuel gauge will
indicate approximately how much fuel is
left in the fuel tank. The arrow adjacent to
the fuel pump symbol indicates on which
side of your vehicle the fuel filler door is
located.
The needle should move toward F when
you refuel your vehicle. If the needle points
to E after adding fuel, this indicates your
vehicle needs service soon. After refueling some variability in needle
position is normal:
•
It may take a short time for the needle
to reach full after leaving the gas
station. This is normal and depends
upon the slope of pavement at the gas
station.
• The fuel amount dispensed into the
tank is a little less or more than the
gauge indicated. This is normal and
depends upon the slope of pavement
at the gas station.
• If the gas station nozzle shuts off
before the tank is full, try a different
gas pump nozzle.
• There is a small reserve left in the tank
when the fuel gauge reaches empty.
Low Fuel Reminder
A low fuel reminder triggers when the
distance to empty reaches about 50 miles
(80 km) to empty.
Variations:
Note: The low fuel reminder can appear at
different fuel gauge positions depending on
fuel economy conditions. This variation is
normal.
90
Fusion/Mondeo (CC7) Canada/United States of America, enUSA, First Printing Instrument Cluster
Page 95 of 518
Note:
Some warning indicators appear in
the information display and function the
same as a warning lamp but do not display
when you start your vehicle.
Adaptive Cruise Control (If Equipped) The speed control system
indicator light changes color to
indicate what mode the system
is in: See Using Cruise Control (page 188).
On (white light): Illuminates when the
adaptive cruise control system is turned
on. Turns off when the speed control
system is turned off.
Engaged (green light): Illuminates when
the adaptive cruise control system is
engaged. Turns off when the speed control
system is disengaged.
Anti-Lock Braking System If it illuminates when you are
driving, this indicates a
malfunction. You will continue
to have the normal braking system
(without ABS) unless the brake system
warning lamp is also illuminated. Have the
system checked by your authorized dealer.
Auto Start-stop
(If Equipped) It will illuminate to inform you
when the engine shuts down or
in conjunction with a message.
Battery If it illuminates while driving, it
indicates a malfunction. Switch
off all unnecessary electrical
equipment and have the system checked
by your authorized dealer immediately. Blind Spot Monitor
(If Equipped) It will illuminate when you switch
this feature off or in conjunction
with a message. See Blind Spot
Information System
(page 201). See
Information Messages (page 105).
Brake System It will illuminate when you
engage the parking brake with
the ignition on.
If it illuminates when you are driving, check
that the parking brake is not engaged. If
the parking brake is not engaged, this
indicates low brake fluid level or a brake
system malfunction. Have the system
checked immediately by your authorized
dealer. WARNING
Driving your vehicle with the warning
lamp on is dangerous. A significant
decrease in braking performance
may occur. It will take you longer to stop
your vehicle. Have your vehicle checked by
your authorized dealer immediately. Driving
extended distances with the parking brake
engaged can cause brake failure and the
risk of personal injury. Cruise Control
(If Equipped)
It will illuminate when you switch
this feature on.
Direction Indicator Illuminates when the left or right
turn signal or the hazard warning
flasher is turned on. If the
indicators stay on or flash faster, check for
a burned out bulb. See
Changing a Bulb
(page 261).
92
Fusion/Mondeo (CC7) Canada/United States of America, enUSA, First Printing Instrument ClusterE144524 E151262 E144522 E71340