2016 FORD F450 SUPER DUTY tire type
[x] Cancel search: tire typePage 35 of 507
Safety Belt Locking Modes
WARNINGS
After any vehicle crash, the safetybelt system at all passenger seatingpositions must be checked by anauthorized dealer to verify that theautomatic locking retractor feature forchild seats is still functioning properly. Inaddition, all safety belts should be checkedfor proper function.
The belt and retractor must bereplaced if the safety belt assemblyautomatic locking retractor featureor any other safety belt function is notoperating properly when checked by anauthorized dealer. Failure to replace thebelt and retractor assembly could increasethe risk of injury in crashes.
All safety restraints in the vehicle arecombination lap and shoulder belts. Thedriver safety belt has the first type oflocking mode. The front outboardpassenger and rear outboard seat safetybelts have both types of locking modesdescribed as follows:
Vehicle Sensitive Mode
This is the normal retractor mode, whichallows free shoulder belt lengthadjustment to your movements andlocking in response to vehicle movement.For example, if the driver brakes suddenlyor turns a corner sharply, or the vehiclereceives an impact of about 5 mph(8 km/h) or more, the combination safetybelts will lock to help reduce forwardmovement of the driver and passengers.
In addition, the retractor is designed to lockif the webbing is pulled out too quickly. Ifthis occurs, let the belt retract slightly andpull webbing out again in a slow andcontrolled manner.
Automatic Locking Mode
In this mode, the shoulder belt isautomatically pre-locked. The belt will stillretract to remove any slack in the shoulderbelt. The automatic locking mode is notavailable on the driver safety belt.
When to Use the Automatic LockingMode
Use this mode any time a child safety seat,except a booster, is installed in passengerfront or rear seating positions. You shouldproperly restrain children 12 years old andunder in a rear seating position wheneverpossible. See Child Safety (page 15).
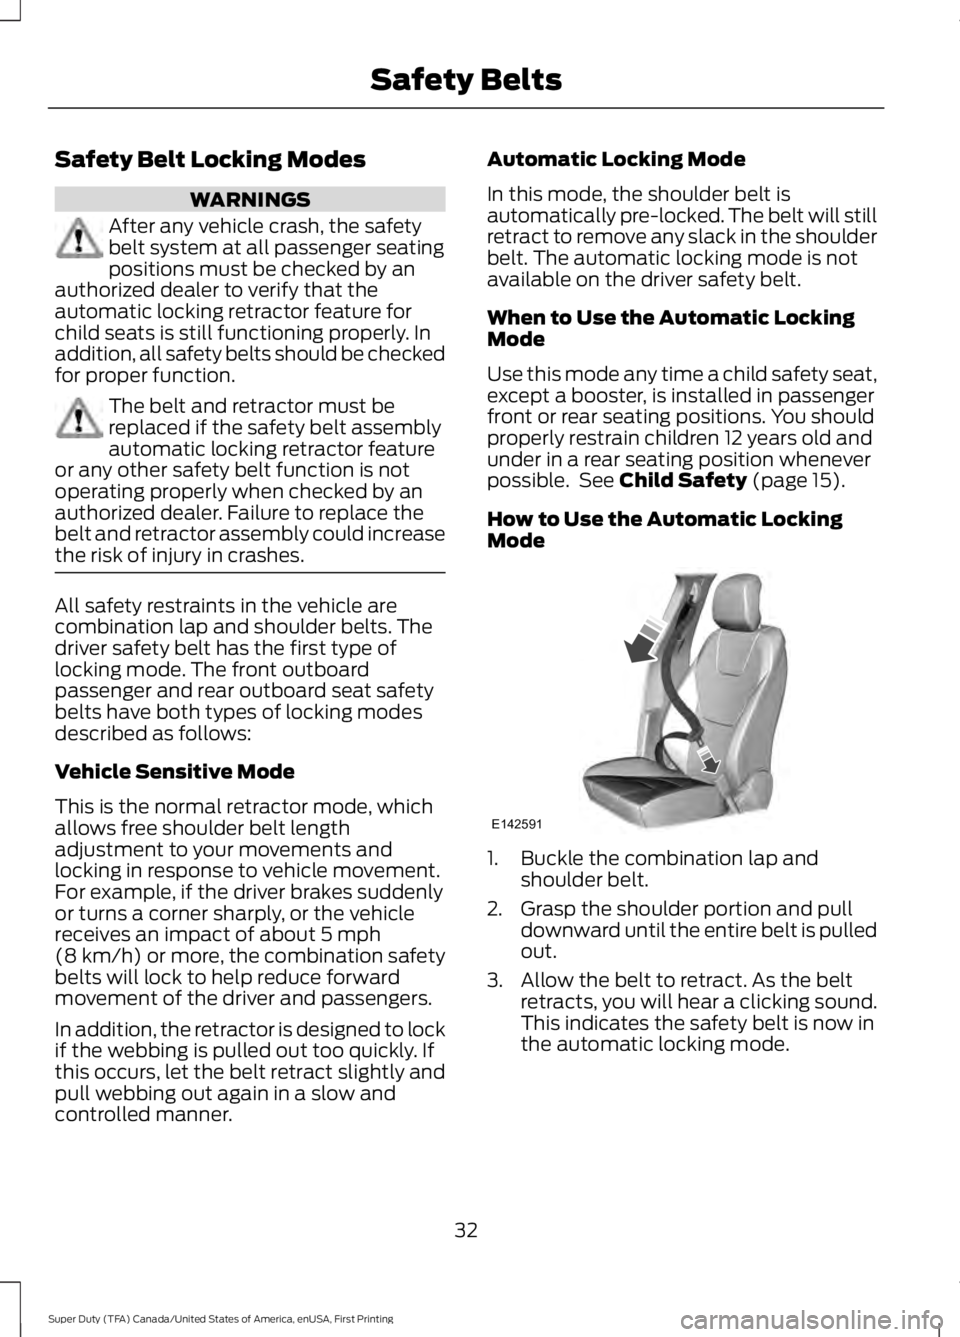
How to Use the Automatic LockingMode
1. Buckle the combination lap andshoulder belt.
2. Grasp the shoulder portion and pulldownward until the entire belt is pulledout.
3. Allow the belt to retract. As the beltretracts, you will hear a clicking sound.This indicates the safety belt is now inthe automatic locking mode.
32
Super Duty (TFA) Canada/United States of America, enUSA, First Printing
Safety BeltsE142591
Page 161 of 507
USING FOUR-WHEEL DRIVE
WARNING
For important information regardingsafe operation of this type of vehicle,See General Information (page264).
Note:Do not use 4X4 mode on dry, hardsurfaced roads. Doing so will produceexcessive noise, increase tire wear and maydamage drive components. 4X4 mode isonly intended for consistently slippery orloose surfaces.
Note:If 4X4 low is selected while thevehicle is moving above 3 mph (5 km/h),the 4WD system will not perform a shift.This is normal and should be no reason forconcern. Refer to Shifting to/from 4L (4X4Low) for proper operation.
Manual Shift On Stop (MSOS)4WD system (If Equipped)
Note:Some vehicles may be equipped withwheel ornaments that cover the 4x4 manualhub lock. These ornaments must beremoved to access the manual hub locks.
Note:The vehicle should not be driven in4X4 High or 4X4 Low modes with the hublocks set to FREE as this condition maydamage driveline system components.
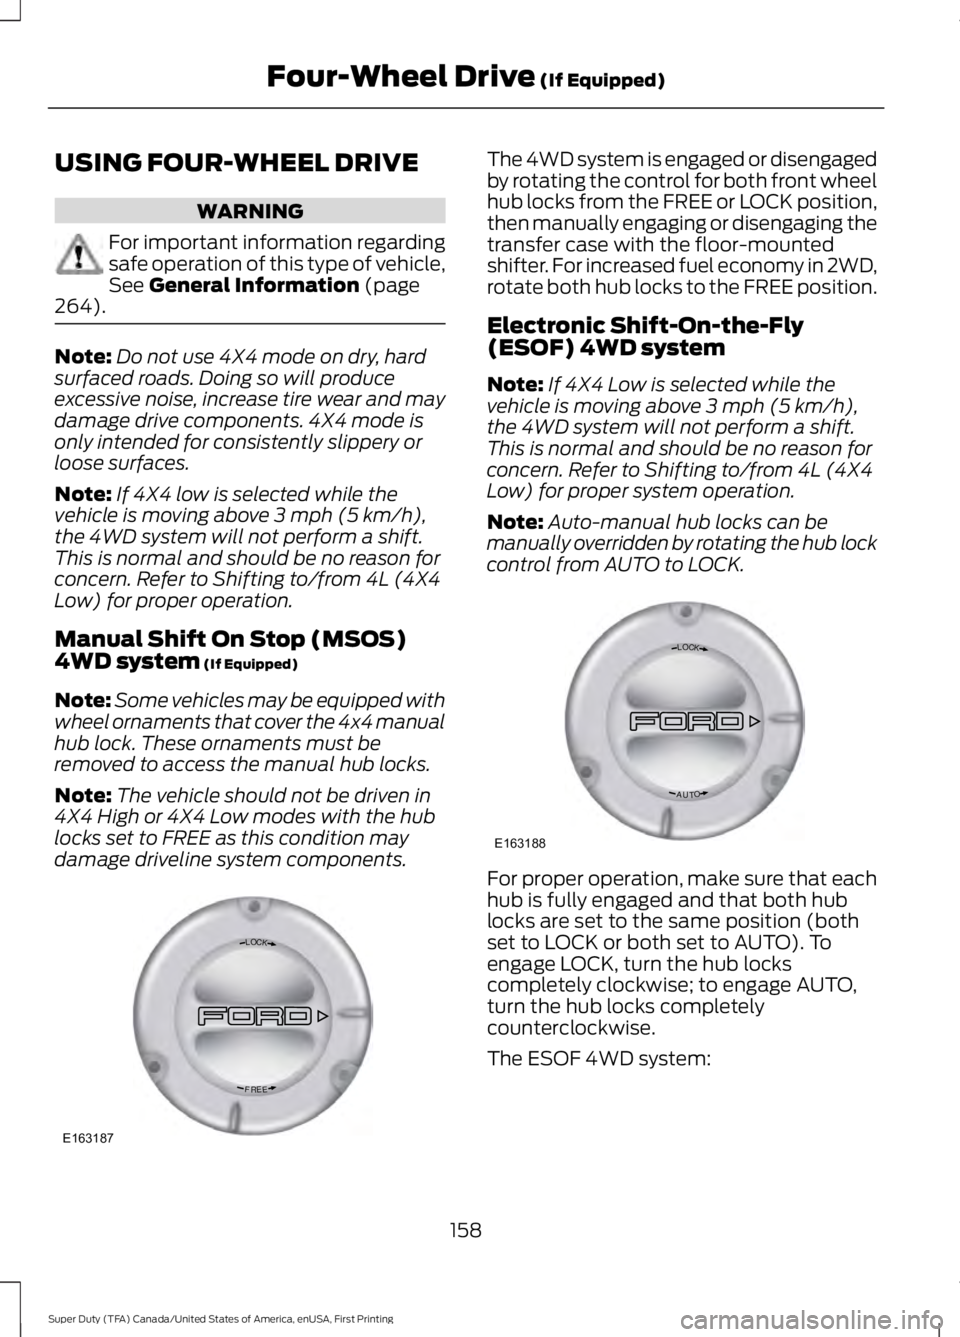
The 4WD system is engaged or disengagedby rotating the control for both front wheelhub locks from the FREE or LOCK position,then manually engaging or disengaging thetransfer case with the floor-mountedshifter. For increased fuel economy in 2WD,rotate both hub locks to the FREE position.
Electronic Shift-On-the-Fly(ESOF) 4WD system
Note:If 4X4 Low is selected while thevehicle is moving above 3 mph (5 km/h),the 4WD system will not perform a shift.This is normal and should be no reason forconcern. Refer to Shifting to/from 4L (4X4Low) for proper system operation.
Note:Auto-manual hub locks can bemanually overridden by rotating the hub lockcontrol from AUTO to LOCK.
For proper operation, make sure that eachhub is fully engaged and that both hublocks are set to the same position (bothset to LOCK or both set to AUTO). Toengage LOCK, turn the hub lockscompletely clockwise; to engage AUTO,turn the hub locks completelycounterclockwise.
The ESOF 4WD system:
158
Super Duty (TFA) Canada/United States of America, enUSA, First Printing
Four-Wheel Drive (If Equipped)LOC K
EERF
E163187 LOC K
OTUA
E163188
Page 166 of 507
Four-wheel drive (when you select a 4WDmode) uses all four wheels to power thevehicle. This increases traction, enablingyou to drive over terrain and roadconditions that a conventional two-wheeldrive vehicle cannot.
Basic Operating Principles
•Drive slower in strong crosswinds whichcan affect the normal steeringcharacteristics of your vehicle.
•When driving your vehicle on surfacesmade slippery by loose sand, water,gravel, snow or ice proceed with care.
•Do not use four-wheel drive on dry,hard surfaced roads. Doing so willproduce excessive noise, increase tirewear and may damage drivecomponents. Four-wheel drive modesare only intended for consistentlyslippery or loose surfaces.
If Your Vehicle leaves the Road
If your vehicle leaves the road, reduce yourvehicle speed and avoid severe braking.When your vehicle speed has been reducedease your vehicle back onto the road. Donot turn the steering wheel sharply whilereturning your vehicle to the road.
It may be safer to stay on the shoulder ofthe road and slow down gradually beforereturning to the road. You may lose controlif you do not slow down or if you turn thesteering wheel too sharply or abruptly.
It may be less risky to strike small objects,such as freeway reflectors, with minordamage to your vehicle rather thanattempt a sudden return to the road whichcould cause your vehicle to slide sidewaysout of control or roll over. Remember, yoursafety and the safety of others should beyour primary concern.
Emergency Maneuvers
In an unavoidable emergency situationwhere a sudden sharp turn must be made,remember to avoid over-driving yourvehicle (i.e. turn the steering wheel only asrapidly and as far as required to avoid theemergency). Excessive steering can resultin loss of vehicle control. Apply smoothpressure to the accelerator pedal or brakepedal when changes in vehicle speed arerequired. Avoid abrupt steering,acceleration and braking. This could resultin an increased risk of vehicle roll over, lossof vehicle control and personal injury. Useall available road surface to bring yourvehicle to a safe direction of travel.
In the event of an emergency stop, avoidskidding the tires and do not attempt anysharp steering wheel movements.
If your vehicle goes from one type ofsurface to another (i.e. from concrete togravel) there will be a change in the wayyour vehicle responds to a maneuver (i.e.steering, acceleration or braking).
Sand
When driving over sand, try to keep all fourwheels on the most solid area of the trail.Avoid reducing the tire pressures but shiftto a lower gear and drive steadily throughthe terrain. Apply the accelerator slowlyand avoid excessive wheel slip.
When driving at slow speeds in deep sandunder high outside temperatures, use a lowgear when possible. Low gear operationwill maximize the engine and transmissioncooling capability.
Avoid driving at excessive speeds, thiscauses vehicle momentum to work againstyou and your vehicle could become stuckto the point that assistance may berequired from another vehicle. Remember,you may be able to back out the way youcame if you proceed with caution.
163
Super Duty (TFA) Canada/United States of America, enUSA, First Printing
Four-Wheel Drive (If Equipped)
Page 206 of 507
•Check your hitch, electrical connectionsand trailer wheel lug nuts thoroughlyafter you have traveled 50 miles (80kilometers).
•When stopped in congested or heavytraffic during hot weather, place thegearshift in position P to aid engine andtransmission cooling and to help A/Cperformance.
•Turn off the speed control with heavyloads or in hilly terrain. The speedcontrol may turn off automaticallywhen you are towing on long, steepgrades.
•Shift to a lower gear when driving downa long or steep hill. Do not apply thebrakes continuously, as they mayoverheat and become less effective.
•If your transmission is equipped with aGrade Assist or Tow/Haul feature, usethis feature when towing. This providesengine braking and helps eliminateexcessive transmission shifting foroptimum fuel economy andtransmission cooling.
•If your vehicle is equipped withAdvanceTrac with RSC, this systemmay turn on during typical corneringmaneuvers with a heavily loaded trailer.This is normal. Turning the corner at aslower speed while towing may reducethis tendency.
•If you are towing a trailer frequently inhot weather, hilly conditions, at thegross combined weight rating (or anycombination of these factors), considerrefilling your rear axle with syntheticgear lubricant (if the axle is not alreadyfilled with it). See Capacities andSpecifications (page 303).
•Allow more distance for stopping witha trailer attached. Anticipate stops andbrake gradually.
•Avoid parking on a grade. However, ifyou must park on a grade:
1. Turn the steering wheel to point yourvehicle tires away from traffic flow.
2. Set your vehicle parking brake.
3. Place the automatic transmission inposition P.
4. Place wheel chocks in front and backof the trailer wheels. (Chocks notincluded with vehicle.)
Your vehicle may be equipped with atemporary or conventional spare tire. A"temporary" spare tire is different in size(diameter or width), tread-type(All-Season or All Terrain) or is from adifferent manufacturer than the road tireson your vehicle. Consult information on thetire label or Safety Compliance label forlimitations when using.
Launching or Retrieving a Boat orPersonal Watercraft (PWC)
Note:Disconnect the wiring to the trailerbefore backing the trailer into the water.
Note:Reconnect the wiring to the trailerafter you remove the trailer from the water.
When backing down a ramp during boatlaunching or retrieval:
•Do not allow the static water level torise above the bottom edge of the rearbumper.
•Do not allow waves to break higherthan 6 inches (15 centimeters) abovethe bottom edge of the rear bumper.
Exceeding these limits may allow water toenter vehicle components:
•Causing internal damage to thecomponents.
•Affecting driveability, emissions, andreliability.
203
Super Duty (TFA) Canada/United States of America, enUSA, First Printing
Towing
Page 267 of 507
GENERAL INFORMATION
Use only approved wheel and tire sizes,using other sizes could damage yourvehicle. If you change the diameter of thetires from that fitted at the factory, thespeedometer may not display the correctspeed. Take your vehicle to an authorizedFord dealer to have the systemreprogrammed. If you intend to change thesize of the wheels from that fitted by themanufacturer, you can check the suitabilitywith an authorized dealer.
Additional information related to thefunctionality and maintenance of your tirescan be found later in this chapter. See TireCare (page 267).
The Ford recommended tire inflationpressures can be found on the Tire Label,which is located on the B-pillar or the edgeof the driver's door. This information canalso be found on the Safety ComplianceCertification Label (affixed to either thedoor hinge pillar, door-latch post, or thedoor edge that meets the door last post;next to the driver’s seating position).
Ford strongly recommends maintainingthese tire pressures at all times. Failure tofollow the tire pressure recommendationscan cause uneven treadwear patterns,reduced fuel economy, and adverselyaffect the way your vehicle handles.
Note:Check and set the tire pressure at theambient temperature in which you areintending to drive your vehicle and when thetires are cold.
Note:Check your tire pressures at leastonce per month.
Set the pressure for your spare tire to thehighest value given for your vehicle and tiresize combination (if equipped).
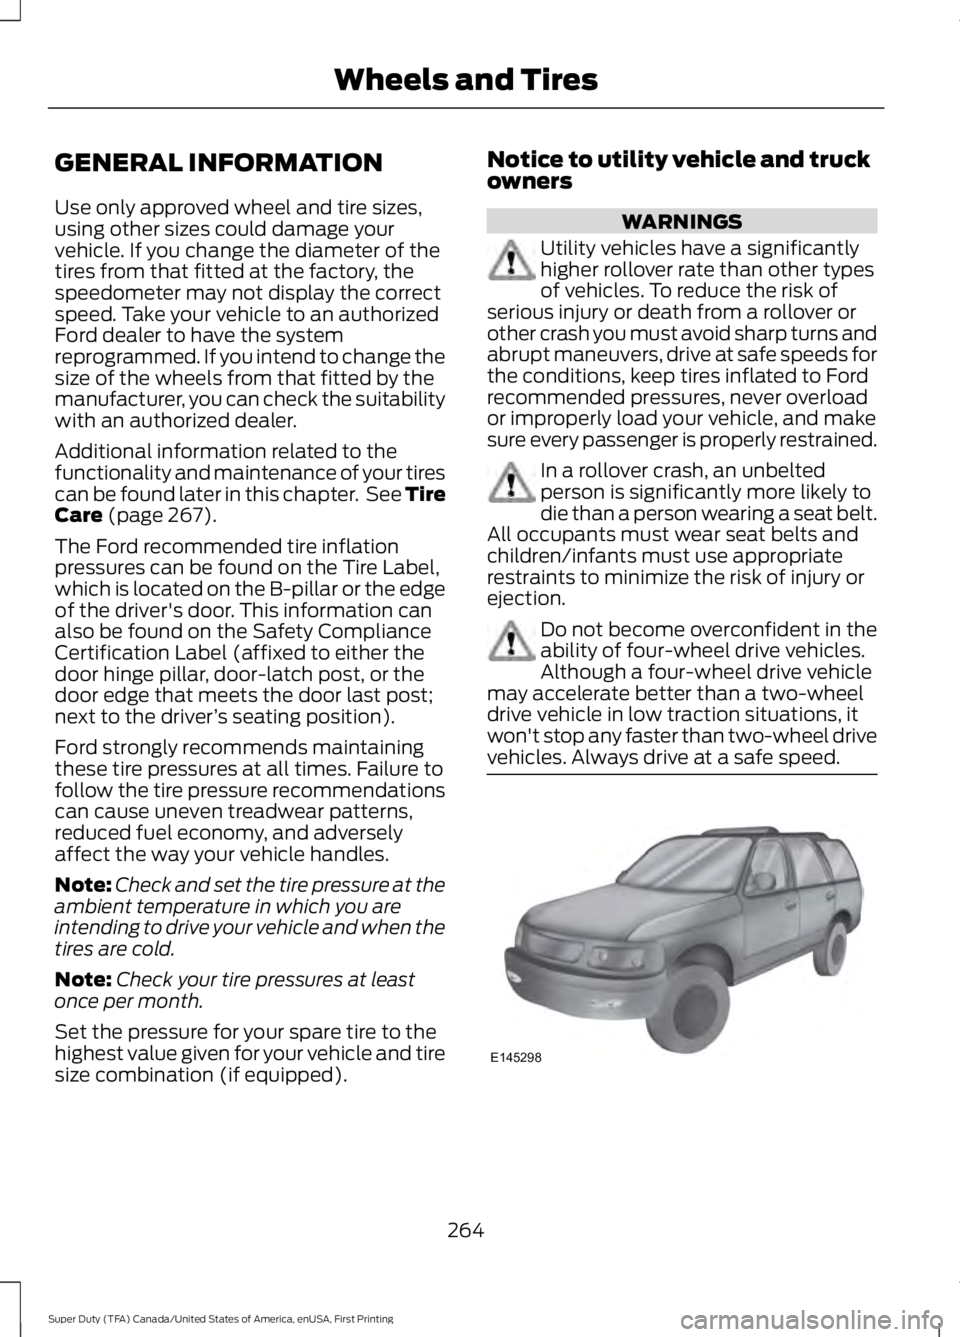
Notice to utility vehicle and truckowners
WARNINGS
Utility vehicles have a significantlyhigher rollover rate than other typesof vehicles. To reduce the risk ofserious injury or death from a rollover orother crash you must avoid sharp turns andabrupt maneuvers, drive at safe speeds forthe conditions, keep tires inflated to Fordrecommended pressures, never overloador improperly load your vehicle, and makesure every passenger is properly restrained.
In a rollover crash, an unbeltedperson is significantly more likely todie than a person wearing a seat belt.All occupants must wear seat belts andchildren/infants must use appropriaterestraints to minimize the risk of injury orejection.
Do not become overconfident in theability of four-wheel drive vehicles.Although a four-wheel drive vehiclemay accelerate better than a two-wheeldrive vehicle in low traction situations, itwon't stop any faster than two-wheel drivevehicles. Always drive at a safe speed.
264
Super Duty (TFA) Canada/United States of America, enUSA, First Printing
Wheels and TiresE145298
Page 270 of 507
TIRE CARE
Information About UniformTire Quality Grading
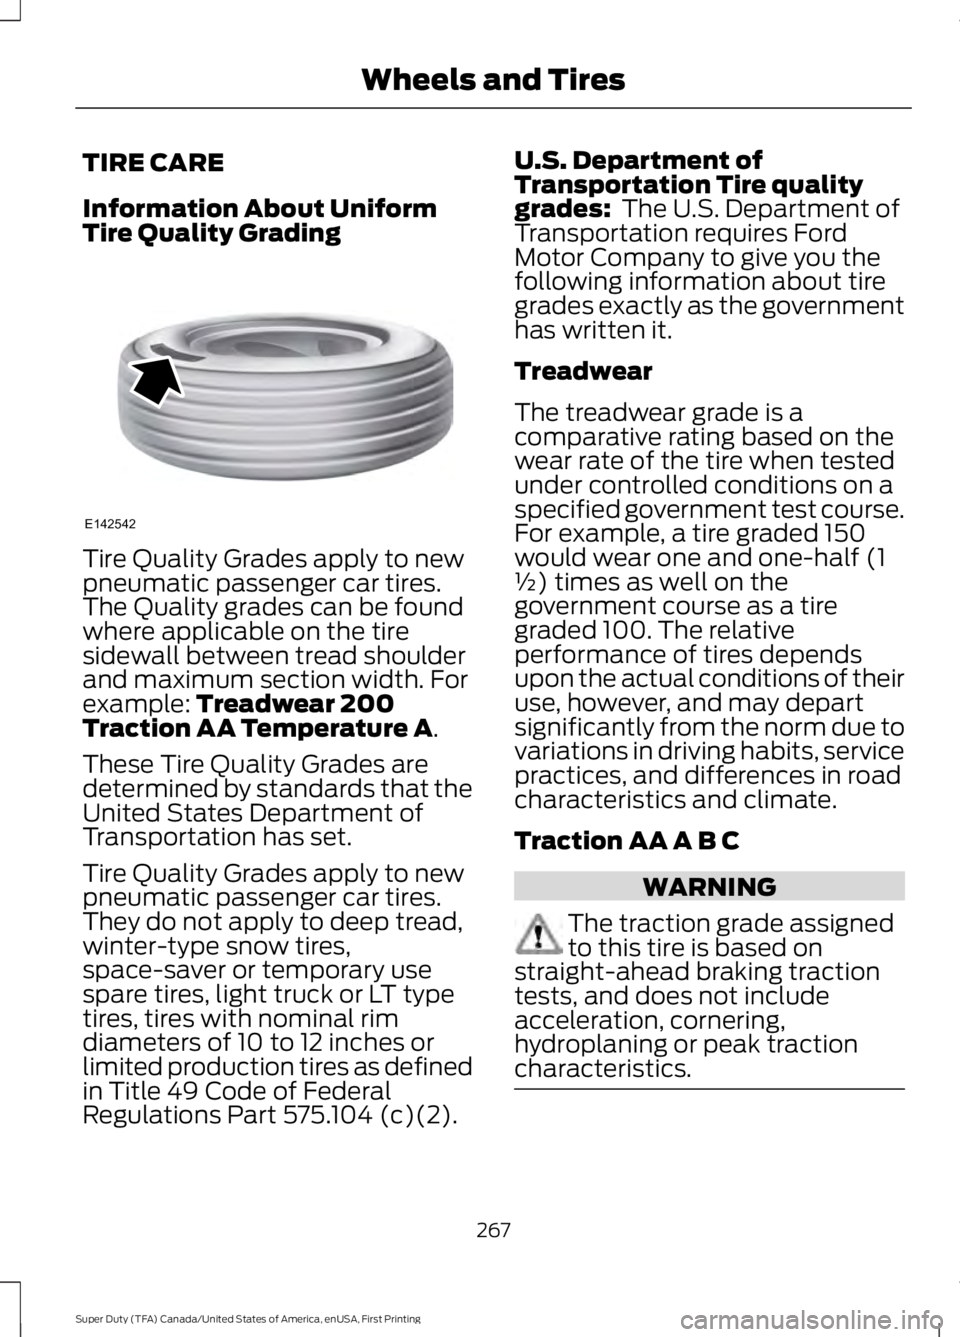
Tire Quality Grades apply to newpneumatic passenger car tires.The Quality grades can be foundwhere applicable on the tiresidewall between tread shoulderand maximum section width. Forexample: Treadwear 200Traction AA Temperature A.
These Tire Quality Grades aredetermined by standards that theUnited States Department ofTransportation has set.
Tire Quality Grades apply to newpneumatic passenger car tires.They do not apply to deep tread,winter-type snow tires,space-saver or temporary usespare tires, light truck or LT typetires, tires with nominal rimdiameters of 10 to 12 inches orlimited production tires as definedin Title 49 Code of FederalRegulations Part 575.104 (c)(2).
U.S. Department ofTransportation Tire qualitygrades: The U.S. Department ofTransportation requires FordMotor Company to give you thefollowing information about tiregrades exactly as the governmenthas written it.
Treadwear
The treadwear grade is acomparative rating based on thewear rate of the tire when testedunder controlled conditions on aspecified government test course.For example, a tire graded 150would wear one and one-half (1½) times as well on thegovernment course as a tiregraded 100. The relativeperformance of tires depends
upon the actual conditions of theiruse, however, and may departsignificantly from the norm due tovariations in driving habits, servicepractices, and differences in roadcharacteristics and climate.
Traction AA A B C
WARNING
The traction grade assignedto this tire is based onstraight-ahead braking tractiontests, and does not includeacceleration, cornering,hydroplaning or peak tractioncharacteristics.
267
Super Duty (TFA) Canada/United States of America, enUSA, First Printing
Wheels and TiresE142542
Page 272 of 507
*kPa: Kilopascal, a metric unit ofair pressure.
*PSI: Pounds per square inch, astandard unit of air pressure.
*Cold tire pressure: The tirepressure when the vehicle hasbeen stationary and out of directsunlight for an hour or more andprior to the vehicle being driven for1 mile (1.6 kilometers).
*Recommended inflationpressure: The cold inflationpressure found on the SafetyCompliance Certification Label(affixed to either the door hingepillar, door-latch post, or the dooredge that meets the door-latchpost, next to the driver's seatingposition), or Tire Label located onthe B-pillar or the edge of thedriver's door.
B-pillar: The structural memberat the side of the vehicle behindthe front door.
*Bead area of the tire: Area ofthe tire next to the rim.
* Sidewall of the tire: Areabetween the bead area and thetread.
*Tread area of the tire: Area ofthe perimeter of the tire thatcontacts the road when mountedon the vehicle.
*Rim: The metal support (wheel)for a tire or a tire and tubeassembly upon which the tire
beads are seated.
Information Contained on theTire Sidewall
Both United States and CanadaFederal regulations require tiremanufacturers to placestandardized information on thesidewall of all tires. Thisinformation identifies anddescribes the fundamentalcharacteristics of the tire and alsoprovides a U.S. DOT TireIdentification Number for safetystandard certification and in caseof a recall.
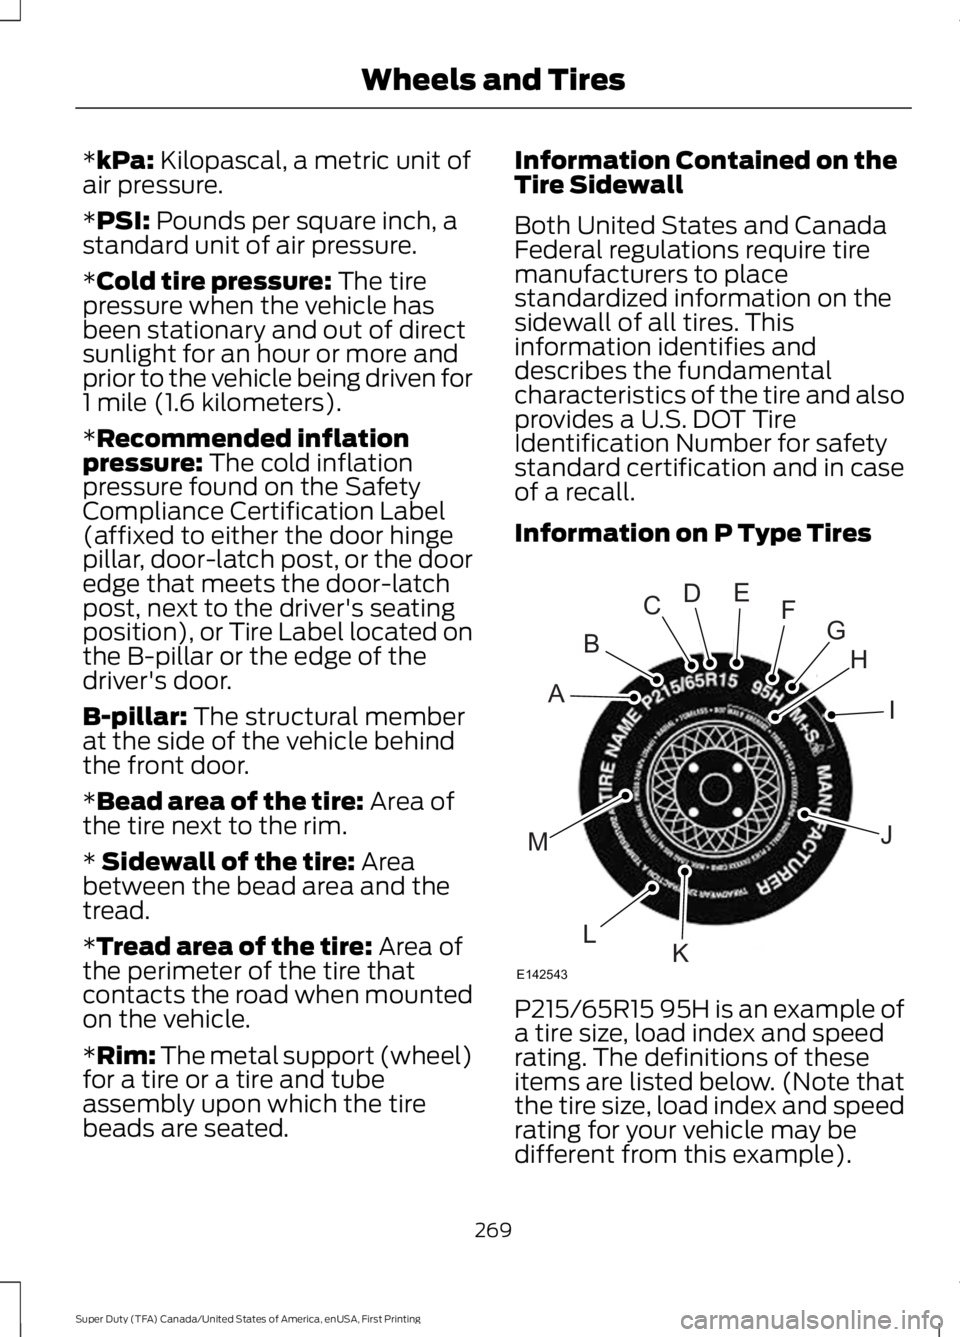
Information on P Type Tires
P215/65R15 95H is an example ofa tire size, load index and speedrating. The definitions of theseitems are listed below. (Note thatthe tire size, load index and speedrating for your vehicle may bedifferent from this example).
269
Super Duty (TFA) Canada/United States of America, enUSA, First Printing
Wheels and TiresH
I
J
KL
M
A
B
CDEFG
E142543
Page 273 of 507
A.P: Indicates a tire, designatedby the Tire and Rim Association,that may be used for service oncars, sport utility vehicles,minivans and light trucks.Note: Ifyour tire size does not begin witha letter this may mean it isdesignated by either the EuropeanTire and Rim TechnicalOrganization or the Japan TireManufacturing Association.
B.215: Indicates the nominalwidth of the tire in millimetersfrom sidewall edge to sidewalledge. In general, the larger thenumber, the wider the tire.
C.65: Indicates the aspect ratiowhich gives the tire's ratio ofheight to width.
D.R: Indicates a radial type tire.
E.15: Indicates the wheel or rimdiameter in inches. If you changeyour wheel size, you will have topurchase new tires to match thenew wheel diameter.
F.95: Indicates the tire's loadindex. It is an index that relates tohow much weight a tire can carry.You may find this information inyour owner’s manual. If not,contact a local tire dealer.
Note:You may not find thisinformation on all tires because itis not required by federal law.
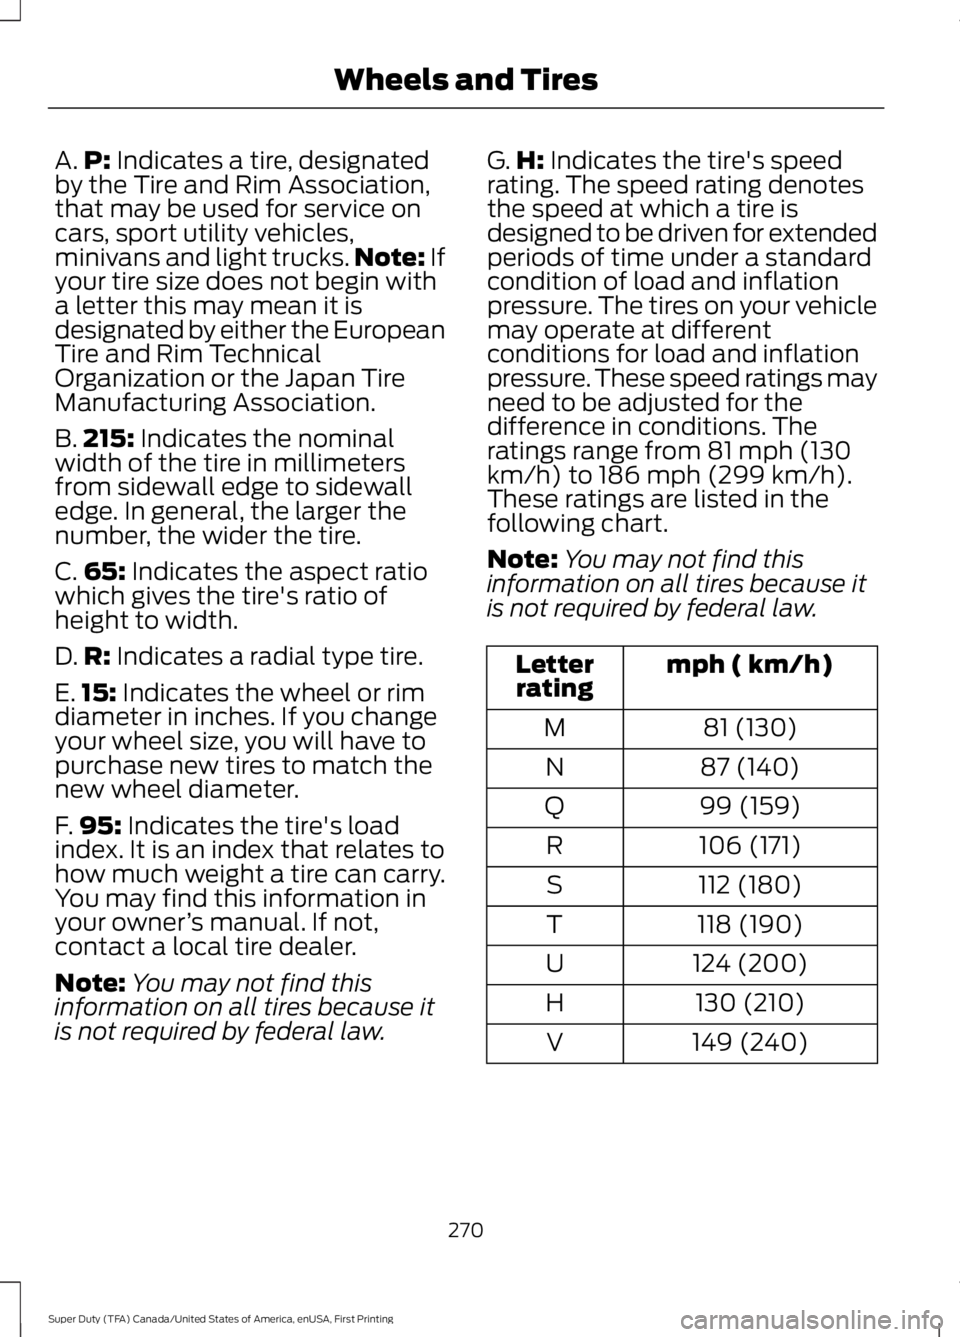
G.H: Indicates the tire's speedrating. The speed rating denotesthe speed at which a tire isdesigned to be driven for extendedperiods of time under a standardcondition of load and inflationpressure. The tires on your vehiclemay operate at differentconditions for load and inflationpressure. These speed ratings mayneed to be adjusted for thedifference in conditions. Theratings range from 81 mph (130km/h) to 186 mph (299 km/h).These ratings are listed in thefollowing chart.
Note:You may not find thisinformation on all tires because itis not required by federal law.
mph ( km/h)Letterrating
81 (130)M
87 (140)N
99 (159)Q
106 (171)R
112 (180)S
118 (190)T
124 (200)U
130 (210)H
149 (240)V
270
Super Duty (TFA) Canada/United States of America, enUSA, First Printing
Wheels and Tires