2016 FORD F250 manual transmission
[x] Cancel search: manual transmissionPage 156 of 507

M (Manual)
With the gearshift lever in manual (M), the
driver can change gears up or down as
desired. By moving the gearshift lever from
drive position drive (D) to manual (M) you
now have control of selecting the gear you
desire using buttons on the shift lever. See
Understanding your SelectShift
Automatic
™ transmission later in this
section.
To return to normal drive (D) position,
move the shift lever back from manual (M)
to drive (D).
The transmission operates in gears one
through six.
Second (2)
Transmission operates in second (2) gear
only. Use second (2) gear to start-up on
slippery roads.
First (1)
• Transmission operates in first (1) gear
only.
• Provides maximum engine braking.
• Allows upshifts by moving gearshift
lever.
• Does not downshift into first (1) gear
at high speeds; allows for first (1) gear
when vehicle reaches slower speeds.
Forced downshifts
• Allowed in drive (D) with the tow/haul
feature on or off.
• Press the accelerator to the floor.
• Allows transmission to select an
appropriate gear.
Tow/Haul Mode To activate tow/haul, press the
button on the gearshift lever
once. The TOW HAUL indicator
light illuminates in the instrument cluster. The tow/haul feature:
•
Delays upshifts to reduce the frequency
of transmission shifting.
• Provides engine braking in all forward
gears, which slows your vehicle and
assists you in controlling your vehicle
when descending a grade.
• Depending on driving conditions and
load conditions, may downshift the
transmission, slow your vehicle and
control your vehicle speed when
descending a hill, without pressing the
accelerator pedal. The amount of
downshift braking provided will vary
based upon the amount you press the
brake pedal.
The tow/haul feature improves
transmission operation when towing a
trailer or a heavy load. All transmission
gear ranges are available when using
tow/haul.
To deactivate the tow/haul feature and
return to normal driving mode, press the
button on the gearshift lever twice. The
TOW HAUL light deactivates. Tow/haul
also deactivates when you power down
your vehicle. WARNING
Do not use the tow/haul feature
when driving in icy or slippery
conditions as the increased engine
braking can cause the rear wheels to slide
and your vehicle to swing around with the
possible loss of vehicle control. 153
Super Duty (TFA) Canada/United States of America, enUSA, First Printing TransmissionE161509
Page 157 of 507
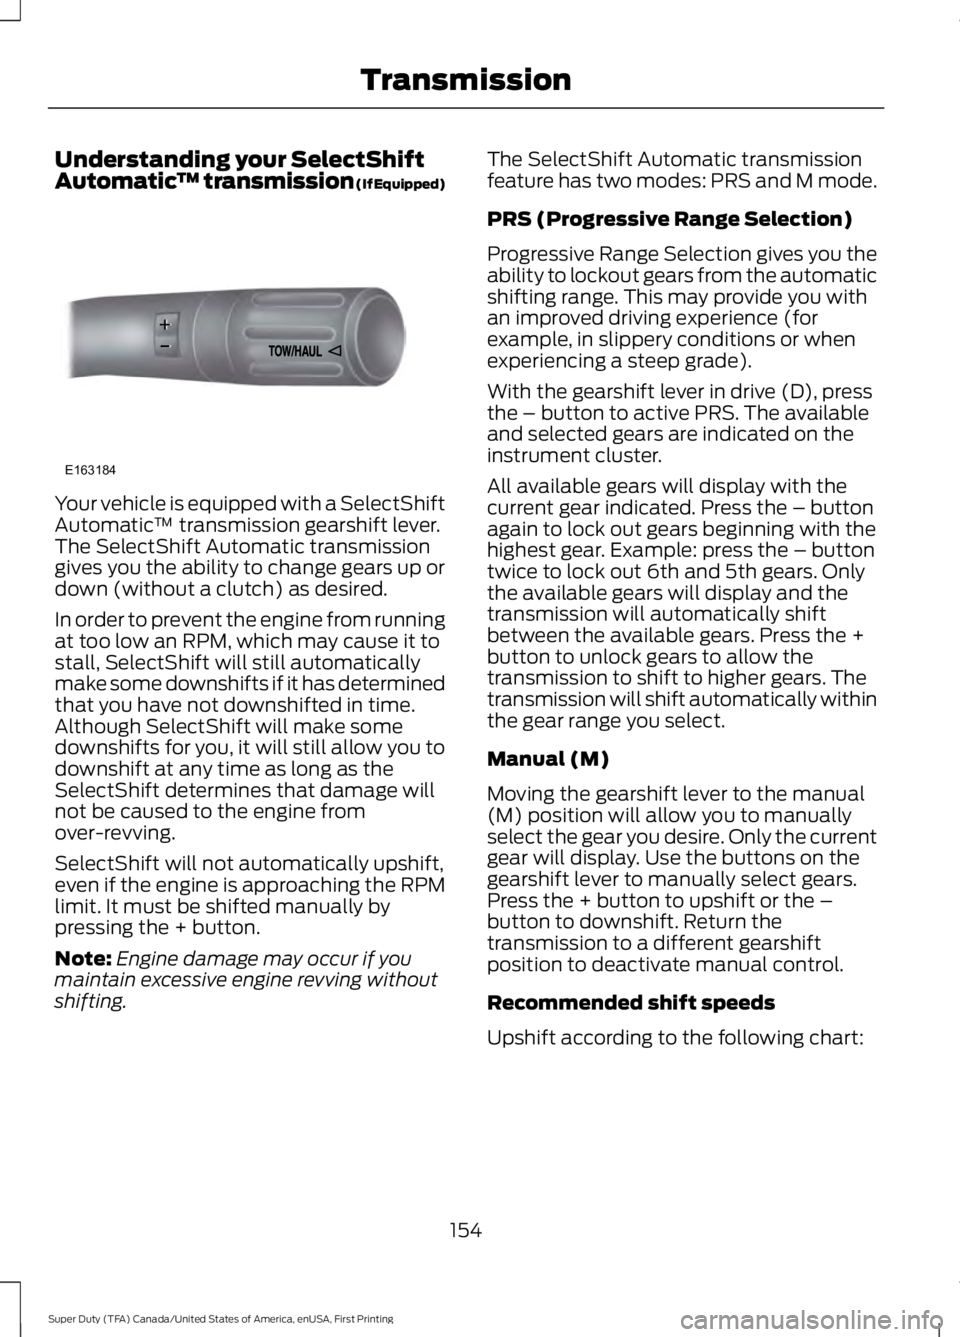
Understanding your SelectShift
Automatic
™ transmission (If Equipped)Your vehicle is equipped with a SelectShift
Automatic
™ transmission gearshift lever.
The SelectShift Automatic transmission
gives you the ability to change gears up or
down (without a clutch) as desired.
In order to prevent the engine from running
at too low an RPM, which may cause it to
stall, SelectShift will still automatically
make some downshifts if it has determined
that you have not downshifted in time.
Although SelectShift will make some
downshifts for you, it will still allow you to
downshift at any time as long as the
SelectShift determines that damage will
not be caused to the engine from
over-revving.
SelectShift will not automatically upshift,
even if the engine is approaching the RPM
limit. It must be shifted manually by
pressing the + button.
Note: Engine damage may occur if you
maintain excessive engine revving without
shifting. The SelectShift Automatic transmission
feature has two modes: PRS and M mode.
PRS (Progressive Range Selection)
Progressive Range Selection gives you the
ability to lockout gears from the automatic
shifting range. This may provide you with
an improved driving experience (for
example, in slippery conditions or when
experiencing a steep grade).
With the gearshift lever in drive (D), press
the – button to active PRS. The available
and selected gears are indicated on the
instrument cluster.
All available gears will display with the
current gear indicated. Press the – button
again to lock out gears beginning with the
highest gear. Example: press the – button
twice to lock out 6th and 5th gears. Only
the available gears will display and the
transmission will automatically shift
between the available gears. Press the +
button to unlock gears to allow the
transmission to shift to higher gears. The
transmission will shift automatically within
the gear range you select.
Manual (M)
Moving the gearshift lever to the manual
(M) position will allow you to manually
select the gear you desire. Only the current
gear will display. Use the buttons on the
gearshift lever to manually select gears.
Press the + button to upshift or the –
button to downshift. Return the
transmission to a different gearshift
position to deactivate manual control.
Recommended shift speeds
Upshift according to the following chart:
154
Super Duty (TFA) Canada/United States of America, enUSA, First Printing TransmissionE163184
Page 169 of 507
On some four-wheel drive vehicles, when
the transfer case is in the N (Neutral)
position, the engine and transmission are
disconnected from the rest of the driveline.
Therefore, the vehicle is free to roll even if
the automatic transmission is in P (Park)
or the manual transmission is in gear. Do
not leave the vehicle unattended with the
transfer case in the N (Neutral) position.
Always set the parking brake fully and turn
off the ignition when leaving the vehicle.
Maintenance and Modifications
The suspension and steering systems on
your vehicle have been designed and
tested to provide predictable performance
whether loaded or empty. For this reason,
we strongly recommend that you do not
make modifications such as adding or
removing parts (i.e. lift kits or stabilizer
bars) or by using replacement parts not
equivalent to the original factory
equipment.
We recommend that you use caution when
your vehicle has either a high load or device
(i.e. ladder or luggage racks). Any
modifications to your vehicle that raise the
center of gravity may cause your vehicle
to roll over when there is a loss of vehicle
control.
Failure to maintain your vehicle correctly
may void the warranty, increase your repair
cost, reduce vehicle performance and
operational capabilities and adversely
affect you and your passenger's safety. We
recommend you frequently inspect your
vehicle's chassis components when your
vehicle is subject to off road usage.
166
Super Duty (TFA) Canada/United States of America, enUSA, First Printing Four-Wheel Drive (If Equipped)
Page 174 of 507

2. If the sensors detect that your vehicle
is on a slope, the system activates
automatically.
3. When you remove your foot from the brake pedal, your vehicle remains on
the slope without rolling away for
about two to three seconds. This hold
time automatically extends if you are
in the process of driving off.
4. Drive off in the normal manner. The system releases the brakes
automatically.
Note: When you remove your foot from the
brake pedal and press the pedal again when
the system is active, you will experience
significantly reduced brake pedal travel. This
is normal.
Switching the System On and Off
Vehicles with Manual Transmission
You can switch this feature on or off in the
information display. The system
remembers the last setting when you start
your vehicle.
Vehicles with Automatic Transmission
You cannot turn the system on or off.
When you switch the ignition on, the
system automatically turns on.
171
Super Duty (TFA) Canada/United States of America, enUSA, First Printing Brakes
Page 183 of 507
The system detects certain objects while
the transmission is in reverse (R):
•
Your vehicle is moving toward a
stationary object at a speed of 3 mph
(5 km/h) or less.
• Your vehicle is not moving, but a
moving object is approaching the rear
of your vehicle at a speed of
3 mph
(5 km/h) or less.
• Your vehicle is moving at a speed of
less than 3 mph (5 km/h) and a moving
object is approaching the rear of your
vehicle at a speed of less than
3 mph
(5 km/h).
REAR VIEW CAMERA
(If Equipped) WARNINGS
The rear view camera system is a
reverse aid supplement device that
still requires the driver to use it in
conjunction with the interior and exterior
mirrors for maximum coverage. Objects that are close to either
corner of the bumper or under the
bumper, might not be seen on the
screen due to the limited coverage of the
camera system. Back up as slow as possible since
higher speeds might limit your
reaction time to stop the vehicle.
Use caution when using the rear
video camera and the tailgate is ajar.
If the tailgate is ajar, the camera will
be out of position and the video image may
be incorrect. All guidelines will be removed
when the tailgate is ajar. Use caution when turning camera
features on or off while in reverse
(R). Make sure your vehicle is not
moving. WARNINGS
When manual zoom is enabled
(Level 1, Level 2 or Level 3), the full
area behind your vehicle will not be
shown. Be aware of your surroundings
when using the manual zoom feature. The rear view camera system provides a
video image of the area behind your
vehicle.
During operation, lines appear in the
display which represent your vehicle
’s path
and proximity to objects behind your
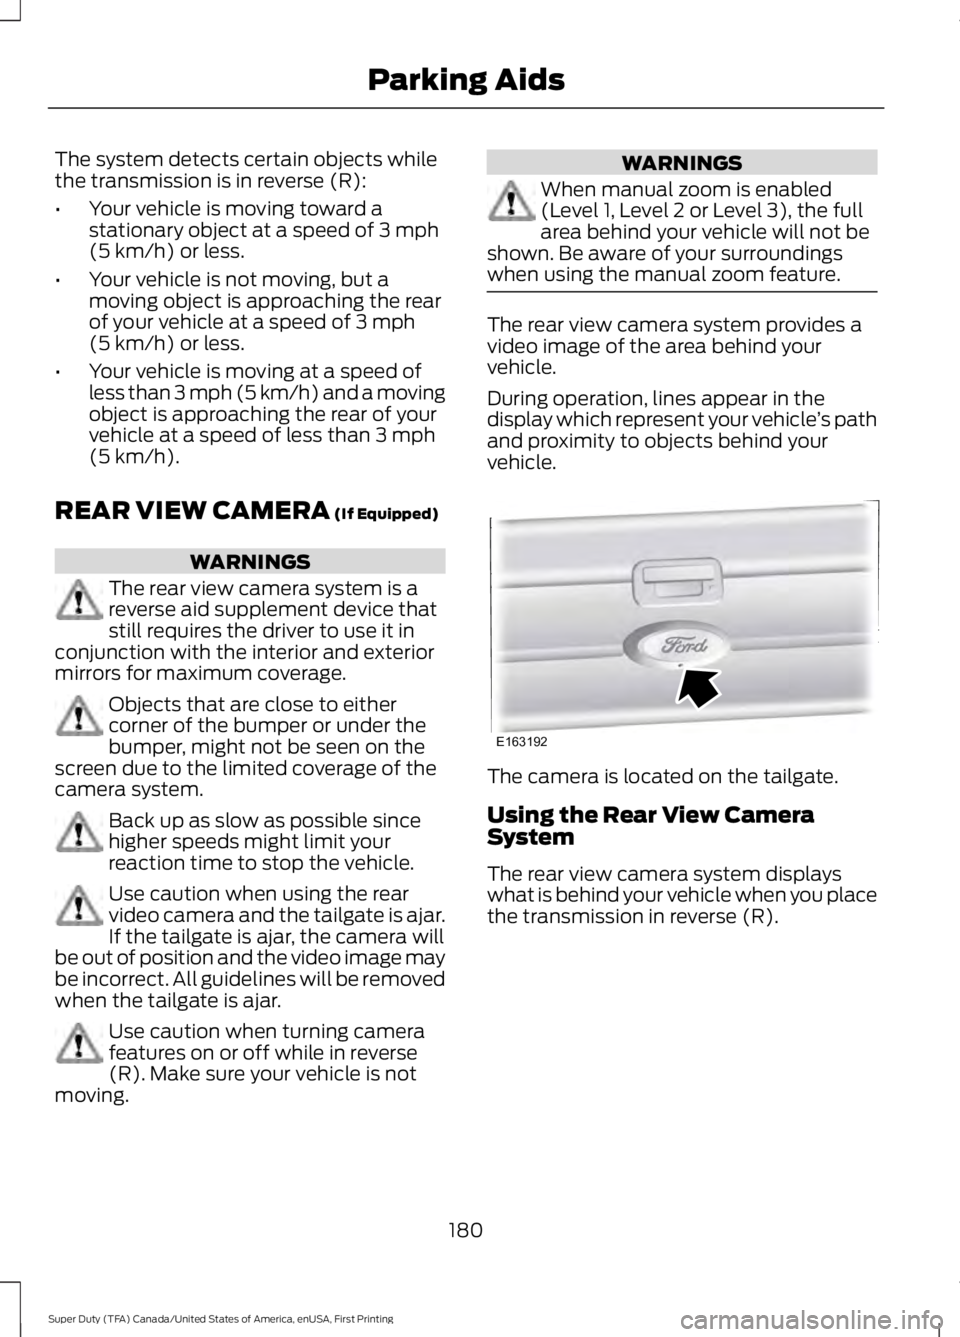
vehicle. The camera is located on the tailgate.
Using the Rear View Camera
System
The rear view camera system displays
what is behind your vehicle when you place
the transmission in reverse (R).
180
Super Duty (TFA) Canada/United States of America, enUSA, First Printing Parking AidsE163192
Page 185 of 507
Fixed guidelines are always shown in the
display, but the active guidelines only
display when the steering wheel is turned.
To use active guidelines, turn the steering
wheel to point the guidelines toward an
intended path. If the steering wheel
position is changed while reversing, the
vehicle might deviate from the original
intended path.
The active guidelines fade in and out
depending on the steering wheel position.
The active guidelines are not shown when
the steering wheel position is straight.
Always use caution while reversing.
Objects in the red zone are closest to your
vehicle and objects in the green zone are
farther away. Objects are getting closer to
your vehicle as they move from the green
zone to the yellow or red zones. Use the
side view mirrors and rear view mirror to
get better coverage on both sides and rear
of your vehicle.
Enhanced Park Aids
Note:
Enhanced park aids is only available
when the transmission is in reverse (R).
Note: The reverse sensing system is not
effective at speeds above 3 mph (5 km/h)
and may not detect certain angular or
moving objects.
The system uses red, yellow and green
highlights which appear on top of the video
image when an object is detected by the
reverse sensing system. The alert highlights
the closest object detected. The reverse
sensing alert can be disabled and if visual
park aid alert is enabled, highlighted areas
are still displayed.
Selectable settings for this feature are ON
and OFF. Manual Zoom WARNING
When manual zoom is on, the full
area behind your vehicle is not
shown. Be aware of your
surroundings when using the manual zoom
feature. Note:
Manual zoom is only available when
the transmission is in reverse (R).
Note: When manual zoom is enabled, only
the centerline is shown.
This feature allows you to get a closer view
of an object behind your vehicle (for
example, a trailer). The zoomed image
keeps the bumper in the image to provide
a reference. The zoom is only active while
the transmission is in reverse (R). When
the transmission is shifted out of reverse
(R), the feature automatically turns off
and must be reset when it is used again.
Selectable settings for this feature is OFF,
Level 1, Level 2 and Level 3. The selected
level will appear between the buttons (for
example, Level 1) The default setting for
the manual zoom is OFF.
Rear Camera Delay
When shifting the transmission out of
reverse (R) and into any gear other than
park (P), the camera image remains in the
display until your vehicle speed reaches
5 mph (8 km/h). This occurs when the rear
camera delay feature is on or until a radio
button is selected.
Selectable settings for this feature are ON
and OFF. The default setting for the rear
camera delay is ON.
182
Super Duty (TFA) Canada/United States of America, enUSA, First Printing Parking Aids
Page 195 of 507

TOWING A TRAILER
WARNINGS
Do not exceed the GVWR or
the GAWR specified on the
certification label. Towing trailers beyond the
maximum recommended
gross trailer weight exceeds the
limit of the vehicle and could
result in engine damage,
transmission damage, structural
damage, loss of vehicle control,
vehicle rollover and personal
injury. Your vehicle may have electrical
items, such as fuses or relays,
related to towing. See the Fuses
chapter.
Your vehicle's load capacity
designation is by weight, not by
volume, so you cannot necessarily
use all available space when
loading a vehicle or trailer.
Towing a trailer places an extra
load on your vehicle's engine,
transmission, axle, brakes, tires
and suspension. Inspect these
components periodically during,
and after, any towing operation. Load Placement
To help minimize how trailer
movement affects your vehicle
when driving:
•
Load the heaviest items closest
to the trailer floor.
• Load the heaviest items
centered between the left and
right side trailer tires.
• Load the heaviest items above
the trailer axles or just slightly
forward toward the trailer
tongue. Do not allow the final
trailer tongue weight to go
above or below 10-15% of the
loaded trailer weight.
• Select a tow bar with the
correct rise or drop. When both
the loaded vehicle and trailer
are connected, the trailer frame
should be level, or slightly
angled down toward your
vehicle, when viewed from the
side.
When driving with a trailer or
payload, a slight takeoff vibration
or shudder may be present due to
the increased payload weight.
Additional information regarding
proper trailer loading and setting
your vehicle up for towing is
located in another chapter of this
manual. See
Load Limit (page
185).
You can also find information in
the
RV & Trailer Towing Guide
available at your authorized
dealer, or online.
192
Super Duty (TFA) Canada/United States of America, enUSA, First Printing Towing
Page 208 of 507
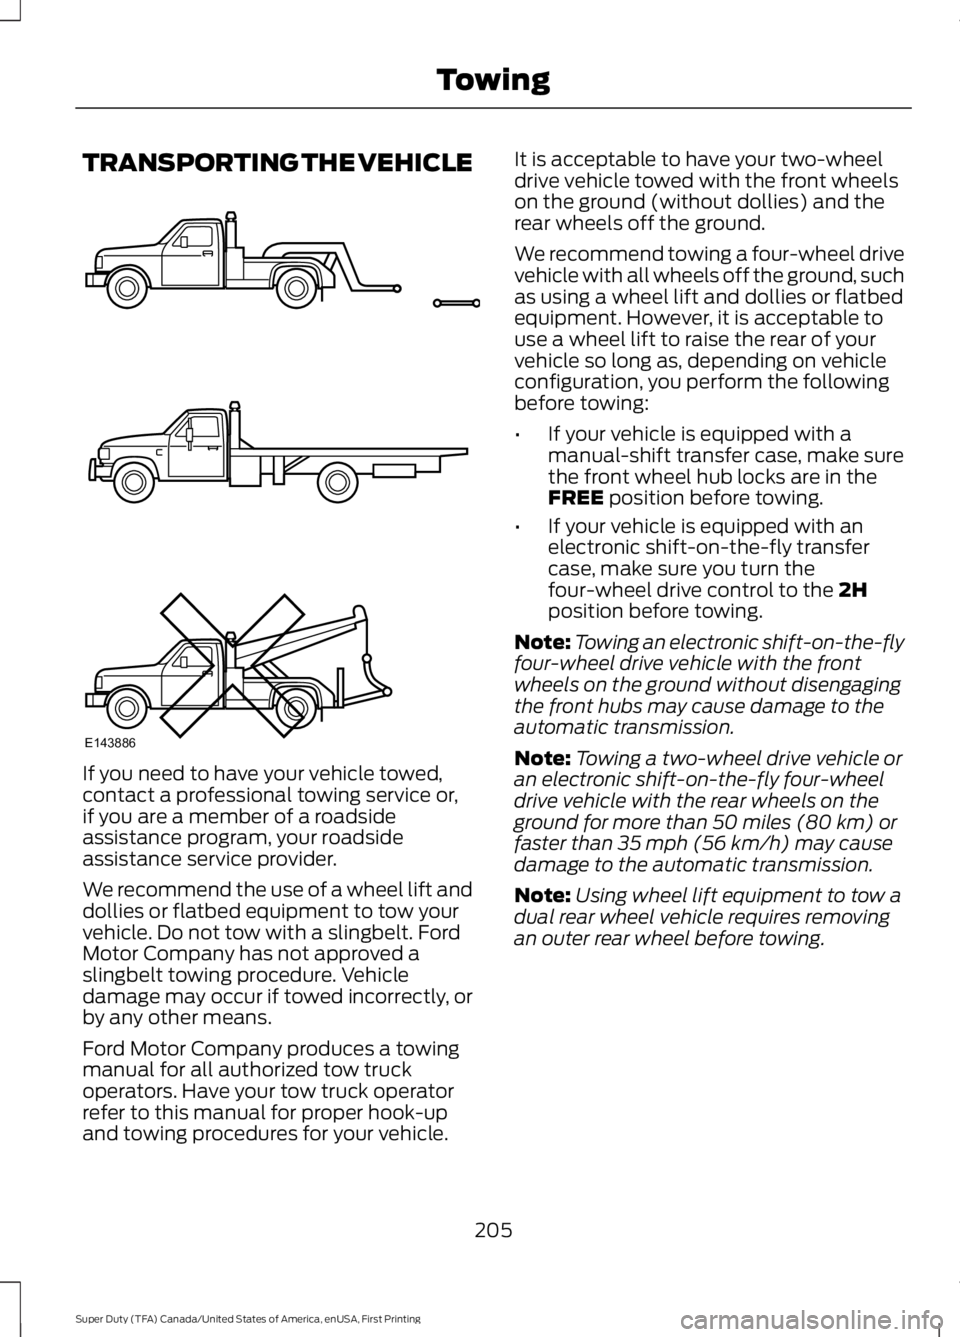
TRANSPORTING THE VEHICLE
If you need to have your vehicle towed,
contact a professional towing service or,
if you are a member of a roadside
assistance program, your roadside
assistance service provider.
We recommend the use of a wheel lift and
dollies or flatbed equipment to tow your
vehicle. Do not tow with a slingbelt. Ford
Motor Company has not approved a
slingbelt towing procedure. Vehicle
damage may occur if towed incorrectly, or
by any other means.
Ford Motor Company produces a towing
manual for all authorized tow truck
operators. Have your tow truck operator
refer to this manual for proper hook-up
and towing procedures for your vehicle. It is acceptable to have your two-wheel
drive vehicle towed with the front wheels
on the ground (without dollies) and the
rear wheels off the ground.
We recommend towing a four-wheel drive
vehicle with all wheels off the ground, such
as using a wheel lift and dollies or flatbed
equipment. However, it is acceptable to
use a wheel lift to raise the rear of your
vehicle so long as, depending on vehicle
configuration, you perform the following
before towing:
•
If your vehicle is equipped with a
manual-shift transfer case, make sure
the front wheel hub locks are in the
FREE position before towing.
• If your vehicle is equipped with an
electronic shift-on-the-fly transfer
case, make sure you turn the
four-wheel drive control to the
2H
position before towing.
Note: Towing an electronic shift-on-the-fly
four-wheel drive vehicle with the front
wheels on the ground without disengaging
the front hubs may cause damage to the
automatic transmission.
Note: Towing a two-wheel drive vehicle or
an electronic shift-on-the-fly four-wheel
drive vehicle with the rear wheels on the
ground for more than 50 miles (80 km) or
faster than 35 mph (56 km/h) may cause
damage to the automatic transmission.
Note: Using wheel lift equipment to tow a
dual rear wheel vehicle requires removing
an outer rear wheel before towing.
205
Super Duty (TFA) Canada/United States of America, enUSA, First Printing TowingE143886