2016 FORD F150 lock
[x] Cancel search: lockPage 329 of 505

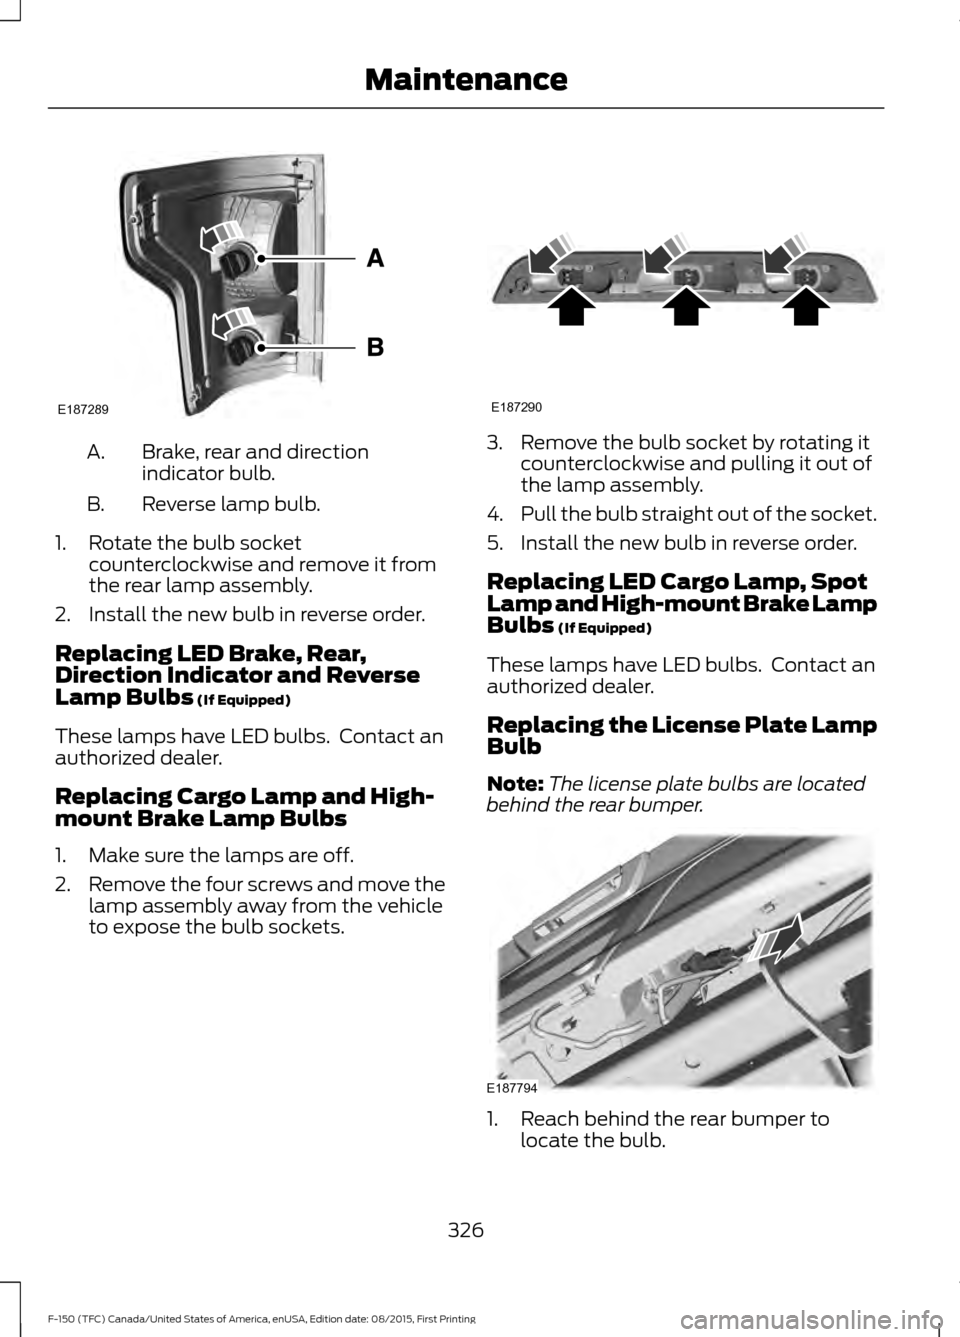
Brake, rear and direction
indicator bulb.
A.
Reverse lamp bulb.
B.
1. Rotate the bulb socket counterclockwise and remove it from
the rear lamp assembly.
2. Install the new bulb in reverse order.
Replacing LED Brake, Rear,
Direction Indicator and Reverse
Lamp Bulbs (If Equipped)
These lamps have LED bulbs. Contact an
authorized dealer.
Replacing Cargo Lamp and High-
mount Brake Lamp Bulbs
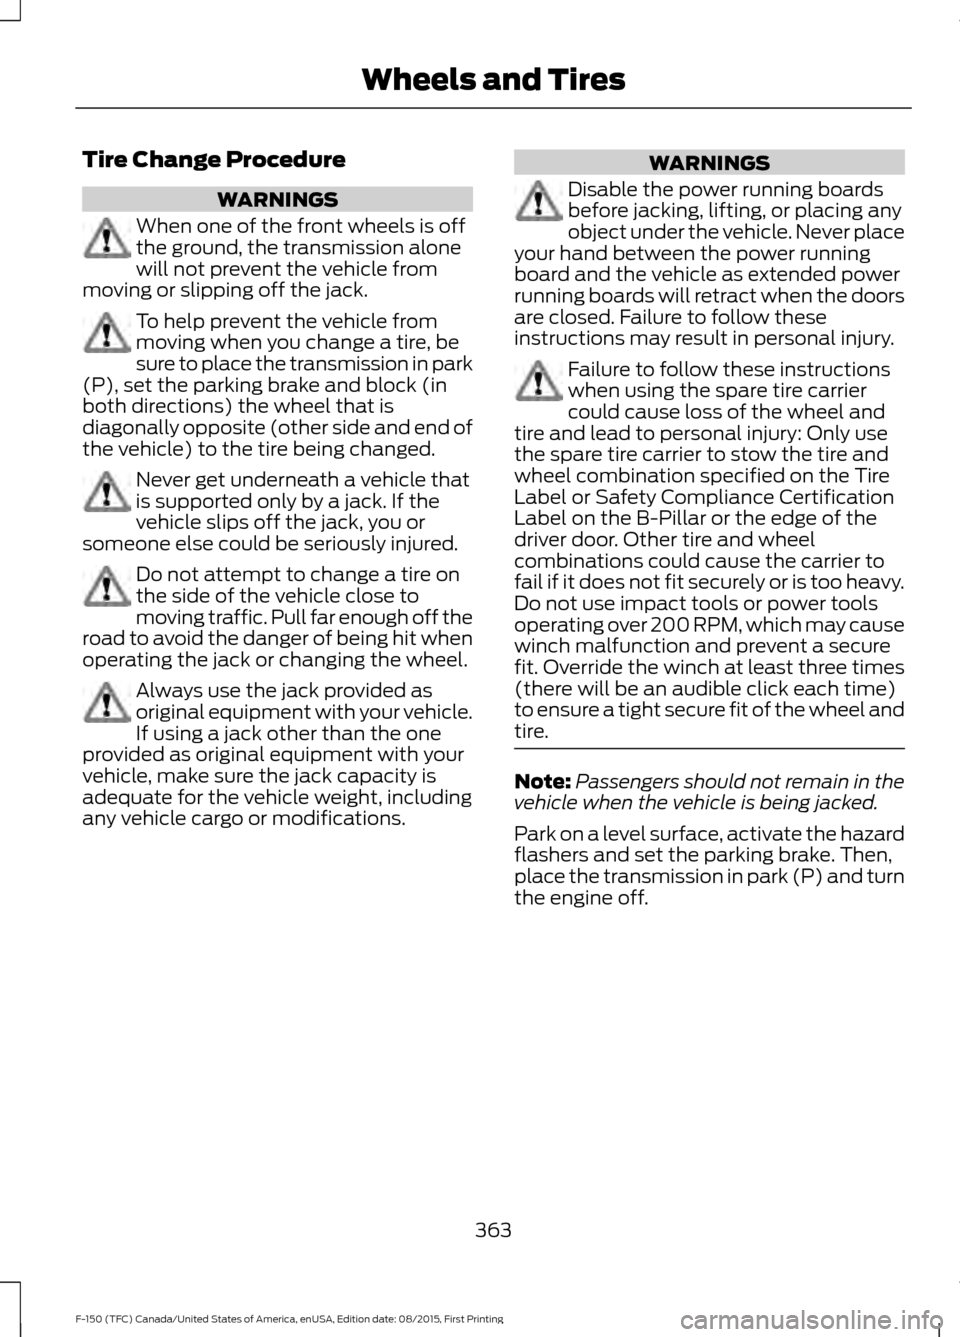
1. Make sure the lamps are off.
2. Remove the four screws and move the
lamp assembly away from the vehicle
to expose the bulb sockets. 3. Remove the bulb socket by rotating it
counterclockwise and pulling it out of
the lamp assembly.
4. Pull the bulb straight out of the socket.
5. Install the new bulb in reverse order.
Replacing LED Cargo Lamp, Spot
Lamp and High-mount Brake Lamp
Bulbs
(If Equipped)
These lamps have LED bulbs. Contact an
authorized dealer.
Replacing the License Plate Lamp
Bulb
Note: The license plate bulbs are located
behind the rear bumper. 1. Reach behind the rear bumper to
locate the bulb.
326
F-150 (TFC) Canada/United States of America, enUSA, Edition date: 08/2015, First Printing MaintenanceE187289 E187290 E187794
Page 330 of 505

2.
Twist the bulb socket counterclockwise
and carefully pull to remove it from the
lamp assembly.
3. Pull the bulb straight out of the socket.
4. Install the new bulb in reverse order.
Replacing Exterior Mounted Mirror
Direction Indicator Lamp Bulbs
These lamps have LED bulbs. Contact an
authorized dealer. BULB SPECIFICATION CHART
Replacement bulbs are specified in the
chart below. Headlamp bulbs must be
marked with an authorized D.O.T. marking
for North America to make sure they have
the proper lamp performance, light
brightness, light pattern and safe visibility.
The correct bulbs will not damage the
lamp assembly or void the lamp assembly
warranty and will provide quality bulb
illumination time.
Exterior Lamps Power (Watt)
Specification
Lamp
21/5W
7444NA
Front direction indicator and parking lamps.
LED
LED
Daytime running lamps.
65W
9005
Headlamp high beam.
55W
H11
Headlamp low beam.
55W
9140
Front fog lamps.
5W
W5W
Front side marker lamps.
LED
LED
Side direction indicator.
LED
LED
Puddle lamp.
27/8W
3157
Rear lamps, brake lamps, rear direction indicator
and rear side marker lamps. *
16W
921
Central high mounted brake lamp. *
LED
LED
Central high mounted brake lamp. Vehicles with
cargo box.
27W
3156K
Reversing lamps.
5W
168
License plate lamp.
* May have optional LED lamps.
Note: LED lamps are not serviceable. See an authorized dealer if they fail.
327
F-150 (TFC) Canada/United States of America, enUSA, Edition date: 08/2015, First Printing Maintenance
Page 335 of 505

•
Do not allow wax to come in contact
with any non-body (low-gloss black)
colored trim. The wax will discolor or
stain the parts over time.
•Roof racks.
• Bumpers.
• Grained door handles.
• Side moldings.
• Mirror housings.
• Windshield cowl area.
• Do not apply wax to glass areas.
• After waxing, your car's paint should
feel smooth, and be free of streaks and
smudges.
CLEANING THE ENGINE
Engines are more efficient when they are
clean because grease and dirt buildup keep
the engine warmer than normal.
When washing:
• Take care when using a power washer
to clean the engine. The high-pressure
fluid could penetrate the sealed parts
and cause damage.
• Do not spray a hot engine with cold
water to avoid cracking the engine
block or other engine components.
• Spray Motorcraft Engine Shampoo and
Degreaser on all parts that require
cleaning and pressure rinse clean. In
Canada, use Motorcraft Engine
Shampoo.
• Never wash or rinse the engine while it
is hot or running; water in the running
engine may cause internal damage. •
Never wash or rinse any ignition coil,
spark plug wire or spark plug well, or
the area in and around these locations.
• Cover the battery, power distribution
box, and air filter assembly to prevent
water damage when cleaning the
engine.
CLEANING THE WINDOWS AND
WIPER BLADES
Car wash chemicals and environmental
fallout can result in windshield and wiper
blade contamination. Dirty windshield and
wipers will result in poor windshield wiper
operation. Keep the windshield and wiper
blades clean to maintain windshield wiper
performance.
To clean the windshield and wiper blades:
• Clean the windshield with a
non-abrasive glass cleaner. When
cleaning the interior of the windshield,
avoid getting any glass cleaner on the
instrument panel or door panels. Wipe
any glass cleaner off these surfaces
immediately.
• For windshields contaminated with
tree sap, chemicals, wax or bugs, clean
the entire windshield using steel wool
(no greater than 0000 grade) in a
circular motion and rinse with water.
• Clean the wiper blades with isopropyl
rubbing alcohol or windshield washer
concentrate.
Note: Do not use razor blades or other
sharp objects to clean or remove decals
from the inside of the heated rear window.
The vehicle warranty does not cover
damage caused to the heated rear window
grid lines.
332
F-150 (TFC) Canada/United States of America, enUSA, Edition date: 08/2015, First Printing Vehicle Care
Page 363 of 505

•
To reduce the chances of interference
from another vehicle, perform the
system reset procedure at least three
feet (one meter) away from another
Ford Motor Company vehicle
undergoing the system reset procedure
at the same time.
• Do not wait more than two minutes
between resetting each tire sensor or
the system will time-out and the entire
procedure will have to be repeated on
all four wheels.
• A double horn will sound indicating the
need to repeat the procedure.
Performing the System Reset Procedure
Read the entire procedure before
attempting.
1. Drive the vehicle above 20 mph (32 km/h) for at least two minutes, then
park in a safe location where you can
easily get to all four tires and have
access to an air pump.
2. Place the ignition in the off position and
keep the key in the ignition.
3. Cycle the ignition to the on position with the engine off.
4. Turn the hazard flashers on then off three times. You must accomplish this
within 10 seconds. If the reset mode
has been entered successfully, the horn
will sound once, the system indicator
will flash and a message is shown in
the information display. If this does not
occur, please try again starting at Step
2. If after repeated attempts to enter
the reset mode, the horn does not
sound, the system indicator does not
flash and no message is shown in the
information display, seek service from
your authorized dealer. 5. Train the tire pressure monitoring
system sensors in the tires using the
following system reset sequence
starting with the left front tire in the
following clockwise order: Left front
(driver's side front tire), Right front
(passenger's side front tire), Right rear
(passenger's side rear tire), Left rear
(driver's side rear tire).
6. Remove the valve cap from the valve stem on the left front tire. Decrease the
air pressure until the horn sounds.
Note: The single horn chirp confirms that
the sensor identification code has been
learned by the module for this position. If a
double horn is heard, the reset procedure
was unsuccessful, and you must repeat it.
7. Remove the valve cap from the valve stem on the right front tire. Decrease
the air pressure until the horn sounds.
8. Remove the valve cap from the valve stem on the right rear tire. Decrease the
air pressure until the horn sounds.
9. Remove the valve cap from the valve stem on the left rear tire. Decrease the
air pressure until the horn sounds.
Training is complete after the horn
sounds for the last tire trained (driver's
side rear tire), the system indicator
stops flashing, and a message is shown
in the information display.
10. Turn the ignition off. If two short horn
beeps are heard, the reset procedure
was unsuccessful and you must
repeat it. If after repeating the
procedure and two short beeps are
heard when the ignition is turned to
off, seek assistance from your
authorized dealer.
360
F-150 (TFC) Canada/United States of America, enUSA, Edition date: 08/2015, First Printing Wheels and Tires
Page 366 of 505

Tire Change Procedure
WARNINGS
When one of the front wheels is off
the ground, the transmission alone
will not prevent the vehicle from
moving or slipping off the jack. To help prevent the vehicle from
moving when you change a tire, be
sure to place the transmission in park
(P), set the parking brake and block (in
both directions) the wheel that is
diagonally opposite (other side and end of
the vehicle) to the tire being changed. Never get underneath a vehicle that
is supported only by a jack. If the
vehicle slips off the jack, you or
someone else could be seriously injured. Do not attempt to change a tire on
the side of the vehicle close to
moving traffic. Pull far enough off the
road to avoid the danger of being hit when
operating the jack or changing the wheel. Always use the jack provided as
original equipment with your vehicle.
If using a jack other than the one
provided as original equipment with your
vehicle, make sure the jack capacity is
adequate for the vehicle weight, including
any vehicle cargo or modifications. WARNINGS
Disable the power running boards
before jacking, lifting, or placing any
object under the vehicle. Never place
your hand between the power running
board and the vehicle as extended power
running boards will retract when the doors
are closed. Failure to follow these
instructions may result in personal injury. Failure to follow these instructions
when using the spare tire carrier
could cause loss of the wheel and
tire and lead to personal injury: Only use
the spare tire carrier to stow the tire and
wheel combination specified on the Tire
Label or Safety Compliance Certification
Label on the B-Pillar or the edge of the
driver door. Other tire and wheel
combinations could cause the carrier to
fail if it does not fit securely or is too heavy.
Do not use impact tools or power tools
operating over 200 RPM, which may cause
winch malfunction and prevent a secure
fit. Override the winch at least three times
(there will be an audible click each time)
to ensure a tight secure fit of the wheel and
tire. Note:
Passengers should not remain in the
vehicle when the vehicle is being jacked.
Park on a level surface, activate the hazard
flashers and set the parking brake. Then,
place the transmission in park (P) and turn
the engine off.
363
F-150 (TFC) Canada/United States of America, enUSA, Edition date: 08/2015, First Printing Wheels and Tires
Page 368 of 505

1. Use your key to remove the lock
cylinder from the access hole of the
bumper to allow access to the guide
tube. Assemble the jack handle as
shown in the illustration. 2.
Fully insert the jack handle through the
bumper hole and into the guide tube
through the access hole in the rear
bumper.
3. Turn the handle counterclockwise until
the tire is lowered to the ground, the
tire can be slid rearward and the cable
is slightly slack.
4. Remove the retainer from the center of the wheel. 5. Block both the front and rear of the
wheel diagonally opposite the flat tire.
For example, if the left front tire is flat,
block the right rear wheel. 6. Obtain the spare tire and jack from
their storage locations.
7. Loosen each wheel lug nut on the affected flat tire one-half turn
counterclockwise, but do not remove
them.
Jacking the Vehicle
Front Jacking Points Note:
Use the frame rail as the jacking
location point, not the control arm. The
frame rail is marked with an arrow.
365
F-150 (TFC) Canada/United States of America, enUSA, Edition date: 08/2015, First Printing Wheels and TiresE184020 E175447 E183709
Page 369 of 505

Rear Jacking Points
Note:
Jack at the specified locations to
avoid damage to the vehicle.
1. Place the jack at the jacking point next
to the tire you are changing. Turn the
jack handle clockwise until the wheel
is completely off the ground.
2. Remove the lug nuts with the lug wrench.
3. Replace the flat tire with the spare tire,
making sure the valve stem is facing
outward. Reinstall the lug nuts until the
wheel is snug against the hub. Do not
fully tighten the lug nuts until the wheel
has been lowered.
4. Lower the wheel by turning the jack handle counterclockwise. 5. Remove the jack and fully tighten the
lug nuts in the order shown. See
Technical Specifications (page 369).
6. Stow the flat tire. See the Stowing the Flat or Spare Tire.
7. Stow the jack and lug wrench. Make sure the jack is fastened securely
before you drive. See Stowing the Jack
and Tools.
8. Unblock the wheels. Stowing the Flat or Spare Tire
Note:
Failure to follow the spare tire
stowage instructions may result in failure of
the cable or loss of the spare tire.
1. Lay the tire on the ground with the valve stem facing up.
2. Slide the wheel partially under the vehicle and install the retainer through
the wheel center. Pull on the cable to
align the components at the end of the
cable.
3. Turn the jack handle clockwise until the tire is raised to its stowed position
underneath the vehicle. The effort to
turn the jack handle increases
significantly and the spare tire carrier
ratchets or slips when the tire is raised
to the maximum tightness. Tighten to
366
F-150 (TFC) Canada/United States of America, enUSA, Edition date: 08/2015, First Printing Wheels and TiresE183403 E166719
1
3
5 4
6
2
Page 370 of 505

the best of your ability, to the point
where the ratchet or slip occurs, if
possible. The spare tire carrier will not
allow you to overtighten. If the spare
tire carrier ratchets or slips with little
effort, contact your authorized dealer.
4. Check that the tire lies flat against the frame and is properly tightened. Try to
push or pull, then turn the tire to be
sure it will not move. Loosen and
retighten, if necessary. Failure to
properly stow the spare tire may result
in failure of the winch cable and loss
of the tire.
5. Repeat this tightness check procedure
when servicing the spare tire pressure
(every six months, as per your
scheduled maintenance information),
or at any time that the spare tire is
disturbed through service of other
components.
6. If removed, install the spare tire lock into the bumper drive tube with the
spare tire lock key and jack handle.
Stowing the Jack and Tools
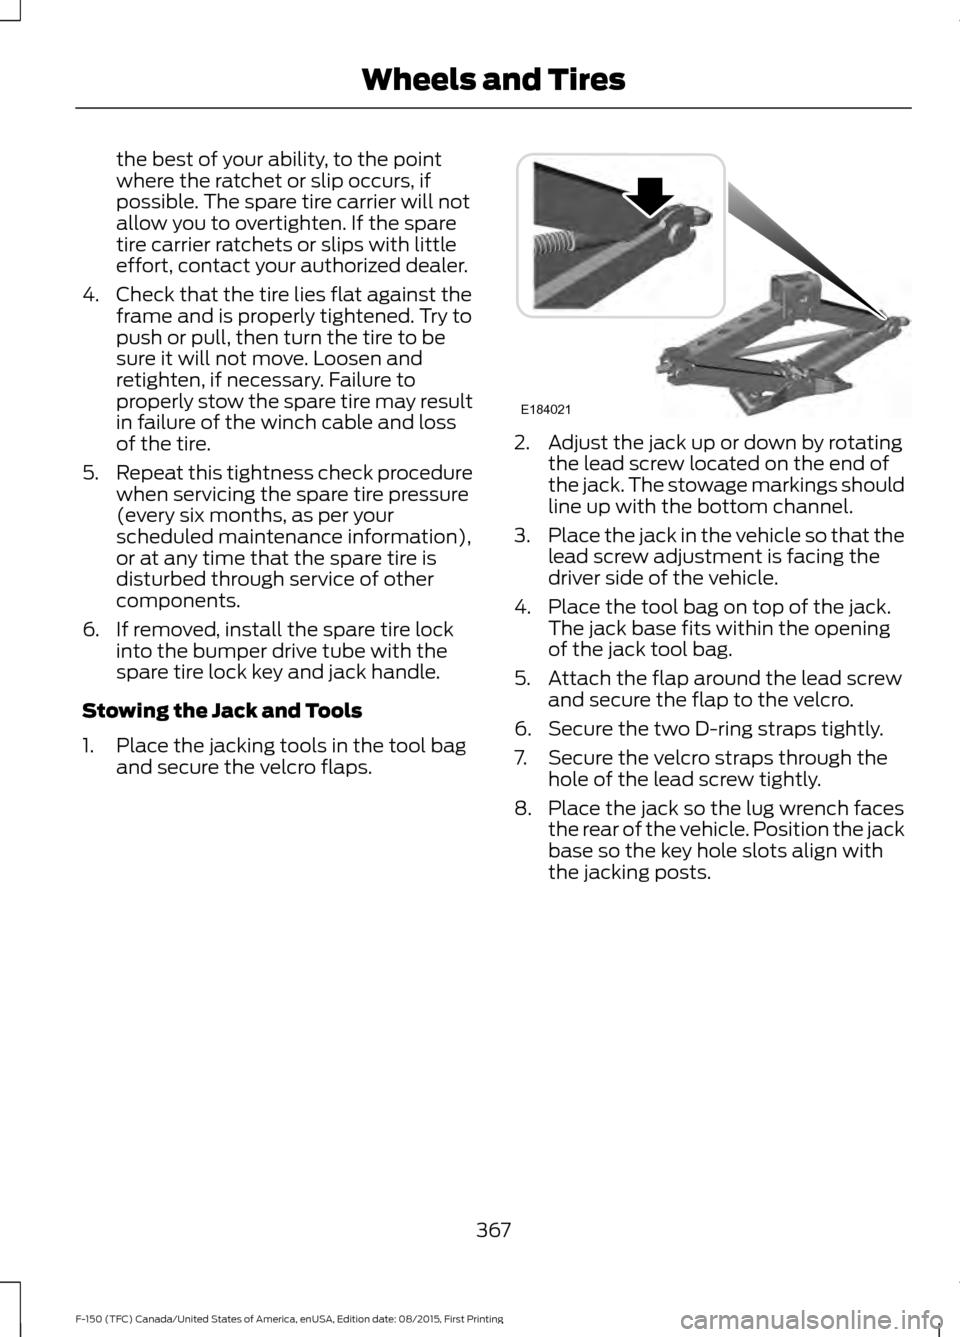
1. Place the jacking tools in the tool bag and secure the velcro flaps. 2. Adjust the jack up or down by rotating
the lead screw located on the end of
the jack. The stowage markings should
line up with the bottom channel.
3. Place the jack in the vehicle so that the
lead screw adjustment is facing the
driver side of the vehicle.
4. Place the tool bag on top of the jack. The jack base fits within the opening
of the jack tool bag.
5. Attach the flap around the lead screw and secure the flap to the velcro.
6. Secure the two D-ring straps tightly.
7. Secure the velcro straps through the hole of the lead screw tightly.
8. Place the jack so the lug wrench faces the rear of the vehicle. Position the jack
base so the key hole slots align with
the jacking posts.
367
F-150 (TFC) Canada/United States of America, enUSA, Edition date: 08/2015, First Printing Wheels and TiresE184021