2016 FORD F SERIES MOTORHOME AND COMMERCIAL CHASSIS fuel cap
[x] Cancel search: fuel capPage 5 of 154
Driving Hints
Breaking-In........................................................51
Reduced Engine Performance...................51
Economical Driving.........................................51
Driving Through Water..................................52
Roadside Emergencies
Roadside Assistance.....................................53
Hazard Warning Flashers............................54
Jump Starting the Vehicle...........................54
Customer Assistance
Getting the Services You Need..................57
In California (U.S. Only)...............................58
The Better Business Bureau (BBB) AutoLine Program (U.S. Only)........................59
Utilizing the Mediation/ArbitrationProgram (Canada Only).........................59
Getting Assistance Outside the U.S. andCanada..........................................................60
Ordering Additional Owner'sLiterature........................................................61
Reporting Safety Defects (U.S.Only)................................................................61
Reporting Safety Defects (CanadaOnly)...............................................................62
Fuses
Fuse Specification Chart.............................63
Changing a Fuse............................................80
Maintenance
General Information.......................................81
Under Hood Overview..................................82
Engine Oil Dipstick.........................................83
Engine Oil Check............................................83
Oil Change Indicator Reset.........................83
Engine Coolant Check..................................84
Automatic Transmission FluidCheck..............................................................87
Brake Fluid Check..........................................88
Power Steering Fluid Check.......................90
Fuel Filter............................................................91
Changing the 12V Battery.............................91
Changing the Engine Air Filter...................93
Vehicle Care
General Information.....................................94
Cleaning the Exterior....................................94
Cleaning the Engine......................................94
Cleaning the Alloy Wheels.........................95
Vehicle Storage...............................................95
Wheels and Tires
Tire Care............................................................98
Using Snow Chains.......................................113
Changing a Road Wheel.............................114
Technical Specifications.............................117
Capacities and Specific-ations
Engine Specifications..................................118
Motorcraft Parts.............................................118
Vehicle Identification Number.................120
Vehicle Certification Label........................120
Transmission Code Designation..............121
Capacities and Specifications.................122
Extended Service Plan(ESP)
Extended Service Plan (ESP)..................126
Scheduled Maintenance
General Maintenance Information.........128
Normal Scheduled Maintenance.............131
Special Operating Conditions ScheduledMaintenance...............................................133
Scheduled Maintenance Record............135
2Motorhome (TY3) , enUSA, First PrintingTable of Contents
Page 7 of 154
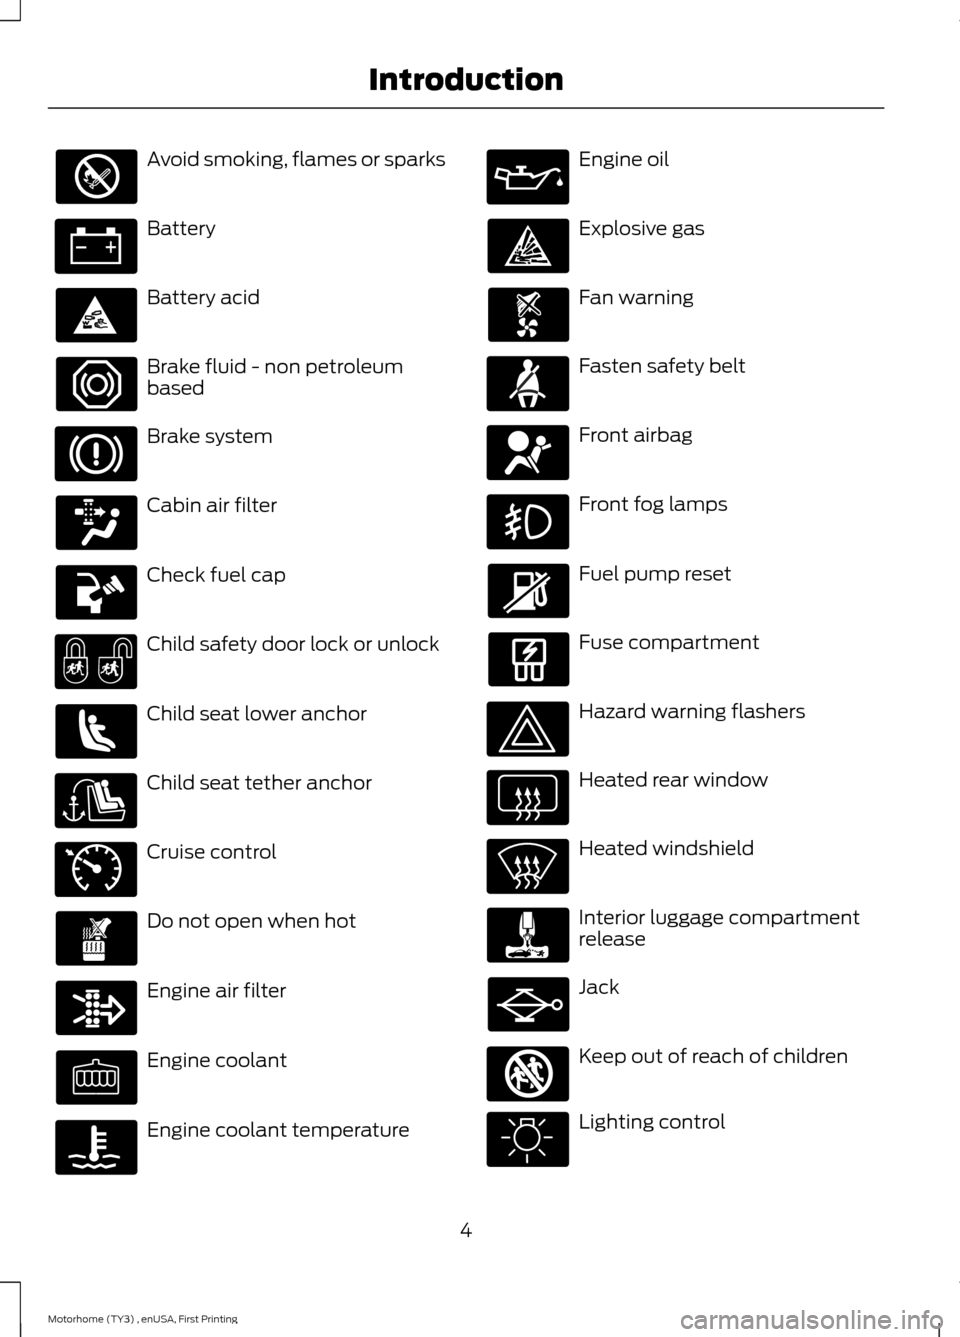
Avoid smoking, flames or sparks
Battery
Battery acid
Brake fluid - non petroleumbased
Brake system
Cabin air filter
Check fuel cap
Child safety door lock or unlock
Child seat lower anchor
Child seat tether anchor
Cruise control
Do not open when hot
Engine air filter
Engine coolant
Engine coolant temperature
Engine oil
Explosive gas
Fan warning
Fasten safety belt
Front airbag
Front fog lamps
Fuel pump reset
Fuse compartment
Hazard warning flashers
Heated rear window
Heated windshield
Interior luggage compartmentrelease
Jack
Keep out of reach of children
Lighting control
4Motorhome (TY3) , enUSA, First PrintingIntroduction E71340 E161353
Page 17 of 154
Engine Oil Pressure Gauge
Indicates engine oil pressure. The needleshould stay in the normal operating range(between L and H). If the needle fallsbelow the normal range, stop the vehicle,turn off the engine and check the engineoil level. Add oil if needed. If the oil level iscorrect, have your vehicle checked by yourauthorized dealer.
Speedometer
Indicates vehicle speed. Vehicle speed islimited to either 65 mph (105 km/h) or 75mph (120 km/h).
Transmission Fluid TemperatureGauge
Normal area
The transmission fluid is within the normaloperating temperature (between H andC).
Yellow area
The transmission fluid is higher thannormal operating temperature. This canbe caused by special operation conditions(i.e. snowplowing, towing or off-road use).Operating the transmission for extendedperiods of time with the gauge in theyellow area may cause internaltransmission damage. Altering the severityof the driving conditions is recommendedto lower the transmission temperature intothe normal range.
Red area
The transmission fluid is overheating. Stopthe vehicle to allow the temperature toreturn to normal range.
If the gauge is operating in the yellow orred area, stop the vehicle and verify theairflow is not restricted such as snow ordebris blocking airflow through the grill. Ifthe gauge continues to show hightemperatures, see your authorized dealer.
Engine Coolant TemperatureGauge
WARNING
Never remove the coolant reservoircap while the engine is running or hot.
At normal operating temperature, theneedle will remain in the center section.
Note:Do not restart the engine until thecause of overheating has been resolved.
If the needle enters the red section, theengine is overheating. Stop the engine,switch the ignition off and determine thecause once the engine has cooled down.
Fuel Gauge
Note:The fuel gauge may vary slightlywhen your vehicle is moving or on a slope.
Switch the ignition on. The fuel gaugeindicates approximately how much fuelyou have left in the fuel tank. The arrowadjacent to the fuel pump symbolindicates on which side of your vehicle thefuel filler door is located.
The needle should move toward F whenyou refuel your vehicle. If the needle pointsto E after adding fuel, have an authorizeddealer check the system soon.
After refueling, some variability in theposition of the needle is normal:
14Motorhome (TY3) , enUSA, First PrintingInstrument Cluster
Page 23 of 154
Certain messages need to be confirmedbefore you can access the menus.
Engine
ActionMessage
The engine is overheating. Stop your vehicle as soonas safely possible, turn off the engine. If the warningstays on followed by an indicator chime or continuesto come on, contact an authorized dealer as soon aspossible. Never remove the coolant reservoir cap whilethe engine is running or hot.
REDUCED ENGINE POWER
The engine is overheating. Stop your vehicle as soonas safely possible, turn off the engine. If the warningstays on followed by an indicator chime or continuesto come on, contact an authorized dealer as soon aspossible.
STOP ENGINE SAFELY
The engine coolant is overheating. Stop your vehicleas soon as safely possible, turn off the engine and letit cool. Check the coolant and coolant level. If thewarning stays on or continues to come on, contact anauthorized dealer as soon as possible.
CHECK ENGINE TEMPERATURE
A early reminder of a low fuel condition.FUEL LEVEL LOW
20Motorhome (TY3) , enUSA, First PrintingInformation Displays
Page 24 of 154
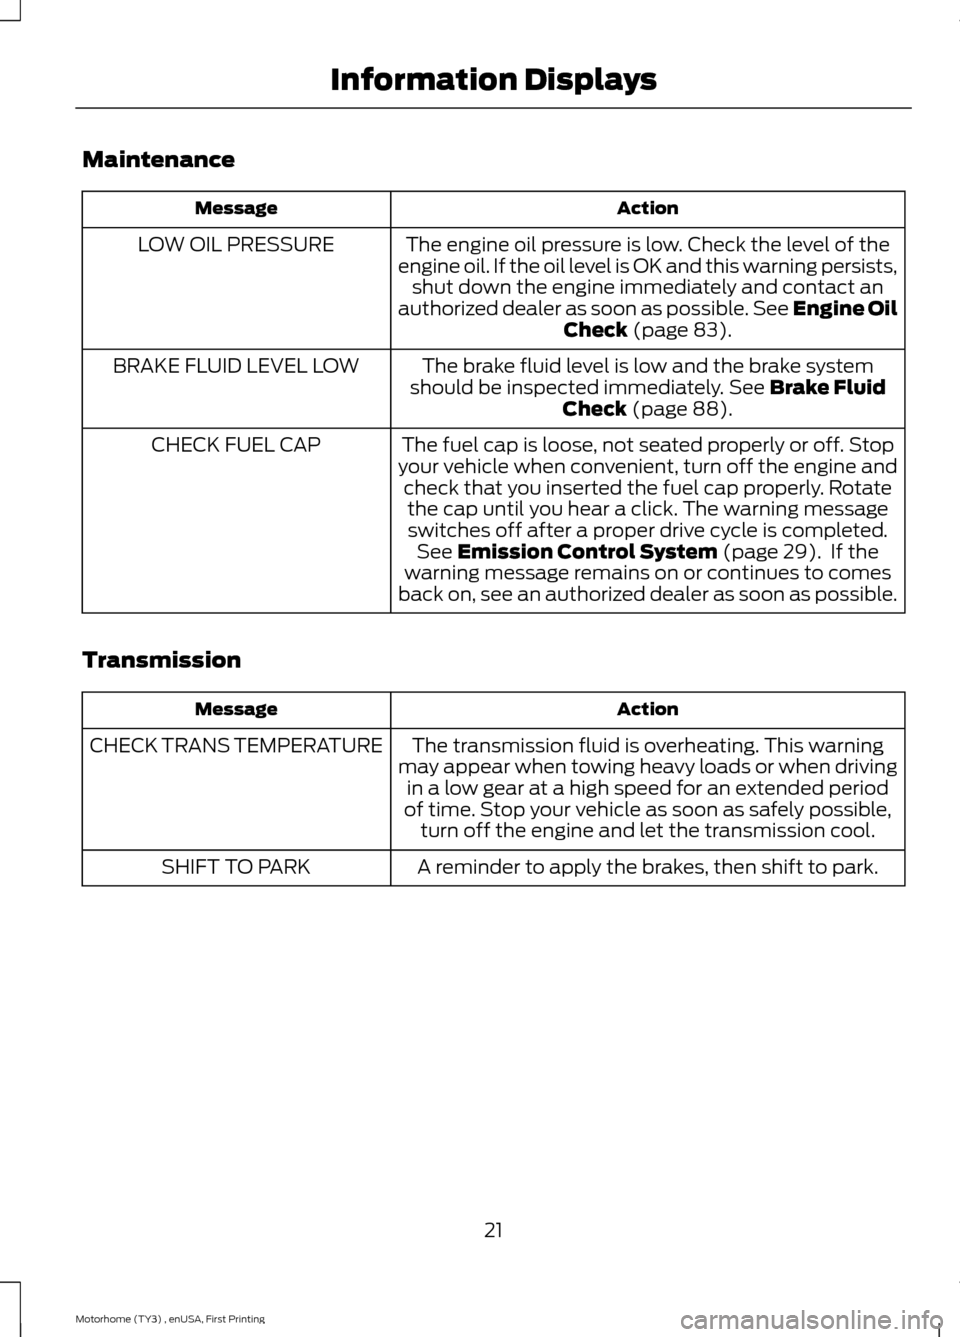
Maintenance
ActionMessage
The engine oil pressure is low. Check the level of theengine oil. If the oil level is OK and this warning persists,shut down the engine immediately and contact anauthorized dealer as soon as possible. See Engine OilCheck (page 83).
LOW OIL PRESSURE
The brake fluid level is low and the brake systemshould be inspected immediately. See Brake FluidCheck (page 88).
BRAKE FLUID LEVEL LOW
The fuel cap is loose, not seated properly or off. Stopyour vehicle when convenient, turn off the engine andcheck that you inserted the fuel cap properly. Rotatethe cap until you hear a click. The warning messageswitches off after a proper drive cycle is completed.See Emission Control System (page 29). If thewarning message remains on or continues to comesback on, see an authorized dealer as soon as possible.
CHECK FUEL CAP
Transmission
ActionMessage
The transmission fluid is overheating. This warningmay appear when towing heavy loads or when drivingin a low gear at a high speed for an extended periodof time. Stop your vehicle as soon as safely possible,turn off the engine and let the transmission cool.
CHECK TRANS TEMPERATURE
A reminder to apply the brakes, then shift to park.SHIFT TO PARK
21Motorhome (TY3) , enUSA, First PrintingInformation Displays
Page 28 of 154
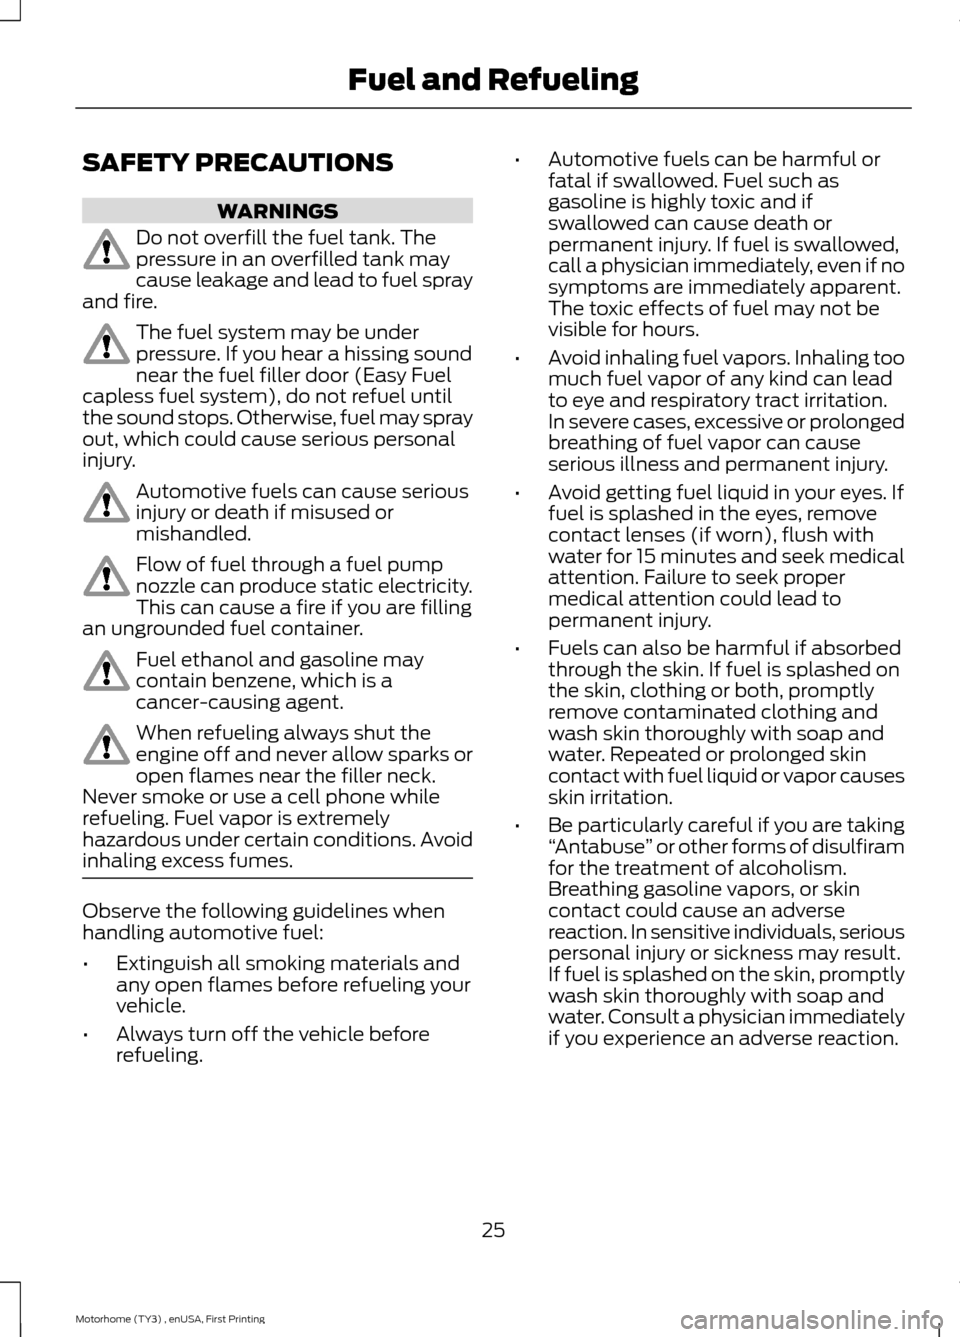
SAFETY PRECAUTIONS
WARNINGS
Do not overfill the fuel tank. Thepressure in an overfilled tank maycause leakage and lead to fuel sprayand fire.
The fuel system may be underpressure. If you hear a hissing soundnear the fuel filler door (Easy Fuelcapless fuel system), do not refuel untilthe sound stops. Otherwise, fuel may sprayout, which could cause serious personalinjury.
Automotive fuels can cause seriousinjury or death if misused ormishandled.
Flow of fuel through a fuel pumpnozzle can produce static electricity.This can cause a fire if you are fillingan ungrounded fuel container.
Fuel ethanol and gasoline maycontain benzene, which is acancer-causing agent.
When refueling always shut theengine off and never allow sparks oropen flames near the filler neck.Never smoke or use a cell phone whilerefueling. Fuel vapor is extremelyhazardous under certain conditions. Avoidinhaling excess fumes.
Observe the following guidelines whenhandling automotive fuel:
•Extinguish all smoking materials andany open flames before refueling yourvehicle.
•Always turn off the vehicle beforerefueling.
•Automotive fuels can be harmful orfatal if swallowed. Fuel such asgasoline is highly toxic and ifswallowed can cause death orpermanent injury. If fuel is swallowed,call a physician immediately, even if nosymptoms are immediately apparent.The toxic effects of fuel may not bevisible for hours.
•Avoid inhaling fuel vapors. Inhaling toomuch fuel vapor of any kind can leadto eye and respiratory tract irritation.In severe cases, excessive or prolongedbreathing of fuel vapor can causeserious illness and permanent injury.
•Avoid getting fuel liquid in your eyes. Iffuel is splashed in the eyes, removecontact lenses (if worn), flush withwater for 15 minutes and seek medicalattention. Failure to seek propermedical attention could lead topermanent injury.
•Fuels can also be harmful if absorbedthrough the skin. If fuel is splashed onthe skin, clothing or both, promptlyremove contaminated clothing andwash skin thoroughly with soap andwater. Repeated or prolonged skincontact with fuel liquid or vapor causesskin irritation.
•Be particularly careful if you are taking“Antabuse” or other forms of disulfiramfor the treatment of alcoholism.Breathing gasoline vapors, or skincontact could cause an adversereaction. In sensitive individuals, seriouspersonal injury or sickness may result.If fuel is splashed on the skin, promptlywash skin thoroughly with soap andwater. Consult a physician immediatelyif you experience an adverse reaction.
25Motorhome (TY3) , enUSA, First PrintingFuel and Refueling
Page 30 of 154
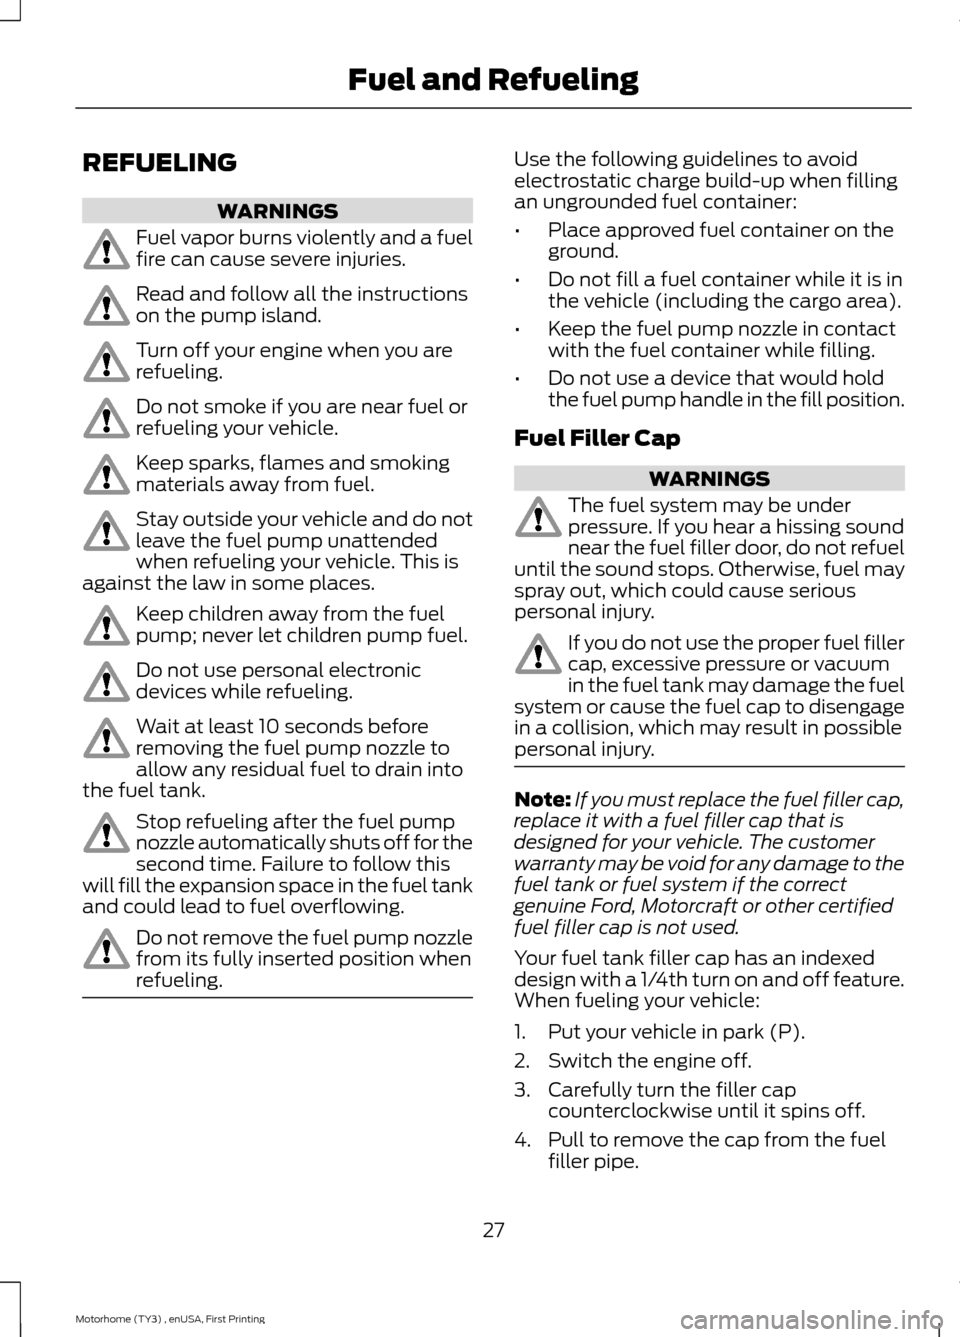
REFUELING
WARNINGS
Fuel vapor burns violently and a fuelfire can cause severe injuries.
Read and follow all the instructionson the pump island.
Turn off your engine when you arerefueling.
Do not smoke if you are near fuel orrefueling your vehicle.
Keep sparks, flames and smokingmaterials away from fuel.
Stay outside your vehicle and do notleave the fuel pump unattendedwhen refueling your vehicle. This isagainst the law in some places.
Keep children away from the fuelpump; never let children pump fuel.
Do not use personal electronicdevices while refueling.
Wait at least 10 seconds beforeremoving the fuel pump nozzle toallow any residual fuel to drain intothe fuel tank.
Stop refueling after the fuel pumpnozzle automatically shuts off for thesecond time. Failure to follow thiswill fill the expansion space in the fuel tankand could lead to fuel overflowing.
Do not remove the fuel pump nozzlefrom its fully inserted position whenrefueling.
Use the following guidelines to avoidelectrostatic charge build-up when fillingan ungrounded fuel container:
•Place approved fuel container on theground.
•Do not fill a fuel container while it is inthe vehicle (including the cargo area).
•Keep the fuel pump nozzle in contactwith the fuel container while filling.
•Do not use a device that would holdthe fuel pump handle in the fill position.
Fuel Filler Cap
WARNINGS
The fuel system may be underpressure. If you hear a hissing soundnear the fuel filler door, do not refueluntil the sound stops. Otherwise, fuel mayspray out, which could cause seriouspersonal injury.
If you do not use the proper fuel fillercap, excessive pressure or vacuumin the fuel tank may damage the fuelsystem or cause the fuel cap to disengagein a collision, which may result in possiblepersonal injury.
Note:If you must replace the fuel filler cap,replace it with a fuel filler cap that isdesigned for your vehicle. The customerwarranty may be void for any damage to thefuel tank or fuel system if the correctgenuine Ford, Motorcraft or other certifiedfuel filler cap is not used.
Your fuel tank filler cap has an indexeddesign with a 1/4th turn on and off feature.When fueling your vehicle:
1.Put your vehicle in park (P).
2.Switch the engine off.
3.Carefully turn the filler capcounterclockwise until it spins off.
4.Pull to remove the cap from the fuelfiller pipe.
27Motorhome (TY3) , enUSA, First PrintingFuel and Refueling
Page 31 of 154
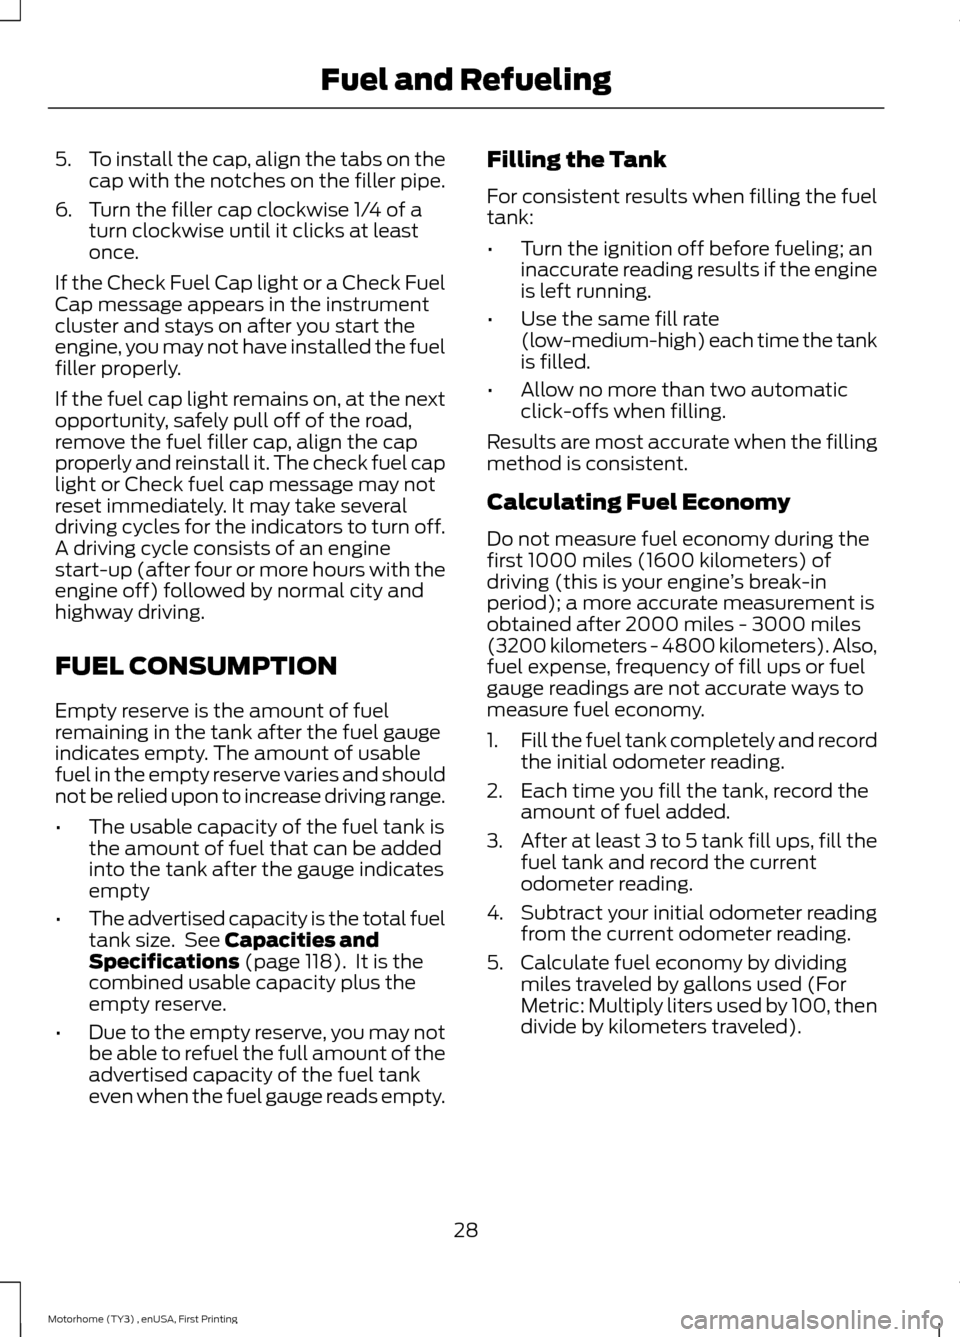
5.To install the cap, align the tabs on thecap with the notches on the filler pipe.
6.Turn the filler cap clockwise 1/4 of aturn clockwise until it clicks at leastonce.
If the Check Fuel Cap light or a Check FuelCap message appears in the instrumentcluster and stays on after you start theengine, you may not have installed the fuelfiller properly.
If the fuel cap light remains on, at the nextopportunity, safely pull off of the road,remove the fuel filler cap, align the capproperly and reinstall it. The check fuel caplight or Check fuel cap message may notreset immediately. It may take severaldriving cycles for the indicators to turn off.A driving cycle consists of an enginestart-up (after four or more hours with theengine off) followed by normal city andhighway driving.
FUEL CONSUMPTION
Empty reserve is the amount of fuelremaining in the tank after the fuel gaugeindicates empty. The amount of usablefuel in the empty reserve varies and shouldnot be relied upon to increase driving range.
•The usable capacity of the fuel tank isthe amount of fuel that can be addedinto the tank after the gauge indicatesempty
•The advertised capacity is the total fueltank size. See Capacities andSpecifications (page 118). It is thecombined usable capacity plus theempty reserve.
•Due to the empty reserve, you may notbe able to refuel the full amount of theadvertised capacity of the fuel tankeven when the fuel gauge reads empty.
Filling the Tank
For consistent results when filling the fueltank:
•Turn the ignition off before fueling; aninaccurate reading results if the engineis left running.
•Use the same fill rate(low-medium-high) each time the tankis filled.
•Allow no more than two automaticclick-offs when filling.
Results are most accurate when the fillingmethod is consistent.
Calculating Fuel Economy
Do not measure fuel economy during thefirst 1000 miles (1600 kilometers) ofdriving (this is your engine’s break-inperiod); a more accurate measurement isobtained after 2000 miles - 3000 miles(3200 kilometers - 4800 kilometers). Also,fuel expense, frequency of fill ups or fuelgauge readings are not accurate ways tomeasure fuel economy.
1.Fill the fuel tank completely and recordthe initial odometer reading.
2.Each time you fill the tank, record theamount of fuel added.
3.After at least 3 to 5 tank fill ups, fill thefuel tank and record the currentodometer reading.
4.Subtract your initial odometer readingfrom the current odometer reading.
5.Calculate fuel economy by dividingmiles traveled by gallons used (ForMetric: Multiply liters used by 100, thendivide by kilometers traveled).
28Motorhome (TY3) , enUSA, First PrintingFuel and Refueling