2016 FORD F SERIES MOTORHOME AND COMMERCIAL CHASSIS change wheel
[x] Cancel search: change wheelPage 5 of 154
Driving Hints
Breaking-In........................................................51
Reduced Engine Performance...................51
Economical Driving.........................................51
Driving Through Water..................................52
Roadside Emergencies
Roadside Assistance.....................................53
Hazard Warning Flashers............................54
Jump Starting the Vehicle...........................54
Customer Assistance
Getting the Services You Need..................57
In California (U.S. Only)...............................58
The Better Business Bureau (BBB) AutoLine Program (U.S. Only)........................59
Utilizing the Mediation/ArbitrationProgram (Canada Only).........................59
Getting Assistance Outside the U.S. andCanada..........................................................60
Ordering Additional Owner'sLiterature........................................................61
Reporting Safety Defects (U.S.Only)................................................................61
Reporting Safety Defects (CanadaOnly)...............................................................62
Fuses
Fuse Specification Chart.............................63
Changing a Fuse............................................80
Maintenance
General Information.......................................81
Under Hood Overview..................................82
Engine Oil Dipstick.........................................83
Engine Oil Check............................................83
Oil Change Indicator Reset.........................83
Engine Coolant Check..................................84
Automatic Transmission FluidCheck..............................................................87
Brake Fluid Check..........................................88
Power Steering Fluid Check.......................90
Fuel Filter............................................................91
Changing the 12V Battery.............................91
Changing the Engine Air Filter...................93
Vehicle Care
General Information.....................................94
Cleaning the Exterior....................................94
Cleaning the Engine......................................94
Cleaning the Alloy Wheels.........................95
Vehicle Storage...............................................95
Wheels and Tires
Tire Care............................................................98
Using Snow Chains.......................................113
Changing a Road Wheel.............................114
Technical Specifications.............................117
Capacities and Specific-ations
Engine Specifications..................................118
Motorcraft Parts.............................................118
Vehicle Identification Number.................120
Vehicle Certification Label........................120
Transmission Code Designation..............121
Capacities and Specifications.................122
Extended Service Plan(ESP)
Extended Service Plan (ESP)..................126
Scheduled Maintenance
General Maintenance Information.........128
Normal Scheduled Maintenance.............131
Special Operating Conditions ScheduledMaintenance...............................................133
Scheduled Maintenance Record............135
2Motorhome (TY3) , enUSA, First PrintingTable of Contents
Page 40 of 154
PRINCIPLE OF OPERATION
Cruise control lets you maintain a setspeed without keeping your foot on theaccelerator pedal. You can use cruisecontrol when your vehicle speed is greaterthan 20 mph (30 km/h).
USING CRUISE CONTROL
WARNINGS
Do not use cruise control on windingroads, in heavy traffic or when theroad surface is slippery. This couldresult in loss of vehicle control, seriousinjury or death.
When you are going downhill, yourvehicle speed may increase abovethe set speed. The system will notapply the brakes. Change down a gear toassist the system in maintaining the setspeed. Failure to do so could result in lossof vehicle control, serious injury or death.
Note:Cruise control will disengage if thevehicle speed decreases more than 10 mph(16 km/h) below the set speed while drivinguphill.
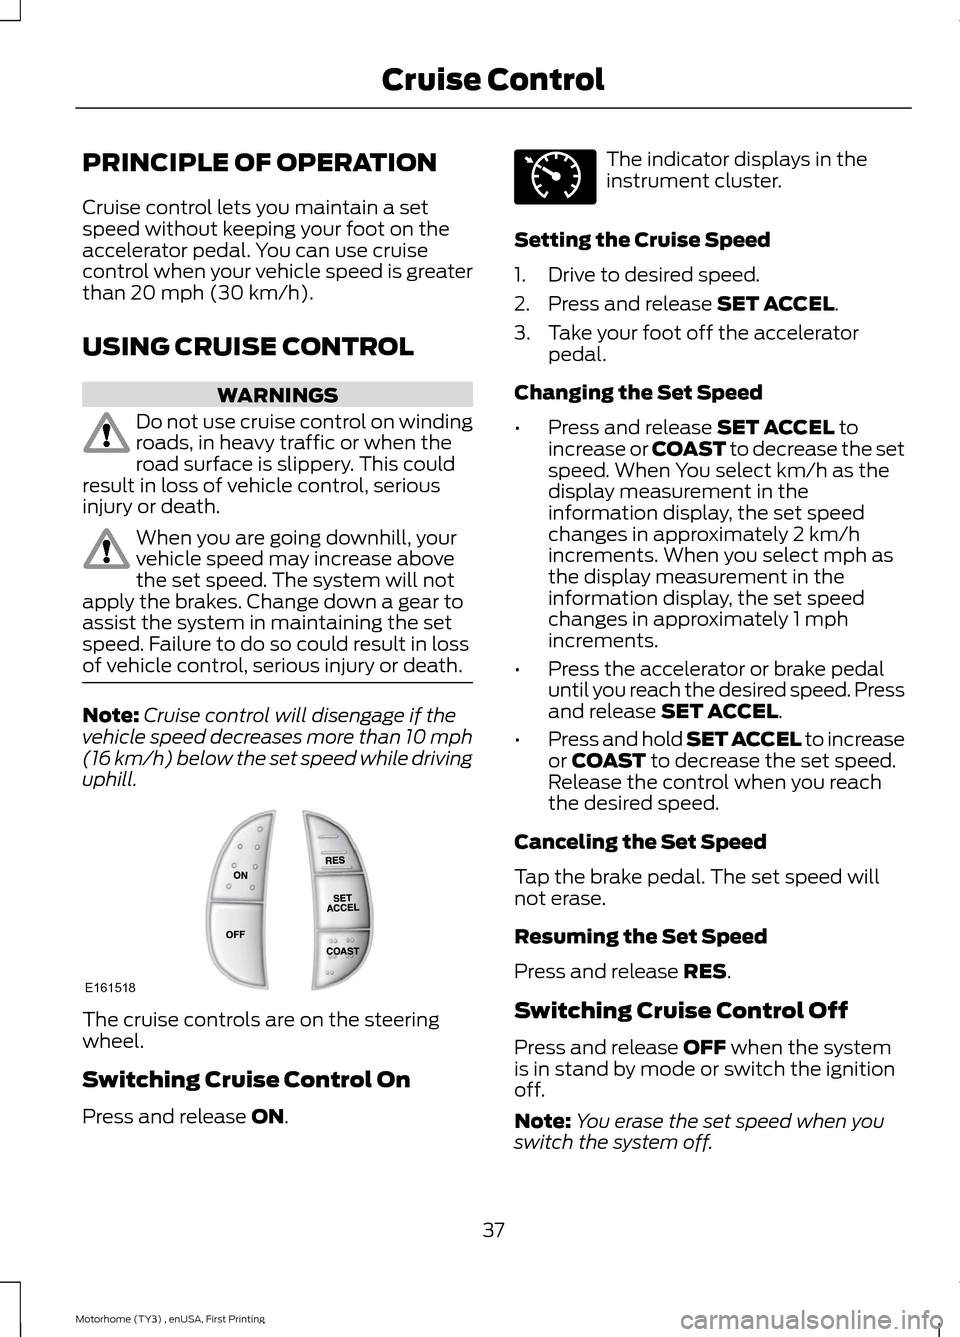
The cruise controls are on the steeringwheel.
Switching Cruise Control On
Press and release ON.
The indicator displays in theinstrument cluster.
Setting the Cruise Speed
1.Drive to desired speed.
2.Press and release SET ACCEL.
3.Take your foot off the acceleratorpedal.
Changing the Set Speed
•Press and release SET ACCEL toincrease or COAST to decrease the setspeed. When You select km/h as thedisplay measurement in theinformation display, the set speedchanges in approximately 2 km/hincrements. When you select mph asthe display measurement in theinformation display, the set speedchanges in approximately 1 mphincrements.
•Press the accelerator or brake pedaluntil you reach the desired speed. Pressand release SET ACCEL.
•Press and hold SET ACCEL to increaseor COAST to decrease the set speed.Release the control when you reachthe desired speed.
Canceling the Set Speed
Tap the brake pedal. The set speed willnot erase.
Resuming the Set Speed
Press and release RES.
Switching Cruise Control Off
Press and release OFF when the systemis in stand by mode or switch the ignitionoff.
Note:You erase the set speed when youswitch the system off.
37Motorhome (TY3) , enUSA, First PrintingCruise ControlE161518 E71340
Page 52 of 154
2.Set your vehicle parking brake.
3.Place the automatic transmission inpark (P).
4.Place wheel chocks in the front andback of the trailer wheels. (Chocks notincluded with vehicle.)
Launching or Retrieving a Boat orPersonal Watercraft (PWC)
Note:Disconnect the wiring to the trailerbefore backing the trailer into the water.
Note:Reconnect the wiring to the trailerafter removing the trailer from the water.
When backing down a ramp during boatlaunching or retrieval:
•Do not allow the static water level torise above the bottom edge of the rearbumper.
•Do not allow waves to break higherthan 6 in (15 cm) above the bottomedge of the rear bumper.
Exceeding these limits may allow water toenter vehicle components:
•Causing internal damage to thecomponents.
•Affecting driveability, emissions andreliability.
Replace the rear axle lubricant anytimethe rear axle has been submerged in water.Water may have contaminated the rearaxle lubricant, which is not normallychecked or changed unless a leak issuspected or other axle repair is required.
TRANSPORTING THE VEHICLE
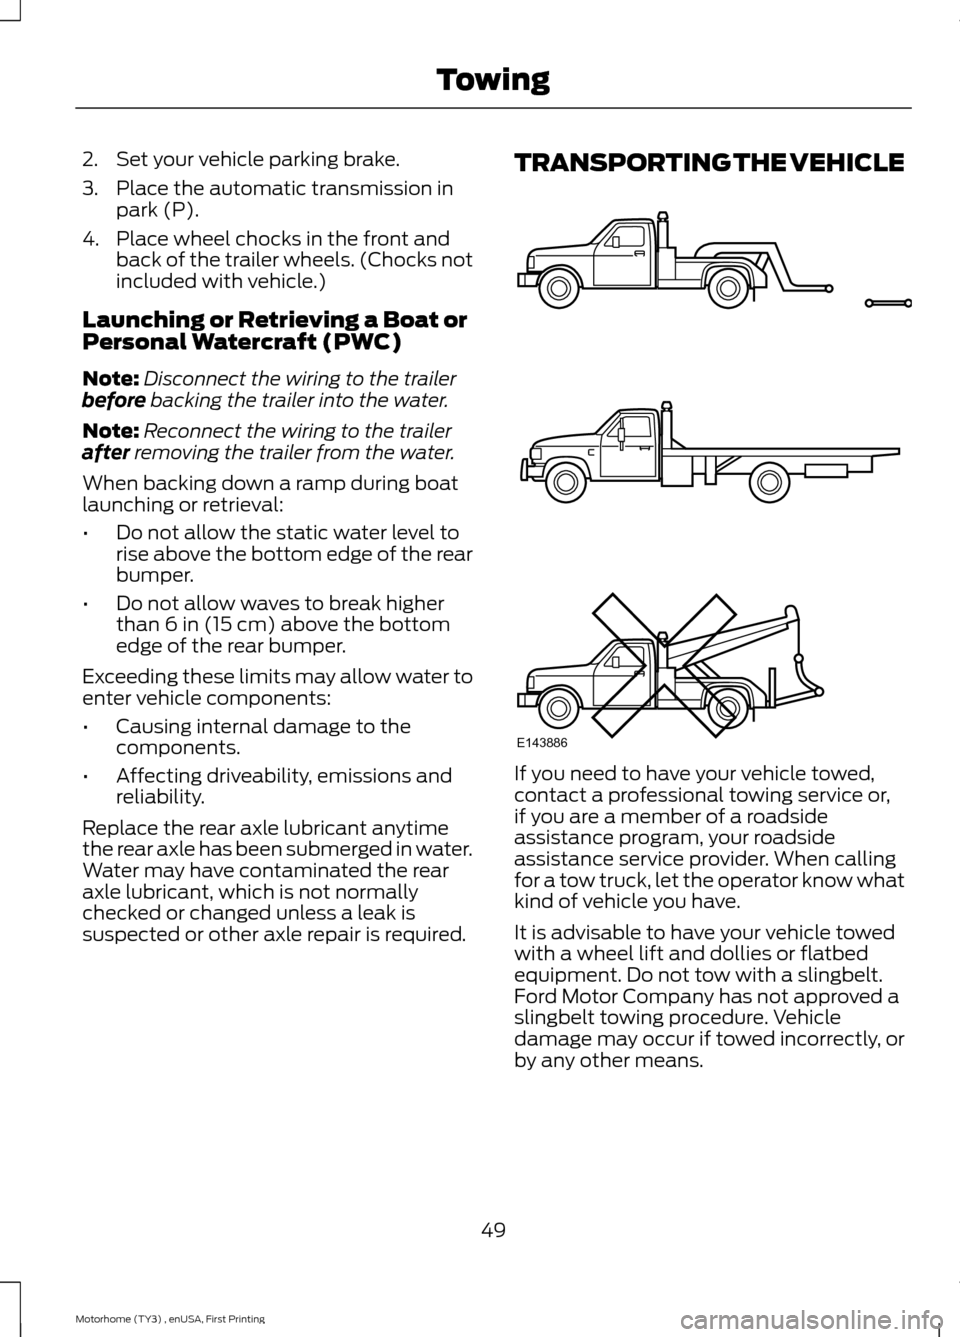
If you need to have your vehicle towed,contact a professional towing service or,if you are a member of a roadsideassistance program, your roadsideassistance service provider. When callingfor a tow truck, let the operator know whatkind of vehicle you have.
It is advisable to have your vehicle towedwith a wheel lift and dollies or flatbedequipment. Do not tow with a slingbelt.Ford Motor Company has not approved aslingbelt towing procedure. Vehicledamage may occur if towed incorrectly, orby any other means.
49Motorhome (TY3) , enUSA, First PrintingTowingE143886
Page 99 of 154
Body
•Wash your vehicle thoroughly toremove dirt, grease, oil, tar or mud fromexterior surfaces, rear-wheel housingand the underside of front fenders.
•Periodically wash your vehicle if it isstored in exposed locations.
•Touch-up exposed or primed metal toprevent rust.
•Cover chrome and stainless steel partswith a thick coat of auto wax to preventdiscoloration. Re-wax as necessarywhen you wash your vehicle.
•Lubricate all hood, door and luggagecompartment hinges and latches witha light grade oil.
•Cover interior trim to prevent fading.
•Keep all rubber parts free from oil andsolvents.
Engine
•Change the engine oil and filter prior tostorage because used engine oilcontains contaminates which maycause engine damage.
•Start the engine every 15 days for aminimum of 15 minutes. Run at fast idlewith the climate controls set to defrostuntil the engine reaches normaloperating temperature.
•With your foot on the brake, shiftthrough all the gears while the engineis running.
•We recommend that you change theengine oil before you use your vehicleagain.
Fuel system
•Fill the fuel tank with high-quality fueluntil the first automatic shutoff of thefuel pump nozzle.
Cooling system
•Protect against freezing temperatures.
•When removing your vehicle fromstorage, check coolant fluid level.Confirm that there are no coolingsystem leaks and that fluid is at therecommended level.
Battery
•Check and recharge as necessary. Keepconnections clean.
•If storing your vehicle for more than 30days without recharging the battery,we recommend that you disconnectthe battery cables to maintain batterycharge for quick starting.
Note:It is necessary to reset memoryfeatures if battery cables are disconnected.
Brakes
•Make sure the brakes and parking brakerelease fully.
Tires
•Maintain recommended air pressure.
Miscellaneous
•Make sure all linkages, cables, leversand pins under your vehicle are coveredwith grease to prevent rust.
•Move vehicles at least 25 ft (7.5 m)every 15 days to lubricate working partsand prevent corrosion.
Removing Vehicle From Storage
When your vehicle is ready to come out ofstorage, do the following:
•Wash your vehicle to remove any dirtor grease film build-up on windowsurfaces.
•Check windshield wipers for anydeterioration.
96Motorhome (TY3) , enUSA, First PrintingVehicle Care
Page 104 of 154
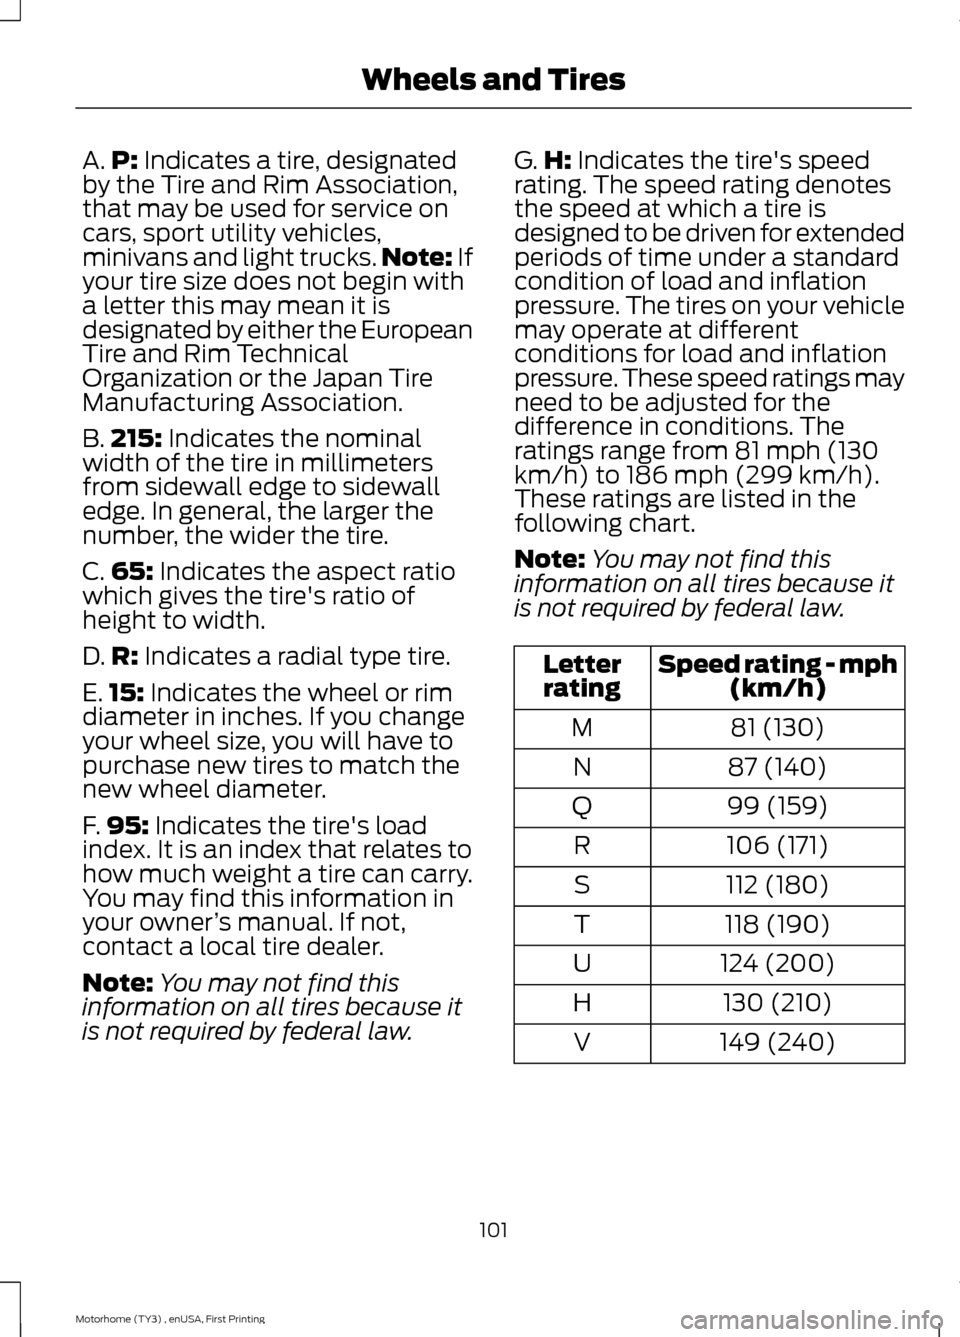
A.P: Indicates a tire, designatedby the Tire and Rim Association,that may be used for service oncars, sport utility vehicles,minivans and light trucks.Note: Ifyour tire size does not begin witha letter this may mean it isdesignated by either the EuropeanTire and Rim TechnicalOrganization or the Japan TireManufacturing Association.
B.215: Indicates the nominalwidth of the tire in millimetersfrom sidewall edge to sidewalledge. In general, the larger thenumber, the wider the tire.
C.65: Indicates the aspect ratiowhich gives the tire's ratio ofheight to width.
D.R: Indicates a radial type tire.
E.15: Indicates the wheel or rimdiameter in inches. If you changeyour wheel size, you will have topurchase new tires to match thenew wheel diameter.
F.95: Indicates the tire's loadindex. It is an index that relates tohow much weight a tire can carry.You may find this information inyour owner’s manual. If not,contact a local tire dealer.
Note:You may not find thisinformation on all tires because itis not required by federal law.
G.H: Indicates the tire's speedrating. The speed rating denotesthe speed at which a tire isdesigned to be driven for extendedperiods of time under a standardcondition of load and inflationpressure. The tires on your vehiclemay operate at differentconditions for load and inflationpressure. These speed ratings mayneed to be adjusted for thedifference in conditions. Theratings range from 81 mph (130km/h) to 186 mph (299 km/h).These ratings are listed in thefollowing chart.
Note:You may not find thisinformation on all tires because itis not required by federal law.
Speed rating - mph(km/h)Letterrating
81 (130)M
87 (140)N
99 (159)Q
106 (171)R
112 (180)S
118 (190)T
124 (200)U
130 (210)H
149 (240)V
101Motorhome (TY3) , enUSA, First PrintingWheels and Tires
Page 107 of 154
D.Maximum Load Single lb(kg) at psi (kPa) cold: Indicatesthe maximum load and tirepressure when the tire is used asa single; defined as two tires(total) on the rear axle.
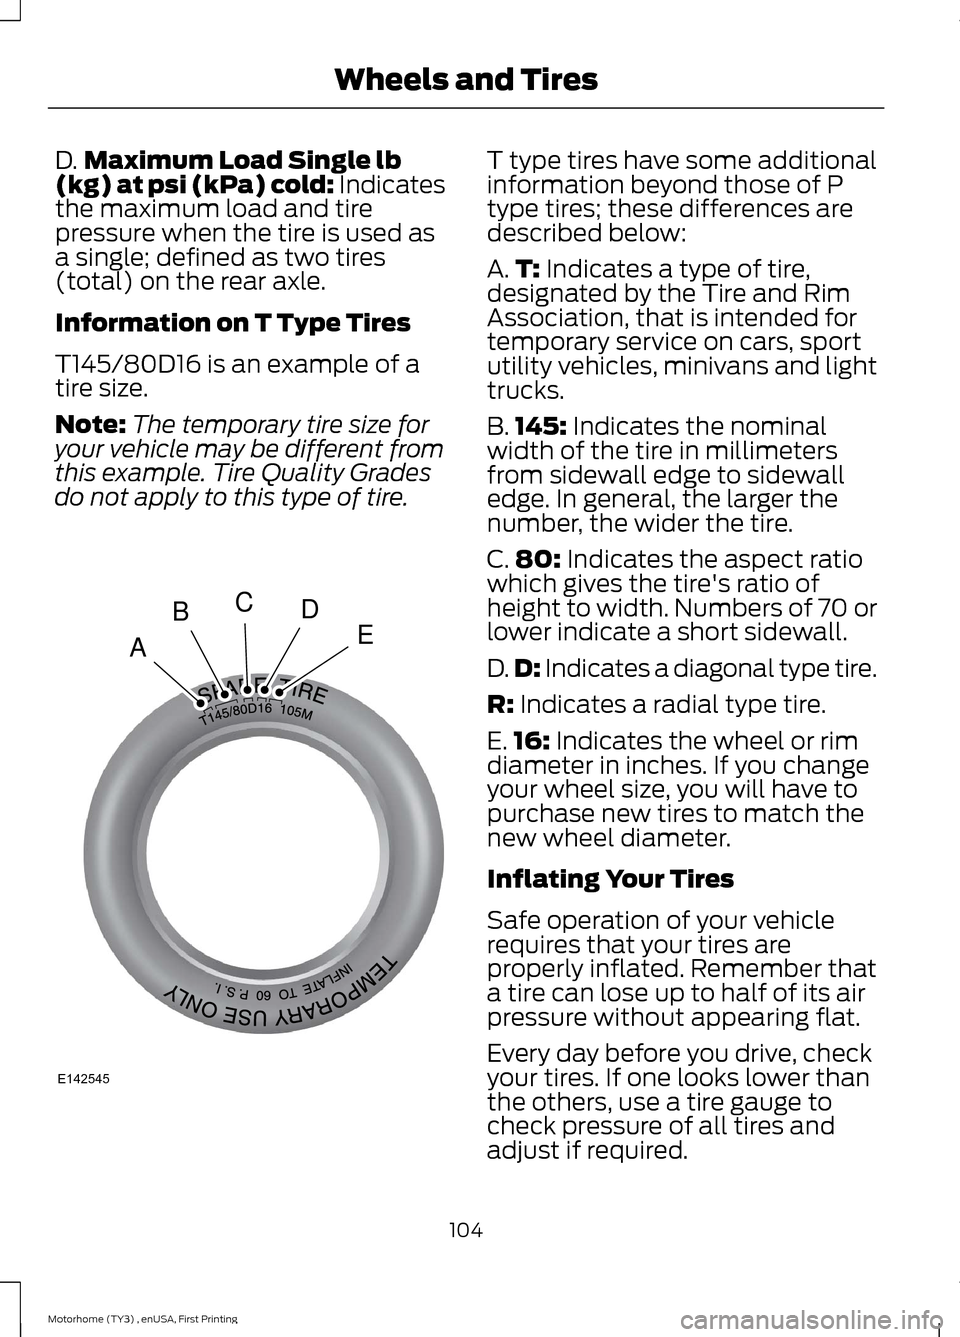
Information on T Type Tires
T145/80D16 is an example of atire size.
Note:The temporary tire size foryour vehicle may be different fromthis example. Tire Quality Gradesdo not apply to this type of tire.
T type tires have some additionalinformation beyond those of Ptype tires; these differences aredescribed below:
A.T: Indicates a type of tire,designated by the Tire and RimAssociation, that is intended fortemporary service on cars, sportutility vehicles, minivans and lighttrucks.
B.145: Indicates the nominalwidth of the tire in millimetersfrom sidewall edge to sidewalledge. In general, the larger thenumber, the wider the tire.
C.80: Indicates the aspect ratiowhich gives the tire's ratio ofheight to width. Numbers of 70 orlower indicate a short sidewall.
D.D: Indicates a diagonal type tire.
R: Indicates a radial type tire.
E.16: Indicates the wheel or rimdiameter in inches. If you changeyour wheel size, you will have topurchase new tires to match thenew wheel diameter.
Inflating Your Tires
Safe operation of your vehiclerequires that your tires areproperly inflated. Remember thata tire can lose up to half of its airpressure without appearing flat.
Every day before you drive, checkyour tires. If one looks lower thanthe others, use a tire gauge tocheck pressure of all tires andadjust if required.
104Motorhome (TY3) , enUSA, First PrintingWheels and TiresABCDEE142545
Page 109 of 154
When weather temperaturechanges occur, tire inflationpressures also change. A 10°F(6°C) temperature drop cancause a corresponding drop of 1psi (7 kPa) in inflation pressure.Check your tire pressuresfrequently and adjust them to theproper pressure which can befound on the Safety ComplianceCertification Label or Tire Label.
To check the pressure in yourtire(s):
1.Make sure the tires are cool,meaning they are not hot fromdriving even a mile.
Note:If you are checking tirepressure when the tire is hot, (forexample, driven more than 1 mile[1.6 kilometers]), never bleed orreduce air pressure. The tires arehot from driving and it is normal forpressures to increase aboverecommended cold pressures. Ahot tire at or below recommendedcold inflation pressure could besignificantly under-inflated.
Note:If you have to drive adistance to get air for your tire(s),check and record the tire pressurefirst and add the appropriate airpressure when you get to thepump. It is normal for tires to heatup and the air pressure inside to goup as you drive.
2.Remove the cap from the valveon one tire, then firmly pressthe tire gauge onto the valve
and measure the pressure.
3.Add enough air to reach therecommended air pressure.
Note:If you overfill the tire, releaseair by pressing on the metal stemin the center of the valve. Thenrecheck the pressure with your tiregauge.
4.Replace the valve cap.
5.Repeat this procedure for eachtire, including the spare.
Note:Some spare tires operate ata higher inflation pressure than theother tires. For T type mini-sparetires, see the Dissimilar spare wheeland tire assembly information fora description. Store and maintainat 60 psi (4.15 bar). For full-sizeand dissimilar spare tires, see theDissimilar spare wheel and tireassembly information for adescription. Store and maintain atthe higher of the front and rearinflation pressure as shown on theSafety Compliance CertificationLabel or Tire Label.
6.Visually inspect the tires tomake sure there are no nails orother objects embedded thatcould poke a hole in the tireand cause an air leak.
7.Check the sidewalls to makesure there are no gouges, cutsor bulges.
106Motorhome (TY3) , enUSA, First PrintingWheels and Tires
Page 118 of 154
Use of one of the dissimilar spare tireslisted above at any one wheel location canlead to impairment of the following:
•Handling, stability and brakingperformance.
•Comfort and noise.
•Ground clearance and parking at curbs.
•Winter weather driving capability.
•Wet weather driving capability.
•All-wheel driving capability.
3.Full-size dissimilar spare withoutlabel on wheel
When driving with the full-size dissimilarspare wheel and tire assembly, do not:
•Exceed 70 mph (113 km/h).
•Use more than one dissimilar sparewheel and tire assembly at a time.
•Use commercial car washingequipment.
•Use snow chains on the end of thevehicle with the dissimilar spare wheeland tire assembly.
The usage of a full-size dissimilar sparewheel and tire assembly can lead toimpairment of the following:
•Handling, stability and brakingperformance.
•Comfort and noise.
•Ground clearance and parking at curbs.
•Winter weather driving capability.
•Wet weather driving capability.
•All-wheel driving capability.
When driving with the full-size dissimilarspare wheel and tire assembly additionalcaution should be given to:
•Towing a trailer.
•Driving vehicles equipped with acamper body.
•Driving vehicles with a load on thecargo rack.
Drive cautiously when using a full-sizedissimilar spare wheel and tire assemblyand seek service as soon as possible.
Tire Change Procedure
WARNINGS
When one of the front wheels is offthe ground, the transmission alonewill not prevent the vehicle frommoving or slipping off the jack, even if thetransmission is in park (P).
To help prevent the vehicle frommoving when you change a tire, besure to place the transmission in park(P), set the parking brake and block (inboth directions) the wheel that isdiagonally opposite (other side and end ofthe vehicle) to the tire being changed.
Never get underneath a vehicle thatis supported only by a jack. If thevehicle slips off the jack, you orsomeone else could be seriously injured.
Do not attempt to change a tire onthe side of the vehicle close tomoving traffic. Pull far enough off theroad to avoid the danger of being hit whenoperating the jack or changing the wheel.
Always use the jack provided asoriginal equipment with your vehicle.If using a jack other than the oneprovided as original equipment with yourvehicle, make sure the jack capacity isadequate for the vehicle weight, includingany vehicle cargo or modifications.
1.Park on a level surface, set the parkingbrake and activate the hazard flashers.
2.Place the transmission in park (P) andturn the engine off.
115Motorhome (TY3) , enUSA, First PrintingWheels and Tires