2016 FORD EXPLORER keyless entry
[x] Cancel search: keyless entryPage 4 of 541

Introduction
About This Manual...........................................7
Symbols Glossary
.............................................7
Data Recording
..................................................9
California Proposition 65..............................11
Perchlorate.........................................................11
Ford Credit
..........................................................11
Replacement Parts Recommendation
........................................11
Special Notices................................................12
Mobile Communications Equipment.....................................................13
Export Unique Options..................................13
Environment
Protecting the Environment........................14
Child Safety
General Information
.......................................15
Child Seats
.........................................................16
Installing Child Seats......................................17
Booster Seats..................................................26
Child Seat Positioning
..................................28
Child Safety Locks.........................................29
Safety Belts
Principle of Operation....................................31
Fastening the Safety Belts..........................32
Safety Belt Height Adjustment.................36
Safety Belt Warning Lamp and Indicator Chime.............................................................36
Safety Belt Minder..........................................37
Child Restraint and Safety Belt Maintenance................................................38
Personal Safety System ™
Personal Safety System ™
..........................39Supplementary Restraints
System
Principle of Operation
..................................40
Driver and Passenger Airbags....................41
Front Passenger Sensing System............42
Side Airbags
.....................................................44
Passenger Knee Airbag
................................45
Safety Canopy ™
............................................45
Crash Sensors and Airbag Indicator.......46
Airbag Disposal
...............................................47
Keys and Remote Controls
Principle of Operation..................................48
General Information on Radio Frequencies.................................................48
Remote Control
..............................................49
Replacing a Lost Key or Remote Control...........................................................53
MyKey ™
Principle of Operation..................................54
Creating a MyKey
............................................55
Clearing All MyKeys
.......................................56
Checking MyKey System Status...............57
Using MyKey With Remote Start Systems.........................................................58
MyKey Troubleshooting...............................58
Locks
Locking and Unlocking
................................60
Manual Liftgate...............................................63
Power Liftgate
.................................................64
Keyless Entry....................................................67
Security
Passive Anti-Theft System.........................70
Anti-Theft Alarm.............................................71
1
Explorer (TUB), enUSA, First Printing Table of Contents
Page 62 of 541

Potential Causes
Condition
Program a spare key. See Passive Anti-Theft
System (page 70).
I lost a key.
MyKey distances do not accumulate.
•The MyKey user is not using the MyKey.
• An admin key holder cleared the MyKeys
and created new MyKeys.
• The key system has been reset.
• An admin transmitter is present at vehicle
start.
• No MyKeys are created. See
Creating a
MyKey (page 55).
No MyKey functions with the keyless
entry transmitter.
59
Explorer (TUB), enUSA, First Printing MyKey
™
Page 63 of 541

LOCKING AND UNLOCKING
You can use the power door lock control
or the remote control to lock and unlock
your vehicle.
Power Door Locks (If Equipped)
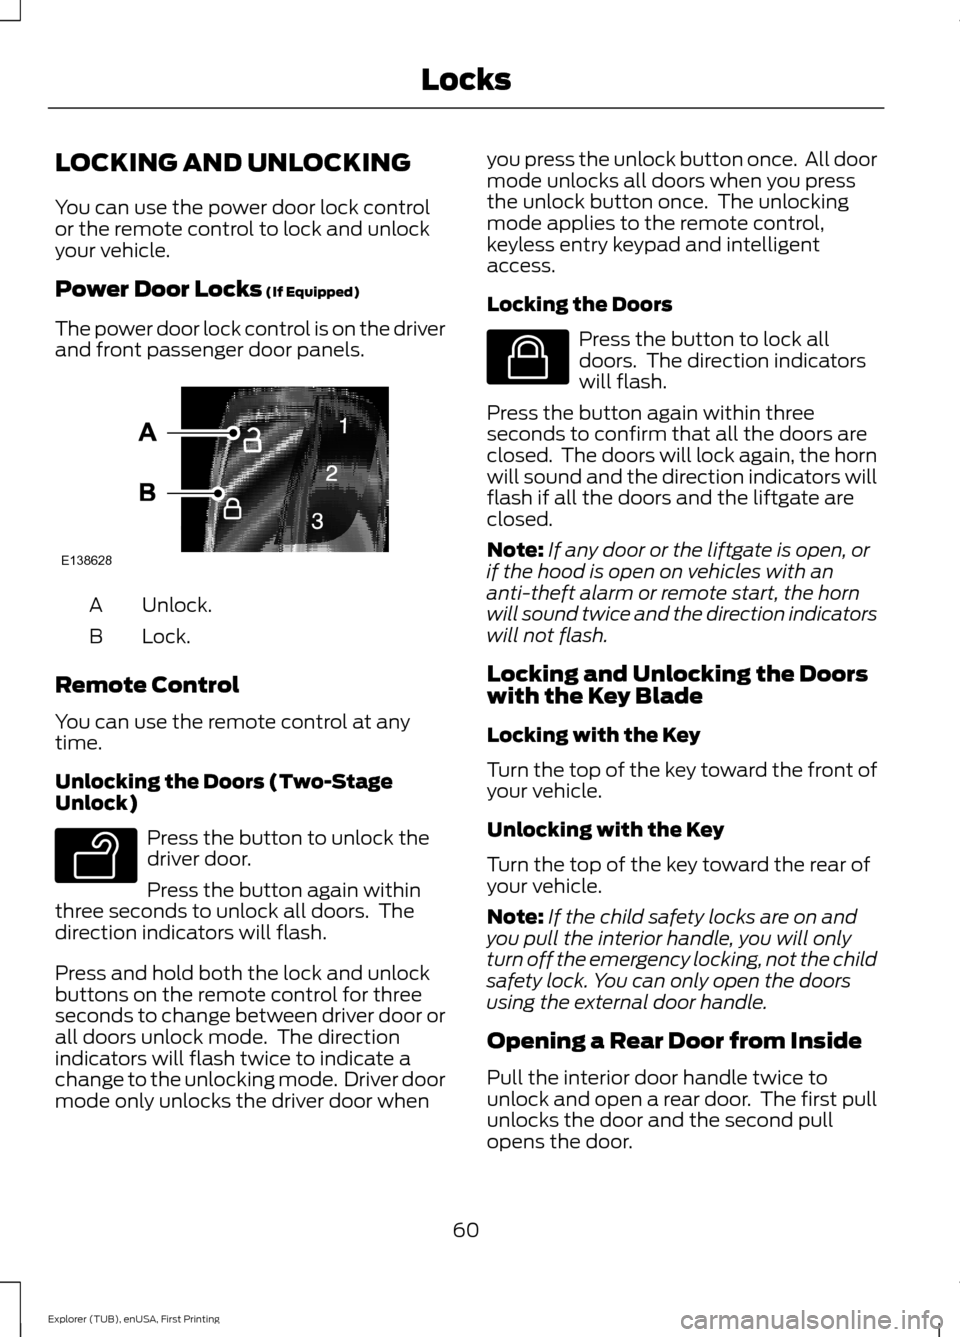
The power door lock control is on the driver
and front passenger door panels. Unlock.
A
Lock.
B
Remote Control
You can use the remote control at any
time.
Unlocking the Doors (Two-Stage
Unlock) Press the button to unlock the
driver door.
Press the button again within
three seconds to unlock all doors. The
direction indicators will flash.
Press and hold both the lock and unlock
buttons on the remote control for three
seconds to change between driver door or
all doors unlock mode. The direction
indicators will flash twice to indicate a
change to the unlocking mode. Driver door
mode only unlocks the driver door when you press the unlock button once. All door
mode unlocks all doors when you press
the unlock button once. The unlocking
mode applies to the remote control,
keyless entry keypad and intelligent
access.
Locking the Doors
Press the button to lock all
doors. The direction indicators
will flash.
Press the button again within three
seconds to confirm that all the doors are
closed. The doors will lock again, the horn
will sound and the direction indicators will
flash if all the doors and the liftgate are
closed.
Note: If any door or the liftgate is open, or
if the hood is open on vehicles with an
anti-theft alarm or remote start, the horn
will sound twice and the direction indicators
will not flash.
Locking and Unlocking the Doors
with the Key Blade
Locking with the Key
Turn the top of the key toward the front of
your vehicle.
Unlocking with the Key
Turn the top of the key toward the rear of
your vehicle.
Note: If the child safety locks are on and
you pull the interior handle, you will only
turn off the emergency locking, not the child
safety lock. You can only open the doors
using the external door handle.
Opening a Rear Door from Inside
Pull the interior door handle twice to
unlock and open a rear door. The first pull
unlocks the door and the second pull
opens the door.
60
Explorer (TUB), enUSA, First Printing LocksE138628 E138629 E138623
Page 64 of 541

Activating Intelligent Access (If
Equipped)
The intelligent access key must be within
3 ft (1 m)
of your vehicle.
At a Door
Pull a front exterior door handle to unlock
and open the door. Do not touch the lock
sensor on the front of the handle. The locking sensors are on the front door
handles.
Touch the locking area on the front of the
door handle to lock your vehicle. There is
a brief delay before you can unlock your
vehicle again.
Note:
Keep the door handle clean to make
sure the system operates correctly.
Note: Your vehicle does not automatically
lock. If you do not touch a locking sensor
your vehicle will remain unlocked.
At the Liftgate
Press the exterior liftgate release button
on the top of the liftgate pull-cup handle.
See
Manual Liftgate (page 63). Smart Unlocks for Integrated
Keyhead Transmitter
This helps to prevent you from locking
yourself out of your vehicle if the key is still
in the ignition.
When you open one of the front doors and
lock your vehicle with the power door lock
control, all the doors will lock then unlock
and the horn will sound twice if the key is
still in the ignition.
You can still lock your vehicle with the key
in the ignition by either:
•
Using the keyless entry keypad with the
driver door closed.
• Pressing the lock button on the remote
control even if the doors are not closed.
If both front doors are closed, you can lock
your vehicle by any method, regardless of
whether the key is in the ignition or not.
Smart Unlocks for Intelligent
Access Keys
(If Equipped)
This helps to prevent you from locking your
key inside the passenger compartment or
rear cargo area.
When you electronically lock your vehicle
with any door open, transmission in park
(P) and the ignition off, the system will
search for an intelligent access key in the
passenger compartment after you close
the last door. If the system finds a key, all
of the doors will immediately unlock and
the horn sounds twice, indicating that a
key is inside.
You can override the smart unlock feature
and intentionally lock the intelligent access
key inside your vehicle.
61
Explorer (TUB), enUSA, First Printing LocksE185863
Page 65 of 541

To override smart unlock, lock your vehicle
after you have closed all doors by:
•
Using the keyless entry keypad.
• Pressing the lock button on another
intelligent access key.
• Touching the locking area on the front
of the door handle with another
intelligent access key in your hand.
When you open one of the front doors and
lock your vehicle using the power door lock
control, all doors will lock then unlock if:
• The ignition is on.
• The ignition is off and the transmission
is not in park (P).
Autolock (If Equipped)
Autolock locks all the doors when:
• All doors are closed.
• The ignition is on.
• You shift into any gear putting your
vehicle in motion.
• Your vehicle attains a speed greater
than
4 mph (7 km/h).
Autounlock
(If Equipped)
Autounlock unlocks all the doors when:
• The ignition is on, all the doors are
closed and your vehicle has been in
motion at a speed greater than
4 mph
(7 km/h).
• Your vehicle comes to a stop and you
switch the ignition off or to accessory.
• You open the driver door within 10
minutes of switching the ignition off or
to accessory.
Note: If you electronically lock your vehicle
after you switch the ignition off with the
driver door closed, the doors will not
autounlock. Enabling or Disabling Autolock and
Autounlock
You can switch autounlock and autolock
on or off independently of each other.
To enable or disable autolock, do the
following:
1. Switch the ignition on.
2. Press the power door unlock control
three times.
3. Switch the ignition off.
4. Press the power door unlock control three times.
5. Switch the ignition on. The horn sounds
indicating your vehicle is in
programming mode.
6. Press the power door unlock control and within five seconds, press the
power door lock control. The horn
sounds once if disabled or twice if
enabled.
7. Switch the ignition off. The horn sounds
indicating programming is complete.
To enable or disable autounlock, do the
following:
1. Switch the ignition on.
2. Press the power door unlock control three times.
3. Switch the ignition off.
4. Press the power door unlock control three times.
5. Switch the ignition on. The horn sounds
indicating your vehicle is in
programming mode.
6. Press the power door lock control and within five seconds, press the power
door unlock control. The horn sounds
once if disabled or twice if enabled.
7. Switch the ignition off. The horn sounds
indicating programming is complete.
62
Explorer (TUB), enUSA, First Printing Locks
Page 70 of 541

When Opening
The system stops when it detects an
obstacle and two short tones sound. Once
you remove the obstacle, you can continue
to operate the liftgate.
Hands-Free Feature (If Equipped)
Make sure you have an intelligent access
transmitter within
3 ft (1 m) of the liftgate. 1. Move your foot under and away from
the rear bumper detection area in a
single-kick motion. Do not move your
foot sideways or the sensors may not
detect the motion.
2. The liftgate powers open or close. Note:
Allow the power system to open the
liftgate. Manually pushing or pulling the
liftgate may activate the system ’s obstacle
detection feature and stop the power
operation or reverse its direction. Manually
interfering with the liftgate motion may also
replicate a gas strut failure.
Note: Splashing water may cause the
hands-free liftgate to open. Keep the
intelligent access key away from the rear
bumper detection area when washing your
vehicle.
KEYLESS ENTRY
SECURICODE™ Keyless Entry
Keypad
The keypad is near the driver window. It
illuminates when touched.
Note: If you enter your entry code too fast
on the keypad, the unlock function may not
work. Enter your entry code again more
slowly. 67
Explorer (TUB), enUSA, First Printing LocksE174120 E138637
Page 74 of 541

You must have two previously
programmed coded keys and the new
unprogrammed key readily accessible. See
your authorized dealer to have the spare
key programmed if two previously
programmed coded keys are not available.
Read and understand the entire procedure
before you begin.
1.
Insert the first previously programmed
coded key into the ignition.
2. Switch the ignition from off to on. Keep
the ignition on for at least three
seconds, but no more than 10 seconds.
3. Switch the ignition off and remove the
first coded key from the ignition.
4. After three seconds but within 10 seconds of switching the ignition off,
insert the second previously coded key
into the ignition.
5. Switch the ignition from off to on. Keep
the ignition on for at least three
seconds, but no more than 10 seconds.
6. Switch the ignition off and remove the
second previously programmed coded
key from the ignition.
7. After three seconds but within 10 seconds of switching the ignition off
and removing the previously
programmed coded key, insert the new
unprogrammed key into the ignition.
8. Switch the ignition from off to on. Keep
the ignition on for at least six seconds.
9. Remove the newly programmed coded
key from the ignition.
If the key has been successfully
programmed it will start the engine and
operate the remote entry system (if the
new key is an integrated keyhead
transmitter).
If programming was not successful, wait
10 seconds and repeat Steps 1 through 8.
If you are still unsuccessful, take your
vehicle to your authorized dealer. Programming a Spare Intelligent
Access Key
See your authorized dealer to have
additional keys programmed to your
vehicle.
ANTI-THEFT ALARM
The system will warn you of an
unauthorized entry to your vehicle. It will
be triggered if any door, the luggage
compartment or the hood is opened
without using the key, remote control or
keyless entry keypad.
The direction indicators will flash and the
horn will sound if unauthorized entry is
attempted while the alarm is armed.
Take all remote controls to an authorized
dealer if there is any potential alarm
problem with your vehicle.
Arming the Alarm
The alarm is ready to arm when there is
not a key in your vehicle. Electronically lock
your vehicle to arm the alarm.
Disarming the Alarm
Disarm the alarm by any of the following
actions:
•
Unlock the doors or luggage
compartment with the remote control
or keyless entry keypad.
• Switch your vehicle on or start your
vehicle.
• Use a key in the driver door to unlock
your vehicle, then switch your vehicle
on within 12 seconds.
Note: Pressing the panic button on the
remote control will stop the horn and signal
indicators, but will not disarm the system.
71
Explorer (TUB), enUSA, First Printing Security
Page 157 of 541

FOLD: Press to fold down the seatback.
C
RH / BOTH / LH: Press to select the normal, stow and fold modes to activate
the right-hand seat, the left-hand seat or both.
D
Note: The third row seat includes obstacle
detection that allows the seat to stop and
reverse direction if it hits an obstacle so that
the obstacle can be removed.
Note: Pressing a different button while the
power seat feature is already being
performed may cause the first selected seat
movement to be cancelled. Allow the first
seat movement to be completed before
pressing a button for another function.
Note: Make sure that there are no objects
such as books, purses or briefcases on the
load floor before unstowing the seat. Failure
to remove all objects from the top of the
load floor prior to unstowing it may cause
damage to the seat.
Note: In order to allow the seat to complete
the stowed position, do not place objects
under the seat before stowing. Remove all
objects from the seat and stowage tub.
Note: In the unlikely event that the third
row power seat stops prematurely or travels
to an unexpected position, press the FOLD
button (C) to reset the seat and return it to
a normal position.
These seats feature a power one-touch
operation that allows you fold and stow
the seats.
• The power fold seats work only when
the transmission is in park (P) and the
liftgate is open.
• If the ignition is off and the feature is
still running, the battery saver will turn
it off after 10 minutes. Press unlock on
the remote entry key transmitter to
reactivate the power seats or unlock it
with the keyless entry keypad. See
Remote Control (page 49). HEATED SEATS
(If Equipped)
Front Seats WARNING
People who are unable to feel pain
to their skin because of advanced
age, chronic illness, diabetes, spinal
cord injury, medication, alcohol use,
exhaustion or other physical conditions,
must exercise care when using the heated
seat. The heated seat may cause burns
even at low temperatures, especially if
used for long periods of time. Do not place
anything on the seat that insulates against
heat, such as a blanket or cushion. This
may cause the heated seat to overheat.
Do not puncture the seat with pins, needles
or other pointed objects. This may damage
the heating element which may cause the
heated seat to overheat. An overheated
seat may cause serious personal injury. Do not do the following:
•
Place heavy objects on the seat.
• Operate the heated seat if water or any
other liquid spills on the seat. Allow the
seat to dry thoroughly.
• Operate the heated seats unless the
engine is running. Doing so can cause
the battery to lose charge.
154
Explorer (TUB), enUSA, First Printing Seats