2016 FORD EXPLORER manual transmission
[x] Cancel search: manual transmissionPage 55 of 541

Press the unlock button on a linked remote
control to recall the memory positions. If
you enable the easy-entry-and-exit
feature, the seat moves to the easy-entry
position. The seat moves to the driver
memory position when you put the key in
the ignition.
Linking a Preset Position to your
Remote Control or Intelligent Access
Key Fob
See Memory Function (page 146).
Car Finder Press the button twice within
three seconds. The horn sounds
and the direction indicators
flash. We recommend you use this method
to locate your vehicle, rather than using
the panic alarm.
Sounding a Panic Alarm
Note: The panic alarm only operates when
the ignition is off. Press the button to activate the
alarm. Press the button again or
switch the ignition on to
deactivate.
Remote Start
(If Equipped) WARNING
To avoid exhaust fumes, do not use
remote start if your vehicle is parked
indoors or areas that are not well
ventilated. Note:
Do not use remote start if your vehicle
is low on fuel. The remote start button is on the
transmitter. This feature allows you to start your
vehicle from outside the vehicle. The
transmitter has an extended operating
range.
You can configure vehicles with automatic
climate control to turn on the automatic
climate control when you remote start your
vehicle. See Automatic Climate Control
(page
131). A manual climate control
system runs at the setting you set it to
when you switched off the vehicle.
Many states and provinces restrict the use
of remote start. Check your local and state
or provincial laws for specific requirements
regarding remote start systems.
The remote start system does not work if:
• The ignition is on.
• The alarm system triggers.
• You disable the feature.
• The hood is open.
• The transmission is not in
P.
• The vehicle battery voltage is too low.
• The service engine soon light is on.
Remote Control Feedback
An LED on the remote control provides
status feedback of remote start or stop
commands. Status
LED
Remote start orextension
successful
Solid green
Remote stop
successful; vehicle off
Solid red
Remote start orstop failed
Blinking red
Waiting for statusupdate
Blinking green
52
Explorer (TUB), enUSA, First Printing Keys and Remote ControlsE138623 E138624 E138625
Page 64 of 541

Activating Intelligent Access (If
Equipped)
The intelligent access key must be within
3 ft (1 m)
of your vehicle.
At a Door
Pull a front exterior door handle to unlock
and open the door. Do not touch the lock
sensor on the front of the handle. The locking sensors are on the front door
handles.
Touch the locking area on the front of the
door handle to lock your vehicle. There is
a brief delay before you can unlock your
vehicle again.
Note:
Keep the door handle clean to make
sure the system operates correctly.
Note: Your vehicle does not automatically
lock. If you do not touch a locking sensor
your vehicle will remain unlocked.
At the Liftgate
Press the exterior liftgate release button
on the top of the liftgate pull-cup handle.
See
Manual Liftgate (page 63). Smart Unlocks for Integrated
Keyhead Transmitter
This helps to prevent you from locking
yourself out of your vehicle if the key is still
in the ignition.
When you open one of the front doors and
lock your vehicle with the power door lock
control, all the doors will lock then unlock
and the horn will sound twice if the key is
still in the ignition.
You can still lock your vehicle with the key
in the ignition by either:
•
Using the keyless entry keypad with the
driver door closed.
• Pressing the lock button on the remote
control even if the doors are not closed.
If both front doors are closed, you can lock
your vehicle by any method, regardless of
whether the key is in the ignition or not.
Smart Unlocks for Intelligent
Access Keys
(If Equipped)
This helps to prevent you from locking your
key inside the passenger compartment or
rear cargo area.
When you electronically lock your vehicle
with any door open, transmission in park
(P) and the ignition off, the system will
search for an intelligent access key in the
passenger compartment after you close
the last door. If the system finds a key, all
of the doors will immediately unlock and
the horn sounds twice, indicating that a
key is inside.
You can override the smart unlock feature
and intentionally lock the intelligent access
key inside your vehicle.
61
Explorer (TUB), enUSA, First Printing LocksE185863
Page 67 of 541

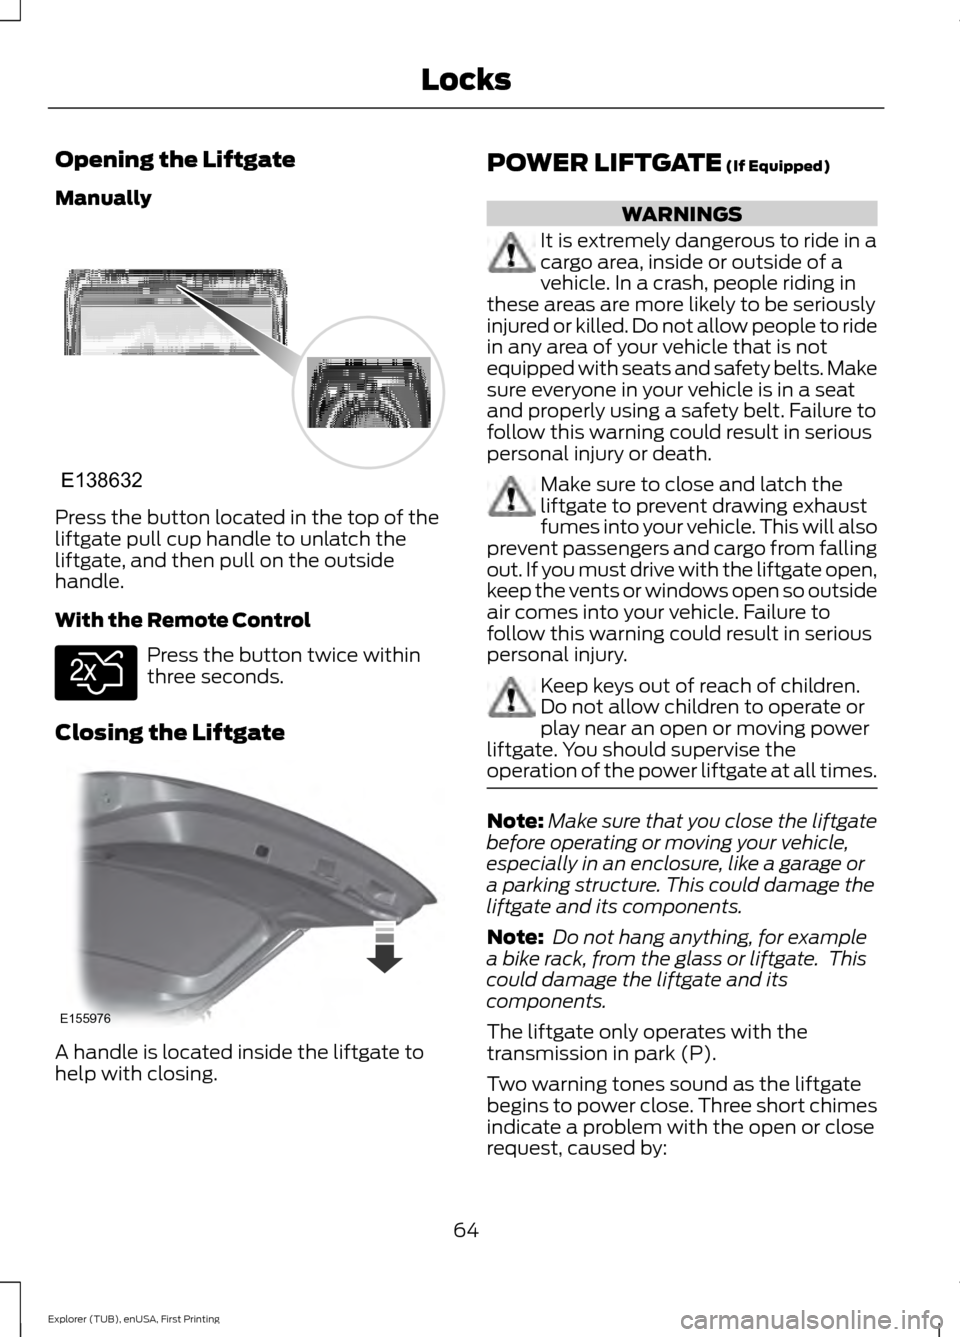
Opening the Liftgate
Manually
Press the button located in the top of the
liftgate pull cup handle to unlatch the
liftgate, and then pull on the outside
handle.
With the Remote Control
Press the button twice within
three seconds.
Closing the Liftgate A handle is located inside the liftgate to
help with closing. POWER LIFTGATE (If Equipped) WARNINGS
It is extremely dangerous to ride in a
cargo area, inside or outside of a
vehicle. In a crash, people riding in
these areas are more likely to be seriously
injured or killed. Do not allow people to ride
in any area of your vehicle that is not
equipped with seats and safety belts. Make
sure everyone in your vehicle is in a seat
and properly using a safety belt. Failure to
follow this warning could result in serious
personal injury or death. Make sure to close and latch the
liftgate to prevent drawing exhaust
fumes into your vehicle. This will also
prevent passengers and cargo from falling
out. If you must drive with the liftgate open,
keep the vents or windows open so outside
air comes into your vehicle. Failure to
follow this warning could result in serious
personal injury. Keep keys out of reach of children.
Do not allow children to operate or
play near an open or moving power
liftgate. You should supervise the
operation of the power liftgate at all times. Note:
Make sure that you close the liftgate
before operating or moving your vehicle,
especially in an enclosure, like a garage or
a parking structure. This could damage the
liftgate and its components.
Note: Do not hang anything, for example
a bike rack, from the glass or liftgate. This
could damage the liftgate and its
components.
The liftgate only operates with the
transmission in park (P).
Two warning tones sound as the liftgate
begins to power close. Three short chimes
indicate a problem with the open or close
request, caused by:
64
Explorer (TUB), enUSA, First Printing LocksE138632 E138630 E155976
Page 68 of 541

•
The ignition is on and the transmission
is not in park (P).
• The battery voltage is below the
minimum operating voltage.
• The vehicle speed is at or above 3 mph
(5 km/h).
If the liftgate starts to close after it has
fully opened, this indicates there may be
excessive weight on the liftgate or a
possible gas strut failure. A repetitive
chime sounds and the liftgate closes under
control. Remove any excessive weight from
the liftgate. If the liftgate continues to
close after opening, have the system
checked by an authorized dealer.
Opening and Closing the Liftgate WARNING
Make sure all persons are clear of the
power liftgate area before using the
power liftgate control.
Note:
Be careful when opening or closing
the liftgate in a garage or other enclosed
area to avoid damaging the liftgate.
Note: Do not leave the liftgate open while
driving. This could damage the liftgate and
its components.
From the Instrument Panel Press the button on the
instrument panel.
With the Remote Control Press the button twice within
three seconds. With the Outside Control Button
Opening the Liftgate
1. Unlock the liftgate with the remote
control or power door unlock control.
If an intelligent access key is within 3 ft
(1 m) of the liftgate, the liftgate unlocks
when you press the liftgate release
button. 2.
Press the control button located in the
top of the liftgate pull-cup handle.
Note: Allow the power system to open the
liftgate. Manually pushing or pulling the
liftgate may activate the system ’s obstacle
detection feature and stop the power
operation or reverse its direction. Manually
interfering with the liftgate motion may also
replicate a gas strut failure.
Closing the Liftgate WARNING
Keep clear of the liftgate when
activating the rear switch.
65
Explorer (TUB), enUSA, First Printing LocksE138633 E138630 E138632
Page 86 of 541

Type 1 - Conventional (Non-
Configurable)
The daytime running lamps turn on when:
1. The ignition is switched to the on
position.
2. The transmission is not in park (P) for vehicles with automatic transmissions
or the parking brake is released for
vehicles with manual transmissions.
3. The lighting control is in the off, parking
lamp or autolamps positions.
Type 2 - Configurable
Switch the daytime running lamps on or
off using the information display controls.
See Information Displays (page 101).
The daytime running lamps turn on when:
1. They are switched on in the information
display. See
Information Displays
(page 101).
2. The ignition is switched to the on position.
3. The transmission is not in park (P) for vehicles with automatic transmissions
or the parking brake is released for
vehicles with manual transmissions.
4. The lighting control is in the autolamps
position.
5. The lighting control sensor detects daylight, and the headlamps or parking
lamps are off.
The other lighting control switch positions
do not activate the daytime running lamps,
and you can use them to temporarily
override autolamp control.
When switched off in the information
display, the daytime running lamps are off
in all lighting control switch positions. AUTOMATIC HIGH BEAM
CONTROL
(If Equipped)
The system automatically turns on the high
beams if it is dark enough and no other
traffic is present. When it detects the
headlights of an approaching vehicle, the
tail lamps of the preceding vehicle or street
lighting, the system turns off the high
beams before they distract other drivers.
The low beams remain on.
Note: If it appears that automatic high
beam is not functioning properly, check the
windshield in front of the camera for a
blockage. A clear view of the road is required
for proper system operation. Make sure that
authorized personnel repair any windshield
damage in the area of the camera's field of
view.
Note: If the system detects a blockage such
as bird droppings, bug splatter, snow or ice,
and you do not observe changes, the system
may go into low beam mode until you clear
the blockage. A message may also appear
in the information display noting the front
camera is blocked.
Note: Typical road dust, dirt and water
spots do not affect the performance of the
automatic high beam control. However, in
cold or inclement weather conditions, you
may notice a decrease in the availability of
the automatic high beam control, especially
at start up. If you want to change the beam
state independently of the system, you may
switch the high beams on or off using the
lighting control switch. Automatic high
beam control resumes when conditions are
correct.
Note: Using much larger tires or equipping
vehicle accessories such as snowplows can
modify your vehicle's ride height and
degrade automatic high beam control
performance.
83
Explorer (TUB), enUSA, First Printing Lighting
Page 131 of 541

Transmission
Action
Message
Contact an authorized dealer.
Transmission Malfunc-
tion Service Now
The transmission is overheating and needs to cool. Stop in asafe place as soon as possible.
Transmission Overtem-
perature Stop Safely
The transmission is overheating and needs to cool. Stop in asafe place as soon as possible.
Transmission Over-
heating Stop Safely
Contact an authorized dealer.
Transmission Service
Required
The transmission is getting hot. Stop to let it cool.
Transmission Too Hot
Press Brake
The transmission has overheated and has limited functionality.See Automatic Transmission (page 180).
Transmission Limited
Function See Manual
The transmission is too cold. Wait for it to warm up beforeyou drive.
Transmission Warming
Up Please Wait
A reminder to shift into park.
Transmission Not in Park
A request for you to apply the brake as needed by the trans-mission.
Press Brake Pedal
The transmission has adjusted the shift strategy.
Transmission Adjusted
The transmission is adjusting the shift strategy.
Transmission Adapt-
Mode
The transmission is locked and unable to select gears.
Transmission Indicat-
Mode Lockup On
The transmission is unlocked and free to select gears.
Transmission Indicat-
Mode Lockup Off
128
Explorer (TUB), enUSA, First Printing Information Displays
Page 184 of 541

•
Provides additional grade braking with
a combination of engine motoring and
high-voltage battery charging to help
maintain vehicle speed when
descending a grade.
• As your vehicle determines the amount
of engine motoring and high-voltage
battery charging, you may notice the
engine speed increasing and
decreasing to help maintain your
vehicle speed when descending a
grade.
• The grade assist lamp in the instrument
cluster is illuminated. The grade assist lamp will
appear in the instrument cluster
when grade assist is turned on.
Press the transmission control switch
again to return to drive (D).
SelectShift Automatic ™
Transmission
Your SelectShift automatic transmission
gives you the ability to manually change
gears.
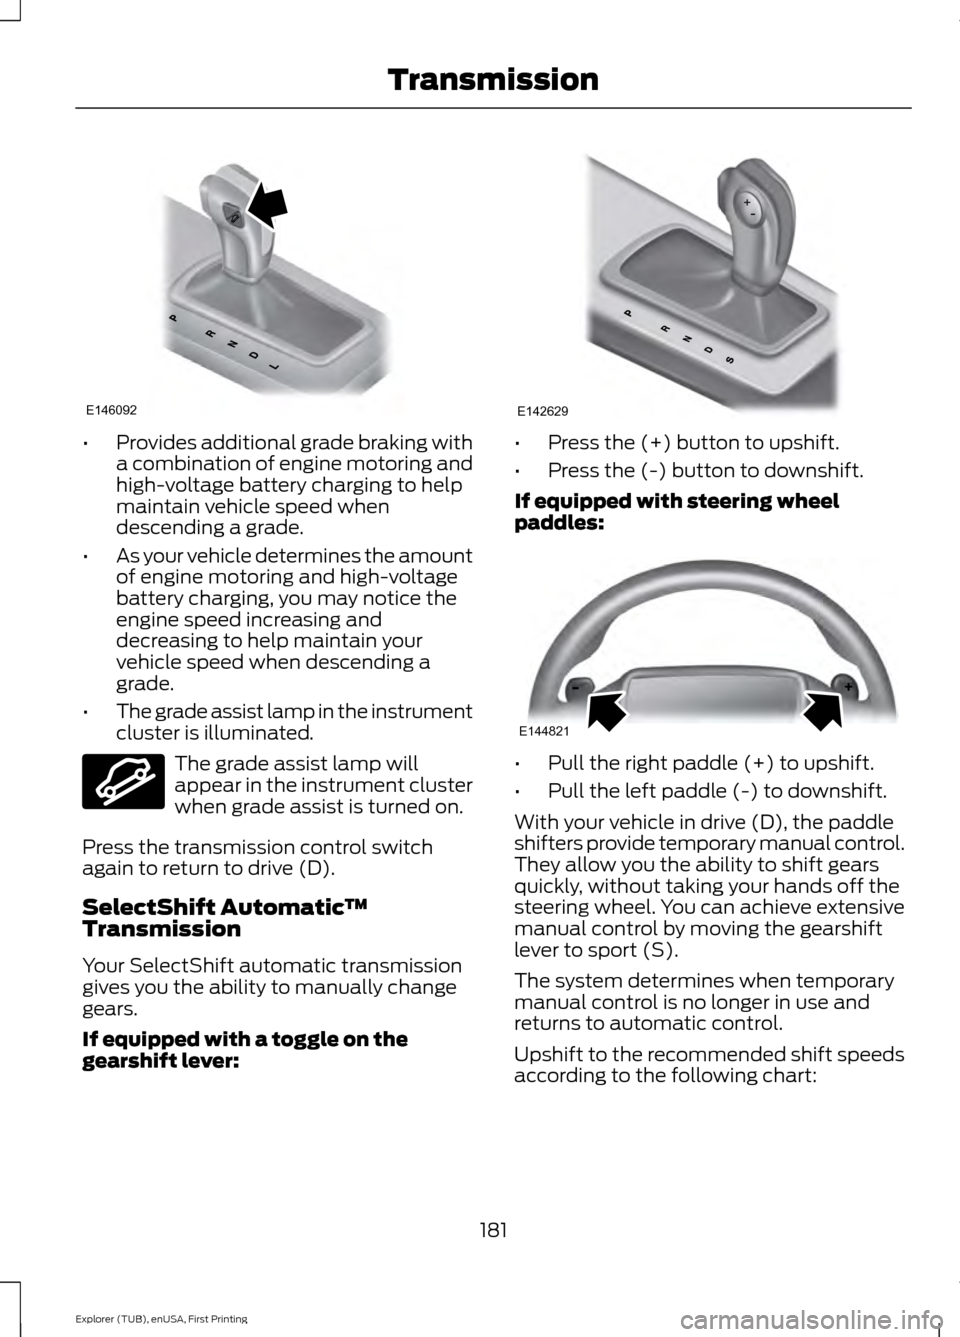
If equipped with a toggle on the
gearshift lever: •
Press the (+) button to upshift.
• Press the (-) button to downshift.
If equipped with steering wheel
paddles: •
Pull the right paddle (+) to upshift.
• Pull the left paddle (-) to downshift.
With your vehicle in drive (D), the paddle
shifters provide temporary manual control.
They allow you the ability to shift gears
quickly, without taking your hands off the
steering wheel. You can achieve extensive
manual control by moving the gearshift
lever to sport (S).
The system determines when temporary
manual control is no longer in use and
returns to automatic control.
Upshift to the recommended shift speeds
according to the following chart:
181
Explorer (TUB), enUSA, First Printing TransmissionE146092 E144523 E142629 E144821
Page 194 of 541

2. If the sensors detect that your vehicle
is on a slope, the system activates
automatically.
3. When you remove your foot from the brake pedal, your vehicle remains on
the slope without rolling away for
about two to three seconds. This hold
time automatically extends if you are
in the process of driving off.
4. Drive off in the normal manner. The system releases the brakes
automatically.
Note: When you remove your foot from the
brake pedal and press the pedal again when
the system is active, you will experience
significantly reduced brake pedal travel. This
is normal.
Switching the System On and Off
Vehicles with Manual Transmission
You can switch this feature on or off in the
information display. The system
remembers the last setting when you start
your vehicle.
Vehicles with Automatic Transmission
You cannot turn the system on or off.
When you switch the ignition on, the
system automatically turns on.
191
Explorer (TUB), enUSA, First Printing Brakes