2016 FORD EXPLORER wheel
[x] Cancel search: wheelPage 216 of 541

PRINCIPLE OF OPERATION
Cruise control lets you maintain a set
speed without keeping your foot on the
accelerator pedal. You can use cruise
control when your vehicle speed is greater
than 20 mph (30 km/h).
USING CRUISE CONTROL WARNINGS
Do not use cruise control on winding
roads, in heavy traffic or when the
road surface is slippery. This could
result in loss of vehicle control, serious
injury or death. When you are going downhill, your
vehicle speed may increase above
the set speed. The system will not
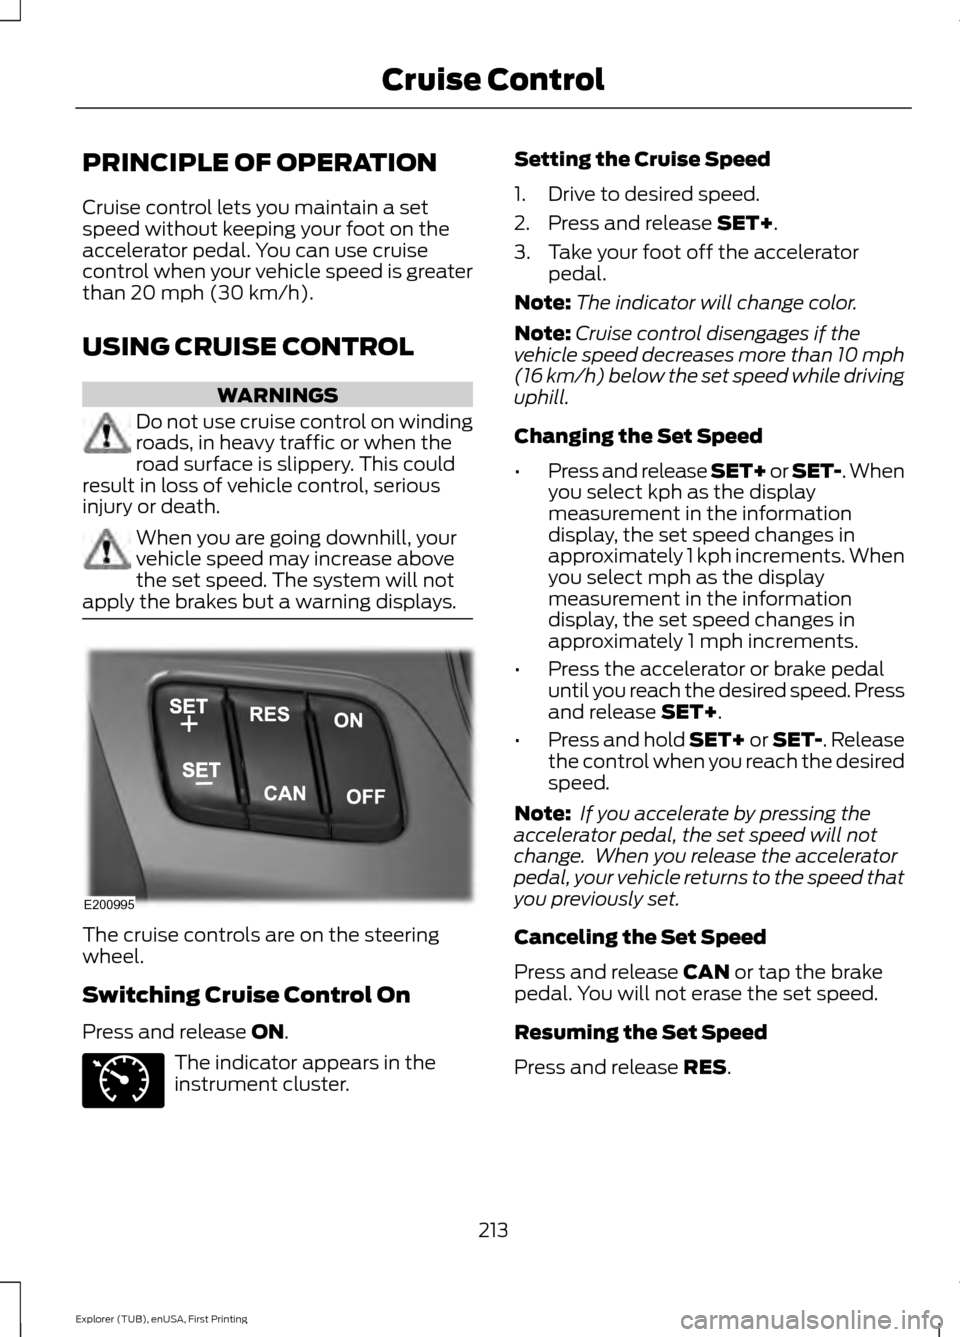
apply the brakes but a warning displays. The cruise controls are on the steering
wheel.
Switching Cruise Control On
Press and release
ON.
The indicator appears in the
instrument cluster. Setting the Cruise Speed
1. Drive to desired speed.
2. Press and release
SET+.
3. Take your foot off the accelerator pedal.
Note: The indicator will change color.
Note: Cruise control disengages if the
vehicle speed decreases more than 10 mph
(16 km/h) below the set speed while driving
uphill.
Changing the Set Speed
• Press and release SET+ or SET-. When
you select kph as the display
measurement in the information
display, the set speed changes in
approximately 1 kph increments. When
you select mph as the display
measurement in the information
display, the set speed changes in
approximately 1 mph increments.
• Press the accelerator or brake pedal
until you reach the desired speed. Press
and release
SET+.
• Press and hold SET+ or SET-. Release
the control when you reach the desired
speed.
Note: If you accelerate by pressing the
accelerator pedal, the set speed will not
change. When you release the accelerator
pedal, your vehicle returns to the speed that
you previously set.
Canceling the Set Speed
Press and release
CAN or tap the brake
pedal. You will not erase the set speed.
Resuming the Set Speed
Press and release
RES.
213
Explorer (TUB), enUSA, First Printing Cruise ControlE200995 E71340
Page 217 of 541

Switching Cruise Control Off
Press and release OFF when the system
is in stand by mode or switch the ignition
off.
Note: You erase the set speed when you
switch the system off.
USING ADAPTIVE CRUISE
CONTROL
(If Equipped) WARNINGS
Always pay close attention to
changing road conditions when using
adaptive cruise control. The system
does not replace attentive driving. Failing
to pay attention to the road may result in
a crash, serious injury or death. Adaptive cruise control is not a crash
warning or avoidance system.
Adaptive cruise control does not
detect stationary or slow moving
vehicles below
6 mph (10 km/h).
Adaptive cruise control does not
detect pedestrians or objects in the
road.
Adaptive cruise control does not
detect oncoming vehicles in the
same lane.
Do not use adaptive cruise control
on winding roads, in heavy traffic or
when the road surface is slippery.
This could result in loss of vehicle control,
serious injury or death. Do not use adaptive cruise control
when towing a trailer that has trailer
brakes. The auto-brake component
of the adaptive cruise control system does
not operate the trailer brakes. Using
adaptive cruise control when towing a
trailer that has trailer brakes may result in
the loss of vehicle control, which could
result in serious injury. WARNINGS
Do not use tire sizes other than those
recommended because this can
affect the normal operation of the
system. Failing to do so may result in a loss
of vehicle control, which could result in
serious injury. The system adjusts your vehicle speed to
maintain the set gap between you and the
vehicle in front of you in the same lane.
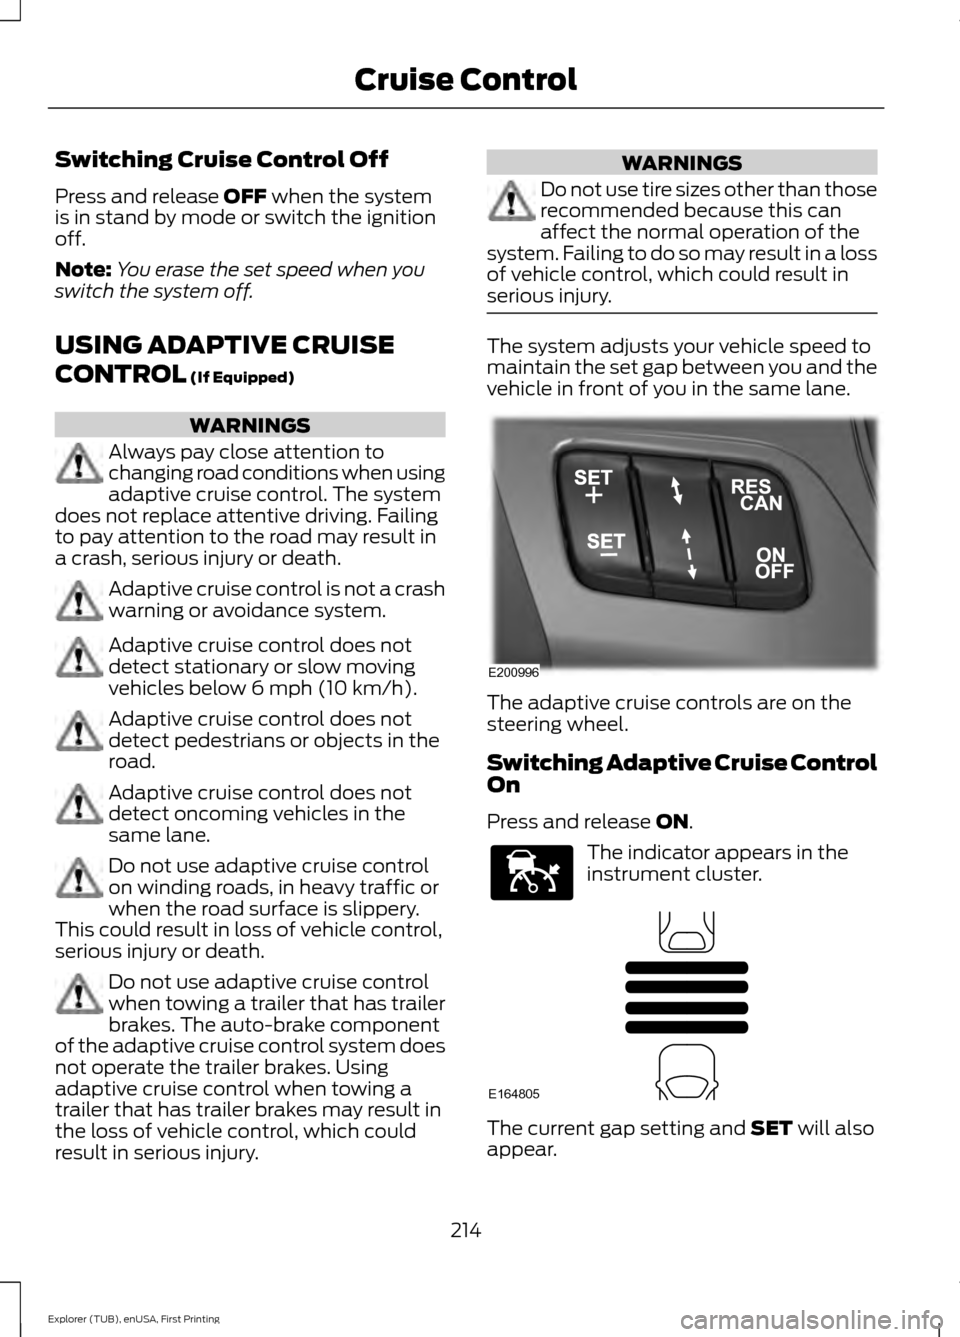
The adaptive cruise controls are on the
steering wheel.
Switching Adaptive Cruise Control
On
Press and release
ON.
The indicator appears in the
instrument cluster.
The current gap setting and
SET will also
appear.
214
Explorer (TUB), enUSA, First Printing Cruise ControlE200996 E144529 E164805
Page 223 of 541

DRIVER ALERT (If Equipped)
PRINCIPLE OF OPERATION WARNING
The driver alert system is designed
to aid you. It is not intended to
replace your attention and judgment.
You are still responsible to drive with due
care and attention. Note:
The system will store the on or off
setting in the information display menu
through ignition cycles.
Note: If enabled in the menu, the system
will be active at speeds above
40 mph
(64 km/h). When below the activation
speed, the information display will inform
the driver that the system is unavailable.
Note: The system works as long as one lane
marking can be detected by the camera.
Note: If the camera is blocked or if the
windshield is damaged, the system may not
function.
Note: The system may not be available in
poor weather or other low visibility
conditions.
The system automatically monitors your
driving behavior using various inputs
including the front camera sensor.
If the system detects that your driving
alertness is reduced below a certain
threshold, the system will alert you using
a chime and a message in the cluster
display.
USING DRIVER ALERT
Switching the System On and Off
Switch the system on or off using the
information display. See
General
Information (page 101). When activated, the system will monitor
your alertness level based upon your
driving behavior in relation to the lane
markings, and other factors.
System Warnings
Note:
The system will not issue warnings
below approximately
40 mph (64 km/h).
The warning system has two stages. At
first, the system issues a temporary
warning that you need to take a rest. This
message will only appear for a short time.
If the system detects further reduction in
driving alertness, it may issue another
warning that will remain in the information
display for a longer time. You can press OK
on the steering wheel control to clear the
warning.
Resetting the System
You can reset the system by either:
• Switching the ignition off and on.
• Stopping the vehicle and then opening
and closing the driver ’s door.
LANE KEEPING SYSTEM
(If
Equipped) WARNINGS
The system does not relieve you of
your responsibility to drive with due
care and attention.
At all times you are responsible for
controlling your vehicle, supervising
the system and intervening if
required. If the sensor becomes blocked the
system may not function.
In cold and severe weather
conditions the system may not
function. Rain, snow, spray can all
limit sensor performance.
220
Explorer (TUB), enUSA, First Printing Driving Aids
Page 224 of 541

WARNINGS
Large contrasts in lighting can limit
sensor performance.
The system will not operate if the
sensor cannot track the road lane
markings.
The vehicle should be taken to an
authorized dealer for inspection if
damage occurs in the immediate
area surrounding the sensor. Note:
The system works above 40 mph
(64 km/h).
Note: The system works as long as the
camera can detect one lane marking.
Note: The system may not function if the
camera is blocked or there is damage to the
windshield.
Note: When Aid mode is on and the system
detects no steering activity for a short
period, the system will alert you to put your
hands on the steering wheel. The system
may detect a light grip or touch on the
steering wheel as hands off driving.
The system notifies you to stay in your lane
through the steering system and the
instrument cluster display when the front
camera detects an unintentional drift out
of your lane is likely to occur. The system
automatically detects and tracks the road
lane markings using a camera mounted
behind the interior rear view mirror.
Switching the System On and Off
Note: The system on or off setting is stored
until it is manually changed, unless a MyKey
is detected. If the system detects a MyKey
it defaults to on and the mode is set to Alert.
Note: If a MyKey is detected, pressing the
button will not affect the on or off status of
the system. Press the button located on the
left steering wheel stalk to
switch the system on or off.
System Settings
The system has optional setting menus
available. To view or adjust the settings,
See General Information (page 101). The
system stores the last-known selection for
each of these settings. You do not need to
readjust your settings each time you turn
on the system.
Mode: This setting allows you to select
which of the system features you can
enable. Alert only – Provides a steering wheel
vibration when the system detects an
unintended lane departure.
221
Explorer (TUB), enUSA, First Printing Driving AidsE144813 E165515 E165516
Page 225 of 541

Aid only – Provides an assistance steering
torque input toward the lane center when
the system detects an unintended lane
departure.
Alert
A
AidB
Alert + Aid – Provides an assistance
steering torque input toward the lane
center. If your vehicle continues drifting out
of the lane, the system provides a steering
wheel vibration.
Note: The alert and aid diagrams illustrate
general zone coverage. They do not provide
exact zone parameters.
Intensity: This setting affects the intensity
of the steering wheel vibration used for the
alert and alert + aid modes. This setting
does not affect the aid mode.
• Low
• Normal
• High System Display
When you switch on the system, an
overhead graphic of a vehicle with lane
markings will display in the information
display. If you select aid mode when you
switch on the system, a separate white
icon will also appear or in some vehicles
arrows will display with the lane markings.
When you switch off the system, the lane
marking graphics will not display.
While the system is on, the color of the
lane markings will change to indicate the
system status.
Gray: Indicates that the system is
temporarily unable to provide a warning
or intervention on the indicated side(s).
This may be because:
•
Your vehicle is under the activation
speed.
• The turn indicator is active.
• Your vehicle is in a dynamic maneuver.
222
Explorer (TUB), enUSA, First Printing Driving AidsE165517 E151660
Page 235 of 541

Action
Cause
Clean the radar sensor cover or remove theobstruction
The radar sensor cover in the grille is dirty
or obstructed
Wait a short time. The radar may take
several minutes to reset after you remove the obstruction
The surface of the radar sensor cover is
clean but the message remains in the display
The Pre-Collision Assist system is tempor-
arily disabled. Shortly after weather condi-
tions improve, the collision warning systemautomatically reactivates
Heavy rain, spray, snow or fog in the air
interferes with the radar signals
The Pre-Collision Assist system is tempor-
arily disabled. Shortly after weather condi-
tions improve, the collision warning systemautomatically reactivates
Swirling water, snow or ice on the road
surface interferes with the radar signals
System Limitations WARNING
The Pre-Collision Assist system
’s
brake support only reduces collision
speed if you first apply your brakes.
You must brake as you would in any typical
braking situation. Due to the nature of radar technology,
there may be certain instances where
vehicles do not provide a collision warning.
These include:
•
Stationary vehicles or vehicles moving
below 6.2 mph (10 km/h).
• Pedestrians or objects in the roadway.
• Oncoming vehicles in the same lane.
• Severe weather conditions (see
blocked sensor section).
• Debris build-up on the grille near the
headlamps (see blocked sensor
section).
• Small distance to vehicle ahead.
• Large steering wheel and pedal
movements (very active driving style). Damage to the front end of your vehicle
may alter the radar sensor's coverage area.
This may result in missed or false collision
warnings. Have an authorized dealer check
your radar sensor for proper coverage and
operation.
232
Explorer (TUB), enUSA, First Printing Driving Aids
Page 237 of 541

LUGGAGE COVERS
WARNINGS
Make sure that the posts are properly
latched in mounting features. The
cover may cause injury in a sudden
stop or accident if it is not securely
installed. Do not place any objects on the
cargo area shade. They may obstruct
your vision or strike occupants of
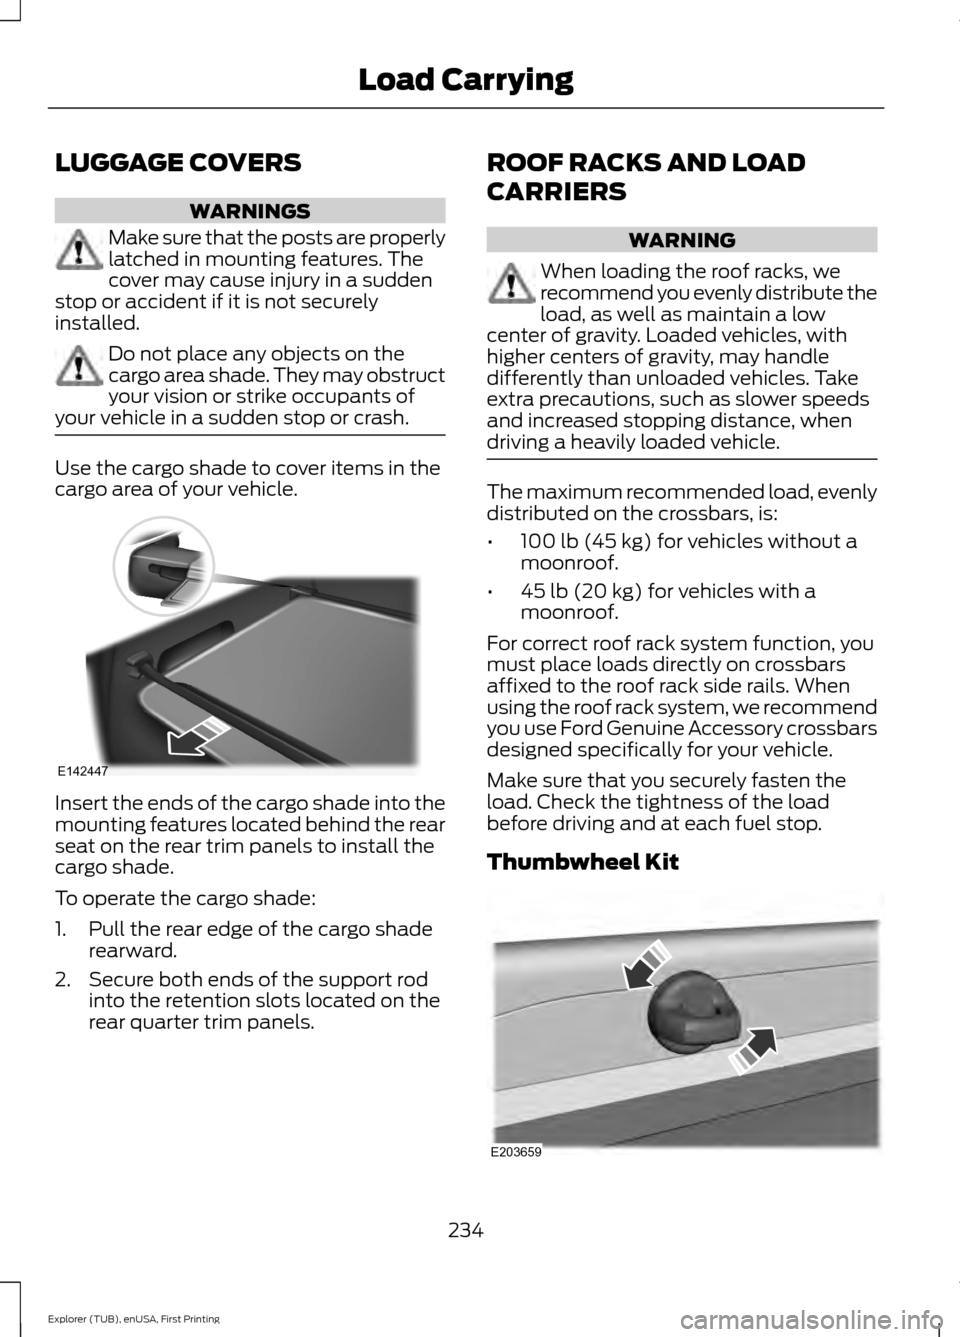
your vehicle in a sudden stop or crash. Use the cargo shade to cover items in the
cargo area of your vehicle.
Insert the ends of the cargo shade into the
mounting features located behind the rear
seat on the rear trim panels to install the
cargo shade.
To operate the cargo shade:
1. Pull the rear edge of the cargo shade
rearward.
2. Secure both ends of the support rod into the retention slots located on the
rear quarter trim panels. ROOF RACKS AND LOAD
CARRIERS WARNING
When loading the roof racks, we
recommend you evenly distribute the
load, as well as maintain a low
center of gravity. Loaded vehicles, with
higher centers of gravity, may handle
differently than unloaded vehicles. Take
extra precautions, such as slower speeds
and increased stopping distance, when
driving a heavily loaded vehicle. The maximum recommended load, evenly
distributed on the crossbars, is:
•
100 lb (45 kg) for vehicles without a
moonroof.
• 45 lb (20 kg)
for vehicles with a
moonroof.
For correct roof rack system function, you
must place loads directly on crossbars
affixed to the roof rack side rails. When
using the roof rack system, we recommend
you use Ford Genuine Accessory crossbars
designed specifically for your vehicle.
Make sure that you securely fasten the
load. Check the tightness of the load
before driving and at each fuel stop.
Thumbwheel Kit 234
Explorer (TUB), enUSA, First Printing Load CarryingE142447 E203659
Page 238 of 541

A thumbwheel kit is included in your
vehicle for tying light loads to your roof.
The kit is located in the glovebox.
Make sure to check that the thumbwheels
are tight each time you add or remove load
from the roof rack, and periodically while
traveling. Make sure that the load is secure
before traveling.
Note:
There may be snap caps in the side
rail, which must be removed before
installing the thumbwheels. These caps can
be removed by using a T25 torx tool or a
similar tool.
Adjusting the Crossbar (If Equipped)
Note: For less wind noise and better
aerodynamics, only install the crossbars
when you need them for carrying cargo.
Follow the steps to reposition or remove the
rear crossbar. You can remove the front
crossbar fasteners by unscrewing the
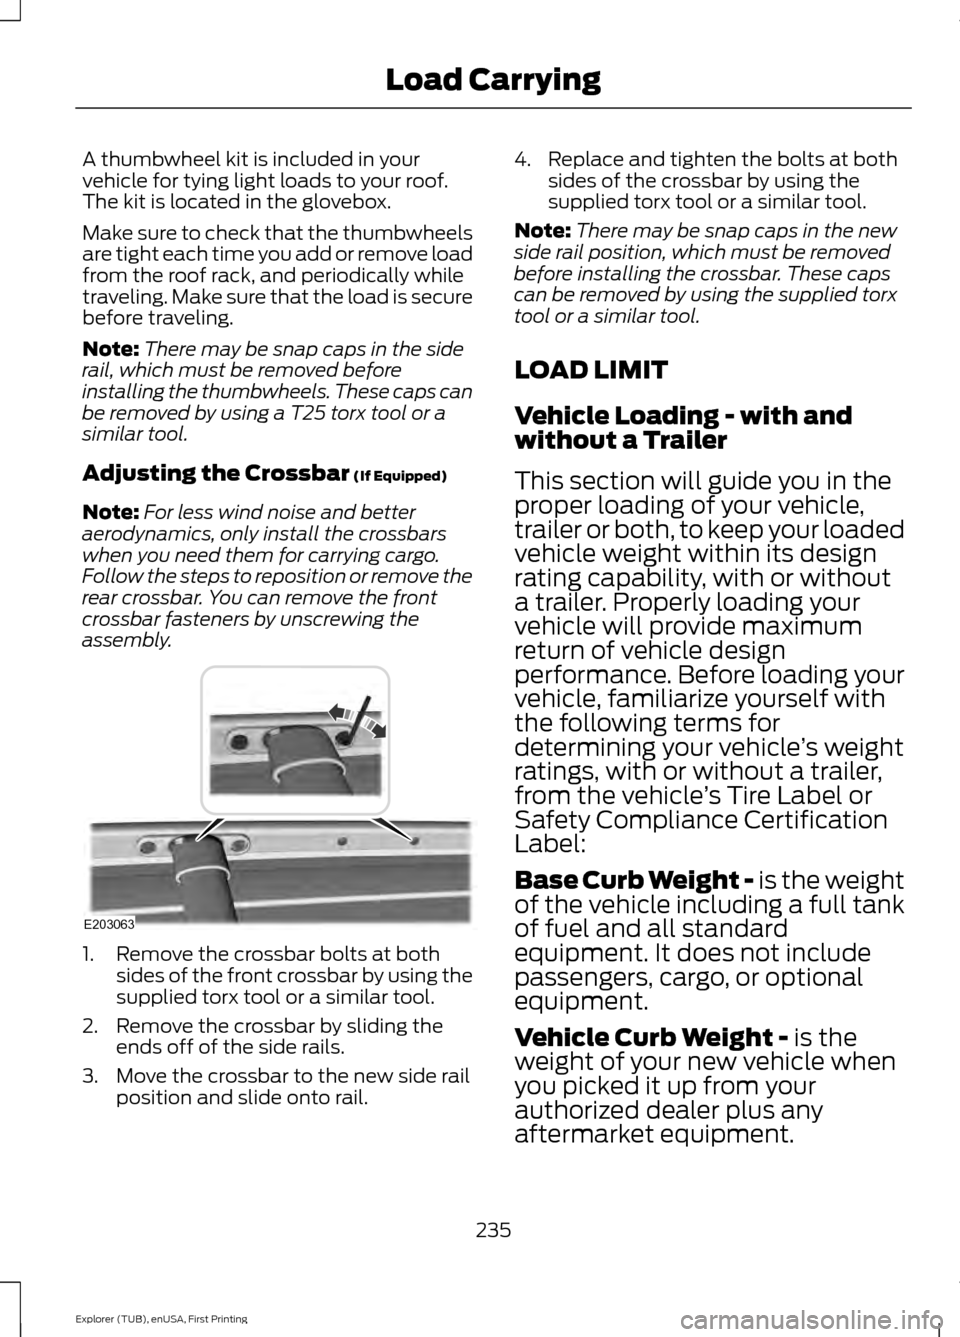
assembly. 1. Remove the crossbar bolts at both
sides of the front crossbar by using the
supplied torx tool or a similar tool.
2. Remove the crossbar by sliding the ends off of the side rails.
3. Move the crossbar to the new side rail position and slide onto rail. 4. Replace and tighten the bolts at both
sides of the crossbar by using the
supplied torx tool or a similar tool.
Note: There may be snap caps in the new
side rail position, which must be removed
before installing the crossbar. These caps
can be removed by using the supplied torx
tool or a similar tool.
LOAD LIMIT
Vehicle Loading - with and
without a Trailer
This section will guide you in the
proper loading of your vehicle,
trailer or both, to keep your loaded
vehicle weight within its design
rating capability, with or without
a trailer. Properly loading your
vehicle will provide maximum
return of vehicle design
performance. Before loading your
vehicle, familiarize yourself with
the following terms for
determining your vehicle ’s weight
ratings, with or without a trailer,
from the vehicle ’s Tire Label or
Safety Compliance Certification
Label:
Base Curb Weight -
is the weight
of the vehicle including a full tank
of fuel and all standard
equipment. It does not include
passengers, cargo, or optional
equipment.
Vehicle Curb Weight -
is the
weight of your new vehicle when
you picked it up from your
authorized dealer plus any
aftermarket equipment.
235
Explorer (TUB), enUSA, First Printing Load CarryingE203063