2016 FORD EXPEDITION lights
[x] Cancel search: lightsPage 39 of 421

Restraint Safety System
The restraint safety system provides an
improved overall level of frontal crash
protection to front seat occupants and is
designed to help further reduce the risk of
airbag-related injuries. The system is able
to analyze different occupant conditions
and crash severity before activating the
appropriate safety devices to help better
protect a range of occupants in a variety
of frontal crash situations.
Your vehicle restraint safety system
consists of:
•
Driver and passenger dual-stage airbag
supplemental restraints.
• Front outboard safety belts with
pretensioners, energy management
retractors (first row only), and safety
belt usage sensors.
• Driver seat position sensor.
• Front crash severity sensors.
• Restraints control module with impact
and safing sensors.
• Restraint system warning light and
backup tone.
• The electrical wiring for the airbags,
crash sensor(s), safety belt
pretensioners, front safety belt usage
sensors, driver seat position sensor, and
indicator lights.
How does the restraint safety system
work?
The restraint safety system can adapt the
deployment strategy of your vehicle ’s
safety devices according to crash severity
and occupant conditions. A collection of
crash and occupant sensors provides
information to the restraints control module. During a crash, the restraints
control module may activate the safety
belt pretensioners and/or either one or
both stages of the dual-stage airbag
supplemental restraints based on crash
severity and occupant conditions.
DRIVER AND PASSENGER
AIRBAGS
WARNINGS
Never place your arm or any objects
over an airbag module. Placing your
arm over a deploying airbag can
result in serious arm fractures or other
injuries. Objects placed on or over the
airbag inflation area may cause those
objects to be propelled by the airbag into
your face and torso causing serious injury. Airbags can kill or injure a child in a
child seat. Never place a rear-facing
child seat in front of an active airbag.
If you must use a forward-facing child seat
in the front seat, move the seat upon which
the child seat is installed all the way back. The driver and passenger front airbags will
deploy during significant frontal and near
frontal crashes.
The driver and passenger front airbag
system consists of:
•
Driver and passenger airbag modules.
36
Expedition (TB7) Canada/United States of America, enUSA, First Printing Supplementary Restraints SystemE151127
Page 79 of 421

INSTRUMENT LIGHTING
DIMMER
Use to adjust the brightness of the
instrument panel and all applicable lit
components in the vehicle during
headlamp and parking lamp operation.
•
Tap the top or bottom of the control
to brighten/dim all interior lit
components incrementally, or
• Press and hold at the first position the
top or bottom of the control until the
desired lighting level is reached.
• Press and hold the top of the control
to the full on position to activate the
“dome on ” feature. This will turn on the
interior courtesy lights. The lights will
remain on until the bottom of the
control is pressed. DAYTIME RUNNING LAMPS (If
Equipped) WARNING
The daytime running lamps system
does not activate the rear lamps and
may not provide adequate lighting
during low visibility driving conditions. Also,
the autolamps switch position may not
activate the headlamps in all low visibility
conditions, such as daytime fog. Make sure
the headlamps are switched to auto or on,
as appropriate, during all low visibility
conditions. Failure to do so may result in a
crash. Type 1 - Conventional (Non-
Configurable)
The daytime running lamps turn on when:
1. The ignition is switched to the on
position.
2. The transmission is not in park (P) for vehicles with automatic transmissions
or the parking brake is released for
vehicles with manual transmissions.
3. The lighting control is in the off, parking
lamp or autolamps positions.
4. The headlamps are off.
Type 2 - Configurable
Switch the daytime running lamps on or
off using the information display controls.
See
Information Displays (page 92).
The daytime running lamps turn on when:
1. They are switched on in the information
display. See
Information Displays
(page 92).
2. The ignition is switched to the on position.
76
Expedition (TB7) Canada/United States of America, enUSA, First Printing LightingE163270
Page 81 of 421

INTERIOR LAMPS
Front Row Map Lamps (If Equipped)
Press the switches on either side of each
map lamp to turn on the lamps. The map
lamps light when:
• any door is opened.
• the instrument panel dimmer switch is
pressed up until the courtesy lamps
come on.
• any of the remote entry controls are
pressed and the ignition is off. Front Row Map and Dome Lamps
(If Equipped)
Press the switches on either side of the
dome lamp to turn on the lamps. The
dome lamp lights when:
•
any door is opened.
• the instrument panel dimmer switch is
pressed up until the courtesy lamps
come on.
• any of the remote entry controls are
pressed and the ignition is off. Second Row Map Lamps
(If Equipped)
The map lamps are located in the
headliner above the second row seats. The
map lamps light when:
• any door is opened.
• the instrument panel dimmer switch is
pressed up until the courtesy lamps
come on.
• any of the remote entry controls are
pressed and the ignition is off.
Press the controls to activate the lamps. 78
Expedition (TB7) Canada/United States of America, enUSA, First Printing LightingE163273 E163274 E206071
Page 85 of 421

Heated Exterior Mirrors
See Heated Windows and Mirrors (page
121).
Memory Mirrors
(If Equipped)
You can save and recall the mirror
positions through the memory function.
See
Memory Function (page 126).
Auto-Dimming Feature
The driver exterior mirror automatically
dims with the auto-dimming interior mirror.
Signal Indicator Mirrors
(If Equipped)
The outer portion of the appropriate mirror
housing blinks when you switch on the
direction indicator.
Blind Spot Monitor
(If Equipped)
See
Blind Spot Information System
(page 188).
INTERIOR MIRROR WARNING
Do not adjust the mirror when your
vehicle is moving.
Note:
Do not clean the housing or glass of
any mirror with harsh abrasives, fuel or other
petroleum or ammonia-based cleaning
products.
You can adjust the interior mirror to your
preference. Some mirrors also have a
second pivot point. This lets you move the
mirror head up or down and from side to
side. Auto-Dimming Mirror
Note:
Do not block the sensors on the front
and back of the mirror. Mirror performance
may be affected. A rear center passenger or
raised rear center head restraint may also
block light from reaching the sensor.
The mirror will dim automatically to reduce
glare when bright lights are detected from
behind your vehicle. It will automatically
return to normal reflection when you select
reverse gear to make sure you have a clear
view when backing up.
CHILDMINDER MIRROR
On double bin overhead consoles, the
conversation mirror allows the driver to
view the rear seating area. WARNING
Do not use the childminder mirror to
view rearward traffic, do not allow
rear passengers to distract you from
the driving task, and make sure the rear
view mirror has a clear view of rearward
traffic. Failure to do so could increase the
risk of a crash from an unseen vehicle,
which may result in serious injury. Press the release area on the rear edge of
the bin door to open the childminder mirror.
The door will open to full open position.
82
Expedition (TB7) Canada/United States of America, enUSA, First Printing Windows and MirrorsE205354
Page 92 of 421

Engine Oil
If it illuminates with the engine
running or when you are driving,
this indicates a malfunction.
Stop your vehicle as soon as it is safe to
do so and switch the engine off. Check the
engine oil level. See Engine Oil Check
(page 245).
Note: Do not resume your journey if it
illuminates despite the level being correct.
Have the system checked by an authorized
dealer.
Fasten Safety Belt It illuminates and a chime
sounds to remind you to fasten
your safety belt.
Front Airbag If it fails to illuminate on startup,
continues to flash or remains on,
it indicates a malfunction. Have
the system checked by an authorized
dealer. A chime sounds when there is a
malfunction in the indicator light.
Front Fog Lamps
(If Equipped) It illuminates when you switch
the front fog lamps on.
High Beam It illuminates when you switch
the headlamp high beam on. It
flashes when you use the
headlamp flasher.
Hill Descent
(If Equipped) Illuminates when you switch hill
descent on. Liftgate Ajar Lights when the liftgate is not
completely closed.
Low Fuel Level It illuminates when the fuel level
is low or near empty. Refuel as
soon as possible.
Low Tire Pressure Warning It illuminates when your tire
pressure is low. If the lamp
remains on with the engine
running or when driving, check your tire
pressure as soon as possible.
The lamp also illuminates momentarily
when you switch the ignition on to confirm
the lamp is functional. If it does not
illuminate when you switch the ignition on,
or begins to flash at any time, have the
system checked by an authorized dealer.
Low Washer Fluid It illuminates when the
windshield washer fluid is low.
Parking Lamps It illuminates when you switch
the parking lamps on.
Powertrain Fault Illuminates when a powertrain
fault has been detected. Contact
an authorized dealer as soon as
possible.
89
Expedition (TB7) Canada/United States of America, enUSA, First Printing Instrument Cluster E163171 E162453 E132353
Page 100 of 421

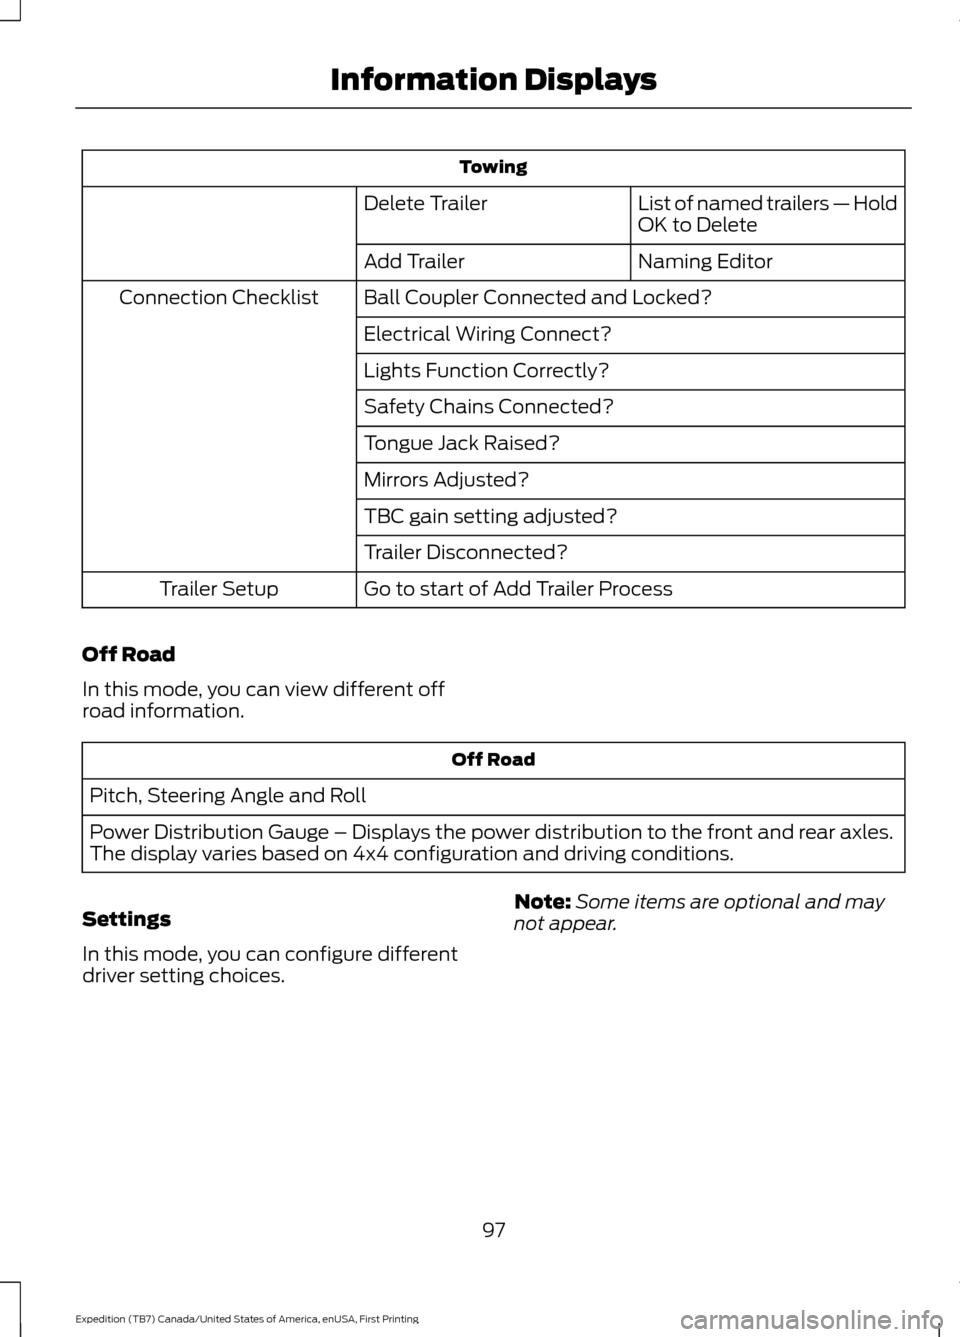
Towing
List of named trailers — Hold
OK to Delete
Delete Trailer
Naming Editor
Add Trailer
Ball Coupler Connected and Locked?
Connection Checklist
Electrical Wiring Connect?
Lights Function Correctly?
Safety Chains Connected?
Tongue Jack Raised?
Mirrors Adjusted?
TBC gain setting adjusted?
Trailer Disconnected?
Go to start of Add Trailer Process
Trailer Setup
Off Road
In this mode, you can view different off
road information. Off Road
Pitch, Steering Angle and Roll
Power Distribution Gauge – Displays the power distribution to the front and rear axles.
The display varies based on 4x4 configuration and driving conditions.
Settings
In this mode, you can configure different
driver setting choices. Note:
Some items are optional and may
not appear.
97
Expedition (TB7) Canada/United States of America, enUSA, First Printing Information Displays
Page 104 of 421

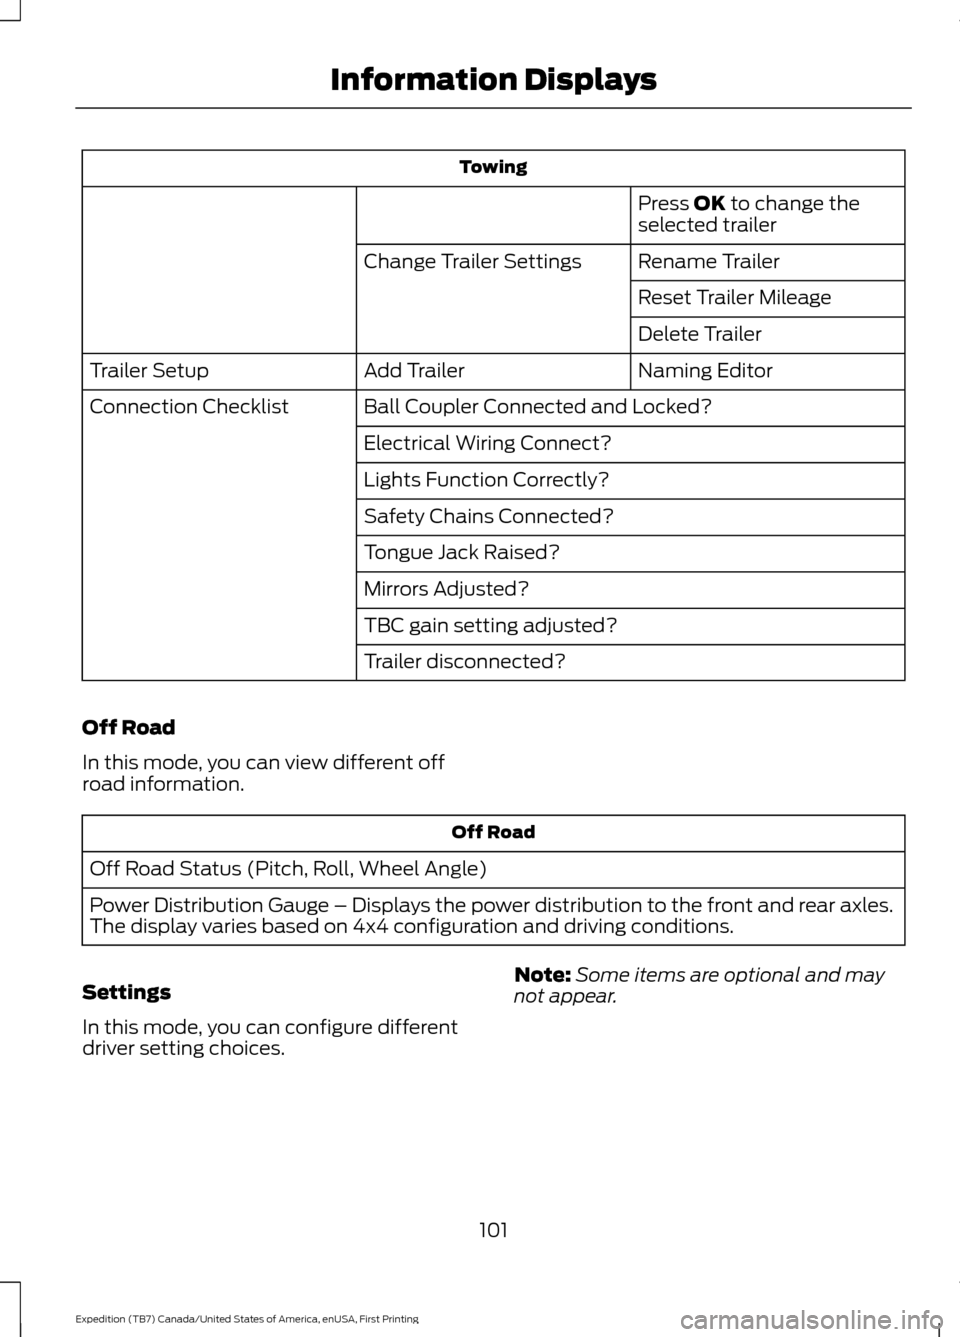
Towing
Press OK to change the
selected trailer
Rename Trailer
Change Trailer Settings
Reset Trailer Mileage
Delete Trailer
Naming Editor
Add Trailer
Trailer Setup
Ball Coupler Connected and Locked?
Connection Checklist
Electrical Wiring Connect?
Lights Function Correctly?
Safety Chains Connected?
Tongue Jack Raised?
Mirrors Adjusted?
TBC gain setting adjusted?
Trailer disconnected?
Off Road
In this mode, you can view different off
road information. Off Road
Off Road Status (Pitch, Roll, Wheel Angle)
Power Distribution Gauge – Displays the power distribution to the front and rear axles.
The display varies based on 4x4 configuration and driving conditions.
Settings
In this mode, you can configure different
driver setting choices. Note:
Some items are optional and may
not appear.
101
Expedition (TB7) Canada/United States of America, enUSA, First Printing Information Displays
Page 137 of 421

HEATED SEATS (If Equipped)
Front Seats WARNING
People who are unable to feel pain
to their skin because of advanced
age, chronic illness, diabetes, spinal
cord injury, medication, alcohol use,
exhaustion or other physical conditions,
must exercise care when using the heated
seat. The heated seat may cause burns
even at low temperatures, especially if
used for long periods of time. Do not place
anything on the seat that insulates against
heat, such as a blanket or cushion. This
may cause the heated seat to overheat.
Do not puncture the seat with pins, needles
or other pointed objects. This may damage
the heating element which may cause the
heated seat to overheat. An overheated
seat may cause serious personal injury. Do not do the following:
•
Place heavy objects on the seat.
• Operate the heated seat if water or any
other liquid spills on the seat. Allow the
seat to dry thoroughly.
• Operate the heated seats unless the
engine is running. Doing so can cause
the battery to lose charge. Press the heated seat symbol to cycle
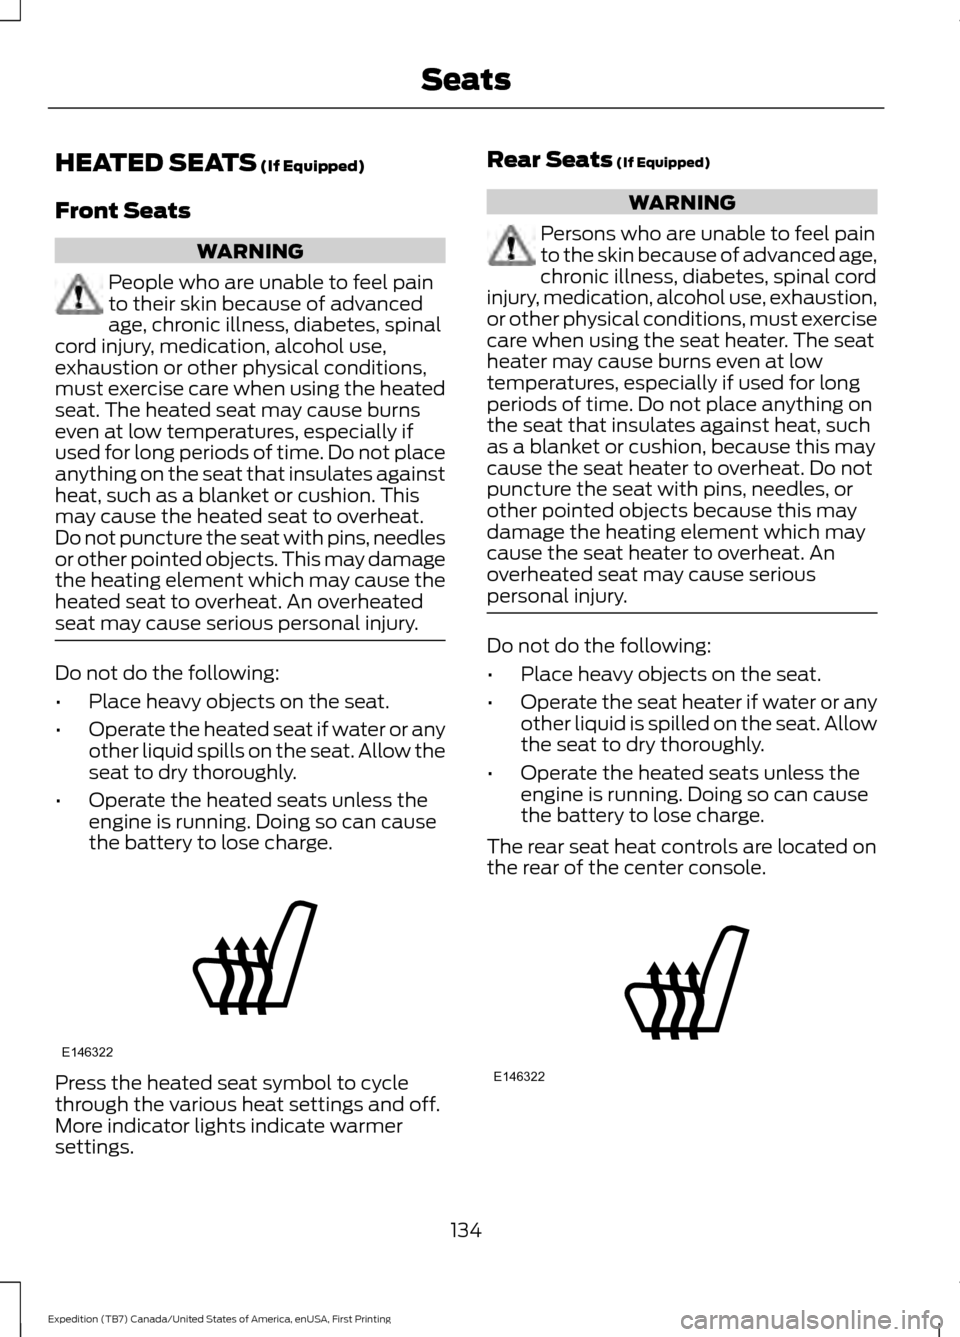
through the various heat settings and off.
More indicator lights indicate warmer
settings. Rear Seats (If Equipped) WARNING
Persons who are unable to feel pain
to the skin because of advanced age,
chronic illness, diabetes, spinal cord
injury, medication, alcohol use, exhaustion,
or other physical conditions, must exercise
care when using the seat heater. The seat
heater may cause burns even at low
temperatures, especially if used for long
periods of time. Do not place anything on
the seat that insulates against heat, such
as a blanket or cushion, because this may
cause the seat heater to overheat. Do not
puncture the seat with pins, needles, or
other pointed objects because this may
damage the heating element which may
cause the seat heater to overheat. An
overheated seat may cause serious
personal injury. Do not do the following:
•
Place heavy objects on the seat.
• Operate the seat heater if water or any
other liquid is spilled on the seat. Allow
the seat to dry thoroughly.
• Operate the heated seats unless the
engine is running. Doing so can cause
the battery to lose charge.
The rear seat heat controls are located on
the rear of the center console. 134
Expedition (TB7) Canada/United States of America, enUSA, First Printing SeatsE146322 E146322