2016 FORD EXPEDITION tow
[x] Cancel search: towPage 153 of 421

•
Make sure the system is unplugged and
properly stowed before starting and
driving your vehicle. Make sure the
protective cover seals the prongs of the
block heater cord plug when not in use.
• Make sure the heater system is
checked for proper operation before
winter.
Using the Engine Block Heater
Make sure the receptacle terminals are
clean and dry prior to use. Clean them with
a dry cloth if necessary.
The heater uses 0.4 to 1.0 kilowatt-hours
of energy per hour of use. The system does
not have a thermostat. It achieves
maximum temperature after
approximately three hours of operation.
Using the heater longer than three hours
does not improve system performance and
unnecessarily uses electricity.
150
Expedition (TB7) Canada/United States of America, enUSA, First Printing Starting and Stopping the Engine
Page 155 of 421

FUEL QUALITY
Choosing the Right Fuel
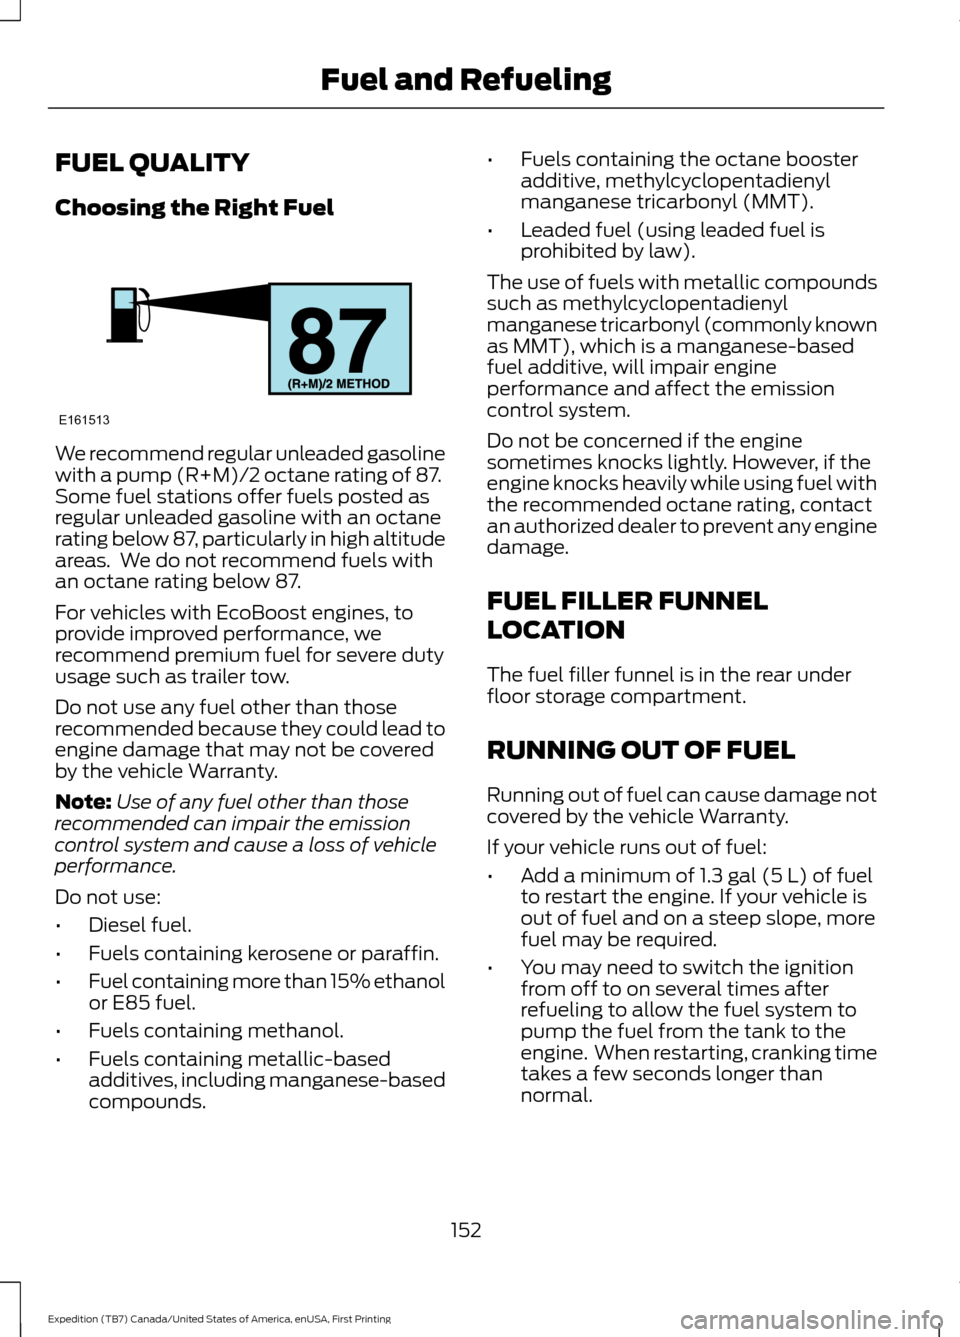
We recommend regular unleaded gasoline
with a pump (R+M)/2 octane rating of 87.
Some fuel stations offer fuels posted as
regular unleaded gasoline with an octane
rating below 87, particularly in high altitude
areas. We do not recommend fuels with
an octane rating below 87.
For vehicles with EcoBoost engines, to
provide improved performance, we
recommend premium fuel for severe duty
usage such as trailer tow.
Do not use any fuel other than those
recommended because they could lead to
engine damage that may not be covered
by the vehicle Warranty.
Note:
Use of any fuel other than those
recommended can impair the emission
control system and cause a loss of vehicle
performance.
Do not use:
• Diesel fuel.
• Fuels containing kerosene or paraffin.
• Fuel containing more than 15% ethanol
or E85 fuel.
• Fuels containing methanol.
• Fuels containing metallic-based
additives, including manganese-based
compounds. •
Fuels containing the octane booster
additive, methylcyclopentadienyl
manganese tricarbonyl (MMT).
• Leaded fuel (using leaded fuel is
prohibited by law).
The use of fuels with metallic compounds
such as methylcyclopentadienyl
manganese tricarbonyl (commonly known
as MMT), which is a manganese-based
fuel additive, will impair engine
performance and affect the emission
control system.
Do not be concerned if the engine
sometimes knocks lightly. However, if the
engine knocks heavily while using fuel with
the recommended octane rating, contact
an authorized dealer to prevent any engine
damage.
FUEL FILLER FUNNEL
LOCATION
The fuel filler funnel is in the rear under
floor storage compartment.
RUNNING OUT OF FUEL
Running out of fuel can cause damage not
covered by the vehicle Warranty.
If your vehicle runs out of fuel:
• Add a minimum of 1.3 gal (5 L) of fuel
to restart the engine. If your vehicle is
out of fuel and on a steep slope, more
fuel may be required.
• You may need to switch the ignition
from off to on several times after
refueling to allow the fuel system to
pump the fuel from the tank to the
engine. When restarting, cranking time
takes a few seconds longer than
normal.
152
Expedition (TB7) Canada/United States of America, enUSA, First Printing Fuel and RefuelingE161513
Page 162 of 421

AUTOMATIC TRANSMISSION
WARNINGS
Always set the parking brake fully
and latch the gearshift in park (P).
Turn the ignition to the off position
and remove the key whenever you leave
your vehicle. Do not use the tow/haul feature
when driving in icy or slippery
conditions as the increased engine
braking can cause the rear wheels to slide
and your vehicle to swing around with the
possible loss of vehicle control. Selector Lever Positions
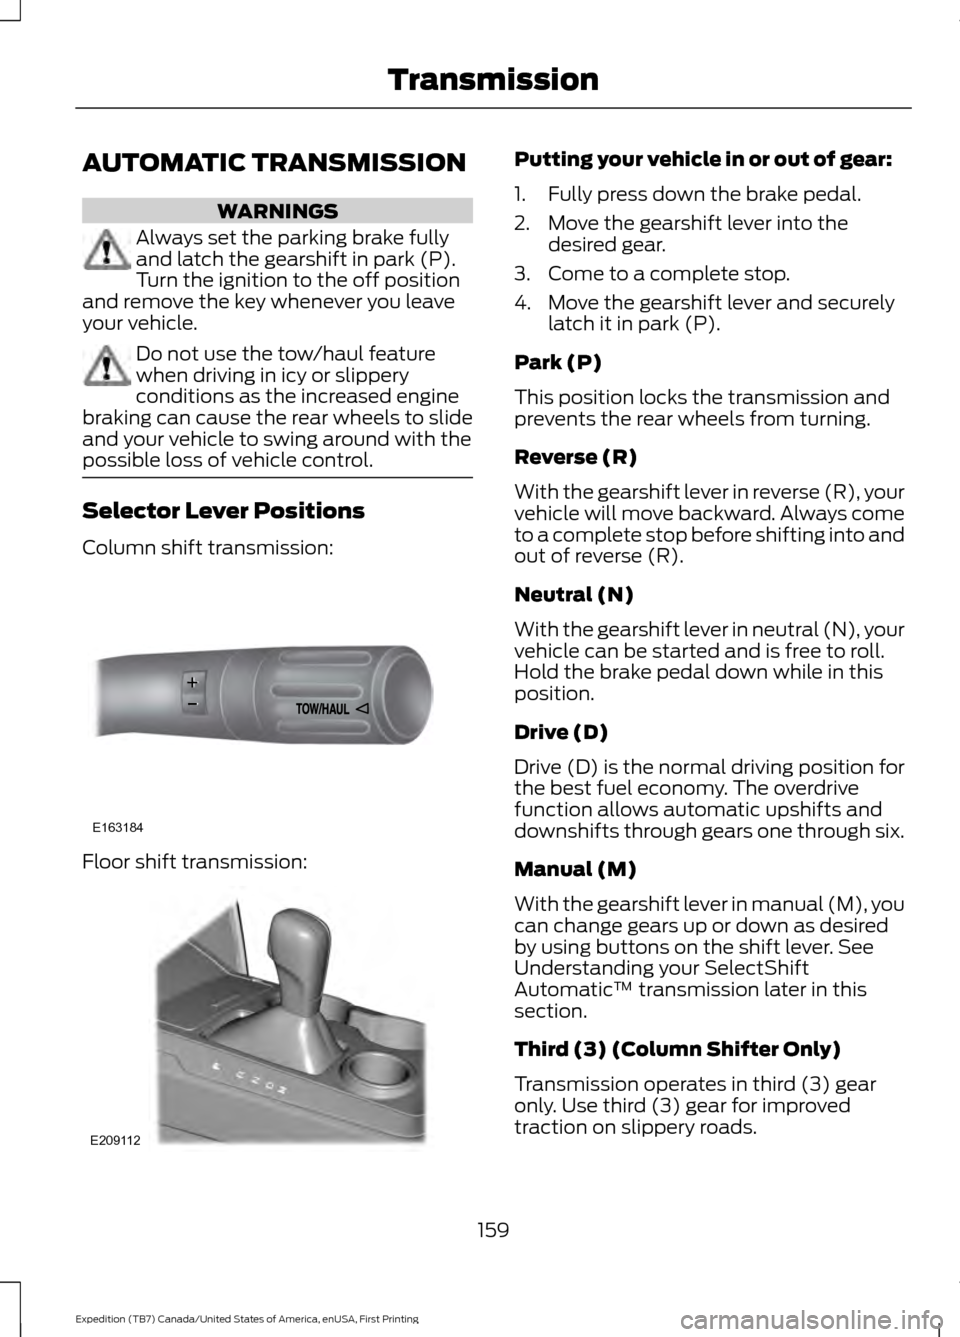
Column shift transmission:
Floor shift transmission: Putting your vehicle in or out of gear:
1. Fully press down the brake pedal.
2. Move the gearshift lever into the
desired gear.
3. Come to a complete stop.
4. Move the gearshift lever and securely latch it in park (P).
Park (P)
This position locks the transmission and
prevents the rear wheels from turning.
Reverse (R)
With the gearshift lever in reverse (R), your
vehicle will move backward. Always come
to a complete stop before shifting into and
out of reverse (R).
Neutral (N)
With the gearshift lever in neutral (N), your
vehicle can be started and is free to roll.
Hold the brake pedal down while in this
position.
Drive (D)
Drive (D) is the normal driving position for
the best fuel economy. The overdrive
function allows automatic upshifts and
downshifts through gears one through six.
Manual (M)
With the gearshift lever in manual (M), you
can change gears up or down as desired
by using buttons on the shift lever. See
Understanding your SelectShift
Automatic ™ transmission later in this
section.
Third (3) (Column Shifter Only)
Transmission operates in third (3) gear
only. Use third (3) gear for improved
traction on slippery roads.
159
Expedition (TB7) Canada/United States of America, enUSA, First Printing TransmissionE163184 E209112
Page 163 of 421

Second (2)
Transmission operates in second (2) gear
only. Use second (2) gear to start-up on
slippery roads.
First (1)
•
Transmission operates in first (1) gear
only.
• Provides maximum engine braking.
• Allows upshifts by moving gearshift
lever.
• Will not downshift into first (1) gear at
high speeds; allows for first (1) gear
when vehicle reaches slower speeds.
Tow/Haul Mode To activate tow/haul, press the
button on the gearshift lever
once. The TOW HAUL indicator
light will illuminate in the instrument
cluster.
The tow/haul feature:
• Delays upshifts to reduce the frequency
of transmission shifting.
• Provides engine braking in all forward
gears, which will slow your vehicle and
assist you in controlling your vehicle
when descending a grade.
• Depending on driving conditions and
load conditions, may downshift the
transmission, slow your vehicle and
control your vehicle speed when
descending a hill, without pressing the
accelerator pedal. The amount of
downshift braking provided will vary
based upon the amount the brake
pedal is pressed.
The tow/haul feature improves
transmission operation when towing a
trailer or a heavy load. All transmission
gear ranges are available when using
tow/haul. To deactivate the tow/haul feature and
return to normal driving mode, press the
button on the gearshift lever twice. The
TOW HAUL light will deactivate. Tow/haul
will also deactivate when you power down
your vehicle. WARNING
Do not use the tow/haul feature
when driving in icy or slippery
conditions as the increased engine
braking can cause the rear wheels to slide
and your vehicle to swing around with the
possible loss of vehicle control. Forced Downshifts
•
Allowed in drive (D) with the tow/haul
feature on or off.
• Press the accelerator to the floor.
• Allows transmission to select an
appropriate gear.
Automatic Transmission Adaptive
Learning
This feature may increase durability and
provide consistent shift feel over the life
of your vehicle. A new vehicle or
transmission may have firm shifts, soft
shifts or both. This operation is considered
normal and will not affect function or
durability of the transmission. Over time,
the adaptive learning process will fully
update transmission operation.
Understanding your SelectShift
Automatic ™ Transmission (If
Equipped)
Your vehicle is equipped with a SelectShift
Automatic transmission gearshift lever.
The SelectShift Automatic transmission
gives you the ability to change gears up or
down (without a clutch) as desired.
160
Expedition (TB7) Canada/United States of America, enUSA, First Printing TransmissionE161509
Page 165 of 421

Brake-Shift Interlock
WARNINGS
Do not drive your vehicle until you
verify that the brake lamps are
working.
When doing this procedure, you will
be taking your vehicle out of park (P)
which means your vehicle can roll
freely. To avoid unwanted vehicle
movement, always fully set the parking
brake prior to doing this procedure. Use
wheel chocks if appropriate. If you fully release the parking brake
and the brake warning lamp remains
illuminated, the brakes may not be
working properly. See your authorized
dealer. Your vehicle is equipped with a brake-shift
interlock feature that prevents moving the
gearshift lever from park (P) when the
ignition is in the on position and the brake
pedal is not pressed.
If you cannot move the gearshift lever out
of park (P) position with the ignition in the
on position and the brake pedal pressed,
a malfunction may have occurred. It is
possible that a fuse has blown or your
vehicle
’s brake lamps are not operating
properly. See Fuse Specification Chart
(page 234).
If the fuse is not blown and the brake
lamps are working properly, the following
procedure will allow you to move the
gearshift lever from park (P):
Column-shifter
1. Apply the parking brake. Turn the ignition key to the off position, then
remove the key.
2. Move the steering column to the full down and full rearward position
(toward the driver ’s seat). 3. Remove the gearshift lever boot.
4. Place fingers into gearshift lever boot
hole and pull top half of shroud up and
forward to separate it from the lower
half of the shroud. There is a hinge at
the forward edge of the top shroud.
Roll the top half of the shroud upward
on the hinge point to clear the hazard
flasher button, then pull straight
rearward toward the driver ’s seat to
remove.
5. Remove the top half of the shroud.
6. Remove the three fasteners under the column that secure the lower shroud
half to the column. 7.
Pull the lock lever into the full unlocked
position and remove the lower shroud
cover by pulling the lever handle
through the slot in the cover. 162
Expedition (TB7) Canada/United States of America, enUSA, First Printing TransmissionE163185 E163186
Page 175 of 421

GENERAL INFORMATION
Note:
Occasional brake noise is normal. If
a metal-to-metal, continuous grinding or
continuous squeal sound is present, the
brake linings may be worn-out and an
authorized dealer should check them. If the
vehicle has continuous vibration or shudder
in the steering wheel while braking, an
authorized dealer should check your vehicle.
Note: Brake dust may accumulate on the
wheels, even under normal driving
conditions. Some dust is inevitable as the
brakes wear and does not contribute to
brake noise. See Cleaning the Alloy
Wheels (page 269). See
Warning Lamps and
Indicators (page 88).
Wet brakes result in reduced braking
efficiency. Gently press the brake pedal a
few times when driving from a car wash or
standing water to dry the brakes.
Brake Over Accelerator
In the event the accelerator pedal
becomes stuck or entrapped, apply steady
and firm pressure to the brake pedal to
slow the vehicle and reduce engine power.
If you experience this condition, apply the
brakes and bring your vehicle to a safe
stop. Switch the engine off, move the
transmission to park (P) and apply the
parking brake. Inspect the accelerator
pedal and the area around it for any items
or debris that may be obstructing its
movement. If none are found and the
condition persists, have your vehicle towed
to the nearest authorized dealer. Emergency Brake Assist
Emergency brake assist detects when you
brake heavily by measuring the rate at
which you press the brake pedal. It
provides maximum braking efficiency as
long as you press the pedal. Emergency
brake assist can reduce stopping distances
in critical situations.
Anti-lock Brake System
This system helps you maintain steering
control during emergency stops by keeping
the brakes from locking.
This lamp momentarily
illuminates when you switch the
ignition on. If the light does not
illuminate during start up, remains on or
flashes, the anti-lock braking system may
be disabled. Have the system checked by
an authorized dealer. If the anti-lock brake
system is disabled, normal braking is still
effective. If the brake warning lamp
illuminates with the parking
brake released, have your brake
system serviced immediately.
HINTS ON DRIVING WITH
ANTI-LOCK BRAKES
Note: When the system is operating, the
brake pedal will pulse and may travel
further. Maintain pressure on the brake
pedal. You may also hear a noise from the
system. This is normal.
The anti-lock braking system will not
eliminate the risks when:
• You drive too closely to the vehicle in
front of you.
• Your vehicle is hydroplaning.
• You take corners too fast.
• The road surface is poor.
172
Expedition (TB7) Canada/United States of America, enUSA, First Printing BrakesE138644 E138644
Page 185 of 421

Coverage area of up to 6 ft (1.8 m) from
the rear bumper. There may be decreased
coverage area at the outer corners of the
bumper.
The system detects certain objects while
the transmission is in reverse (R) :
• Your vehicle is moving toward a
stationary object at a speed of
3 mph
(5 km/h) or less.
• Your vehicle is not moving, but a
moving object is approaching the rear
of your vehicle at a speed of
3 mph
(5 km/h) or less.
• Your vehicle is moving at a speed of
less than 3 mph (5 km/h) and a moving
object is approaching the rear of your
vehicle at a speed of less than
3 mph
(5 km/h).
FRONT PARKING AID
The front sensors are active when the
transmission is in any position other than
park (P) and the vehicle speed is below
8 mph (13 km/h)
. Coverage area of up to
28 in (70 cm) from
the front bumper. There is decreased
coverage area at the outer corners.
The system sounds an audible warning
when obstacles are near either bumper in
the following manner:
• Objects detected by the front sensors
are indicated by a high-pitched tone
from the front of the vehicle.
• Objects detected by the rear sensors
are indicated by a lower pitched tone
from the rear of the vehicle.
• The sensing system reports the
obstacle which is closest to the front
or rear of the vehicle. For example, if
an obstacle is
12 in (30 cm) from the
front of the vehicle and, at the same
time, an obstacle is only
6 in (15 cm)
from the rear of the vehicle, the lower
pitched tone sounds.
• An alternating warning sounds from
the front and rear if there are objects
at both bumpers that are closer than
10 in (25 cm)
.
182
Expedition (TB7) Canada/United States of America, enUSA, First Printing Parking AidsE130178 E187330
Page 187 of 421

Note:
When towing, the camera only sees
what you are towing behind your vehicle.
This might not provide adequate coverage
as it usually provides in normal operation
and you might not see some objects. In
some vehicles, the guidelines may disappear
once you engage the trailer tow connector.
The camera may not operate correctly
under the following conditions:
• Nighttime or dark areas if one or both
reverse lamps are not operating.
• Mud, water or debris obstructs the
camera's view. Clean the lens with a
soft, lint-free cloth and non-abrasive
cleaner.
• The camera is misaligned due to
damage to the rear of your vehicle.
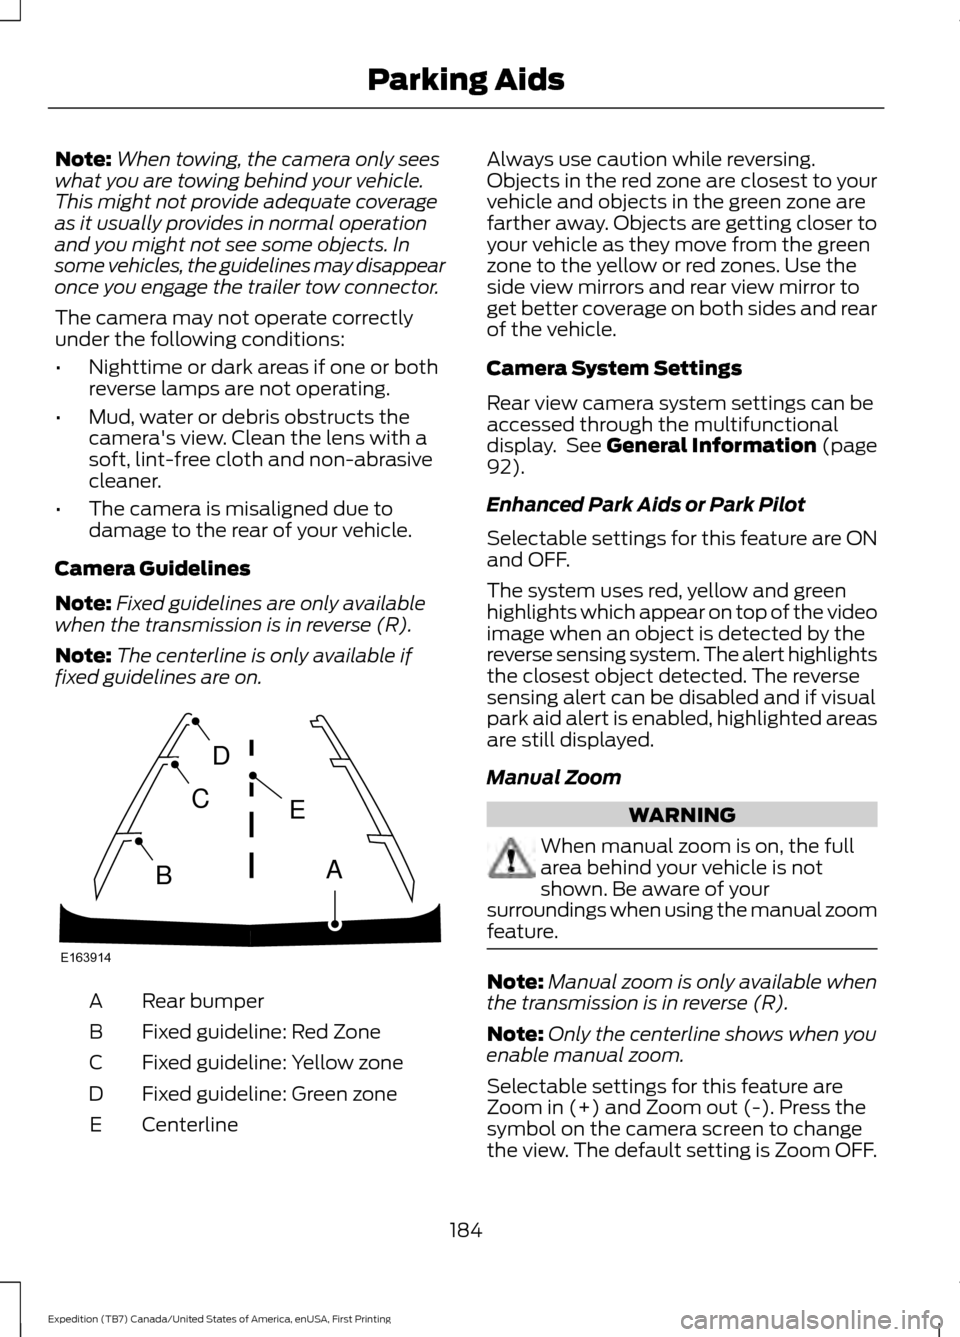
Camera Guidelines
Note: Fixed guidelines are only available
when the transmission is in reverse (R).
Note: The centerline is only available if
fixed guidelines are on. Rear bumper
A
Fixed guideline: Red Zone
B
Fixed guideline: Yellow zone
C
Fixed guideline: Green zone
D
Centerline
E Always use caution while reversing.
Objects in the red zone are closest to your
vehicle and objects in the green zone are
farther away. Objects are getting closer to
your vehicle as they move from the green
zone to the yellow or red zones. Use the
side view mirrors and rear view mirror to
get better coverage on both sides and rear
of the vehicle.
Camera System Settings
Rear view camera system settings can be
accessed through the multifunctional
display. See General Information (page
92).
Enhanced Park Aids or Park Pilot
Selectable settings for this feature are ON
and OFF.
The system uses red, yellow and green
highlights which appear on top of the video
image when an object is detected by the
reverse sensing system. The alert highlights
the closest object detected. The reverse
sensing alert can be disabled and if visual
park aid alert is enabled, highlighted areas
are still displayed.
Manual Zoom WARNING
When manual zoom is on, the full
area behind your vehicle is not
shown. Be aware of your
surroundings when using the manual zoom
feature. Note:
Manual zoom is only available when
the transmission is in reverse (R).
Note: Only the centerline shows when you
enable manual zoom.
Selectable settings for this feature are
Zoom in (+) and Zoom out (-). Press the
symbol on the camera screen to change
the view. The default setting is Zoom OFF.
184
Expedition (TB7) Canada/United States of America, enUSA, First Printing Parking AidsE163914
A
E
D
C
B