2016 FORD EXPEDITION warning light
[x] Cancel search: warning lightPage 89 of 421

Vehicle Settings and Personalization
See General Information (page 92).
Fuel Gauge
Note: The fuel gauge may vary slightly
when your vehicle is moving or on a gradient.
Switch the ignition on. The fuel gauge
indicates approximately how much fuel
remains in the fuel tank. The arrow
adjacent to the fuel pump symbol
indicates on which side of your vehicle the
fuel filler door is located.
The needle should move toward F when
you refuel your vehicle. If the needle points
to E after adding fuel, this indicates your
vehicle needs service soon.
After refueling, the needle may not always
return to the exact same position. This is
normal.
Note: It may take a short time for the
needle to reach F after leaving the gas
station. This is normal and depends upon
the slope of pavement at the gas station.
Note: The fuel amount dispensed into the
tank is a little less or more than the gauge
indicated. This is normal and depends upon
the slope of pavement at the gas station. Note:
If the gas station nozzle shuts off
before the tank is full, try a different gas
pump nozzle.
Note: There is a small reserve left in the
tank when the fuel gauge reaches empty.
Low Fuel Reminder
A low reminder displays when the distance
to empty reaches 50 miles (80 km) to
empty.
Note: The low fuel reminder can appear at
different fuel gauge positions depending on
fuel economy conditions. This variation is
normal.
Engine Coolant Temperature Gauge
Shows the temperature of the engine
coolant. At normal operating temperature,
the needle remains in the center section.
If the needle enters the red section, the
engine is overheating. Stop the engine,
switch the ignition off and determine the
cause once the engine has cooled down.
Note: Do not restart the engine until you
conclude the cause of overheating. WARNING
Never remove the coolant reservoir
cap while the engine is running or hot.
The hot coolant is under pressure
and may cause serious burns. 86
Expedition (TB7) Canada/United States of America, enUSA, First Printing Instrument Cluster
Page 91 of 421

WARNING LAMPS AND
INDICATORS
The following warning lamps and
indicators alert you to a vehicle condition
that may become serious. Some lamps
illuminate when you start your vehicle to
make sure they work. If any lamps remain
on after starting your vehicle, refer to the
respective system warning lamp for further
information.
Note:
Some warning indicators appear in
the information display and function the
same as a warning lamp but do not display
when you start your vehicle.
Anti-Lock Braking System If it illuminates when you are
driving, this indicates a
malfunction. You continue to
have the normal braking system (without
ABS) unless the brake warning lamp is also
illuminated. Have the system checked by
an authorized dealer.
Battery If it illuminates while driving, it
indicates a malfunction. Switch
off all unnecessary electrical
equipment and have the system checked
by an authorized dealer.
Brake System It illuminates when you engage
the parking brake and the
ignition is on.
If it illuminates when you are driving, check
that the parking brake is not engaged. If
the parking brake is not engaged, this
indicates low brake fluid level or a brake
system malfunction. Have the system
checked immediately by an authorized
dealer. WARNING
Driving a vehicle with the brake
system warning light on is dangerous.
A significant decrease in braking
performance may occur. It will take you
longer to stop the vehicle. Have the vehicle
checked by your authorized dealer as soon
as possible. Driving extended distances
with the parking brake engaged can cause
brake failure and the risk of personal injury. Cruise Control
It illuminates when you switch
this feature on. See Using
Cruise Control (page 186).
Direction Indicator Illuminates when you switch the
left or right direction indicator or
the hazard warning flasher on. If
the indicators stay on or flash faster, check
for a burned out bulb.
Door Ajar Displays when the ignition is on
and any door is not completely
closed.
Engine Coolant Temperature Illuminates when the engine
coolant temperature is high.
Stop the vehicle as soon as
possible, switch off the engine and let cool.
See
Engine Coolant Check (page 247).
88
Expedition (TB7) Canada/United States of America, enUSA, First Printing Instrument Cluster E144522 E71340
Page 92 of 421

Engine Oil
If it illuminates with the engine
running or when you are driving,
this indicates a malfunction.
Stop your vehicle as soon as it is safe to
do so and switch the engine off. Check the
engine oil level. See Engine Oil Check
(page 245).
Note: Do not resume your journey if it
illuminates despite the level being correct.
Have the system checked by an authorized
dealer.
Fasten Safety Belt It illuminates and a chime
sounds to remind you to fasten
your safety belt.
Front Airbag If it fails to illuminate on startup,
continues to flash or remains on,
it indicates a malfunction. Have
the system checked by an authorized
dealer. A chime sounds when there is a
malfunction in the indicator light.
Front Fog Lamps
(If Equipped) It illuminates when you switch
the front fog lamps on.
High Beam It illuminates when you switch
the headlamp high beam on. It
flashes when you use the
headlamp flasher.
Hill Descent
(If Equipped) Illuminates when you switch hill
descent on. Liftgate Ajar Lights when the liftgate is not
completely closed.
Low Fuel Level It illuminates when the fuel level
is low or near empty. Refuel as
soon as possible.
Low Tire Pressure Warning It illuminates when your tire
pressure is low. If the lamp
remains on with the engine
running or when driving, check your tire
pressure as soon as possible.
The lamp also illuminates momentarily
when you switch the ignition on to confirm
the lamp is functional. If it does not
illuminate when you switch the ignition on,
or begins to flash at any time, have the
system checked by an authorized dealer.
Low Washer Fluid It illuminates when the
windshield washer fluid is low.
Parking Lamps It illuminates when you switch
the parking lamps on.
Powertrain Fault Illuminates when a powertrain
fault has been detected. Contact
an authorized dealer as soon as
possible.
89
Expedition (TB7) Canada/United States of America, enUSA, First Printing Instrument Cluster E163171 E162453 E132353
Page 93 of 421

Service Engine Soon
If the service engine soon
indicator light stays illuminated
after you start the engine, it
indicates that the On Board Diagnostics
system (OBD) has detected a malfunction
of the vehicle emissions control system.
Refer to On Board Diagnostics (OBD) in
the Fuel and Refueling chapter for more
information about having your vehicle
serviced. See Emission Control System
(page 156).
If the light is blinking, engine misfire is
occurring which could damage your
catalytic converter. Drive in a moderate
fashion (avoid heavy acceleration and
deceleration) and have your vehicle
serviced immediately. WARNING
Under engine misfire conditions,
excessive exhaust temperatures
could damage the catalytic
converter, the fuel system, interior floor
coverings or other vehicle components,
possibly causing a fire. Have an authorized
dealer service your vehicle immediately. The service engine soon indicator light
illuminates when you first switch on the
ignition before engine start to check the
bulb and to indicate whether the vehicle
is ready for Inspection/Maintenance (I/M)
testing.
Normally, the service engine soon light
stays on until you crank the engine, then
turns itself off if no malfunctions are
present. However, if after 15 seconds the
service engine soon light blinks eight times,
it means that the vehicle is not ready for
I/M testing. See
Emission Control
System (page 156). Stability Control System Displays when the
AdvanceTrac®/Traction control
is active. If the light remains on,
have the system serviced immediately.
See
Using Stability Control (page 177).
Stability Control System Off Illuminates when you disable
AdvanceTrac®/Traction. See
Using Stability Control
(page
177).
Transmission Tow/Haul
(If Equipped) Illuminates when you activate
the tow/haul feature. If the light
flashes steadily, have the system
serviced immediately. Damage to the
transmission could occur. See
Automatic
Transmission (page 159).
4X2 Illuminates momentarily when
you engage two-wheel drive
high. If the light fails to display
or remains on when the ignition is on, have
the system serviced immediately by an
authorized dealer.
4X4 Auto Illuminates when you engage the
four-wheel drive system. If the
light fails to display or remains
on when the ignition is on, have the system
serviced immediately by an authorized
dealer.
90
Expedition (TB7) Canada/United States of America, enUSA, First Printing Instrument Cluster E138639 E161509 E163173 E166922
Page 94 of 421

4X4 LOW
Illuminates when you engage
four-wheel drive low. If the light
fails to display or remains on
when the ignition is on, have the system
serviced immediately by an authorized
dealer.
4X4 HIGH Illuminates when you engage
four-wheel drive high. If the light
fails to display or remains on
when the ignition is turned on, have the
system serviced immediately by an
authorized dealer.
AUDIBLE WARNINGS AND
INDICATORS
Key in Ignition Warning Chime
Sounds when you leave the key in the
ignition and the driver door open.
Headlamps On Warning Chime
Sounds when the headlamps or parking
lamps are on, the ignition is off (the key is
not in the ignition) and the driver door is
open.
Parking Brake On Warning Chime
Sounds when you have left the parking
brake on and drive your vehicle. If the
warning chime remains on after you have
released the parking brake, have the
system checked by an authorized dealer
immediately.
Direction Indicator Chime
Sounds when you leave the direction
indicator on after signaling a turn and
driving the vehicle more than 1.5 miles (2.4
km).
91
Expedition (TB7) Canada/United States of America, enUSA, First Printing Instrument ClusterE163174 E163175
Page 95 of 421

GENERAL INFORMATION
WARNING
Driving while distracted can result in
loss of vehicle control, crash and
injury. We strongly recommend that
you use extreme caution when using any
device that may take your focus off the
road. Your primary responsibility is the safe
operation of your vehicle. We recommend
against the use of any handheld device
while driving and encourage the use of
voice-operated systems when possible.
Make sure you are aware of all applicable
local laws that may affect the use of
electronic devices while driving. You can control various systems on your
vehicle using the information display
controls on the steering wheel.
Corresponding information shows in the
information display.
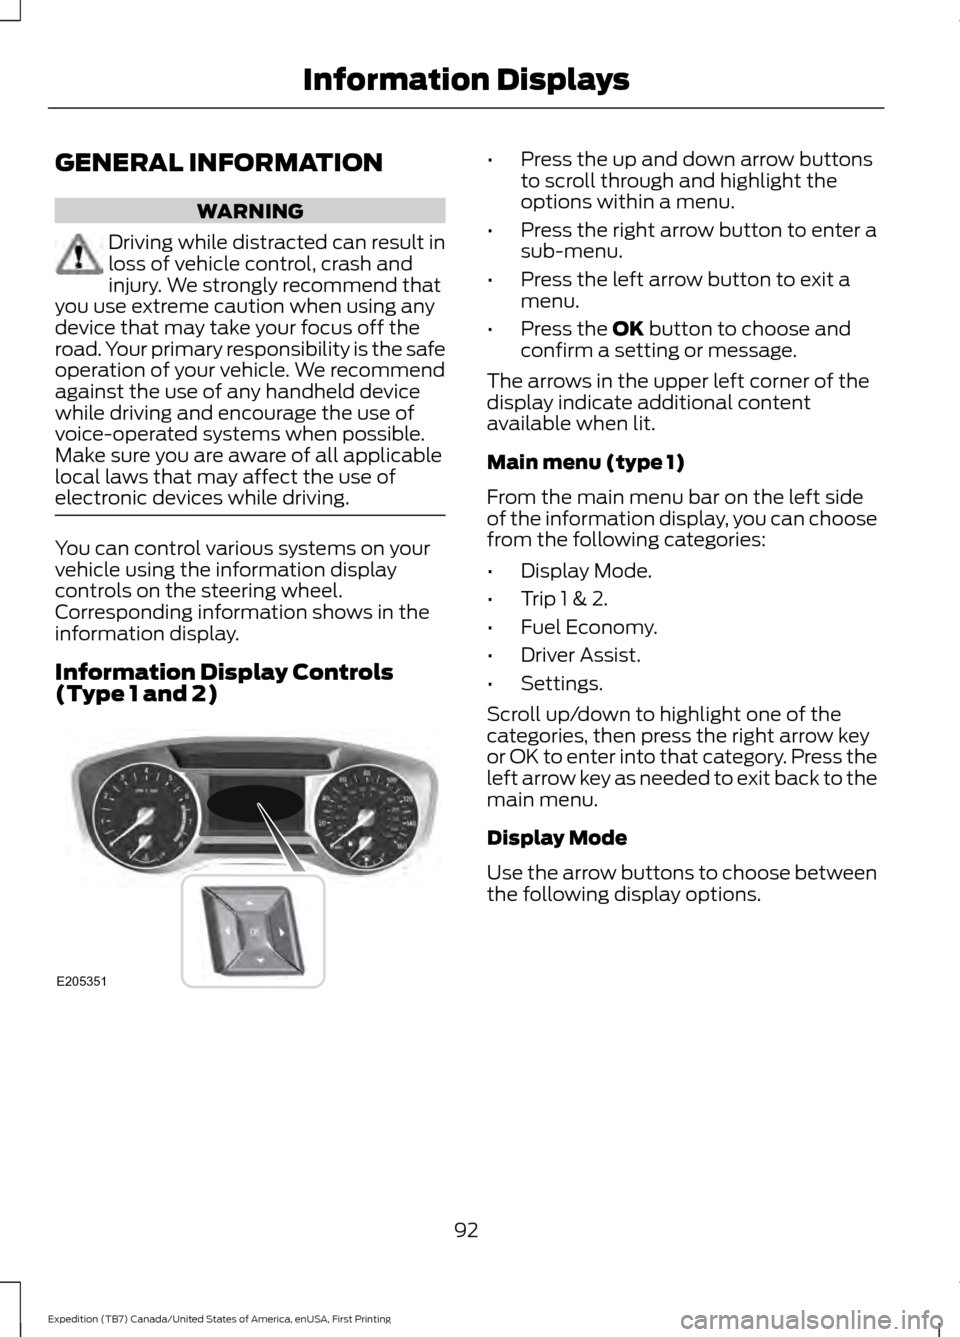
Information Display Controls
(Type 1 and 2) •
Press the up and down arrow buttons
to scroll through and highlight the
options within a menu.
• Press the right arrow button to enter a
sub-menu.
• Press the left arrow button to exit a
menu.
• Press the OK button to choose and
confirm a setting or message.
The arrows in the upper left corner of the
display indicate additional content
available when lit.
Main menu (type 1)
From the main menu bar on the left side
of the information display, you can choose
from the following categories:
• Display Mode.
• Trip 1 & 2.
• Fuel Economy.
• Driver Assist.
• Settings.
Scroll up/down to highlight one of the
categories, then press the right arrow key
or OK to enter into that category. Press the
left arrow key as needed to exit back to the
main menu.
Display Mode
Use the arrow buttons to choose between
the following display options.
92
Expedition (TB7) Canada/United States of America, enUSA, First Printing Information DisplaysE205351
Page 125 of 421

SITTING IN THE CORRECT
POSITION
WARNINGS
Sitting improperly, out of position or
with the seatback reclined too far
can take weight off the seat cushion
and affect the decision of the passenger
sensing system, resulting in serious injury
or death in the event of a crash. Always sit
upright against your seat back, with your
feet on the floor. Do not recline the seatback as this
can cause the occupant to slide
under the safety belt, resulting in
serious injury in the event of a crash. Do not place objects higher than the
seatback to reduce the risk of serious
injury in the event of a crash or during
heavy braking. When you use them properly, the seat,
head restraint, safety belt and airbags will
provide optimum protection in the event
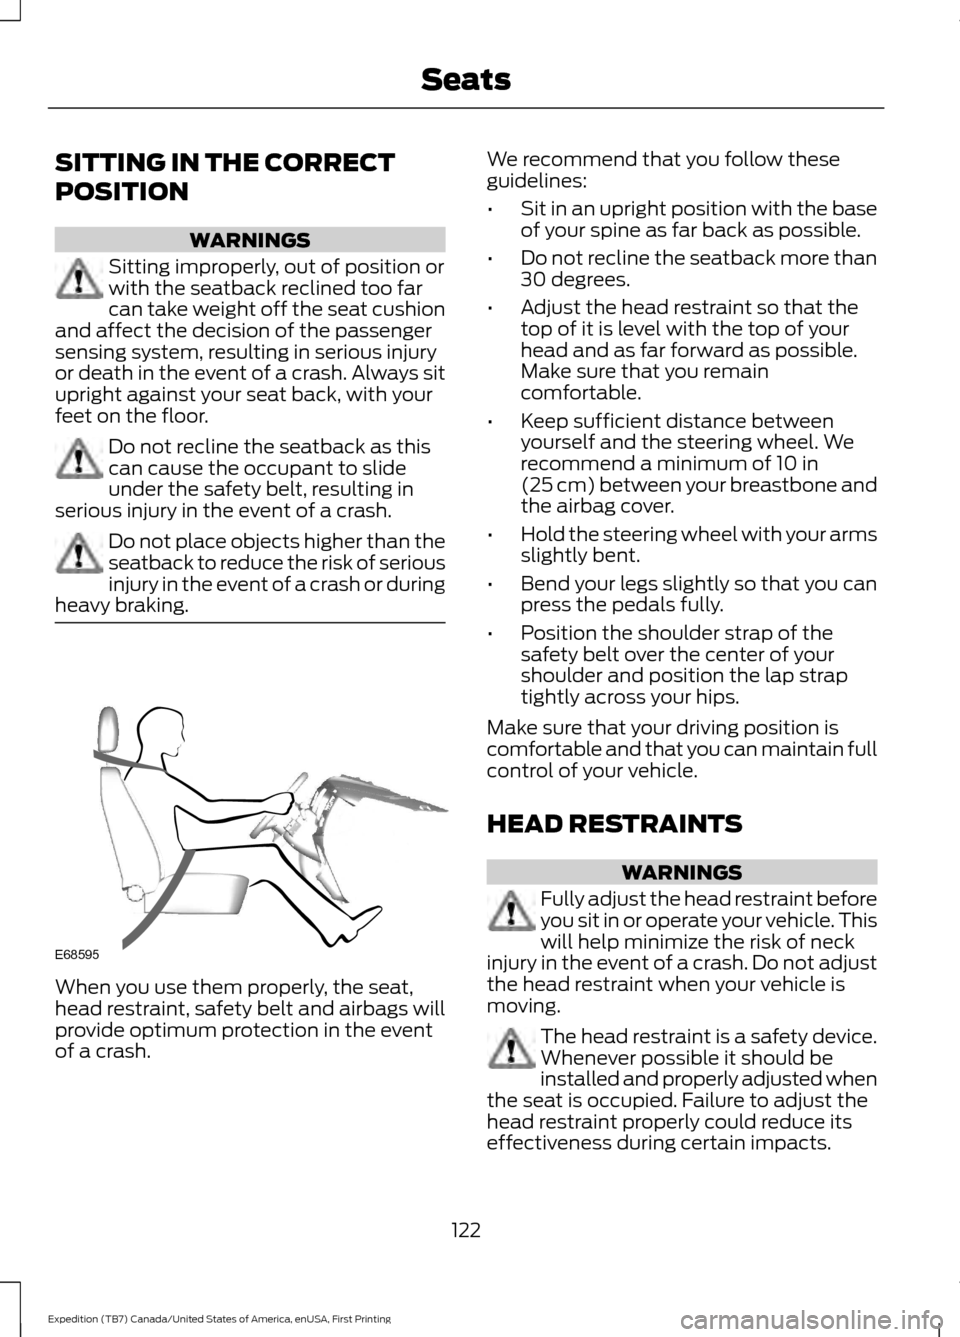
of a crash. We recommend that you follow these
guidelines:
•
Sit in an upright position with the base
of your spine as far back as possible.
• Do not recline the seatback more than
30 degrees.
• Adjust the head restraint so that the
top of it is level with the top of your
head and as far forward as possible.
Make sure that you remain
comfortable.
• Keep sufficient distance between
yourself and the steering wheel. We
recommend a minimum of 10 in
(25 cm) between your breastbone and
the airbag cover.
• Hold the steering wheel with your arms
slightly bent.
• Bend your legs slightly so that you can
press the pedals fully.
• Position the shoulder strap of the
safety belt over the center of your
shoulder and position the lap strap
tightly across your hips.
Make sure that your driving position is
comfortable and that you can maintain full
control of your vehicle.
HEAD RESTRAINTS WARNINGS
Fully adjust the head restraint before
you sit in or operate your vehicle. This
will help minimize the risk of neck
injury in the event of a crash. Do not adjust
the head restraint when your vehicle is
moving. The head restraint is a safety device.
Whenever possible it should be
installed and properly adjusted when
the seat is occupied. Failure to adjust the
head restraint properly could reduce its
effectiveness during certain impacts.
122
Expedition (TB7) Canada/United States of America, enUSA, First Printing SeatsE68595
Page 129 of 421

2. Continue pressing the control until it
reaches the end of the seat track.
3. Continue pressing the control for about
two seconds. You will feel the seat
bounce back slightly.
Power Lumbar (If Equipped) The control is located on the outboard side
of the seat. Press the forward or rearward
side of the control for more or less support.
MEMORY FUNCTION
(If Equipped)
WARNINGS
Before activating the seat memory,
make sure that the area immediately
surrounding the seat is clear of
obstructions and that all occupants are
clear of moving parts. Do not use the memory function
when your vehicle is moving.
This feature automatically recalls the
position of the following:
•
Driver seat.
• Power mirrors.
• Power steering column.
• Optional power adjustable foot pedals.
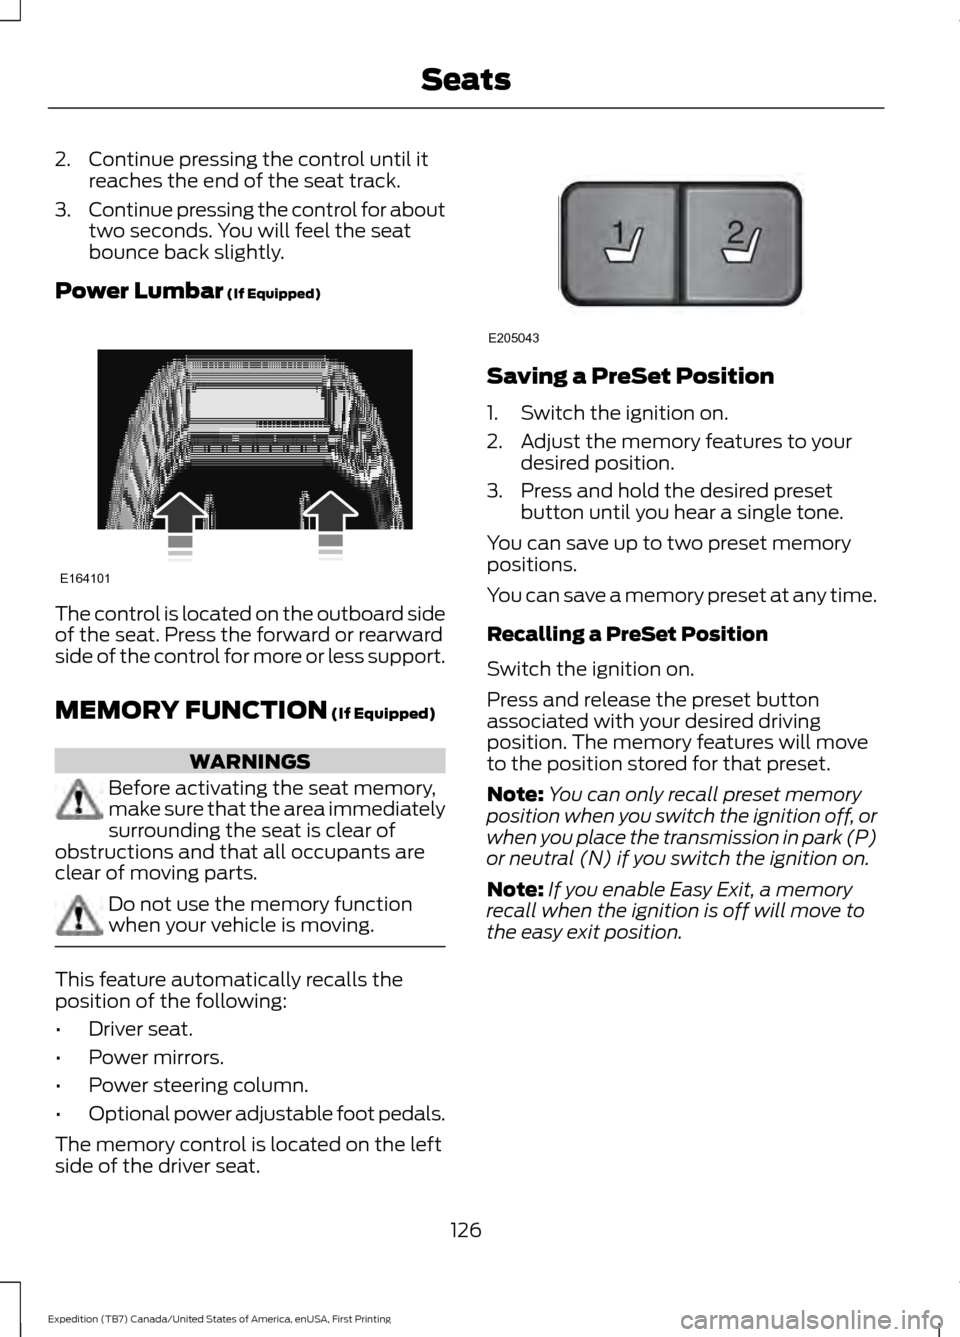
The memory control is located on the left
side of the driver seat. Saving a PreSet Position
1. Switch the ignition on.
2. Adjust the memory features to your
desired position.
3. Press and hold the desired preset button until you hear a single tone.
You can save up to two preset memory
positions.
You can save a memory preset at any time.
Recalling a PreSet Position
Switch the ignition on.
Press and release the preset button
associated with your desired driving
position. The memory features will move
to the position stored for that preset.
Note: You can only recall preset memory
position when you switch the ignition off, or
when you place the transmission in park (P)
or neutral (N) if you switch the ignition on.
Note: If you enable Easy Exit, a memory
recall when the ignition is off will move to
the easy exit position.
126
Expedition (TB7) Canada/United States of America, enUSA, First Printing SeatsE164101 21
E205043