2016 FORD EXPEDITION EL transmission
[x] Cancel search: transmissionPage 172 of 421
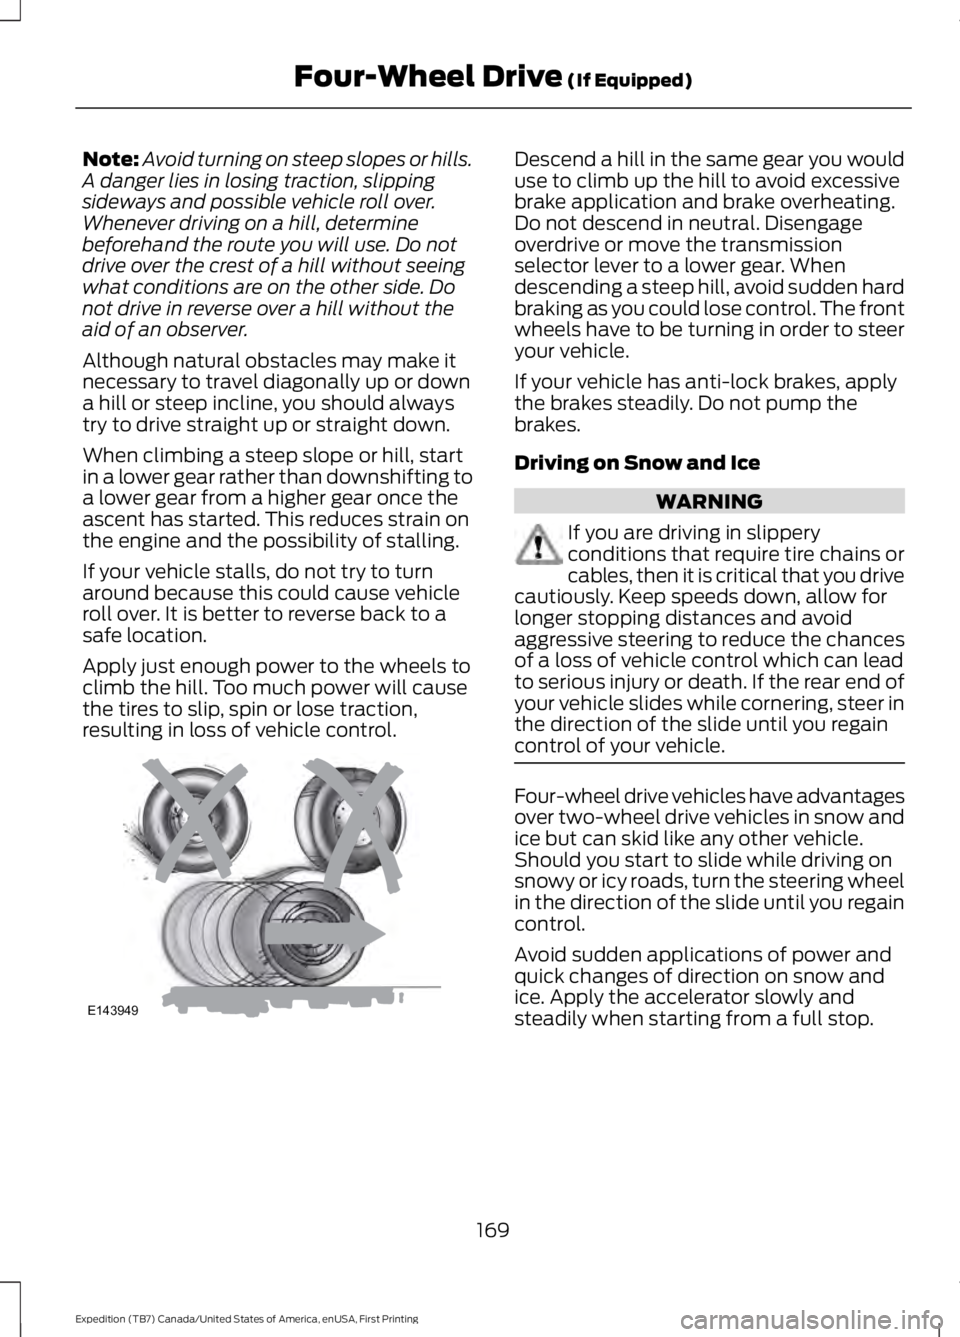
Note:Avoid turning on steep slopes or hills.A danger lies in losing traction, slippingsideways and possible vehicle roll over.Whenever driving on a hill, determinebeforehand the route you will use. Do notdrive over the crest of a hill without seeingwhat conditions are on the other side. Donot drive in reverse over a hill without theaid of an observer.
Although natural obstacles may make itnecessary to travel diagonally up or downa hill or steep incline, you should alwaystry to drive straight up or straight down.
When climbing a steep slope or hill, startin a lower gear rather than downshifting toa lower gear from a higher gear once theascent has started. This reduces strain onthe engine and the possibility of stalling.
If your vehicle stalls, do not try to turnaround because this could cause vehicleroll over. It is better to reverse back to asafe location.
Apply just enough power to the wheels toclimb the hill. Too much power will causethe tires to slip, spin or lose traction,resulting in loss of vehicle control.
Descend a hill in the same gear you woulduse to climb up the hill to avoid excessivebrake application and brake overheating.Do not descend in neutral. Disengageoverdrive or move the transmissionselector lever to a lower gear. Whendescending a steep hill, avoid sudden hardbraking as you could lose control. The frontwheels have to be turning in order to steeryour vehicle.
If your vehicle has anti-lock brakes, applythe brakes steadily. Do not pump thebrakes.
Driving on Snow and Ice
WARNING
If you are driving in slipperyconditions that require tire chains orcables, then it is critical that you drivecautiously. Keep speeds down, allow forlonger stopping distances and avoidaggressive steering to reduce the chancesof a loss of vehicle control which can leadto serious injury or death. If the rear end ofyour vehicle slides while cornering, steer inthe direction of the slide until you regaincontrol of your vehicle.
Four-wheel drive vehicles have advantagesover two-wheel drive vehicles in snow andice but can skid like any other vehicle.Should you start to slide while driving onsnowy or icy roads, turn the steering wheelin the direction of the slide until you regaincontrol.
Avoid sudden applications of power andquick changes of direction on snow andice. Apply the accelerator slowly andsteadily when starting from a full stop.
169
Expedition (TB7) Canada/United States of America, enUSA, First Printing
Four-Wheel Drive (If Equipped)E143949
Page 175 of 421
GENERAL INFORMATION
Note:Occasional brake noise is normal. Ifa metal-to-metal, continuous grinding orcontinuous squeal sound is present, thebrake linings may be worn-out and anauthorized dealer should check them. If thevehicle has continuous vibration or shudderin the steering wheel while braking, anauthorized dealer should check your vehicle.
Note:Brake dust may accumulate on thewheels, even under normal drivingconditions. Some dust is inevitable as thebrakes wear and does not contribute tobrake noise. See Cleaning the AlloyWheels (page 269).
See Warning Lamps andIndicators (page 88).
Wet brakes result in reduced brakingefficiency. Gently press the brake pedal afew times when driving from a car wash orstanding water to dry the brakes.
Brake Over Accelerator
In the event the accelerator pedalbecomes stuck or entrapped, apply steadyand firm pressure to the brake pedal toslow the vehicle and reduce engine power.If you experience this condition, apply thebrakes and bring your vehicle to a safestop. Switch the engine off, move thetransmission to park (P) and apply theparking brake. Inspect the acceleratorpedal and the area around it for any itemsor debris that may be obstructing itsmovement. If none are found and thecondition persists, have your vehicle towedto the nearest authorized dealer.
Emergency Brake Assist
Emergency brake assist detects when youbrake heavily by measuring the rate atwhich you press the brake pedal. Itprovides maximum braking efficiency aslong as you press the pedal. Emergencybrake assist can reduce stopping distancesin critical situations.
Anti-lock Brake System
This system helps you maintain steeringcontrol during emergency stops by keepingthe brakes from locking.
This lamp momentarilyilluminates when you switch theignition on. If the light does notilluminate during start up, remains on orflashes, the anti-lock braking system maybe disabled. Have the system checked byan authorized dealer. If the anti-lock brakesystem is disabled, normal braking is stilleffective.
If the brake warning lampilluminates with the parkingbrake released, have your brakesystem serviced immediately.
HINTS ON DRIVING WITH
ANTI-LOCK BRAKES
Note:When the system is operating, thebrake pedal will pulse and may travelfurther. Maintain pressure on the brakepedal. You may also hear a noise from thesystem. This is normal.
The anti-lock braking system will noteliminate the risks when:
•You drive too closely to the vehicle infront of you.
•Your vehicle is hydroplaning.
•You take corners too fast.
•The road surface is poor.
172
Expedition (TB7) Canada/United States of America, enUSA, First Printing
BrakesE138644 E138644
Page 176 of 421
PARKING BRAKE
WARNING
Always set the parking brake fullyand make sure the transmission isplaced in park (P). Failure to set theparking brake and engage park could resultin vehicle roll-away, property damage orbodily injury. Turn the ignition to the lockposition and remove the key whenever youleave your vehicle.
Apply the parking brake whenever yourvehicle is parked. Press the pedaldownward to set the parking brake. Thebrake warning lamp in the instrumentcluster will illuminate and remainsilluminated until the parking brake isreleased.
To release, pull the brake release leverlocated at the lower left side of theinstrument panel.
If you are parking your vehicle on a gradeor with a trailer, press and hold the brakepedal down, then set the parking brake.There may be a little vehicle movement asthe parking brake sets to hold the vehicle'sweight. This is normal and should be noreason for concern. If needed, press andhold the service brake pedal down, thentry reapplying the parking brake. Chock thewheels if required. If the parking brakecannot hold the weight of the vehicle, theparking brake may need to be serviced orthe vehicle may be overloaded.
HILL START ASSIST
WARNINGS
The system does not replace theparking brake. When you leave yourvehicle, always apply the parkingbrake and shift the transmission into park(P) (automatic transmission) or first gear(1) (manual transmission).
WARNINGS
You must remain in your vehicle onceyou have activated the system.
During all times, you are responsiblefor controlling your vehicle,supervising the system andintervening, if required.
If the engine is revved excessively, orif a malfunction is detected, thesystem will be deactivated.
The system makes it easier to pull awaywhen your vehicle is on a slope without theneed to use the parking brake.
When the system is active, your vehicle willremain stationary on the slope for two tothree seconds after you release the brakepedal. This allows you time to move yourfoot from the brake to the acceleratorpedal. The brakes release automaticallywhen the engine has sufficient torque toprevent your vehicle from rolling down thegrade. This is an advantage when pullingaway on a slope, for example from a carpark ramp, traffic lights or when reversinguphill into a parking space.
The system will activate automatically onany slope that will cause significant vehiclerollback. For vehicles with a manualtransmission, you can switch this featureoff using the information display. SeeInformation Displays (page 92). Thesystem will remain on or off depending onhow it was last set.
Note:There is no warning lamp to indicatethe system is either on or off.
Note:If your vehicle is equipped with AutoHold, Hill Start Assist will not be availablewhile Auto Hold is active.
173
Expedition (TB7) Canada/United States of America, enUSA, First Printing
Brakes
Page 177 of 421

Using Hill Start Assist
1. Bring your vehicle to a completestandstill. Keep the brake pedalpressed and select an uphill gear (forexample, first (1) when facing uphill orreverse (R) when facing downhill).
2. If the sensors detect that your vehicleis on a slope, the system will activateautomatically.
3. When you remove your foot from thebrake pedal, your vehicle will remainon the slope without rolling away forabout two or three seconds. This holdtime will automatically be extended ifyou are in the process of driving off.
4. Drive off in the normal manner. Thebrakes will release automatically.
Switching the System On and Off
You can switch this feature on or off if yourvehicle is equipped with a manualtransmission and an information display.See General Information (page 92). Thesystem remembers the last setting whenyou start your vehicle.
If your vehicle is not equipped with amanual transmission and an informationdisplay, you cannot turn the system on oroff. When you switch the ignition on, thesystem automatically turns on.
174
Expedition (TB7) Canada/United States of America, enUSA, First Printing
Brakes
Page 180 of 421
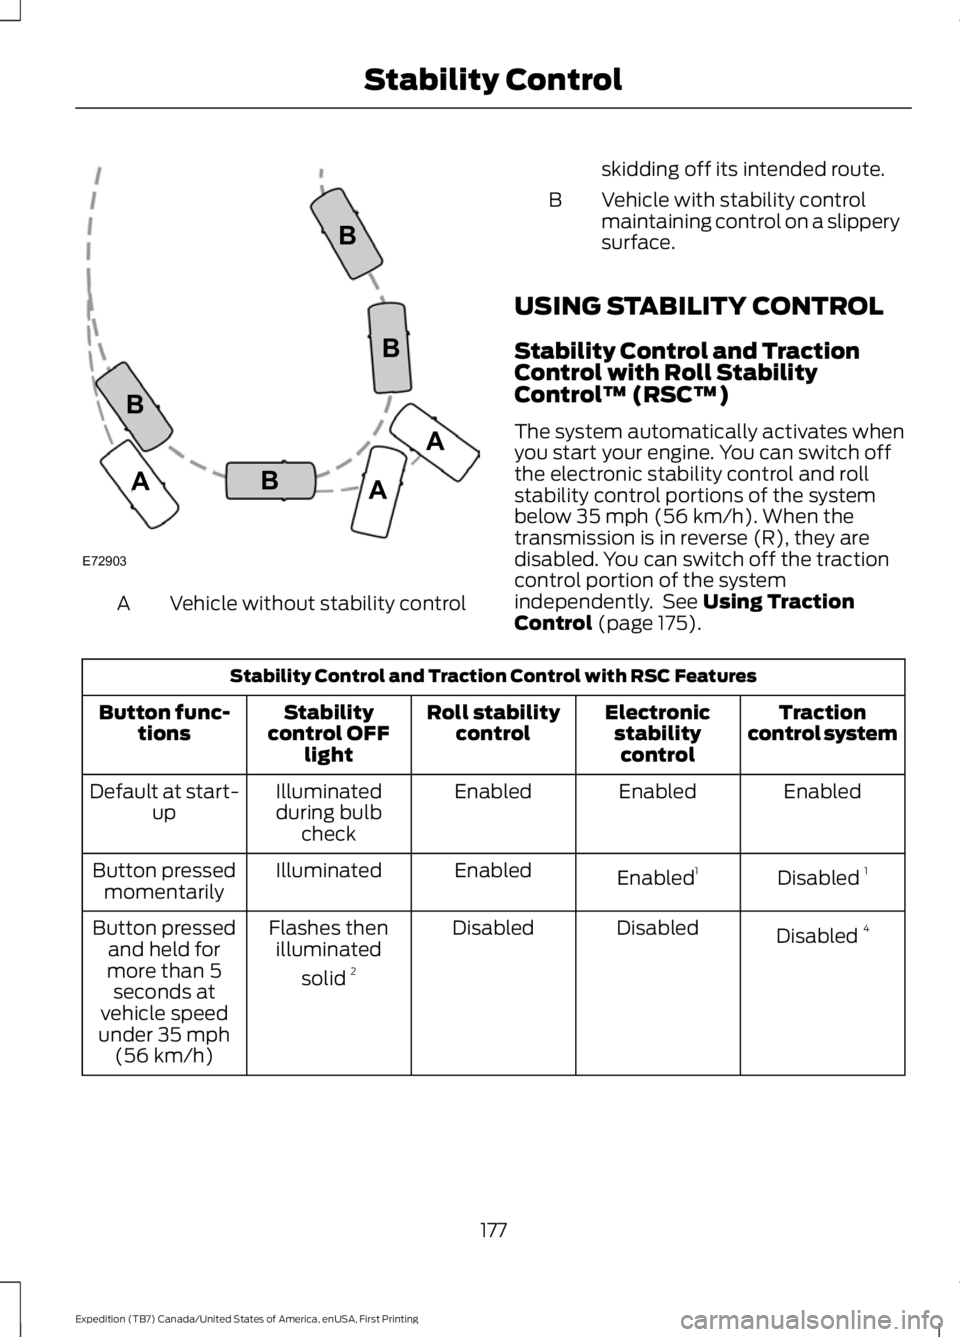
Vehicle without stability controlA
skidding off its intended route.
Vehicle with stability controlmaintaining control on a slipperysurface.
B
USING STABILITY CONTROL
Stability Control and TractionControl with Roll StabilityControl™ (RSC™)
The system automatically activates whenyou start your engine. You can switch offthe electronic stability control and rollstability control portions of the systembelow 35 mph (56 km/h). When thetransmission is in reverse (R), they aredisabled. You can switch off the tractioncontrol portion of the systemindependently. See Using TractionControl (page 175).
Stability Control and Traction Control with RSC Features
Tractioncontrol systemElectronicstabilitycontrol
Roll stabilitycontrolStabilitycontrol OFFlight
Button func-tions
EnabledEnabledEnabledIlluminatedduring bulbcheck
Default at start-up
Disabled 1Enabled1EnabledIlluminatedButton pressedmomentarily
Disabled 4DisabledDisabledFlashes thenilluminated
solid 2
Button pressedand held formore than 5seconds atvehicle speedunder 35 mph(56 km/h)
177
Expedition (TB7) Canada/United States of America, enUSA, First Printing
Stability ControlE72903A
AA
B
BB
B
Page 184 of 421

PRINCIPLE OF OPERATION
WARNINGS
To help avoid personal injury, pleaseread and understand the limitationsof the system as contained in thissection. Sensing is only an aid for some(generally large and fixed) objects whenmoving on a flat surface at parking speeds.Certain objects with surfaces that absorbultrasonic waves, surrounding vehicle'sparking aid systems, traffic controlsystems, fluorescent lamps, inclementweather, air brakes, and external motorsand fans may also affect the function ofthe sensing system; this may includereduced performance or a false activation.
To help avoid personal injury, alwaysuse caution when in reverse (R) andwhen using the sensing system.
This system is not designed toprevent contact with small or movingobjects. The system is designed toprovide a warning to assist the driver indetecting large stationary objects to avoiddamaging your vehicle. The system maynot detect smaller objects, particularlythose close to the ground.
Certain add-on devices such as largetrailer hitches, bike or surfboard racksand any device that may block thenormal detection zone of the system, maycreate false beeps.
Note:Keep the sensors, located on thebumper or fascia, free from snow, ice andlarge accumulations of dirt. If the sensorsare covered, the system’s accuracy can beaffected. Do not clean the sensors withsharp objects.
Note:If your vehicle sustains damage tothe bumper or fascia, leaving it misalignedor bent, the sensing zone may be alteredcausing inaccurate measurement ofobstacles or false alarms.
Note:The sensing system cannot be turnedoff when a MyKey is present. See Principleof Operation (page 46).
Note:If you attach certain add-on devicessuch as a trailer or bike rack, the rear sensingsystem may detect that add-on device andtherefore provide warnings. It is suggestedthat you disable the rear sensing systemwhen you attach an add-on device to yourvehicle to prevent these warnings.
The sensing system warns the driver ofobstacles within a certain range of yourvehicle. The system turns on automaticallywhenever you switch the ignition on.
The system can be switched off throughthe information display menu or from thepop-up message that appears once youshift the transmission into reverse (R). SeeGeneral Information (page 92).
Note:On vehicles with front parking aid youcan use the parking aid switch to switch thesystem off.
If a fault is present in the system, a warningmessage appears in the informationdisplay. See Information Messages(page 103).
REAR PARKING AID
The rear sensors are only active when thetransmission is in reverse (R). As yourvehicle moves closer to the obstacle, therate of the audible warning increases.When the obstacle is less than 10 in(25 cm) away, the warning soundscontinuously. If the system detects astationary or receding object farther than10 in (25 cm) from the corners of thebumper, the tone sounds for only threeseconds. Once the system detects anobject approaching, the warning soundsagain.
181
Expedition (TB7) Canada/United States of America, enUSA, First Printing
Parking Aids
Page 185 of 421

Coverage area of up to 6 ft (1.8 m) fromthe rear bumper. There may be decreasedcoverage area at the outer corners of thebumper.
The system detects certain objects whilethe transmission is in reverse (R) :
•Your vehicle is moving toward astationary object at a speed of 3 mph(5 km/h) or less.
•Your vehicle is not moving, but amoving object is approaching the rearof your vehicle at a speed of 3 mph(5 km/h) or less.
•Your vehicle is moving at a speed ofless than 3 mph (5 km/h) and a movingobject is approaching the rear of yourvehicle at a speed of less than 3 mph(5 km/h).
FRONT PARKING AID
The front sensors are active when thetransmission is in any position other thanpark (P) and the vehicle speed is below8 mph (13 km/h).
Coverage area of up to 28 in (70 cm) fromthe front bumper. There is decreasedcoverage area at the outer corners.
The system sounds an audible warningwhen obstacles are near either bumper inthe following manner:
•Objects detected by the front sensorsare indicated by a high-pitched tonefrom the front of the vehicle.
•Objects detected by the rear sensorsare indicated by a lower pitched tonefrom the rear of the vehicle.
•The sensing system reports theobstacle which is closest to the frontor rear of the vehicle. For example, ifan obstacle is 12 in (30 cm) from thefront of the vehicle and, at the sametime, an obstacle is only 6 in (15 cm)from the rear of the vehicle, the lowerpitched tone sounds.
•An alternating warning sounds fromthe front and rear if there are objectsat both bumpers that are closer than10 in (25 cm).
182
Expedition (TB7) Canada/United States of America, enUSA, First Printing
Parking AidsE130178 E187330
Page 186 of 421
REAR VIEW CAMERA
WARNINGS
The rear view camera system is areverse aid supplement device thatstill requires the driver to use it inconjunction with the interior and exteriormirrors for maximum coverage.
Objects that are close to eithercorner of the bumper or under thebumper, might not be seen on thescreen due to the limited coverage of thecamera system.
Back up as slow as possible sincehigher speeds might limit yourreaction time to stop your vehicle.
Use caution when using the rearvideo camera and the luggagecompartment door is ajar. If theluggage compartment door is ajar, thecamera will be out of position and thevideo image may be incorrect. Allguidelines disappear when the luggagecompartment door is ajar.
Use caution when turning camerafeatures on or off. Make sure yourvehicle is not moving.
The rear view camera system provides avideo image of the area behind yourvehicle.
During operation, lines appear in thedisplay which represent your vehicle’s pathand proximity to objects behind yourvehicle.
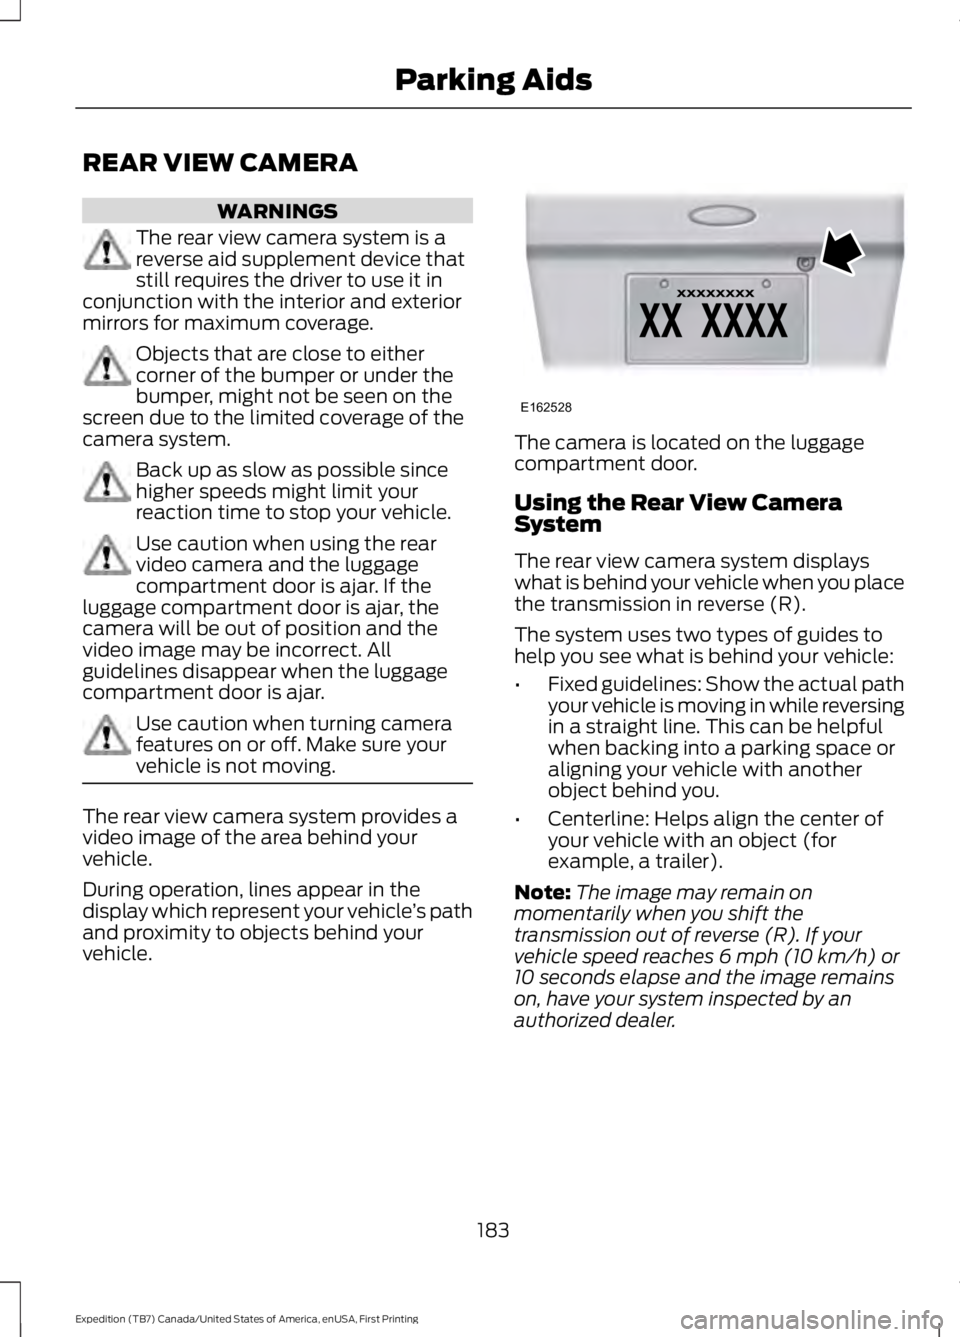
The camera is located on the luggagecompartment door.
Using the Rear View CameraSystem
The rear view camera system displayswhat is behind your vehicle when you placethe transmission in reverse (R).
The system uses two types of guides tohelp you see what is behind your vehicle:
•Fixed guidelines: Show the actual pathyour vehicle is moving in while reversingin a straight line. This can be helpfulwhen backing into a parking space oraligning your vehicle with anotherobject behind you.
•Centerline: Helps align the center ofyour vehicle with an object (forexample, a trailer).
Note:The image may remain onmomentarily when you shift thetransmission out of reverse (R). If yourvehicle speed reaches 6 mph (10 km/h) or10 seconds elapse and the image remainson, have your system inspected by anauthorized dealer.
183
Expedition (TB7) Canada/United States of America, enUSA, First Printing
Parking AidsE162528