2016 FIAT TIPO 5DOORS STATION WAGON headlights
[x] Cancel search: headlightsPage 9 of 240

KNOWING YOUR CAR
In-depth knowledge of your new vehicle
starts here.
The booklet that you are reading simply
and directly explains how it is made and
how it works.
That’s why we advise you to read it
seated comfortably on board, so that
you can see immediately what is
described here for yourself.INSTRUMENT PANEL...........8
THE KEYS.................10
IGNITION DEVICE............11
FIAT CODE.................12
DOORS...................13
SEATS....................15
HEAD RESTRAINTS...........18
STEERING WHEEL............19
REAR VIEW MIRRORS.........19
EXTERNAL LIGHTS...........21
INTERIOR LIGHTS............23
WINDSCREEN / REAR WINDOW
WIPERS..................24
CLIMATE CONTROL...........27
ELECTRIC WINDOWS..........32
BONNET..................32
DUALDRIVE ELECTRIC POWER
STEERING.................33
LUGGAGE COMPARTMENT......34
HEADLIGHTS...............35
ROOF RACK/SKI RACK........36
7
Page 10 of 240

INSTRUMENT PANEL
Version with Uconnect™3" Radio, Uconnect™5" LIVE and Uconnect™5" Nav
LIVE
1. Adjustable side air diffusers 2. Left stalk: direction indicators, main beam headlights, flashings 3. Instrument panel
4. Steering wheel controls 5. Right stalk: windscreen wiper/washer, rear window wiper/washer, rain sensor sensitivity level
setting 6.Uconnect™7. Control buttons 8. Passenger front airbag 9. Adjustable central air diffusers 10. Glove
compartment 11. Climate controls 12. Buttons on the central console: seat heating, USB port + AUX plug panel,
socket/cigarette lighter 13. Ignition device 14. Driver front airbag 15. Steering wheel controls 16. Control panel: front fog
lights (where present), rear fog lights, headlight alignment adjustment, iTPMS reset, ESC OFF (where present).
1P2000085-000-000
8
KNOWING YOUR CAR
Page 11 of 240

Version with Uconnect™7" HD LIVE and Uconnect™7" HD Nav LIVE
1. Adjustable side air diffusers 2. Left stalk: direction indicators, main beam headlights, flashings 3. Instrument panel
4. Steering wheel controls 5. Right stalk: windscreen wiper/washer, rear window wiper/washer, rain sensor sensitivity level
setting 6.Uconnect™7. Control buttons 8. Passenger front airbag 9. Adjustable central air diffusers 10. Glove
compartment 11. Climate controls 12. Buttons on the central console: seat heating, USB port + AUX plug panel,
socket/cigarette lighter 13. Ignition device 14. Driver front airbag 15. Steering wheel controls 16. Control panel: front fog
lights (where present), rear fog lights, headlight alignment adjustment, iTPMS reset, ESC OFF (where present).
2P2000050-000-000
9
Page 23 of 240

EXTERNAL LIGHTS
The left-hand stalk 1 fig. 26 operates
most of the external lights. The exterior
lights turn on also with the ignition key
in the MAR position. The instrument
panel and the various dashboard
controls will come on with the external
lights.
DAYTIME RUNNING
LIGHTS (DRL)
"Daytime Running Lights"
19) 20)
With the key in MAR position and the
ring nut turned to theOposition, the
daytime running lights and the rear side
lights switch on automatically; the other
lights and the internal lighting remain
off. If the daytime running lights are
deactivated (for versions/markets whereit is provided), no light comes on when
the ring nut is turned toO.
DIPPED HEADLIGHTS
With the ignition key turned to MAR,
turn the ring nut 1 fig. 26 to
.Ifthe
dipped beam headlights are activated,
the daytime running lights are switched
off and the dipped beam headlights,
rear side lights and number plate lights
are switched on. The
warning light
switches on in the instrument panel.
PARKING LIGHTS
These lights can be turned on with
ignition device in STOP position or with
the key removed, by moving the left
stalk ring nut first to positionOand
then to position
.
The
warning light switches on in
the instrument panel.
Repeat the same operation to switch
them off.
AUTO FUNCTION(Dusk sensor)
(where provided)
This is an infrared LED sensor that
works in conjunction with the rain
sensor and is located on the
windscreen. It is able to detect
variations in outside lighting based on
the light sensitivity set in the display
Menu or theUconnect™ 5"or7" HD
system (where provided).The higher the sensitivity, the lower the
amount of external light needed to
automatically switch the external lights
on.
Function activation
Turn the left stalk ring nut to position
.
IMPORTANT The function can only be
activated with the ignition device at
MAR.
Function deactivation
To deactivate the function, turn the left
stalk ring nut to a position other than
.
MAIN BEAM HEADLIGHTS
With ring nut in position, push the
stalk forward toward the dashboard
(stable position). The
warning light
switches on in the instrument panel.
They are switched off by pulling the
stalk towards the steering wheel.
MAIN BEAM HEADLIGHTS
Flashing the headlights
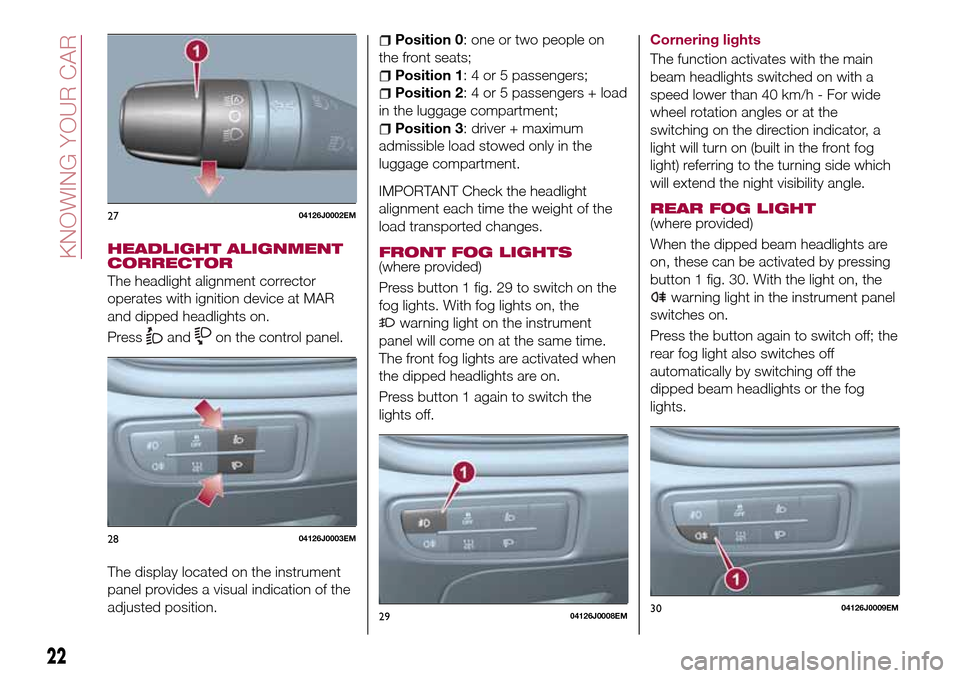
Pull the left stalk 1 fig. 27 toward
yourself, to the stable position; the stalk
goes back to the central stable position
when it is released.
With main beam headlights on, the
warning light on the instrument
panel will come on at the same time.
2604126J0001EM
21
Page 24 of 240

HEADLIGHT ALIGNMENT
CORRECTOR
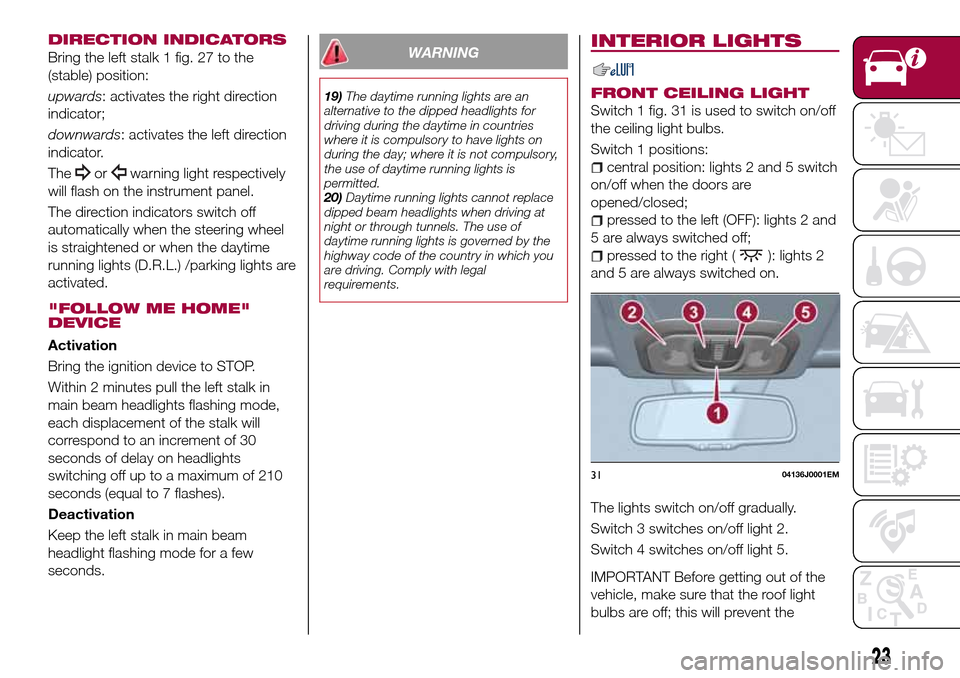
The headlight alignment corrector
operates with ignition device at MAR
and dipped headlights on.
Press
andon the control panel.
The display located on the instrument
panel provides a visual indication of the
adjusted position.
Position 0: one or two people on
the front seats;
Position 1: 4 or 5 passengers;
Position 2: 4 or 5 passengers + load
in the luggage compartment;
Position 3: driver + maximum
admissible load stowed only in the
luggage compartment.
IMPORTANT Check the headlight
alignment each time the weight of the
load transported changes.
FRONT FOG LIGHTS
(where provided)
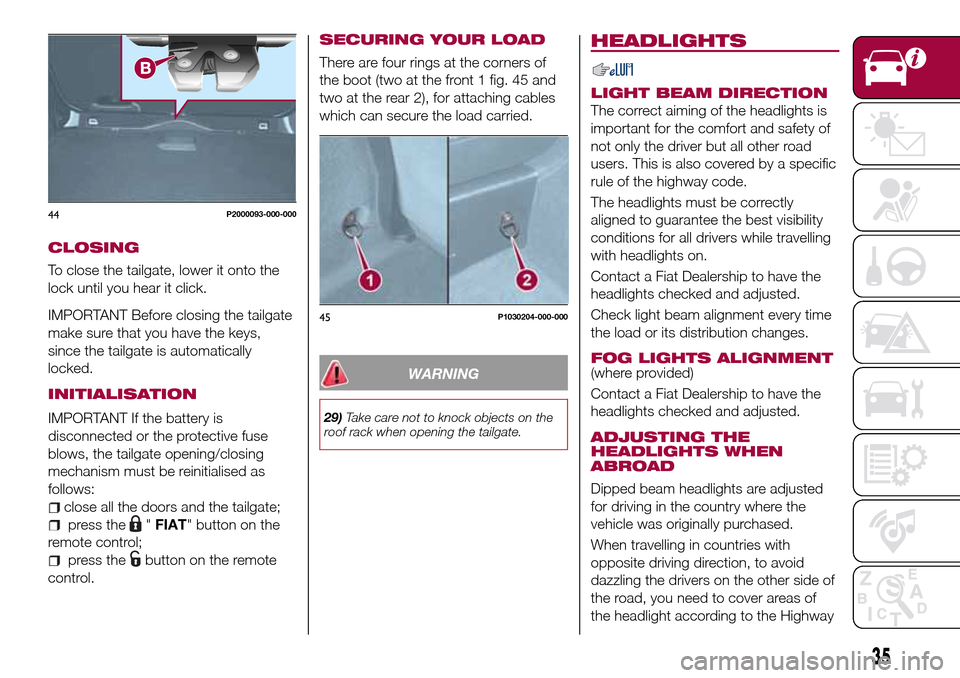
Press button 1 fig. 29 to switch on the
fog lights. With fog lights on, the
warning light on the instrument
panel will come on at the same time.
The front fog lights are activated when
the dipped headlights are on.
Press button 1 again to switch the
lights off.Cornering lights
The function activates with the main
beam headlights switched on with a
speed lower than 40 km/h - For wide
wheel rotation angles or at the
switching on the direction indicator, a
light will turn on (built in the front fog
light) referring to the turning side which
will extend the night visibility angle.
REAR FOG LIGHT(where provided)
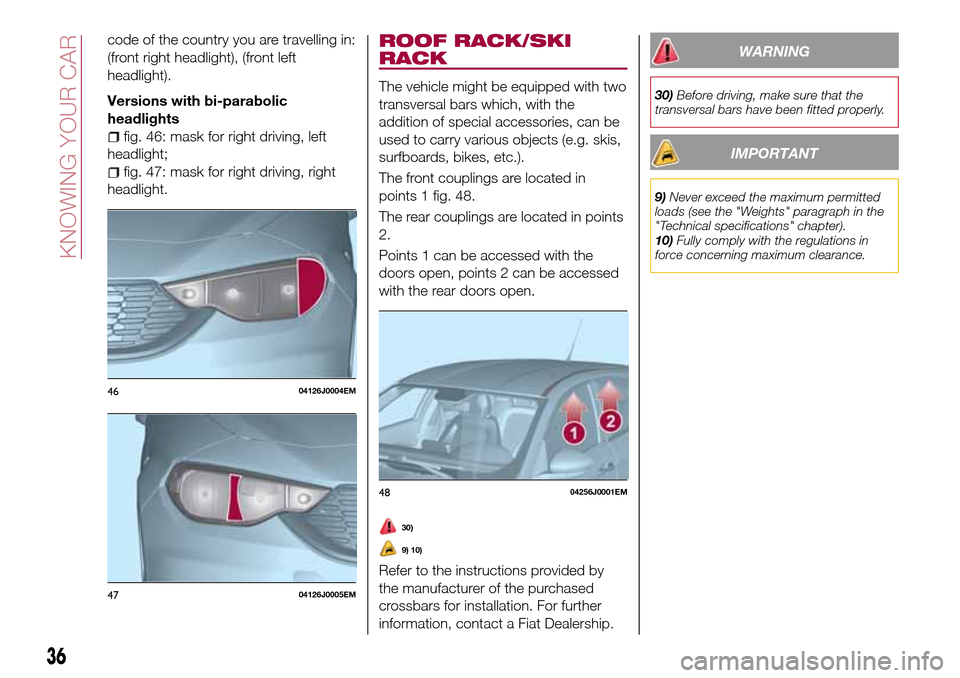
When the dipped beam headlights are
on, these can be activated by pressing
button 1 fig. 30. With the light on, the
warning light in the instrument panel
switches on.
Press the button again to switch off; the
rear fog light also switches off
automatically by switching off the
dipped beam headlights or the fog
lights.
2704126J0002EM
2804126J0003EM
2904126J0008EM3004126J0009EM
22
KNOWING YOUR CAR
Page 25 of 240

DIRECTION INDICATORS
Bring the left stalk 1 fig. 27 to the
(stable) position:
upwards: activates the right direction
indicator;
downwards: activates the left direction
indicator.
The
orwarning light respectively
will flash on the instrument panel.
The direction indicators switch off
automatically when the steering wheel
is straightened or when the daytime
running lights (D.R.L.) /parking lights are
activated.
"FOLLOW ME HOME"
DEVICE
Activation
Bring the ignition device to STOP.
Within 2 minutes pull the left stalk in
main beam headlights flashing mode,
each displacement of the stalk will
correspond to an increment of 30
seconds of delay on headlights
switching off up to a maximum of 210
seconds (equal to 7 flashes).
Deactivation
Keep the left stalk in main beam
headlight flashing mode for a few
seconds.
WARNING
19)The daytime running lights are an
alternative to the dipped headlights for
driving during the daytime in countries
where it is compulsory to have lights on
during the day; where it is not compulsory,
the use of daytime running lights is
permitted.
20)Daytime running lights cannot replace
dipped beam headlights when driving at
night or through tunnels. The use of
daytime running lights is governed by the
highway code of the country in which you
are driving. Comply with legal
requirements.
INTERIOR LIGHTS
FRONT CEILING LIGHT
Switch 1 fig. 31 is used to switch on/off
the ceiling light bulbs.
Switch 1 positions:
central position: lights 2 and 5 switch
on/off when the doors are
opened/closed;
pressed to the left (OFF): lights 2 and
5 are always switched off;
pressed to the right (): lights 2
and 5 are always switched on.
The lights switch on/off gradually.
Switch 3 switches on/off light 2.
Switch 4 switches on/off light 5.
IMPORTANT Before getting out of the
vehicle, make sure that the roof light
bulbs are off; this will prevent the
3104136J0001EM
23
Page 37 of 240

CLOSING
To close the tailgate, lower it onto the
lock until you hear it click.
IMPORTANT Before closing the tailgate
make sure that you have the keys,
since the tailgate is automatically
locked.
INITIALISATION
IMPORTANT If the battery is
disconnected or the protective fuse
blows, the tailgate opening/closing
mechanism must be reinitialised as
follows:
close all the doors and the tailgate;
press the"FIAT" button on the
remote control;
press thebutton on the remote
control.
SECURING YOUR LOAD
There are four rings at the corners of
the boot (two at the front 1 fig. 45 and
two at the rear 2), for attaching cables
which can secure the load carried.
WARNING
29)Take care not to knock objects on the
roof rack when opening the tailgate.
HEADLIGHTS
LIGHT BEAM DIRECTION
The correct aiming of the headlights is
important for the comfort and safety of
not only the driver but all other road
users. This is also covered by a specific
rule of the highway code.
The headlights must be correctly
aligned to guarantee the best visibility
conditions for all drivers while travelling
with headlights on.
Contact a Fiat Dealership to have the
headlights checked and adjusted.
Check light beam alignment every time
the load or its distribution changes.
FOG LIGHTS ALIGNMENT(where provided)
Contact a Fiat Dealership to have the
headlights checked and adjusted.
ADJUSTING THE
HEADLIGHTS WHEN
ABROAD
Dipped beam headlights are adjusted
for driving in the country where the
vehicle was originally purchased.
When travelling in countries with
opposite driving direction, to avoid
dazzling the drivers on the other side of
the road, you need to cover areas of
the headlight according to the Highway
44P2000093-000-000
45P1030204-000-000
35
Page 38 of 240

code of the country you are travelling in:
(front right headlight), (front left
headlight).
Versions with bi-parabolic
headlights
fig. 46: mask for right driving, left
headlight;
fig. 47: mask for right driving, right
headlight.
ROOF RACK/SKI
RACK
The vehicle might be equipped with two
transversal bars which, with the
addition of special accessories, can be
used to carry various objects (e.g. skis,
surfboards, bikes, etc.).
The front couplings are located in
points 1 fig. 48.
The rear couplings are located in points
2.
Points 1 can be accessed with the
doors open, points 2 can be accessed
with the rear doors open.
30)
9) 10)
Refer to the instructions provided by
the manufacturer of the purchased
crossbars for installation. For further
information, contact a Fiat Dealership.
WARNING
30)Before driving, make sure that the
transversal bars have been fitted properly.
IMPORTANT
9)Never exceed the maximum permitted
loads (see the "Weights" paragraph in the
"Technical specifications" chapter).
10)Fully comply with the regulations in
force concerning maximum clearance.
4604126J0004EM
4704126J0005EM
4804256J0001EM
36
KNOWING YOUR CAR