2016 FIAT TIPO 5DOORS STATION WAGON stop start
[x] Cancel search: stop startPage 102 of 240
When travelling downhill with the device
active, the vehicle speed may exceed
the set one.
CHANGING SPEED
Increasing speed
Once the electronic Cruise Control has
been activated, the speed can be
increased by pressing button SET +.
Keeping the button pressed, the set
speed will increase until the button is
released, then the new speed will be
stored. Perform this operation only if
you want to increase vehicle speed by a
high value.
Each time button SET + is pressed the
set speed will be fine tuned.
Decreasing speed
With the device activated, the speed
can be decreased by pressing button
SET–.
Keeping the button pressed, the set
speed will decrease until the button is
released, then the new speed will be
stored.
Each time button SET – is pressed the
set speed will be fine tuned.
RECALLING THE SPEED
Before returning to the previously set
speed, you must bring the speed close
to that value, press the RES (Resume)
button and then release it.
DEACTIVATING THE
DEVICE
Lightly pressing the brake pedal or
pressing the CANC button deactivates
the electronic Cruise Control without
deleting the stored speed.
The Cruise Control may be deactivated
also by applying the parking brake,
when the braking system is operated
(e.g. operation of the ESC system) or by
pressing the clutch pedal while shifting
gear.
The stored speed is deleted in the
following cases:
pressing button 1 fig. 86 or switching
off the engine;
if there is a malfunction in the
electronic Cruise Control.
DEACTIVATING THE
DEVICE
The electronic Cruise Control is
deactivated by pressing button 1
fig. 86 or bringing the ignition device to
STOP.
WARNING
111)When travelling with the device active,
never move the gear lever to neutral.
112)In case of a malfunction or failure of
the device, contact a Fiat Dealership.113)The electronic Cruise Control can be
dangerous if the system cannot keep a
constant speed. In specific conditions
speed may be excessive, resulting in the
risk of losing control of the vehicle and
causing accidents. Do not use the device
in heavy traffic or on winding, icy, snowy or
slippery roads.
100
STARTING AND DRIVING
Page 110 of 240

PARKING SENSORS
(where provided)
SENSORS
120)
41) 42) 43)
The parking sensors, located in the rear
bumper fig. 95, are used to detect the
presence of any obstacles near the rear
part of the vehicle.
The sensors warn the driver about the
presence of possible obstacles with an
intermittent acoustic signal and,
depending on the version, also with
visual indications on the instrument
panel display.
Activation
The sensors are automatically activated
when reverse gear is selected. As thedistance from the obstacle behind the
vehicle decreases, the frequency of the
acoustic signal increases.
Acoustic signal
When reverse is engaged and there is
an obstacle behind the vehicle, an
acoustic signal is activated and the
signal varies as the distance of the
obstacle from the bumper varies.
The frequency of the acoustic signal:
increases as the distance between
the vehicle and the obstacle decreases;
becomes continuous when the
distance separating the vehicle from the
obstacle is less than about 30 cm;
is constant if the distance between
the vehicle and the obstacle is
unchanged. If this situation concerns
the side sensors, the signal will stop
after approximately 3 seconds to avoid,
for example, indications in the event of
manoeuvres along a wall.
stops immediately if the distance of
the obstacle increases.
When the system emits the acoustic
signal, the volume of theUconnect™
system (where provided) is
automatically lowered.
Detection distances
If several obstacles are detected by the
sensors, only the nearest one is
considered.Indication on display
The indications regarding the Park
Assist system are shown only if the
"Acoustic signal and display" item in the
"Settings" menu of theUconnect™ 5"
or7" HDsystem (where provided) was
previously selected (for more
information, see the description in the
dedicated chapter).
The system indicates the presence of
an obstacle by displaying a single arc in
one of the possible areas, in
accordance with the distance of the
object and the position in relation to the
vehicle. If the obstacle is detected in the
rear central area, a single arc will be
displayed as the obstacle approaches,
first constant, then flashing, in addition
to an acoustic signal.
FAULT INDICATION
Parking sensor faults, if any, will be
indicated when reverse is engaged by
the switching on of the
symbol on
the instrument panel together with the
message on the display (see
description in the "Warning lights and
messages" paragraph, "Knowing the
instrument panel" chapter).
95P2000007-000-000
108
STARTING AND DRIVING
Page 112 of 240
REAR VIEW CAMERA
(where provided)
DESCRIPTION
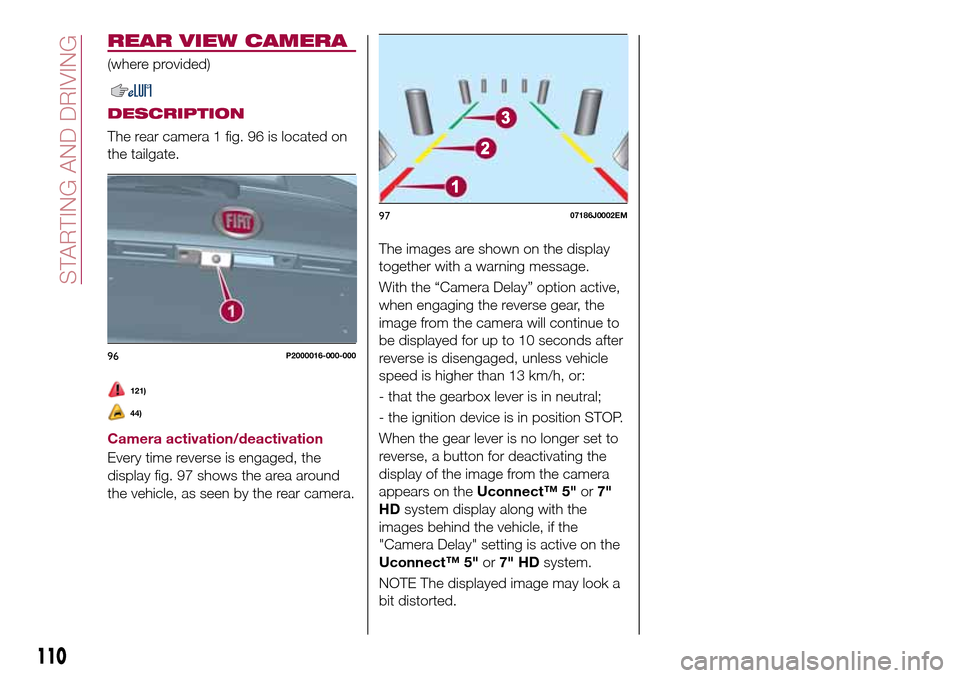
The rear camera 1 fig. 96 is located on
the tailgate.
121)
44)
Camera activation/deactivation
Every time reverse is engaged, the
display fig. 97 shows the area around
the vehicle, as seen by the rear camera.The images are shown on the display
together with a warning message.
With the “Camera Delay” option active,
when engaging the reverse gear, the
image from the camera will continue to
be displayed for up to 10 seconds after
reverse is disengaged, unless vehicle
speed is higher than 13 km/h, or:
- that the gearbox lever is in neutral;
- the ignition device is in position STOP.
When the gear lever is no longer set to
reverse, a button for deactivating the
display of the image from the camera
appears on theUconnect™ 5"or7"
HDsystem display along with the
images behind the vehicle, if the
"Camera Delay" setting is active on the
Uconnect™ 5"or7" HDsystem.
NOTE The displayed image may look a
bit distorted.
96P2000016-000-000
9707186J0002EM
110
STARTING AND DRIVING
Page 139 of 240
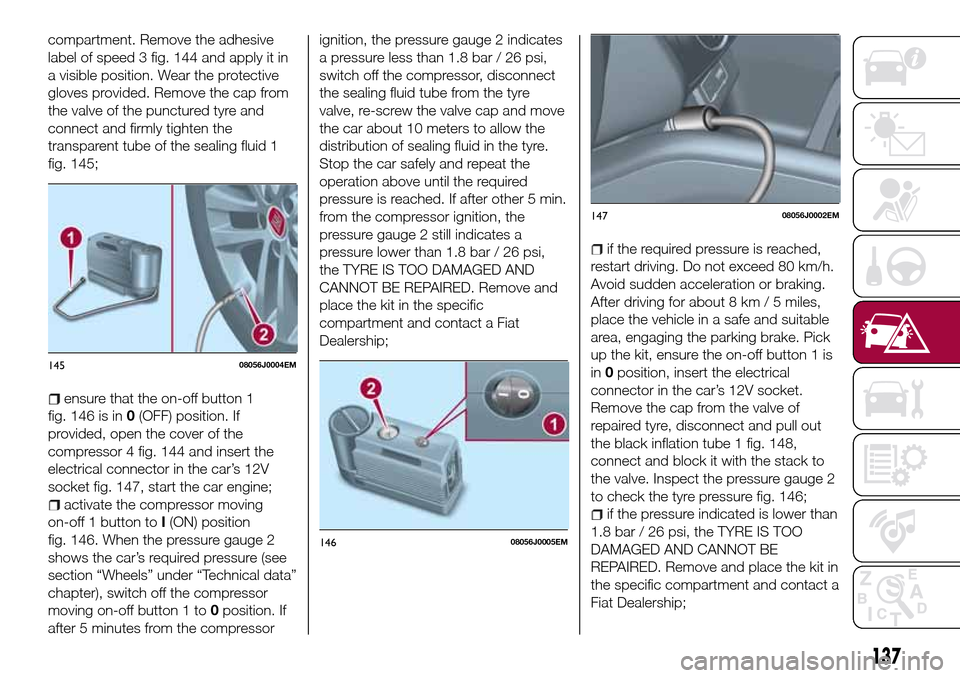
compartment. Remove the adhesive
label of speed 3 fig. 144 and apply it in
a visible position. Wear the protective
gloves provided. Remove the cap from
the valve of the punctured tyre and
connect and firmly tighten the
transparent tube of the sealing fluid 1
fig. 145;
ensure that the on-off button 1
fig. 146 is in0(OFF) position. If
provided, open the cover of the
compressor 4 fig. 144 and insert the
electrical connector in the car’s 12V
socket fig. 147, start the car engine;
activate the compressor moving
on-off 1 button toI(ON) position
fig. 146. When the pressure gauge 2
shows the car’s required pressure (see
section “Wheels” under “Technical data”
chapter), switch off the compressor
moving on-off button 1 to0position. If
after 5 minutes from the compressorignition, the pressure gauge 2 indicates
a pressure less than 1.8 bar / 26 psi,
switch off the compressor, disconnect
the sealing fluid tube from the tyre
valve, re-screw the valve cap and move
the car about 10 meters to allow the
distribution of sealing fluid in the tyre.
Stop the car safely and repeat the
operation above until the required
pressure is reached. If after other 5 min.
from the compressor ignition, the
pressure gauge 2 still indicates a
pressure lower than 1.8 bar / 26 psi,
the TYRE IS TOO DAMAGED AND
CANNOT BE REPAIRED. Remove and
place the kit in the specific
compartment and contact a Fiat
Dealership;
if the required pressure is reached,
restart driving. Do not exceed 80 km/h.
Avoid sudden acceleration or braking.
After driving for about 8 km / 5 miles,
place the vehicle in a safe and suitable
area, engaging the parking brake. Pick
up the kit, ensure the on-off button 1 is
in0position, insert the electrical
connector in the car’s 12V socket.
Remove the cap from the valve of
repaired tyre, disconnect and pull out
the black inflation tube 1 fig. 148,
connect and block it with the stack to
the valve. Inspect the pressure gauge 2
to check the tyre pressure fig. 146;
if the pressure indicated is lower than
1.8 bar / 26 psi, the TYRE IS TOO
DAMAGED AND CANNOT BE
REPAIRED. Remove and place the kit in
the specific compartment and contact a
Fiat Dealership;
14508056J0004EM
14608056J0005EM
14708056J0002EM
137
Page 142 of 240
WARNING
141)Before opening the bonnet, make
sure that the engine is off and that the
ignition key is in the STOP position. Follow
the indications on the plate underneath the
bonnet. We recommend that you remove
the key from the ignition if other people
remain in the vehicle. The vehicle should
always be left after the key has been
removed or turned to the STOP position.
During refuelling, make sure that the engine
is off (and that the ignition key is in the
STOP position).
142)Do not get too close to the radiator
cooling fan: the electric fan may start;
danger of injury. Scarves, ties and other
loose clothing might be pulled by moving
parts.
143)Remove any metal objects (e.g. rings,
watches, bracelets), that might cause an
accidental electrical contact and cause
serious injury.
144)The batteries contain acid that can
burn skin or eyes. Batteries produce
hydrogen, which is easily flammable and
explosive. Therefore, keep away flames or
devices which may cause sparks.
IMPORTANT
53)Never use a fast battery-charger to
start the engine as this could damage the
electronic systems of your vehicle,
particularly the ignition and engine fuel
supply control units.54)Do not connect the cable to the
negative terminal (–) of the flat battery. The
following spark could lead to battery
explosion and cause serious harm. Only
use the specific earth point; do not use any
other exposed metallic part.
FUEL CUT-OFF
SYSTEM
DESCRIPTION
This intervenes in the case of an impact
causing:
the interruption of the fuel supply
with the engine consequently switching
off;
the automatic unlocking of the
doors;
turning on of the lights inside the
vehicle;
deactivation of climate control
system ventilation;
switching on of the hazard warning
lights (to deactivate the lights press the
button on the dashboard).
On some versions, the intervention of
the system is indicated by a message
shown on the display. In the same way,
a dedicated message on the display
warns the driver if system operation is
compromised.
IMPORTANT Carefully check the vehicle
for fuel leaks, for instance in the engine
compartment, under the vehicle or near
the tank area. After a collision, bring the
ignition device to STOP to prevent the
battery from running down.
140
IN AN EMERGENCY
Page 143 of 240
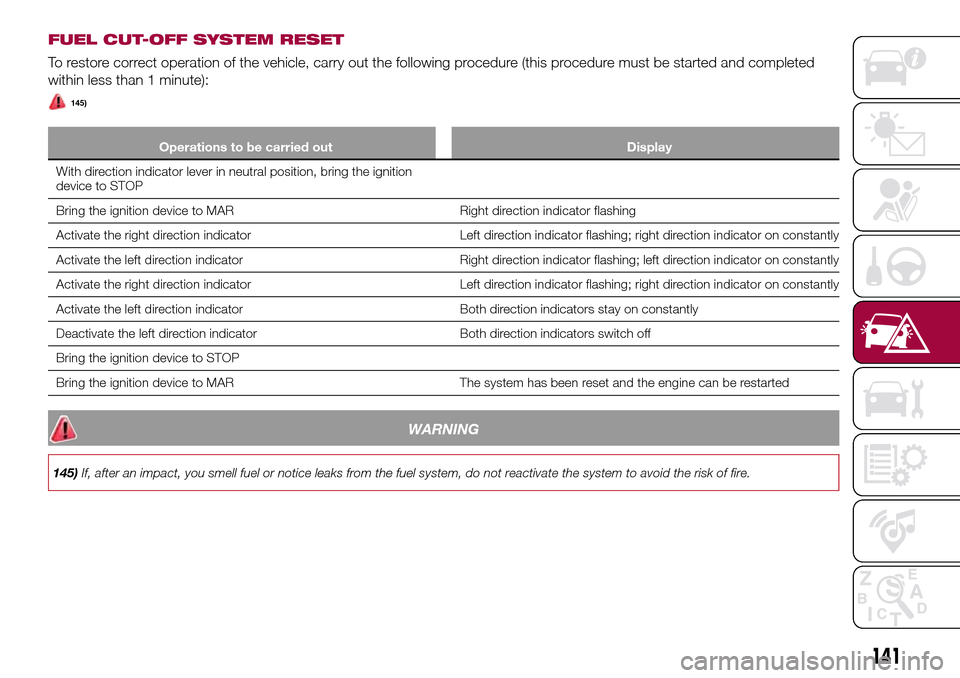
FUEL CUT-OFF SYSTEM RESET
To restore correct operation of the vehicle, carry out the following procedure (this procedure must be started and completed
within less than 1 minute):
145)
Operations to be carried out Display
With direction indicator lever in neutral position, bring the ignition
device to STOP
Bring the ignition device to MAR Right direction indicator flashing
Activate the right direction indicator Left direction indicator flashing; right direction indicator on constantly
Activate the left direction indicator Right direction indicator flashing; left direction indicator on constantly
Activate the right direction indicator Left direction indicator flashing; right direction indicator on constantly
Activate the left direction indicator Both direction indicators stay on constantly
Deactivate the left direction indicator Both direction indicators switch off
Bring the ignition device to STOP
Bring the ignition device to MAR The system has been reset and the engine can be restarted
WARNING
145)If, after an impact, you smell fuel or notice leaks from the fuel system, do not reactivate the system to avoid the risk of fire.
141
Page 144 of 240
TOWING THE
VEHICLE
ATTACHING THE TOW
RING
146) 147) 148)
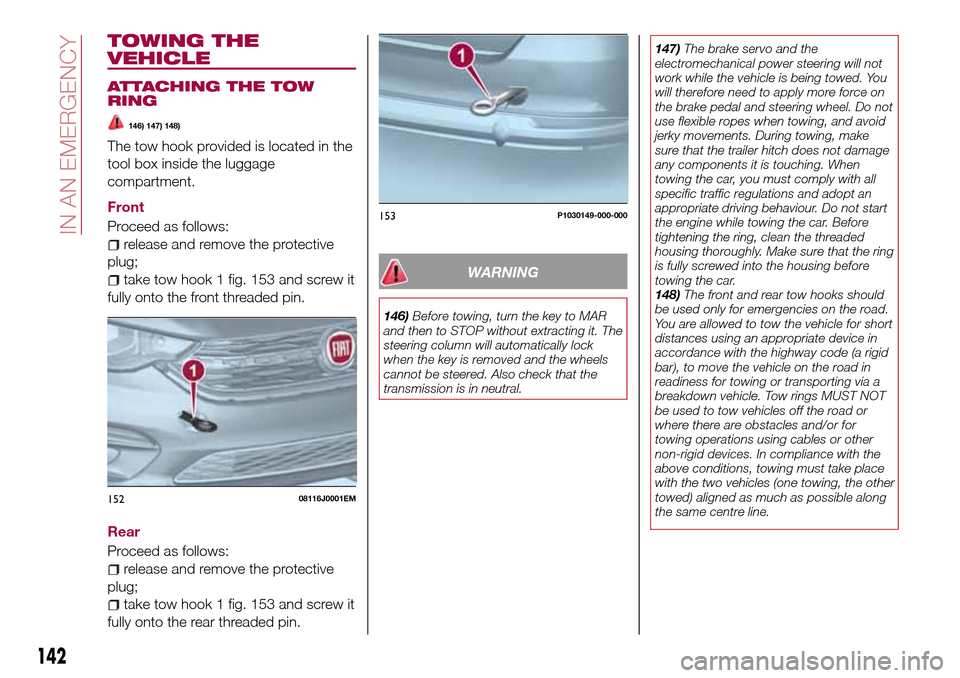
The tow hook provided is located in the
tool box inside the luggage
compartment.
Front
Proceed as follows:
release and remove the protective
plug;
take tow hook 1 fig. 153 and screw it
fully onto the front threaded pin.
Rear
Proceed as follows:
release and remove the protective
plug;
take tow hook 1 fig. 153 and screw it
fully onto the rear threaded pin.
WARNING
146)Before towing, turn the key to MAR
and then to STOP without extracting it. The
steering column will automatically lock
when the key is removed and the wheels
cannot be steered. Also check that the
transmission is in neutral.147)The brake servo and the
electromechanical power steering will not
work while the vehicle is being towed. You
will therefore need to apply more force on
the brake pedal and steering wheel. Do not
use flexible ropes when towing, and avoid
jerky movements. During towing, make
sure that the trailer hitch does not damage
any components it is touching. When
towing the car, you must comply with all
specific traffic regulations and adopt an
appropriate driving behaviour. Do not start
the engine while towing the car. Before
tightening the ring, clean the threaded
housing thoroughly. Make sure that the ring
is fully screwed into the housing before
towing the car.
148)The front and rear tow hooks should
be used only for emergencies on the road.
You are allowed to tow the vehicle for short
distances using an appropriate device in
accordance with the highway code (a rigid
bar), to move the vehicle on the road in
readiness for towing or transporting via a
breakdown vehicle. Tow rings MUST NOT
be used to tow vehicles off the road or
where there are obstacles and/or for
towing operations using cables or other
non-rigid devices. In compliance with the
above conditions, towing must take place
with the two vehicles (one towing, the other
towed) aligned as much as possible along
the same centre line.
15208116J0001EM
153P1030149-000-000
142
IN AN EMERGENCY
Page 160 of 240
159)When performing any operation on
the battery or near it, always protect your
eyes with special goggles.
IMPORTANT
55)Be careful not to confuse the various
types of fluids while topping up: they are
not compatible with each other! Topping up
with an unsuitable fluid could severely
damage your vehicle.
56)The oil level must never exceed the
MAX. mark.
57)Always top up using engine oil of the
same specifications as that already in the
engine.
58)PARAFLU
UPanti-freeze is used in the
engine cooling system. Use fluid of the
same type as that contained in the cooling
system for any top-ups. PARAFLU
UP
cannot be mixed with any other type of
fluid. If this happens, do not start the
engine under any circumstances and
contact a Fiat Dealership.
59)Prevent brake fluid, which is highly
corrosive, from coming into contact with
painted parts. Should it happen,
immediately wash with water.
60)If the vehicle must remain unused for a
long time at a very low temperature,
remove the battery and take it to a warm
place, to avoid freezing.61)Incorrect installation of electric and
electronic devices may cause severe
damage to your car. After purchasing your
vehicle, if you wish to install any
accessories (e.g. anti-theft, radio phone,
etc.), go to a Fiat Dealership, which will
suggest the most suitable devices and
advise you whether a higher capacity
battery needs to be installed.
IMPORTANT
3)The used engine oil and the filter that has
been replaced contain substances that are
harmful to the environment. To change the
oil and filters, we advise you to contact a
Fiat Dealership.
4)Batteries contain substances which are
very dangerous for the environment. For
battery replacement, contact a Fiat
Dealership.
BATTERY
RECHARGING
IMPORTANT NOTES
IMPORTANT The battery recharging
procedure is given as information only.
To carry out this operation contact a
Fiat Dealership.
IMPORTANT After setting the ignition
device to STOP and having closed the
driver side door, wait at least one
minute before disconnecting the
electrical supply from the battery. When
reconnecting the electrical supply to the
battery, make sure that the ignition
device is in the STOP position and the
driver side door is closed.
IMPORTANT Charging should be slow
at a low ampere rating for
approximately 24 hours. Charging for a
longer time may damage the battery.
IMPORTANT The cables of the
electrical system must be correctly
reconnected to the battery, i.e. the
positive cable (+) to the positive
terminal and the negative cable (–) to
the negative terminal. The battery
terminals are marked with the positive
(+) and negative (–) symbols, and are
shown on the battery cover. The battery
terminals must also be corrosion-free
and firmly secured to the terminals. If a
158
SERVICING AND CARE