2016 FIAT TIPO 5DOORS STATION WAGON tow
[x] Cancel search: towPage 14 of 240
STEERING LOCK
Activation
When the key is in the STOP position,
remove the key and turn the steering
wheel until it locks.
IMPORTANT If the ignition key has been
moved from the MAR to the STOP
position, the steering lock cannot
engage until the key is removed from
the ignition device.
Deactivation
Move the steering wheel slightly and
turn the key to MAR.
4) 5) 6)
WARNING
2)If the ignition device has been tampered
with (e.g. an attempted theft), have it
checked by a Fiat Dealership before driving
again.
3)Always take the key with you when you
leave your vehicle to prevent someone
from accidentally operating the controls.
Remember to engage the parking brake.
Never leave children unattended in the
vehicle.
4)It is absolutely forbidden to carry out any
after-market operation involving steering
system or steering column modifications
(e.g. installation of anti-theft device) that
could adversely affect performance,
invalidate the warranty, cause serious
safety problems and also result in the car
not meeting type-approval requirements.5)Never extract the mechanical key while
the vehicle is moving. The steering wheel
will automatically lock as soon as it is
turned. This holds true for cars being
towed as well.
6)Before exiting the vehicle, ALWAYS
engage the parking brake, steer the
wheels, engage the first gear if uphill and
the reverse if downhill. If the vehicle is
parked on a steep slope, chock the wheels
with wedges or stones. When leaving the
vehicle, always lock all the doors by
pressing the button on the key.
FIAT CODE
The Fiat Code system prevents
unauthorised use of the vehicle,
disabling engine starting.
Operation
Each time the vehicle is started by
turning the ignition key to MAR, the Fiat
Code system control unit sends a
recognition code to the Powertrain
Control Module to deactivate the
immobiliser.
The code is sent only if the Fiat Code
system control unit has acknowledged
the code received from the key.
Each time the ignition key is turned to
STOP, the Fiat Code system
deactivates the functions of the
Powertrain Control Module.
Irregular operation
If, during starting, the key code is not
correctly recognised, the
symbol is
displayed on the instrument panel (see
the instructions in the "Warning lights
and messages" paragraph, "Knowing
the instrument panel" chapter). This
condition leads to the engine switching
off after 2 seconds. In this case, bring
the ignition device to STOP and then to
MAR; if it is still blocked, try with the
other keys provided. If it is still not
12
KNOWING YOUR CAR
Page 23 of 240

EXTERNAL LIGHTS
The left-hand stalk 1 fig. 26 operates
most of the external lights. The exterior
lights turn on also with the ignition key
in the MAR position. The instrument
panel and the various dashboard
controls will come on with the external
lights.
DAYTIME RUNNING
LIGHTS (DRL)
"Daytime Running Lights"
19) 20)
With the key in MAR position and the
ring nut turned to theOposition, the
daytime running lights and the rear side
lights switch on automatically; the other
lights and the internal lighting remain
off. If the daytime running lights are
deactivated (for versions/markets whereit is provided), no light comes on when
the ring nut is turned toO.
DIPPED HEADLIGHTS
With the ignition key turned to MAR,
turn the ring nut 1 fig. 26 to
.Ifthe
dipped beam headlights are activated,
the daytime running lights are switched
off and the dipped beam headlights,
rear side lights and number plate lights
are switched on. The
warning light
switches on in the instrument panel.
PARKING LIGHTS
These lights can be turned on with
ignition device in STOP position or with
the key removed, by moving the left
stalk ring nut first to positionOand
then to position
.
The
warning light switches on in
the instrument panel.
Repeat the same operation to switch
them off.
AUTO FUNCTION(Dusk sensor)
(where provided)
This is an infrared LED sensor that
works in conjunction with the rain
sensor and is located on the
windscreen. It is able to detect
variations in outside lighting based on
the light sensitivity set in the display
Menu or theUconnect™ 5"or7" HD
system (where provided).The higher the sensitivity, the lower the
amount of external light needed to
automatically switch the external lights
on.
Function activation
Turn the left stalk ring nut to position
.
IMPORTANT The function can only be
activated with the ignition device at
MAR.
Function deactivation
To deactivate the function, turn the left
stalk ring nut to a position other than
.
MAIN BEAM HEADLIGHTS
With ring nut in position, push the
stalk forward toward the dashboard
(stable position). The
warning light
switches on in the instrument panel.
They are switched off by pulling the
stalk towards the steering wheel.
MAIN BEAM HEADLIGHTS
Flashing the headlights
Pull the left stalk 1 fig. 27 toward
yourself, to the stable position; the stalk
goes back to the central stable position
when it is released.
With main beam headlights on, the
warning light on the instrument
panel will come on at the same time.
2604126J0001EM
21
Page 24 of 240
HEADLIGHT ALIGNMENT
CORRECTOR
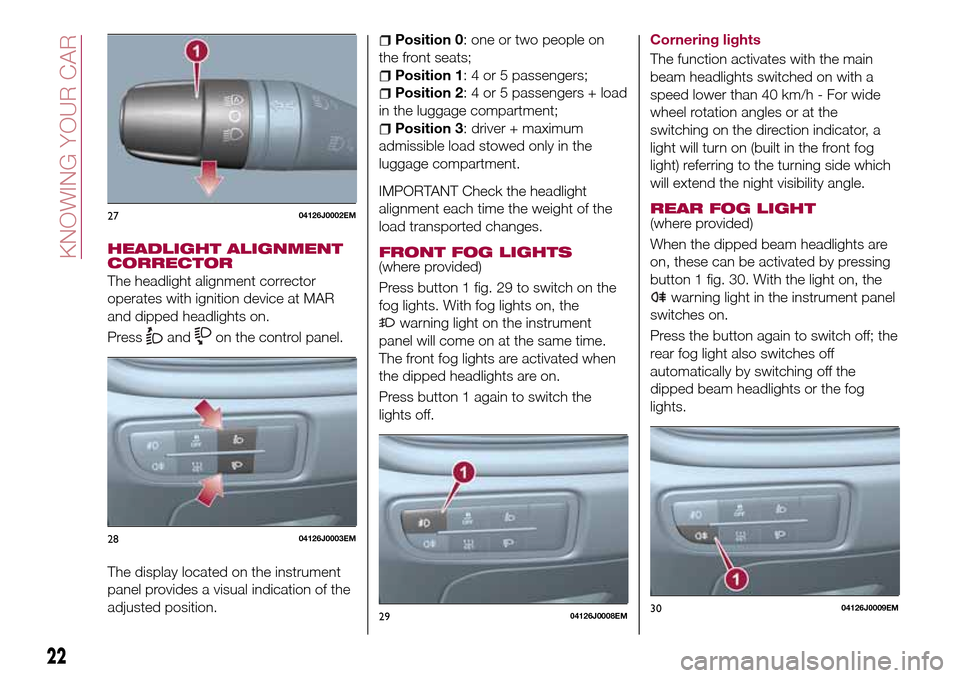
The headlight alignment corrector
operates with ignition device at MAR
and dipped headlights on.
Press
andon the control panel.
The display located on the instrument
panel provides a visual indication of the
adjusted position.
Position 0: one or two people on
the front seats;
Position 1: 4 or 5 passengers;
Position 2: 4 or 5 passengers + load
in the luggage compartment;
Position 3: driver + maximum
admissible load stowed only in the
luggage compartment.
IMPORTANT Check the headlight
alignment each time the weight of the
load transported changes.
FRONT FOG LIGHTS
(where provided)
Press button 1 fig. 29 to switch on the
fog lights. With fog lights on, the
warning light on the instrument
panel will come on at the same time.
The front fog lights are activated when
the dipped headlights are on.
Press button 1 again to switch the
lights off.Cornering lights
The function activates with the main
beam headlights switched on with a
speed lower than 40 km/h - For wide
wheel rotation angles or at the
switching on the direction indicator, a
light will turn on (built in the front fog
light) referring to the turning side which
will extend the night visibility angle.
REAR FOG LIGHT(where provided)
When the dipped beam headlights are
on, these can be activated by pressing
button 1 fig. 30. With the light on, the
warning light in the instrument panel
switches on.
Press the button again to switch off; the
rear fog light also switches off
automatically by switching off the
dipped beam headlights or the fog
lights.
2704126J0002EM
2804126J0003EM
2904126J0008EM3004126J0009EM
22
KNOWING YOUR CAR
Page 26 of 240
battery from being drained once the
doors are closed. In any case, if a light
is left on by mistake, the ceiling light
switches off automatically about 15
minutes after the engine has been
switched off.
Ceiling light timing
On certain versions, to facilitate getting
in/out of the vehicle at night or in
poorly-lit areas, two timed modes have
been provided.
Timing while getting into the car
The ceiling lights switch on according to
the following modes:
for a few seconds when the doors
are unlocked;
for about 3 minutes when one of the
doors is opened;
for a few seconds when the doors
are locked.
Timing is interrupted when the ignition
device is turned to MAR.
Timing while getting out of the car
The roof lights come on when the key is
removed from the ignition within 2
minutes of switching off the engine, on
opening and closing a door with the
removed key.
The timing stops automatically when
the doors are locked.
WINDSCREEN /
REAR WINDOW
WIPERS
The right stalk controls screen
wiper/washer operation.
Operation is only possible with the
ignition device at MAR.
WINDSCREEN WASHER /
WIPER
Operation
21)
5) 6)
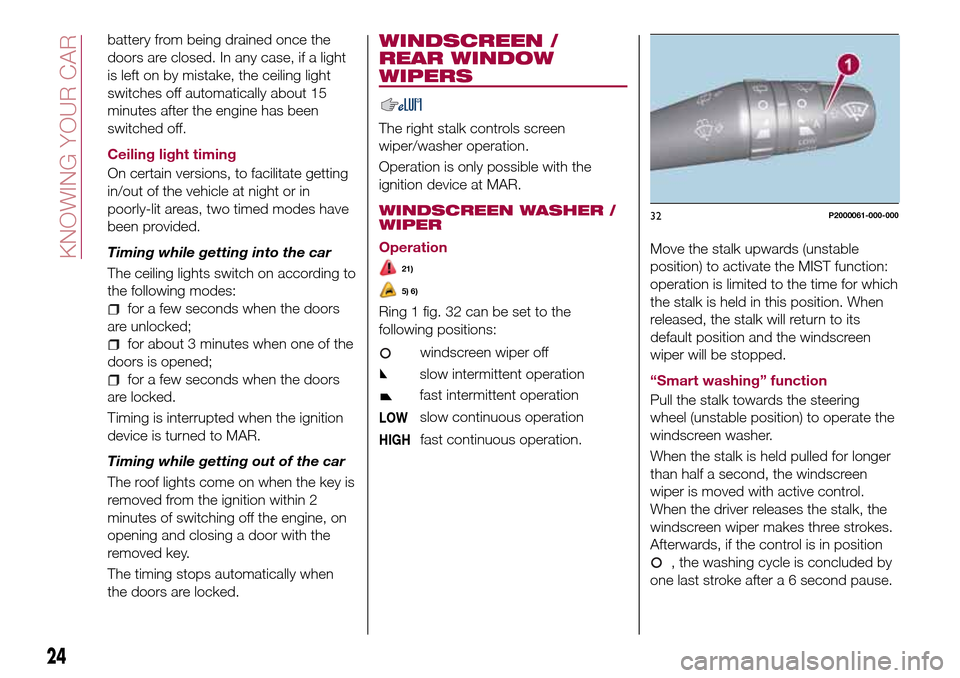
Ring 1 fig. 32 can be set to the
following positions:
windscreen wiper off
slow intermittent operation
fast intermittent operation
LOWslow continuous operation
HIGHfast continuous operation.
Move the stalk upwards (unstable
position) to activate the MIST function:
operation is limited to the time for which
the stalk is held in this position. When
released, the stalk will return to its
default position and the windscreen
wiper will be stopped.
“Smart washing” function
Pull the stalk towards the steering
wheel (unstable position) to operate the
windscreen washer.
When the stalk is held pulled for longer
than half a second, the windscreen
wiper is moved with active control.
When the driver releases the stalk, the
windscreen wiper makes three strokes.
Afterwards, if the control is in position
, the washing cycle is concluded by
one last stroke after a 6 second pause.
32P2000061-000-000
24
KNOWING YOUR CAR
Page 27 of 240

If the position isLOWorHIGH, the
smart washing function is not carried
out.
“Service Position” function
This function makes it possible to
replace the wipers or protect them in
conditions of ice and/or snow.
It can only be activated after turning off
the vehicle.
The Service Position can be explicitly
requested by the driver within two
minutes of turning off the vehicle, when
the wipers have correctly returned to
the parking position.
The driver can enable the function by
turning the ring nut to positionOand
moving the stalk upwards, to the MIST
position, more than three times. The
activations are used to position the
wipers as preferred. The function is
deactivated when the vehicle is turned
on, with a wiping request or when the
vehicle is moving (speed above 5
Km/h).
IMPORTANT Make sure, when turning
on the vehicle, that the windscreen is
free of snow or ice before turning the
ignition key.RAIN SENSOR(where provided)
7) 8)
This is a device located behind the
interior rear view mirrorfig. 33, in
contact with the windscreen and can
measure the amount of rain and,
consequently, manage the automatic
wiping mode of the windscreen in
accordance with the amount of water
on the screen (see the “Automatic
Wiping” paragraph).
REAR WINDOW WIPER /
WASHER
Ring nut 2, shown in fig. 34 can be set
to the following positions:
rear window wiper stopped
intermittent operation
continuous operation, without
pausing between two strokes.
The rear window wiper can be activated
in the following ways:
intermittent with a 2-second pause
between two strokes, when ring nut 2 is
in position
and the windscreen
wiper is not in operation;
synchronous (at half the windscreen
wiper frequency), when ring nut 2 is in
position
and the windscreen
wiper is in operation or when ring nut 2
is in position , reverse gear is
engaged and the windscreen wiper is in
operation;
continuous when ring nut 2 is in
position
.
Push the stalk towards the dashboard
(rocking position) to activate the rear
window washer jet. Keep pushing the
lever to automatically activate both the
rear window washer jet and the rear
window wiper with a single movement.
Releasing the stalk will activate three
3304146J0003EM
34P2000062-000-000
25
Page 63 of 240
49)The capability of the TC must never be
tested irresponsibly and dangerously, in
such a way as to compromise personal
safety and the safety of others.
50)The PBA system cannot overrule the
natural laws of physics, and cannot
increase the grip available according to the
condition of the road.
51)The PBA system cannot prevent
accidents, including those due to excessive
speed on corners, driving on low-grip
surfaces or aquaplaning.
52)The capability of the PBA system must
never be tested irresponsibly and
dangerously, in such a way as to
compromise the safety of the driver, the
other occupants of the vehicle or any other
road user.
53)The Hill Hold Control system is not a
parking brake; therefore, never leave the
vehicle without having engaged the parking
brake, turned the engine off and engaged
first gear, so that it is parked in safe
conditions (for further information read the
"Parking" paragraph in the "Starting and
driving" chapter).
54)There may be situations on small
gradients (less than 8%), with vehicle
laden, in which the Hill Hold Control system
may not activate, causing a slight reversing
motion and increasing the risk of collision
with another vehicle or object. The driver is,
in any case, responsible for safe driving.
55)The performance of a vehicle with ERM
must never be tested in imprudent or
dangerous ways, with the possibility of
putting the safety of the driver or other
people at risk.56)When towing trailers, the utmost
caution at the wheel is recommended.
Never exceed the maximum permitted
loads (see the description in the "Weights"
paragraph in the "Technical Specifications"
chapter).
57)The TSC system cannot prevent
swerving for all trailers. If the system
activates during driving, reduce the speed,
stop the vehicle in a safe place and arrange
the load correctly to prevent the trailer from
swerving.DRIVING
ASSISTANCE
SYSTEMS
FULL BRAKE CONTROL
SYSTEM
58) 59) 60) 61)
18) 19) 20) 21) 22) 23) 24) 25) 26)
The Full Brake Control system is a
SUPPLEMENTARY AID to help the
driver avoid hitting the vehicles in front.
It does not replace the driver, who must
maintain the safety distance and adjust
the vehicle’s speed according to the
traffic, visibility and weather conditions,
even when the system is active.
DO NOT wait for a collision warning to
reduce speed. If the driver fails to use
the brake pedal, it could cause a
collision.
The Full Brake Control system does not
detect pedestrians, animals or other
obstacles that cross the direction of
travel, nor vehicles traveling in the
opposite direction.
The Fill Brake Control system consists
of a radar located behind the front
bumper fig. 53.
61
Page 67 of 240
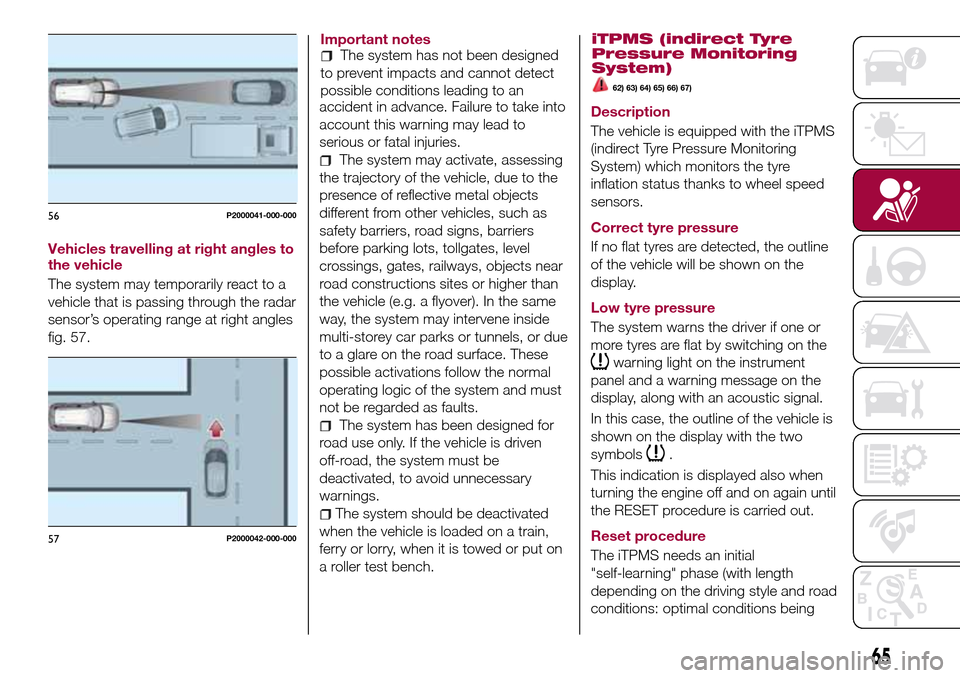
Vehicles travelling at right angles to
the vehicle
The system may temporarily react to a
vehicle that is passing through the radar
sensor’s operating range at right angles
fig. 57.Important notes
The system has not been designed
to prevent impacts and cannot detect
possible conditions leading to an
accident in advance. Failure to take into
account this warning may lead to
serious or fatal injuries.
The system may activate, assessing
the trajectory of the vehicle, due to the
presence of reflective metal objects
different from other vehicles, such as
safety barriers, road signs, barriers
before parking lots, tollgates, level
crossings, gates, railways, objects near
road constructions sites or higher than
the vehicle (e.g. a flyover). In the same
way, the system may intervene inside
multi-storey car parks or tunnels, or due
to a glare on the road surface. These
possible activations follow the normal
operating logic of the system and must
not be regarded as faults.
The system has been designed for
road use only. If the vehicle is driven
off-road, the system must be
deactivated, to avoid unnecessary
warnings.
The system should be deactivated
when the vehicle is loaded on a train,
ferry or lorry, when it is towed or put on
a roller test bench.
iTPMS (indirect Tyre
Pressure Monitoring
System)
62) 63) 64) 65) 66) 67)
Description
The vehicle is equipped with the iTPMS
(indirect Tyre Pressure Monitoring
System) which monitors the tyre
inflation status thanks to wheel speed
sensors.
Correct tyre pressure
If no flat tyres are detected, the outline
of the vehicle will be shown on the
display.
Low tyre pressure
The system warns the driver if one or
more tyres are flat by switching on the
warning light on the instrument
panel and a warning message on the
display, along with an acoustic signal.
In this case, the outline of the vehicle is
shown on the display with the two
symbols
.
This indication is displayed also when
turning the engine off and on again until
the RESET procedure is carried out.
Reset procedure
The iTPMS needs an initial
"self-learning" phase (with length
depending on the driving style and road
conditions: optimal conditions being
56P2000041-000-000
57P2000042-000-000
65
Page 68 of 240
each time tyre pressure is modified;
when even only one tyre is changed;
when tyres are rotated/inverted;
when the space-saver wheel is fitted.
Before carrying out the RESET
procedure, inflate the tyres to the rated
pressure values specified in the inflation
pressure table (see "Wheels" paragraph
in the "Technical specifications"
chapter).
If the RESET is not carried out, in all
above cases, the
warning light may
give false indications on one or more
tyres.
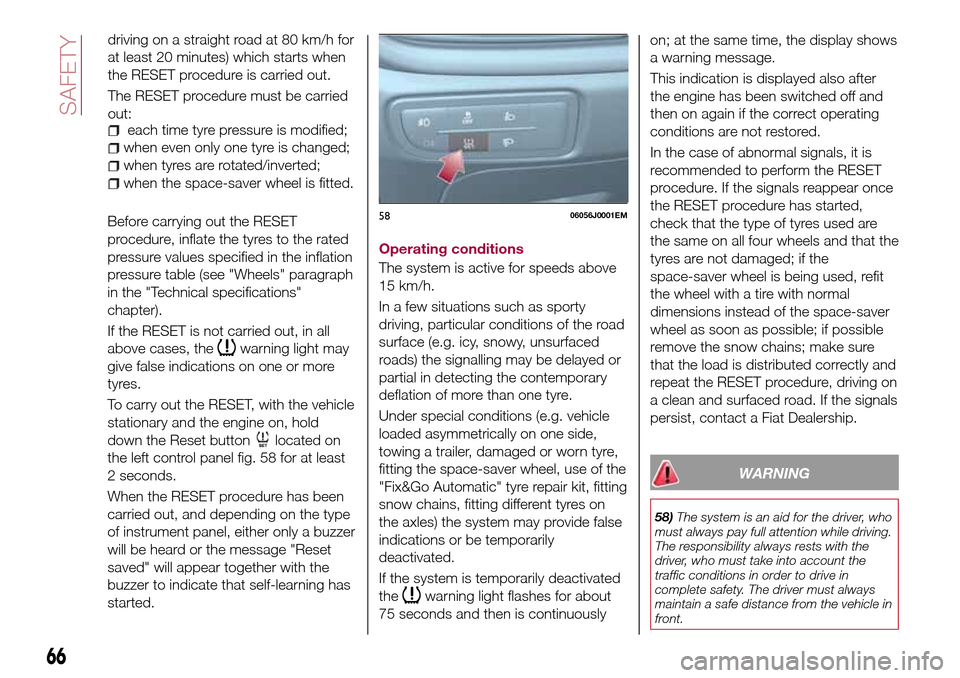
To carry out the RESET, with the vehicle
stationary and the engine on, hold
down the Reset button
located on
the left control panel fig. 58 for at least
2 seconds.
When the RESET procedure has been
carried out, and depending on the type
of instrument panel, either only a buzzer
will be heard or the message "Reset
saved" will appear together with the
buzzer to indicate that self-learning has
started.Operating conditions
The system is active for speeds above
15 km/h.
In a few situations such as sporty
driving, particular conditions of the road
surface (e.g. icy, snowy, unsurfaced
roads) the signalling may be delayed or
partial in detecting the contemporary
deflation of more than one tyre.
Under special conditions (e.g. vehicle
loaded asymmetrically on one side,
towing a trailer, damaged or worn tyre,
fitting the space-saver wheel, use of the
"Fix&Go Automatic" tyre repair kit, fitting
snow chains, fitting different tyres on
the axles) the system may provide false
indications or be temporarily
deactivated.
If the system is temporarily deactivated
the
warning light flashes for about
75 seconds and then is continuouslyon; at the same time, the display shows
a warning message.
This indication is displayed also after
the engine has been switched off and
then on again if the correct operating
conditions are not restored.
In the case of abnormal signals, it is
recommended to perform the RESET
procedure. If the signals reappear once
the RESET procedure has started,
check that the type of tyres used are
the same on all four wheels and that the
tyres are not damaged; if the
space-saver wheel is being used, refit
the wheel with a tire with normal
dimensions instead of the space-saver
wheel as soon as possible; if possible
remove the snow chains; make sure
that the load is distributed correctly and
repeat the RESET procedure, driving on
a clean and surfaced road. If the signals
persist, contact a Fiat Dealership.
WARNING
58)The system is an aid for the driver, who
must always pay full attention while driving.
The responsibility always rests with the
driver, who must take into account the
traffic conditions in order to drive in
complete safety. The driver must always
maintain a safe distance from the vehicle in
front.
5806056J0001EM
66
SAFETY
driving on a straight road at 80 km/h for
at least 20 minutes) which starts when
the RESET procedure is carried out.
The RESET procedure must be carried
out: