2016 FIAT TIPO 4DOORS fog light
[x] Cancel search: fog lightPage 10 of 204

INSTRUMENT PANEL
1. Adjustable side air diffusers 2. Left stalk: direction indicators, main beam headlights, flashings 3. Instrument panel
4. Steering wheel controls: Cruise Control 5. Right stalk: windscreen wiper / windscreen washer, setting of the rain sensor
sensitivity level
6.Adjustable central air diffusers 7.
Uconnect™radio8. Passenger front airbag 9.
Glove compartment 10.Control buttons
11.Buttons on the central console: seat heating, USB port + AUX plug panel,
socket/cigarette lighter12.
Climate controls
13. Ignition device 14. Driver front airbag 15. Steering wheel controls: display menu, trip computer,
multimedia, telephone, voice recognition 16. Control panel: front fog lights (where present), rear fog lights, headlight alignment
adjustment, iTPMS reset, ESC OFF (where present).
103036J0001EM
8
KNOWING YOUR CAR
Page 22 of 204

lights and the internal lighting remain
off. If the daytime running lights are
deactivated (for versions/markets where
it is provided), no light comes on when
the ring nut is turned toO.
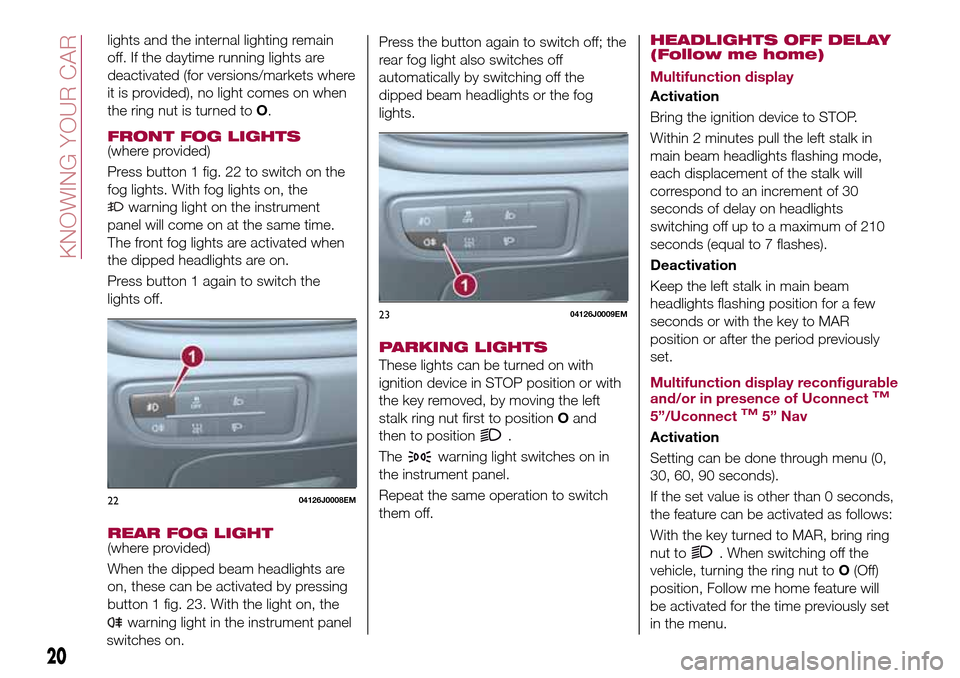
FRONT FOG LIGHTS(where provided)
Press button 1 fig. 22 to switch on the
fog lights. With fog lights on, the
warning light on the instrument
panel will come on at the same time.
The front fog lights are activated when
the dipped headlights are on.
Press button 1 again to switch the
lights off.
REAR FOG LIGHT(where provided)
When the dipped beam headlights are
on, these can be activated by pressing
button 1 fig. 23. With the light on, the
warning light in the instrument panel
switches on.Press the button again to switch off; the
rear fog light also switches off
automatically by switching off the
dipped beam headlights or the fog
lights.
PARKING LIGHTS
These lights can be turned on with
ignition device in STOP position or with
the key removed, by moving the left
stalk ring nut first to positionOand
then to position
.
The
warning light switches on in
the instrument panel.
Repeat the same operation to switch
them off.
HEADLIGHTS OFF DELAY
(Follow me home)
Multifunction display
Activation
Bring the ignition device to STOP.
Within 2 minutes pull the left stalk in
main beam headlights flashing mode,
each displacement of the stalk will
correspond to an increment of 30
seconds of delay on headlights
switching off up to a maximum of 210
seconds (equal to 7 flashes).
Deactivation
Keep the left stalk in main beam
headlights flashing position for a few
seconds or with the key to MAR
position or after the period previously
set.
Multifunction display reconfigurable
and/or in presence of Uconnect
TM
5”/UconnectTM5” Nav
Activation
Setting can be done through menu (0,
30, 60, 90 seconds).
If the set value is other than 0 seconds,
the feature can be activated as follows:
With the key turned to MAR, bring ring
nut to
. When switching off the
vehicle, turning the ring nut toO(Off)
position, Follow me home feature will
be activated for the time previously set
in the menu.
2204126J0008EM
2304126J0009EM
20
KNOWING YOUR CAR
Page 23 of 204

If the set value is at 0 seconds, the
feature can be activated as follows:
Bring the ignition device to STOP.
Within 2 minutes pull the left stalk in
main beam headlights flashing mode,
each displacement of the stalk will
correspond to an increment of 30
seconds of delay on headlights
switching off up to a maximum of 210
seconds (equal to 7 flashes).
If the vehicle also features the dusk
sensor, it is possible to activate feature
in automatic mode - with key to MAR
bring the ring nut to
position.
Bringing the key in OFF position with
the headlights turned on, the feature
automatically activates for the time
previously set in menu.
Deactivation
If activation is done by pulling the main
beam headlight stalk, deactivate the
feature keeping the left stalk in main
beam headlights flashing position for at
least two seconds, with key to MAR or
after the set time.
If activation is done via the ring nut of
lights placed on the left stalk, it won't
be possible to disable the feature and
the switching off of the headlights will
happen at the end of the set time or
with key to MAR.
MAIN BEAM HEADLIGHTS
With ring nut in position, push the
stalk forward toward the dashboard
(stable position). The
warning light
switches on in the instrument panel.
They are switched off by pulling the
stalk towards the steering wheel.
Flashing the headlights
Pull the left stalk 1 fig. 24 toward
yourself, to the stable position; the stalk
goes back to the central stable position
when it is released.
With main beam headlights on, the
warning light on the instrument
panel will come on at the same time.
DIRECTION INDICATORS
Bring the left stalk 1 fig. 24 to the
(stable) position:
upwards: activates the right direction
indicator;downwards: activates the left direction
indicator.
The
orwarning light respectively
will flash on the instrument panel.
The direction indicators switch off
automatically when the steering wheel
is straightened or when the daytime
running lights (D.R.L.) /parking lights are
activated.
Cornering lights
The function activates with the main
beam headlights switched on with a
speed lower than 40 km/h - For wide
wheel rotation angles or at the
switching on the direction indicator, a
light will turn on (built in the front fog
light) referring to the turning side which
will extend the night visibility angle.
HEADLIGHT ALIGNMENT
ADJUSTMENT
Headlight alignment corrector
The headlight alignment corrector
operates with ignition device at MAR
and dipped headlights on.
Press
andon the control panel.2404126J0002EM
21
Page 49 of 204

Warning light What it means
ESC SYSTEM
ESC system activation
Intervention by the system is indicated by the flashing of the warning light: it indicates that the car is in
critical stability and grip conditions.
ESC system failure
If the warning light does not switch off, or if it stays on with the engine running, a failure was found on the
ESC system. Contact a Fiat Dealership as soon as possible.
Hill Hold Control system failure
The warning light turns on to indicate a Hill Holder Control system failure. Contact a Fiat Dealership as soon
as possible.
PARTIAL DEACTIVATION OF ACTIVE SAFETY SYSTEMS
The warning light switches on to indicate that some active safety systems have been partially deactivated.
When the systems are reactivated, the warning light switches off.
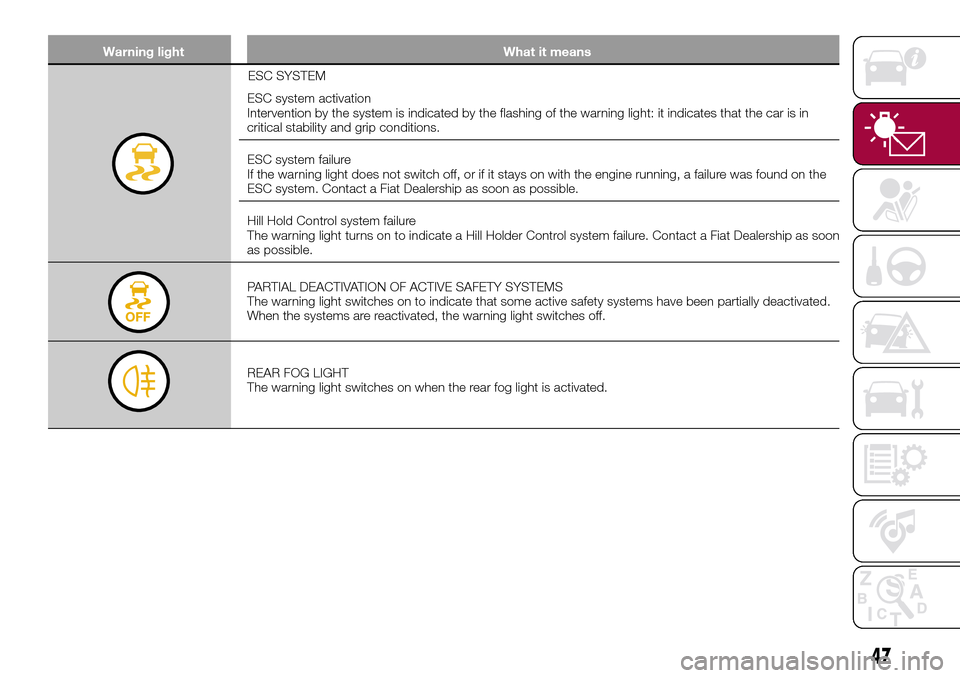
REAR FOG LIGHT
The warning light switches on when the rear fog light is activated.
47
Page 53 of 204

Warning light What it means
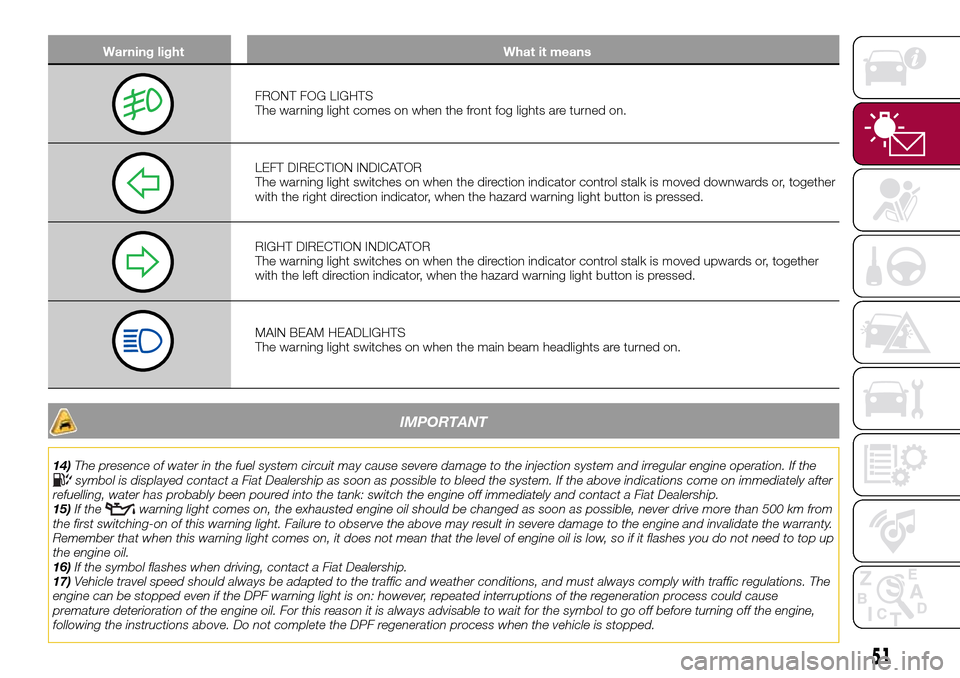
FRONT FOG LIGHTS
The warning light comes on when the front fog lights are turned on.
LEFT DIRECTION INDICATOR
The warning light switches on when the direction indicator control stalk is moved downwards or, together
with the right direction indicator, when the hazard warning light button is pressed.
RIGHT DIRECTION INDICATOR
The warning light switches on when the direction indicator control stalk is moved upwards or, together
with the left direction indicator, when the hazard warning light button is pressed.
MAIN BEAM HEADLIGHTS
The warning light switches on when the main beam headlights are turned on.
IMPORTANT
14)The presence of water in the fuel system circuit may cause severe damage to the injection system and irregular engine operation. If thesymbol is displayed contact a Fiat Dealership as soon as possible to bleed the system. If the above indications come on immediately after
refuelling, water has probably been poured into the tank: switch the engine off immediately and contact a Fiat Dealership.
15)If the
warning light comes on, the exhausted engine oil should be changed as soon as possible, never drive more than 500 km from
the first switching-on of this warning light. Failure to observe the above may result in severe damage to the engine and invalidate the warranty.
Remember that when this warning light comes on, it does not mean that the level of engine oil is low, so if it flashes you do not need to top up
the engine oil.
16)If the symbol flashes when driving, contact a Fiat Dealership.
17)Vehicle travel speed should always be adapted to the traffic and weather conditions, and must always comply with traffic regulations. The
engine can be stopped even if the DPF warning light is on: however, repeated interruptions of the regeneration process could cause
premature deterioration of the engine oil. For this reason it is always advisable to wait for the symbol to go off before turning off the engine,
following the instructions above. Do not complete the DPF regeneration process when the vehicle is stopped.
51
Page 55 of 204

Symbol What it means
FUEL CUT-OFF SYSTEM OPERATION
The symbol switches on in the event of fuel cut-off system intervention.
For reactivating the fuel cut-off system, refer to the description in the "Fuel cut-off system"
section in the "In an emergency" chapter. If it is still not possible to restore the fuel supply,
contact a Fiat Dealership.
FUEL CUT-OFF SYSTEM FAILURE
The symbol switches on in the event of fuel cut-off system failure. Contact a Fiat Dealership as
soon as possible.
START&STOP SYSTEM FAILURE
(for versions/markets, where provided)
The symbol switches on to report a failure of the Start&Stop system. The display will show a
dedicated message. Contact a Fiat Dealership as soon as possible.
EXTERIOR LIGHTS FAILURE
The symbol switches on to indicate a failure on the following lights: daytime running lights
(DRLs); parking lights; side lights; direction indicators; rear fog light; reversing light; number
plate lights.
The failure may be caused by a blown bulb, a blown protection fuse or an interruption of the
electrical connection.
FUEL LEVEL SENSOR FAILURE
The symbol switches on in the event of fuel level sensor failure. Contact a Fiat Dealership.
POSSIBLE ICE ON ROAD
The symbol turns on when the outside temperature falls to or below 3°C.
IMPORTANT In the event of outside temperature sensor failure, the digits that indicate the
value are replaced by dashes.
DUSK SENSOR FAILURE
The symbol switches on along with a message on the display in the event of dusk sensor
failure. Contact a Fiat Dealership as soon as possible.
53
Page 103 of 204

Light bulbs Type Power Figure reference
Front side lights/Daytime running lights (DRL) H15 15W 4
Main beam headlights (halogen) H15 55 W 4
Dipped headlights H7 55 W 3
Front direction indicators PY21W 21 W 2
Number plate W5W 5 W 1
Rear side/brake light P21W 21 W 2
Rear direction indicators WY16W 16 W 1
Reversing light W16W 16 W 1
3rd stop W5W 5 W 1
Fog lights H11 55 W 4
Rear fog light W16W 16 W 1
Front ceiling light C5W 5 W 1
Front roof lights (sun visors) C5W 5 W 1
Rear ceiling light C5W 6W 1
Luggage compartment light W5W 5 W 1
Glove compartment light W5W 5 W 1
101
Page 104 of 204

REPLACING AN
EXTERNAL BULB
Front bulb position
1. Dipped headlights
2. Fog lights
3. Main beam headlights/Daytime
running lights (DRL)
4. Direction indicator.
Main beam headlights/Daytime
running lights (DRL)
To replace the bulb 3 fig. 89, proceed
as follows:
working from inside the engine
compartment, remove rubber cap 1
fig. 90;
rotate the bulb-bulb holder assembly
anticlockwise and extract it;
disconnect the electrical connector
and replace the bulb-bulb holder
assembly 2;
reconnect the electrical connector to
the new assembly;
then insert the assembly in its
housing and turn it clockwise, making
sure that it is locked correctly;
refit the rubber cap 1.
IMPORTANT Only replace the bulb
when the engine is off. Also ensure that
the engine is cold, to prevent the risk of
burns.
Dipped headlights
Right headlight
To replace the bulb 1 fig. 89, proceed
as follows:
steer the vehicle wheels completely
inwards;
adjust the tabs indicated in the figure
fig. 91 and remove the flap;
remove the rubber plug
disconnect the electrical connector;
extract the bulb, releasing it from the
retaining springs;
replace the new bulb and carry out
the procedure described previously in
reverse.
Left headlight
working from inside the engine
compartment, remove the rubber cap
from the dipped beam headlight bulb 1
fig. 89;
extract the bulb, releasing it from the
retaining springs;
disconnect the electrical connector
and replace the bulb 1 fig. 89;
reconnect the electrical connector to
the new bulb;
8908026J0002EM
9008026J0025EM9108026J0004EM
102
IN AN EMERGENCY