2016 FIAT FREEMONT window
[x] Cancel search: windowPage 333 of 412

Thousands Of Kilome-
ters20 40 60 80 100 120 140 160 180 200
12345678910
Check tire condition/wear
and adjust pressure, if
necessary; check TIREKIT
expiration date (if provided).
••••••••••
Check operation of lighting
system (headlights, direction
indicators, hazard lights,
passenger compartment
lights, instrument panel
warning lights, etc.).
••••••••••
Check and, if necessary,
top-up fluid levels (engine
coolant, brake/hydraulic
clutch fluid, windshield
washer fluid, battery fluid,
etc.)
••••••••••
Check exhaust gas
emissions/smokiness.••••••••••
Use the diagnosis socket to
check engine management
system operation; emissions
and (where provided) engine
oil deterioration.
••••••••••
Check windshield/rear
window wiper blade
position/wear.
•••••
327
KNOWING YOURVEHICLE
SAFETY
STARTING ANDDRIVING
WARNING LIGHTSANDMESSAGES
IN AN EMERGENCY
SERVICING AND CARE
TECHNICALSPECIFICATIONS
CONTENTS
Years
Page 337 of 412

Failure to perform the required mainte-
nance items may result in damage to the
vehicle.
Periodic Checks
Every 1,000 km or before long journeys, check and, if
necessary, restore:
• engine coolant;
• brake fluid;
• power steering fluid;
• windshield washer fluid level;
• tire inflation pressure and condition;
• operation of lighting system (headlights, direction indicators, hazard warning lights, etc.);
• operation of windshield washer/wiper system and positioning/wear of windshield/rear window wiper
blades.
Every 3,000 km, check and top up, if required, the
engine oil level.
Heavy-Duty Use Of The Car
If the car is used mainly under one of the following
conditions:
• towing a trailer or caravan; • dusty roads;
• short, repeated journeys (less than 7-8 km) at sub-
zero outside temperatures;
• engine often idling or driving long distances at low speeds or long periods of idleness.
You should perform the following inspections more
frequently than shown on the Scheduled Servicing Plan:
• check front disc brake pad conditions and wear;
• check cleanliness of hood and trunk locks, cleanli- ness and lubrication of linkage;
• visually inspect conditions of: engine, transmission, pipes and hoses (exhaust - fuel system - brakes) and
rubber elements (boots - sleeves - bushes - etc.);
• check battery charge and battery fluid level (electro- lyte);
• visually inspect condition of the accessory drive belts;
• check and, if necessary, change engine oil and replace oil filter;
• check and, if necessary, replace pollen filter;
• check and, if necessary, replace air cleaner.
331
KNOWING
YOUR
VEHICLE
SAFETY
STARTING
AND
DRIVING
WARNING
LIGHTS
AND
MESSAGES
IN AN
EMERGENCY
SERVICING
AND C ARE
TECHNICAL
SPECIFICATIONS
CONTENTS
Page 348 of 412

Car maintenance should be done at a
FIAT Dealership. For routine and minor
maintenance operations you wish to
carry out yourself, we do recommend you have
the proper equipment , genuine FIAT spare parts
and the necessary fluids; do not however carry out
these operations if you have no experience.
WIPER BLADES
Clean the rubber edges of the wiper blades and the
windshield and rear window periodically with a sponge
or soft cloth and a mild nonabrasive cleaner. This will
remove accumulations of salt, waxes, or road film, and
help reduce streaking and smearing.
Operation of the wipers on dry glass for long periods
may cause deterioration of the wiper blades. Always
use washer fluid when using the wipers to remove salt
or dirt from a dry windshield or rear window.
Avoid using the wiper blades to remove frost or ice
from the windshield or rear window. Make sure that
they are not frozen to the glass before turning them on
to avoid damaging the blade. Keep the blade rubber out
of contact with petroleum products such as engine oil,
gasoline, etc. NOTE:
Life expectancy of wiper blades varies depend-
ing on geographical area and frequency of use. Poor
performance of blades may be present with chattering,
marks, water lines or wet spots. If any of these condi-
tions are present, clean the wiper blades or replace as
necessary.
Rear Wiper Removal/Installation
1. Lift the pivot cap on the rear wiper arm upward, this will allow the rear wiper blade to be raised off of the
liftgate glass. (fig. 202)
NOTE: The rear wiper arm cannot be raised fully
upward unless the pivot cap is raised first.
(fig. 202)
1 — Wiper Arm
2 — Pivot Cap
342
KNOWING YOUR
VEHICLE
SAFETY
STARTING AND
DRIVING
WARNING LIGHTSAND
MESSAGES
IN AN
EMERGENCY
SERVICINGAND C ARE
TECHNICAL
SPECIFICATIONS
CONTENTS
Page 349 of 412

2. Lift the rear wiper arm upward to raise the wiperblade off of the liftgate glass.
3. Grab the bottom of the wiper blade and rotate it forward to unsnap the blade pivot pin from the
wiper blade holder. (fig. 203)
4. Install the wiper blade pivot pin into the wiper blade holder at the end of the wiper arm, and firmly press
the wiper blade until it snaps into place.
5. Lower the wiper blade and snap the pivot cap into place. ADDING WASHER FLUID
The windshield washer and the rear window washer
share the same fluid reservoir. The fluid reservoir is
located in the engine compartment. Be sure to check
the fluid level in the reservoir at regular intervals. Fill
the reservoir with windshield washer solvent (not
radiator antifreeze) and operate the system for a few
seconds to flush out the residual water.
When refilling the washer fluid reservoir, apply some
washer fluid to a cloth or towel and wipe the wiper
blades clean. This will help blade performance.
To prevent freeze-up of your windshield washer system
in cold weather, select a solution or mixture that meets
or exceeds the temperature range of your climate. This
rating information can be found on most washer fluid
containers.
The fluid reservoir will hold nearly 4 Liters of washer
fluid when the “Washer Fluid Low” message appears in
the EVIC display.
WARNING!
Commercially available windshield
wash er
solvents are flammable. They
could ignite and burn you. Care must be exer-
cised when filling or working around the washer
solution.
(fig. 203)
1 — Wiper Blade
2 — Blade Pivot Pin
3 — Wiper Arm
4 — Wiper Blade Holder
343
KNOWING
YOUR
VEHICLE
SAFETY
STARTING
AND
DRIVING
WARNING
LIGHTS
AND
MESSAGES
IN AN
EMERGENCY
SERVICING
AND C ARE
TECHNICAL
SPECIFICATIONS
CONTENTS
Page 364 of 412

Glass Surfaces
All glass surfaces should be cleaned on a regular basis
with any commercial household-type glass cleaner.
Never use an abrasive type cleaner. Use caution when
cleaning the inside rear window equipped with an
electric defroster. Do not use scrapers or other sharp
instruments that may scratch the elements.
When cleaning the rear view mirror, spray cleaner on
the towel or rag that you are using. Do not spray
cleaner directly on the mirror.
Cleaning Plastic Instrument Cluster Lenses
The lenses in front of the instruments in this vehicle are
molded in clear plastic. When cleaning the lenses, care
must be taken to avoid scratching the plastic.
1. Clean with a wet soft rag. A mild soap solution maybe used, but do not use high alcohol content or
abrasive cleaners. If soap is used, wipe clean with a
clean damp rag.
2. Dry with a soft cloth. Seat Belt Maintenance
Do not bleach, dye or clean the belts with chemical
solvents or abrasive cleaners. This will weaken the
fabric. Sun damage can also weaken the fabric.
If the belts need cleaning, use a mild soap solution or
lukewarm water. Do not remove the belts from the car
to wash them. Dry with a soft cloth.
Replace the belts if they appear frayed or worn or if the
buckles do not work properly.
WARNING!
A frayed or torn belt could rip apart in a
collisi on
and leave you with no protec-
tion. Inspect the belt system periodically, check-
ing for cuts, frays, or loose parts. Damaged parts
must be replaced immediately. Do not disas-
semble or modify the system. Seat belt assem-
blies must be replaced after a collision if they
have been damaged (i.e., bent retractor, torn
webbing, etc .).
CLEANING THE CUP HOLDERS
Clean with a damp cloth or towel using a mild deter-
gent.
358
KNOWING YOUR
VEHICLE
SAFETY
STARTING AND
DRIVING
WARNING LIGHTSAND
MESSAGES
IN AN
EMERGENCY
SERVICINGAND C ARE
TECHNICAL
SPECIFICATIONS
CONTENTS
Page 366 of 412

TECHNICAL SPECIFICATIONS
VEHICLE IDENTIFICATION NUMBER
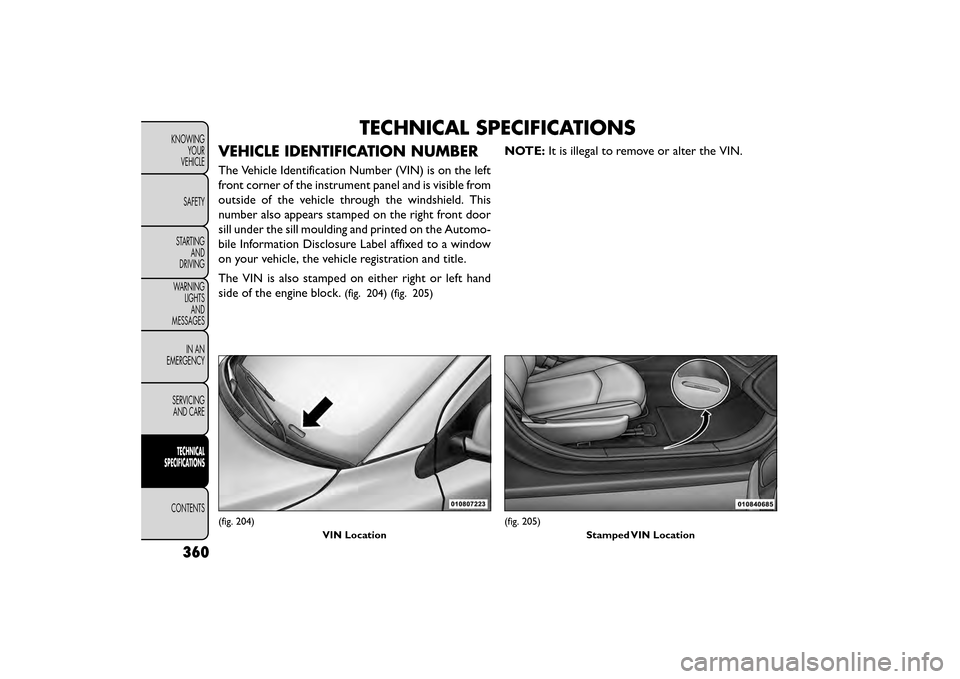
The Vehicle Identification Number (VIN) is on the left
front corner of the instrument panel and is visible from
outside of the vehicle through the windshield. This
number also appears stamped on the right front door
sill under the sill moulding and printed on the Automo-
bile Information Disclosure Label affixed to a window
on your vehicle, the vehicle registration and title.
The VIN is also stamped on either right or left hand
side of the engine block.
(fig. 204) (fig. 205)
NOTE:It is illegal to remove or alter the VIN.
(fig. 204)
VIN Location(fig. 205)Stamped VIN Location
360
KNOWINGYOUR
VEHICLE
SAFETY
STARTING AND
DRIVING
WARNING LIGHTSAND
MESSAGES
IN AN
EMERGENCY
SERVICINGAND CARE
TECHNICAL
SPECIFICATIONS
CONTENTS
Page 387 of 412

WARNING!
Carbon monoxide (CO) in exhaust gases
is deadly .
Follow the precautions below
to prevent carbon monoxide poisoning:
• Do not inhale exhaust gases.They contain car-
bon monoxide, a colorless and odorless gas which
can kill. Never run the engine in a closed area,
such as a garage, and never sit in a parked vehicle
with the engine running for an extended period.
If the vehicle is stopped in an open area with the
engine running for more than a short period,
adjust the ventilation system to force fresh, out-
side air into the vehicle.
• Guard against carbon monoxide with proper
maintenance. Have the exhaust system inspected
every time the vehicle is raised. Have any abnor-
mal conditions repaired promptly. Until re-
paired, drive with all side windows fully open.
• Keep the liftgate closed when driving your ve-
hicle to prevent carbon monoxide and other poi-
sonous exhaust gases from entering the vehicle.
FLEXIBLE FUEL — 3.6L ENGINE
ONLY (for versions/markets where
provided)
E-85 GENERAL INFORMATION
The information in this section is for Flexible Fuel
vehicles only. These vehicles may be identified by a
unique fuel filler door label that states Ethanol (E-85)
or Unleaded Gasoline Only. This section only cov-
ers those subjects that are unique to these vehicles.
Please refer to the other sections of this manual for
information on features that are common between
Flexible Fuel and gasoline-only powered vehicles.
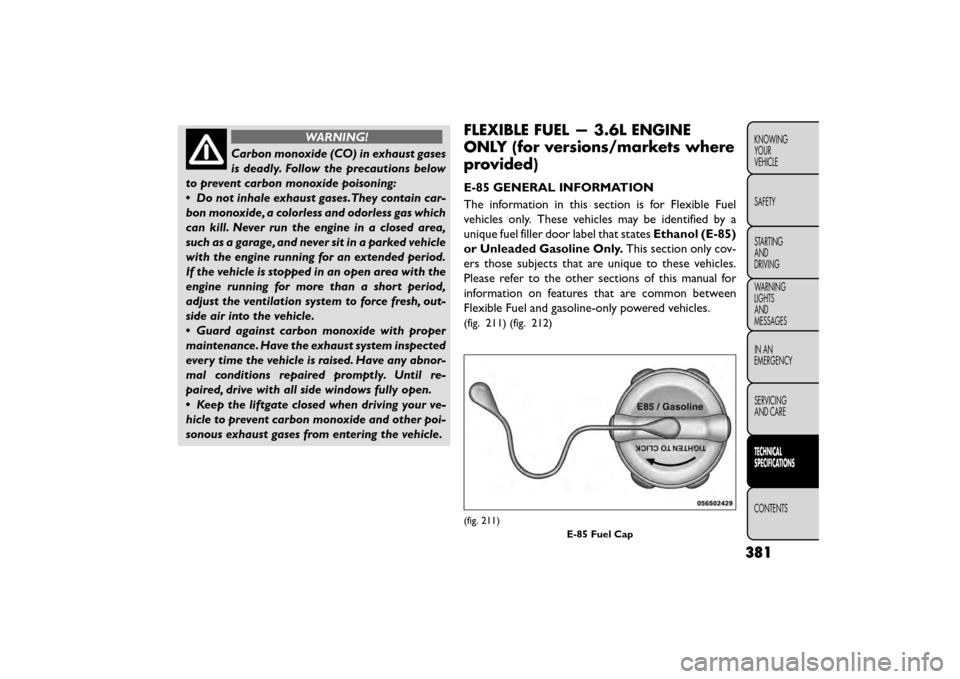
(fig. 211) (fig. 212)
(fig. 211)
E-85 Fuel Cap
381
KNOWING
YOUR
VEHICLE
SAFETY
STARTING
AND
DRIVING
WARNING
LIGHTS
AND
MESSAGES
IN AN
EMERGENCY
SERVICING
AND CARE
TECHNICAL
SPECIFICATIONS
CONTENTS
Page 393 of 412

CHASSIS
ComponentFluids and Lubricants Specs (Genuine Parts)
Automatic Transmission (for
versions/markets, where provided) Totally synthetic lubricant that meets FIAT Classification 9.55550-AV4
(TUTELA TRANSMISSION FORCE4, Contractual Technical Reference
No F108.F11).
Manual Transmission (for versions/
markets, where provided) Grade SAE 75W synthetic lubricant that meets FIAT Classification 9.55550-
MZ6 (TUTELA TRANSMISSION GEARFORCE Contractual Technical Refer-
ence N° F002.F10)
Brake/Clutch Master Cylinder Synthetic fluid that meets FIAT Classification 9.55597, FMVSS n° 116, DOT 4,
ISO 4925, SAE J-1704 (TUTELA TOP 4, Contractual Technical Reference
N° F001.A93)
Power Steering Reservoir Totally synthetic lubricant that meets FIAT Classification 9.55550-AV4
(TUTELA TRANSMISSION FORCE4, Contractual Technical Reference
N° F108.F11)
Windshield/Rear Window Washer
Fluid Mixture of alcohol, water and surfactants that meets FIAT Classification
9.55522, CUNA NC 956-11 (TUTELA PROFESSIONAL SC35, Contractual
Technical Reference N° F201.D02)
387
KNOWING
YOUR
VEHICLE
SAFETY
STARTING
AND
DRIVING
WARNING
LIGHTS
AND
MESSAGES
IN AN
EMERGENCY
SERVICING
AND CARE
TECHNICAL
SPECIFICATIONS
CONTENTS