Page 59 of 587
NOTE:The Passive Entry system will not operate if the
RKE transmitter battery is dead.
The vehicle doors can also be locked by using the lock
button located on the vehicle’s interior door panel.
Push The Door Handle Button To LockDO NOT Grab The Door Handle When Locking
4
GETTING TO KNOW YOUR VEHICLE 57
Page 60 of 587

To minimize the possibility of unintentionally locking a
Passive Entry RKE transmitter inside your vehicle, the")
Preventing Inadvertent Locking Of Passive Entry RKE
Transmitter In Vehicle (FOBIK-Safe)
To minimize the possibility of unintentionally locking a
Passive Entry RKE transmitter inside your vehicle, the
Passive Entry system is equipped with an automatic door
unlock feature which will function if the ignition switch
is in the OFF position.
FOBIK-Safe only executes in vehicles with Passive Entry.
There are three situations that trigger a FOBIK-Safe
search in any Passive Entry vehicle:
•A lock request is made by a valid Passive Entry RKE
transmitter while a door is ajar.
• A lock request is made by the Passive Entry door
handle while a door is ajar.
• A lock request is made by the door panel switch while
the door is ajar. When any of these situations occur, after all ajar doors are
shut, the FOBIK-Safe search will be executed. If it finds a
Passive Entry RKE transmitter inside the car, and it does
not find any Passive Entry RKE transmitters outside the
car, then the car will unlock and alert the customer.
NOTE:
The vehicle will only unlock the doors when a
valid Passive Entry RKE transmitter is detected inside the
vehicle, and no valid Passive Entry RKE transmitter is
detected outside the vehicle. The vehicle will not unlock
the doors when any of the following conditions are met:
• The doors are manually locked using the door lock
knobs.
• There is a valid Passive Entry RKE transmitter outside
the vehicle and within 5 ft (1.5 m) of either Passive
Entry door handle.
58 GETTING TO KNOW YOUR VEHICLE
Page 61 of 587
Emergency Unlocking Driver Door
If the Remote Keyless Entry (RKE) transmitter battery is
low or dead, the emergency key can be used to unlock the
driver side door lock cylinder.
To release the emergency key, proceed as follows:
1. Slide the emergency key release button to the side.
2. Remove the emergency key from the Key Fob withRemote Control housing.
NOTE:The Emergency Key can be inserted into the door
lock cylinder in either direction.
Emergency Key Release
1 — Emergency Key Release Button
2 — Emergency Key
4
GETTING TO KNOW YOUR VEHICLE 59
Page 62 of 587

WARNING!
•Never leave children alone in a vehicle, or with
access to an unlocked vehicle. Allowing children to
be in a vehicle unattended is dangerous for a
number of reasons. A child or others could be
severely injured or killed. Children should be
warned not to touch the parking brake, brake
pedal, or the gear selector. Do not leave the Key Fob
in or near the vehicle, or in a location accessible to
children, and do not leave the ignition of a vehicle
equipped with Keyless Enter- N-Go in the MAR/
RUN mode. A child could start the vehicle, operate
power windows, other controls, or move the ve-
hicle.
• Do not leave children or animals inside parked
vehicles in hot weather. Interior heat build-up may
cause them to be severely injured or killed. To Unlock/Enter The Liftgate
The liftgate Passive Entry unlock feature is built into the
electronic liftgate release. With a valid Passive Entry RKE
transmitter within 3 ft (1.0 m) of the liftgate, push the
Electronic Liftgate release to open with one fluid motion.
Electronic Liftgate Release Button
60 GETTING TO KNOW YOUR VEHICLE
Page 63 of 587
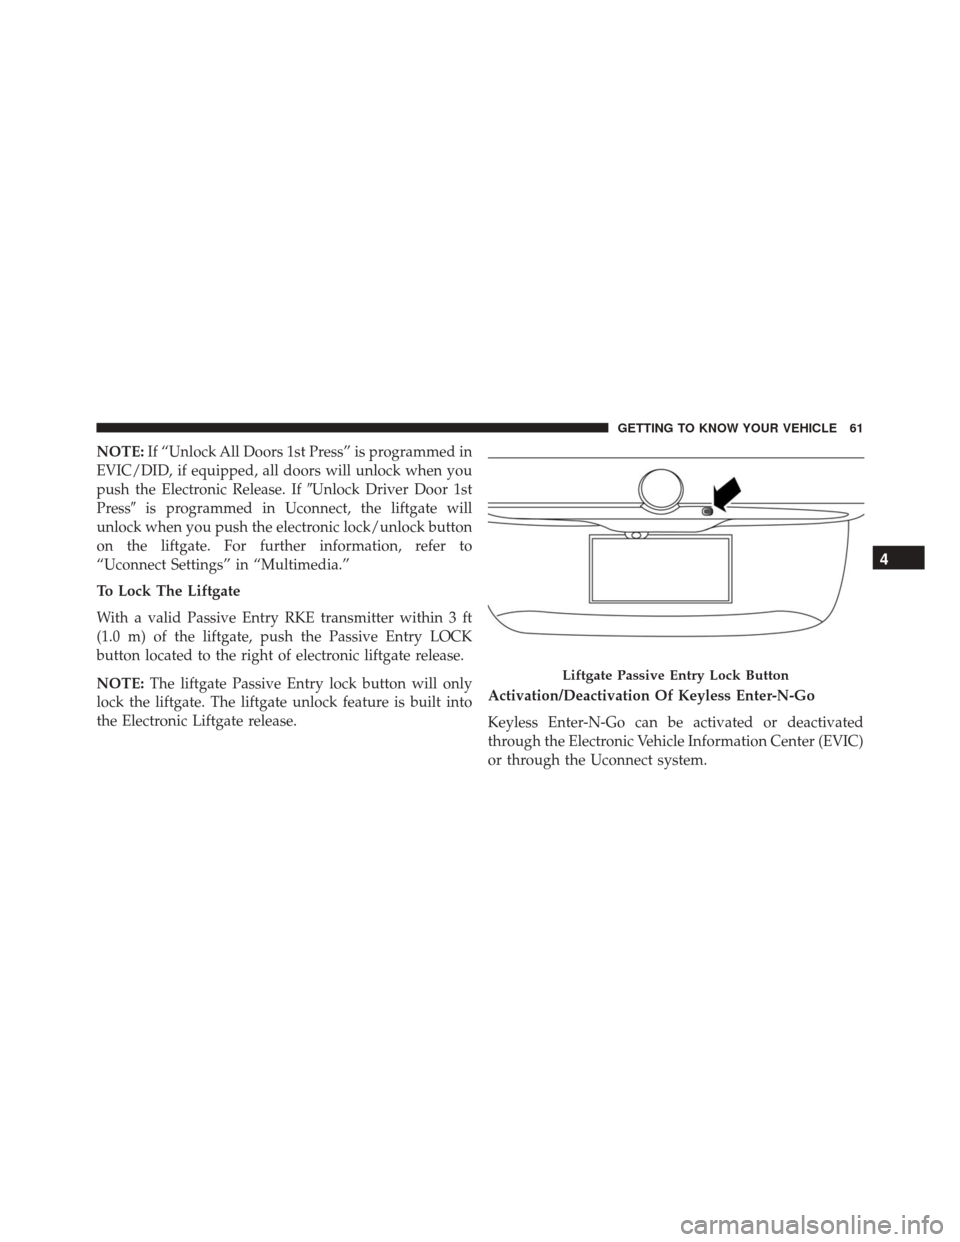
NOTE:If “Unlock All Doors 1st Press” is programmed in
EVIC/DID, if equipped, all doors will unlock when you
push the Electronic Release. If �Unlock Driver Door 1st
Press� is programmed in Uconnect, the liftgate will
unlock when you push the electronic lock/unlock button
on the liftgate. For further information, refer to
“Uconnect Settings” in “Multimedia.”
To Lock The Liftgate
With a valid Passive Entry RKE transmitter within 3 ft
(1.0 m) of the liftgate, push the Passive Entry LOCK
button located to the right of electronic liftgate release.
NOTE: The liftgate Passive Entry lock button will only
lock the liftgate. The liftgate unlock feature is built into
the Electronic Liftgate release. Activation/Deactivation Of Keyless Enter-N-Go
Keyless Enter-N-Go can be activated or deactivated
through the Electronic Vehicle Information Center (EVIC)
or through the Uconnect system.
Liftgate Passive Entry Lock Button
4
GETTING TO KNOW YOUR VEHICLE 61
Page 107 of 587

wiper sensitivity. Setting two can be used if the driver
desires more sensitivity. Place the wiper switch in the
OFF position when not using the system.
NOTE:
•The Rain Sensing feature will not operate when the
wiper switch is in the low or high-speed position.
• The Rain Sensing feature may not function properly
when ice, or dried salt water is present on the wind-
shield.
• Use of Rain-X or products containing wax or silicone
may reduce Rain Sensing performance.
• The Rain Sensing feature can be turned on and off
using the Uconnect System, refer to “Uconnect Set-
tings” in “Multimedia” for further information. The Rain Sensing system has protection features for the
wiper blades and arms, and will not operate under the
following conditions:
•
Low Ambient Temperature — When the ignition is
first turned ON, the Rain Sensing system will not
operate until the wiper switch is moved, vehicle speed
is greater than 0 mph (0 km/h), or the outside tem-
perature is greater than 32°F (0°C).
• Transmission In NEUTRAL Position — When the
ignition is ON, and the automatic transmission is in
the NEUTRAL position, the Rain Sensing system will
not operate until the wiper switch is moved, vehicle
speed is greater than 5 mph (8 km/h), or the shift
lever/gear selector is moved out of the NEUTRAL
position.
Remote Start Mode Inhibit — On vehicles equipped
with Remote Starting system, Rain Sensing wipers are
not operational when the vehicle is in the remote start
4
GETTING TO KNOW YOUR VEHICLE 105
Page 139 of 587
NOTE:
•Before lifting the hood, check that the wiper arms are
not in motion and not in the lifted position.
• While lifting the hood, use both hands.
• Vehicle must be at a stop and the automatic transmis-
sion must be in park. Manual transmission vehicles
must have the electric park brake engaged.
Closing
1. Hold up the hood with one hand and with the other hand remove the support rod from its seat and reinsert
it into the locking tab.
2. Lower the hood to approximately 6 inches (15 cm) from the engine compartment and drop it. Make sure
that the hood is completely closed.
Hood Prop System
1 — Locking Tab
2 — Support Rod
2 — Support Rod Seat
4
GETTING TO KNOW YOUR VEHICLE 137
Page 143 of 587
Cargo Area Features
Cargo Load Floor — If Equipped
The vehicle is equipped with a load floor that can be
adjusted as needed.
Position 1 (Floor Flush):
This position allows you to make the load floor flat for
ease of loading/unloading objects from the cargo area.
This position also makes it possible to use the space
below as another compartment for storing fragile or
smaller objects.Position 2 (Elevated Position):
When the rear seatbacks and front passenger seat is
folded flat, it will allow for loading objects of long
dimensions. It is recommended to use this position only
during the actual transporting of the objects, then bring
the load floor in position 1.
NOTE:
With a full size spare, the floor will be at the
elevated position.
Access To The Loading Floor
To access the double load compartment, proceed as
follows:
1. Lift up on the Load Floor Handle.
4
GETTING TO KNOW YOUR VEHICLE 141

 transmitter battery is
low or dead, the emergency key can be used to unlock the
driver side door lock cylinder.
To release the emergen")

:
This position allows you to make the load floor")