2016 FIAT 500E AUX
[x] Cancel search: AUXPage 3 of 132

INTRODUCTION/WELCOMEWELCOME FROM FIAT...............2
IMPORTANT VEHICLE INFORMATION......4
CONTROLS AT A GLANCEDRIVER COCKPIT..................6
INSTRUMENT CLUSTER..............8
GETTING STARTEDELECTRIC VEHICLE FEATURES..........10
ELECTRIC SYSTEM OPERATION.........13
CHARGING THE HIGH VOLTAGE BATTERY...16
STARTING YOUR 500e...............19
KEY FOB......................20
VEHICLE SECURITY ALARM...........21
POWER DOOR LOCKS..............21
OCCUPANT RESTRAINT SYSTEMS........21
HEAD RESTRAINTS.................31
SEATS........................33
REAR SEATS.....................37
TILT STEERING COLUMN.............38
OPERATING YOUR VEHICLEEXTENDING YOUR DRIVING RANGE PER
CHARGE.......................39
LIGHTS.......................40
WIPER/WASHER LEVER..............43
ELECTRONIC SPEED CONTROL........44
POWER WINDOWS................47
AUTOMATIC TEMPERATURE CONTROLS
(ATC).........................48
REAR PARK ASSIST.................49
POWER SUNROOF.................50
ELECTRONICSYOUR VEHICLE'S SOUND SYSTEM........52
CYBERSECURITY..................54
IDENTIFYING YOUR RADIO............55
UCONNECT 5.0..................56
USB/AUX CONTROL................60
UCONNECT 5.0 VOICE RECOGNITION
QUICK TIPS.....................61
UCONNECT PHONE...............68
STEERING WHEEL AUDIO CONTROLS.....77
ELECTRONIC VEHICLE INFORMATION
CENTER (EVIC)...................77
PROGRAMMABLE FEATURES...........78
TRIP BUTTON....................79
POWER OUTLET.................80
UTILITY
TRAILER TOWING.................82
RECREATIONAL TOWING (BEHIND
MOTORHOME, ETC.)...............82
WHAT TO DO IN EMERGENCIES
ROADSIDE ASSISTANCE..............83
WARNING AND INDICATOR LIGHTS......83
TIRE SERVICE KIT..................89
JUMP-STARTING PROCEDURE
(12 VOLT BATTERY ONLY)............96
MANUAL PARK RELEASE.............99
TOWING A DISABLED VEHICLE.........100
ENHANCED ACCIDENT RESPONSE SYSTEM..100
FREEING A STUCK VEHICLE...........101
EVENT DATA RECORDER (EDR)........102
MAINTAINING YOUR VEHICLE
OPENING THE HOOD..............103
ENGINE COMPARTMENT — ELECTRIC....104
FLUID CAPACITIES................106
FLUIDS, LUBES, AND GENUINE PARTS.....106
MAINTENANCE PROCEDURES.........107
MAINTENANCE SCHEDULE..........107
FUSES.......................110
TIRES — GENERAL INFORMATION......113
TIRE ROTATION RECOMMENDATIONS....116
REPLACEMENT BULBS..............117
CUSTOMER ASSISTANCE
FIAT CUSTOMER CENTER............118
ASSISTANCE FOR THE HEARING
IMPAIRED.....................118
PUBLICATIONS ORDERING...........118
REPORTING SAFETY DEFECTS IN THE
UNITED STATES..................118
MOPAR® ACCESSORIES
AUTHENTIC ACCESSORIES BY MOPAR....119
FAQ ’s
FREQUENTLY ASKED QUESTIONS.......120
INDEX......................121
TABLE OF CONTENTS
1
Page 62 of 132

PRE-DEFINED VOICE TEXT REPLY RESPONSES
Ye s.Stuck in Traffic.See you later.
No.Start without me.I’ll be Late.
Okay.Where are you?
I will be
late.
Call me.Are you there yet?
I’ll call you later.I need directions.
See you in
minutes.
I’m on my way.
Can’t talk right now.
I’m lost.Thanks.
NOTE:
Voice texting reply and voice texting features require a compatible mobile device enabled
with Bluetooth Message Access Profile (MAP).iPhone and some other smartphones do
not currently support Bluetooth MAP.Visit UconnectPhone.com for system and device
compatibility.
Want to dictate a personal message? You must first register with Uconnect Access (U.S.
residents only) to take advantage of a new, cloud-based Voice Texting service, an enhance-
ment to Voice Text Reply.
USB/AUX CONTROL
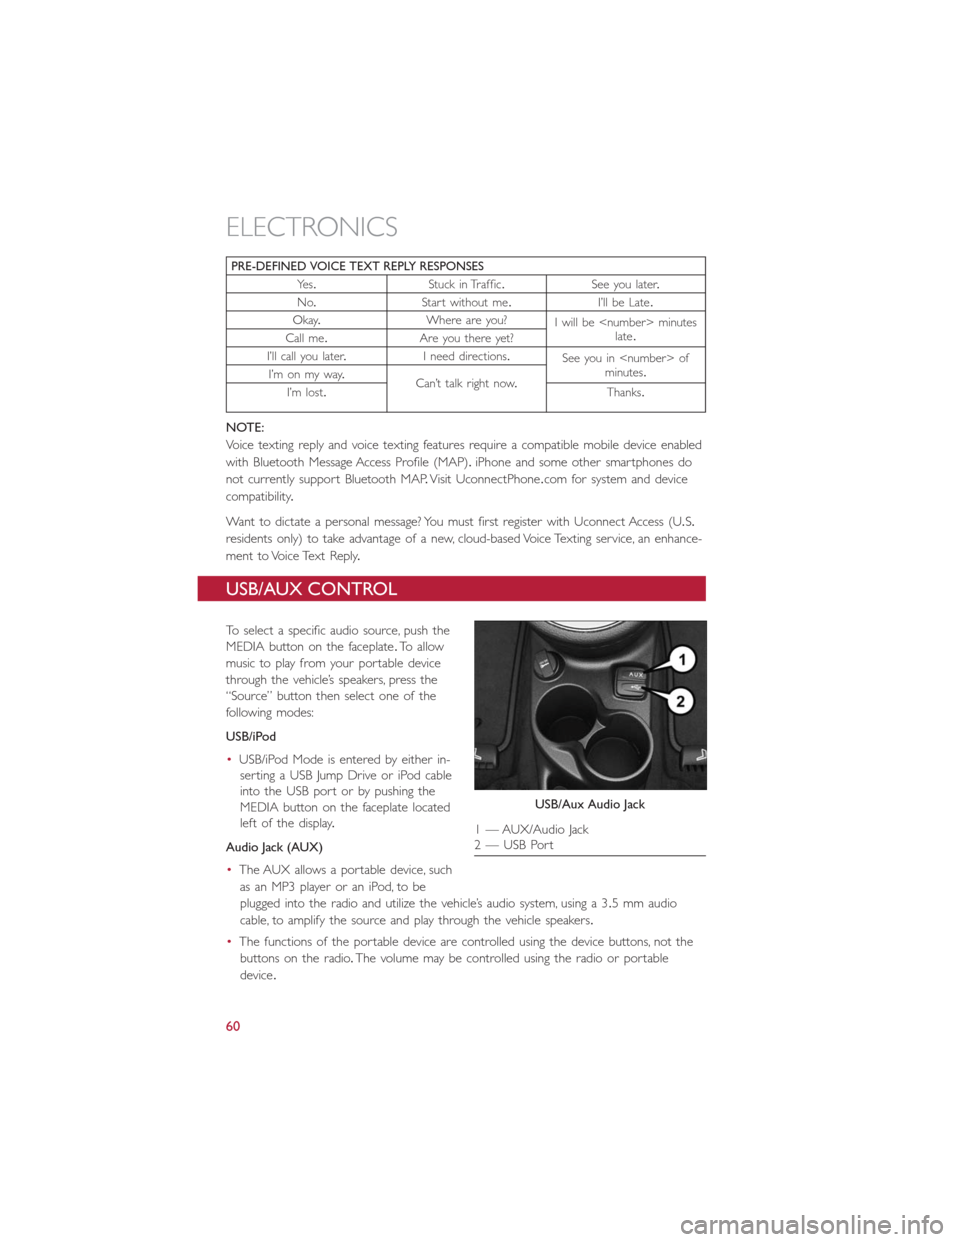
To select a specific audio source, push the
MEDIA button on the faceplate.To allow
music to play from your portable device
through the vehicle’s speakers, press the
“Source” button then select one of the
following modes:
USB/iPod
•USB/iPod Mode is entered by either in-
serting a USB Jump Drive or iPod cable
into the USB port or by pushing the
MEDIA button on the faceplate located
left of the display.
Audio Jack (AUX)
•The AUX allows a portable device, such
as an MP3 player or an iPod, to be
plugged into the radio and utilize the vehicle’s audio system, using a 3.5 mm audio
cable, to amplify the source and play through the vehicle speakers.
•The functions of the portable device are controlled using the device buttons, not the
buttons on the radio.The volume may be controlled using the radio or portable
device.
USB/Aux Audio Jack
1 — AUX/Audio Jack
2 — USB Port
ELECTRONICS
60
Page 67 of 132

Media
Push the VR button.After the beep, say one of the following commands and follow
the prompts to switch your media source or choose an artist.
•Change sourceto Bluetooth
•Change sourceto iPod
•Change sourceto USB
•Play artistBeethoven;Play albumGreatest Hits;Play songMoonlight Sonata;Play genre
Classical
TIP
Press the Browse button on the touchscreen to see all of the music on your iPod or
USB device.Your Voice Command must matchexactlyhow the artist, album, song and
genre information is displayed.
Uconnect offers connections via USB, SD, Bluetooth and auxiliary ports (If Equipped).
Voice operation is only available for connected USB and iPod devices.
Uconnect 5.0 Media
ELECTRONICS
65
Page 78 of 132

Helpful Tips And Common Questions To Improve Bluetooth Performance
With Your Uconnect System
Mobile Phone won’t reconnect to system after pairing:
•Set mobile phone to auto-connect or trusted device in mobile phone Bluetooth set-
tings (Blackberry devices).
•Perform a factory reset on your mobile phone.Refer to your mobile phone manufac-
turer or cellular provider for instructions.
•Many mobile phones do not automatically reconnect after being restarted (hard re-
boot).Your mobile phone can still be connected manually.Close all applications that
may be operating (refer to mobile phone manufacturer’s instructions), and follow “Pair-
ing (Wirelessly Connecting) Your Mobile Phone To The Uconnect System”.
Mobile Phone won’t pair to system:
•Perform a hard reset in the mobile phone by removing the battery (if removable —
see your mobile phone’s owner manual).
•Delete pairing history in mobile phone and Uconnect system; usually found in phone’s
Bluetooth connection settings.
•Verify you are selecting “Uconnect” in the discovered Bluetooth devices on your mo-
bile phone.
•If your vehicle system generates a pin code the default is 0000.
Mobile Phonebook didn’t download:
•Check “Do not ask again,” then accept the “phonebook download” request on your
mobile phone.
•Up to 2,000 contact names with six numbers per contact will transfer to the
Uconnect 5.0/5.0N system phonebook.
Text messaging won’t work:
•Check “Do not ask again,” then accept the “connect to your messages” request on
your mobile phone.
•Verify that your mobile phone has the Bluetooth feature (Message Access Profile).
Can’t make a conference call:
•CDMA (Code-Division Multiple Access) carriers do not support conference calling.
Refer to your mobile phone user’s manual for further information.
Making calls while connected to AUX:
•Plugging in your mobile phone to AUX while connected to Bluetooth will disable
Hands-Free Calling.Do not make calls while your mobile phone is plugged into the
AUX jack.
ELECTRONICS
76
Page 113 of 132

CavityVehicle Fuse
NumberMini Fuse Description
13 F31 5 Amp TanIgnition, Climate Control, RDU
and EVCU
14 F47 20 Amp Yellow Driver Power Window
The fuse for the heated mirrors is located behind an access panel on the front of the
Instrument Panel.
NOTE:
This fuse is a single fuse attached directly to the wire harness.
Cavity Mini Fuse Description
F90 5 Amp Tan Heated Mirrors
Power Distribution Center #1
The Power Distribution Center #1 is located on the right side of the underhood com-
partment.To access the fuses, remove locking screw and slide cover off.
The ID number of the electrical component corresponding to each fuse can be found on
thebackofthecover.
Cavity Maxi Fuse Mini Fuse Description
F01 60 Amp Blue – Body Control Module (BCM)
F02 20 Amp Yellow – Audio Amplifier
F03 20 Amp Yellow – Ignition Switch
F04 40 Amp Orange – Brake System Module Pump
F05 70 Amp Tan – Electric Power Steering (EPS)
F06 60 Amp Blue – Radiator Fan
F07 40 Amp Orange – Regen Brake Module
F08 40 Amp Orange – HVAC
F09 – 5 Amp TanAir Electric Heater
Charge Indicator
F10 – 10 Amp Red Horn
F11 – 10 Amp RedElectronic Vehicle Control Unit
(EVCU)
F14 – 5 Amp Tan High Beam (Shutter)
F15 – 15 Amp BlueCigar Lighter, AUX Power Out-
let
F16 – 10 Amp RedHumidity Sensor
VPAM
AC Compressor
F18 – 5 Amp TanElectronic Vehicle Control Unit
(EVCU)
F19 – 10 Amp Red HVAC
MAINTAINING YOUR VEHICLE
111
Page 124 of 132

Extending Driving Range..........39
FAQ....................120
Flashers
Turn Signal...............88
Fluids, Lubricants And Genuine Parts...106
Fog Lights................42, 88
Freeing A Stuck Vehicle...........101
Fuses....................110
General Maintenance............107
Glass Cleaning...............107
Hands-Free Phone (Uconnect).......68
Headlights..................40
Cleaning................107
Passing.................40
Switch..................40
Heated Mirrors...............49
Heated Seats................36
High Beam Indicator.............88
High Voltage Battery.............16
Hood Release...............103
Identifying Your Radio............55
Installing A Child Restraint With ALR....29
Installing Child Restraints Using The LATCH
Lower Anchorages............29
Instrument Cluster
Indicators.................8
Instrument Cluster Warning Lights.....83
Instrument Panel Cover..........107
Instrument Panel Lens Cleaning......107
Interior And Instrument Lights.......6, 7
Interior Appearance Care.........107
Interior Lighting...............41
iPod/USB/MP3 Control
Bluetooth Streaming Audio.......68
Key Fo b...................20
Disarm The Alarm............21
Lane Change Assist
.............41
Lap/Shoulder Belts..............22
LATCH (Lower Anchors And Tether For
CHildren)...............28, 30
Level 1 Charging...............13
Level 2 Charging...............13Liftgate....................20
Light Bulbs.................117
Lights....................40
Air Bag.................26
Fog...................88
High Beam...............40
High Beam Indicator..........88
Park...................40
Passing.................40
Seat Belt Reminder...........84
Security Alarm.............88
Turn Signal...............41
Locks
Key s...................20
Liftgate, Tailgate.............20
Lower Anchors And Tether For CHildren
(LATCH).................28
Lubrication, Body..............107
Maintenance Free Battery.........107
Maintenance, General...........107
Maintenance Procedures..........107
Maintenance Record............109
Maintenance Schedule...........107
Master Cylinder (Brakes)..........107
Mirrors
Heated.................49
MOPAR Accessories............119
Multi-Function Control Lever........40
Outlet
Power..................80
Paint Care.................107
Passing Light
.................40
Phone, Hands-Free (Uconnect).......68
Phone (Pairing)...............69
Phone (Uconnect)..............68
Placard, Tire And Loading Information...113
Power
Door Locks...............21
Outlet (Auxiliary Electrical Outlet)...80
Steering.................84
Sunroof.................50
Programmable Electronic Features.....78
Radio
Presets..................58
INDEX
122