Page 37 of 308

35SErVIc E I nd I c AtO r
For a few seconds after the ignition is
switched on, the spanner symbolising the
service indicator comes on: the screen
informs you when the next service is due,
in accordance with the servicing schedule
indicated in the maintenance and warranty
guide. This information is determined in
relation to the distance travelled since the
previous service.
After a few seconds, the display returns to
its usual functions. A long press returns you to the main menu.
Refer to the "Technology on board -
Vehicle configuration" section.
deterioration of the engine oil
Refer to the list of checks in the
maintenance and warranty guide which
was given to you on handover of the
vehicle.
reminder of servicing information
At any time, to access the service indicator,
press briefly on the MO d E button.
Use the up/down arrows to see
the scheduling and engine oil wear
information.
Pressing the MO
d E button again allows
you to return to the various display
menus.
Menu...
c
hoose...
Allows you to...
11
Service Service
(miles/
km before
service)
Display the
distance
remaining
before the
next service.
Oil (miles/
km before
oil change) Display
the miles/
kilometres to
the next oil
change.
resetting to zero
The continuous flashing of the indicator is
stopped by a qualified workshop using a
diagnostic tool.This 2
nd warning lamp, coupled
with the 1st, comes on in the
instrument panel when the oil
has not been changed and the
deterioration of the oil has reached another
threshold. To avoid the risk of damage, have
the oil changed without waiting for this level. The warning lamp flashing and,
if your vehicle has the function,
a message displayed at every
engine start: the system has
detected deterioration of the engine oil.
Have the oil changed as soon as possible.
For 3.0 litre HDi engines, the engine speed
is restricted to 3 000 rpm, then 1 500 rpm
until the oil change is done. Have the engine
oil changed to avoid any risk of damage.
2
rEAdY tO GO
Instruments and controls
Page 94 of 308
92
The trIP button, located at the end of the
wiper control stalk, gives access to the
following information:
-
r
ange
This indicates the distance that can still
be travelled with the fuel remaining in
the tank on the basis of the average
consumption over the last few miles
(kilometres) travelled. -
A verage speed A
This is the average speed calculated
since the last trip computer zero reset
(with the ignition on).
-
t
rip
duration A
This indicates the total time since the
last trip recorder zero reset.
-
d istance A
This indicates the distance travelled
since the last trip computer zero reset.
-
A
verage fuel consumption A
This is the average quantity of fuel
consumed since the last trip computer
zero reset.
-
c
urrent fuel consumption A
This is the average quantity of fuel
consumed during the last few seconds.
trIP c OMP ut E r
If TRIP B is activated in the MOdE menu:
-
Distance B
-
A
verage fuel consumption B
-
A
verage speed B
-
T
rip duration B
Vehicle data
Page 191 of 308
189Level 1Level 2 Level 3co mment
rAd
IO Briefly press the buttons for an automatic search.
Press and hold the buttons for a quick search.
rAd
IO
Preset Make a long press on the button to present the
current radio station.
The current station is highlighted.
Press the "All" button to display all of the preset
radio stations in the waveband selected.
rAd
IO
n
avigate List of stations
Selection a station with a press.
Update the list according to reception.
Press these buttons to scroll through the radio
stations received.
Go directly to the desired letter in the list.
rAd
IO
AM/FM /
d
AB
ch
oose the waveband Choose the waveband
rAd
IO
Adjustment
dir
ect adjustment The screen virtual keypad can used to enter a
single number corresponding to a station.
The symbols allow precise adjustment of the
frequency.
rAd
IO
Info Information
Display information on the current radio station.
Touch Screen Audio - Telematic System
AUDIO and TELEMATICS
10
Page 194 of 308
192
If the "DAB" radio station being listened
to is not available, the "AF" alternative
frequency option is crossed out.
DAB (Digital Audio Broadcasting) radio
Select the audio source.Display the name and number of the
multiplex service being used.Alternative frequency.
Adjust audio settings. Select preset radio stations.
Next "Multiplex".
Next radio station.
Display the "DAB" band.
Select a radio station from
"All", "Genres", "Multiplex". Previous "Multiplex".
Previous radio station. Display name and
"Radiotext" for the current
station. Preset station.
Short press: select preset radio station.
Long press: preset a radio station.
Touch Screen Audio - Telematic System
Page 213 of 308
2 11Level 1Level 2 Level 3co mment
MO r
E
A
mbient temp. Displays the ambient temperature.
MO
r
E
c
lock Displays the clock.
MO
r
E
co
mpass Displays the direction of travel.
MO
r
E
tr
i p
cur
rent infoRange
Displays the trip computer.
Make a long press on the "Trip A" or "Trip B"
button to reset the trip in question.
Current fuel consumption
tr
i p A Average fuel consumption
Average speed
Distance travelled
Journey time
tr
i p B Average fuel consumption
Average speed
Distance travelled
Journey time
Touch Screen Audio - Telematic System
AUDIO and TELEMATICS
10
Page 234 of 308
232First steps
On/off, volume setting.
Select FM and AM wavebands.
Display the list of connected
telephones.Rotate: scroll through a list or adjust
radio station.
Press: confirm the option displayed in
the screen.
Select USB or AUX source. Information on the current radio
station or media.Repeat play.
Select preset stations.
FM-A, FM-B, FM- C, AM-A, AM-B,
AM-C. Mute / restore sound. Radio buttons 1 to 6:
Select a pre-set radio station.
Long press: pre-set a station.
Random (shuffle) play
Automatic frequency search up.
Select the next USB track.
Press and hold: fast for ward.
Display the menu and adjust options. Automatic frequency search down.
Select the previous USB track.
Press and hold: fast back.
Abandon the current operation.
Go up one level (menu or folder).
Audio System
Page 236 of 308

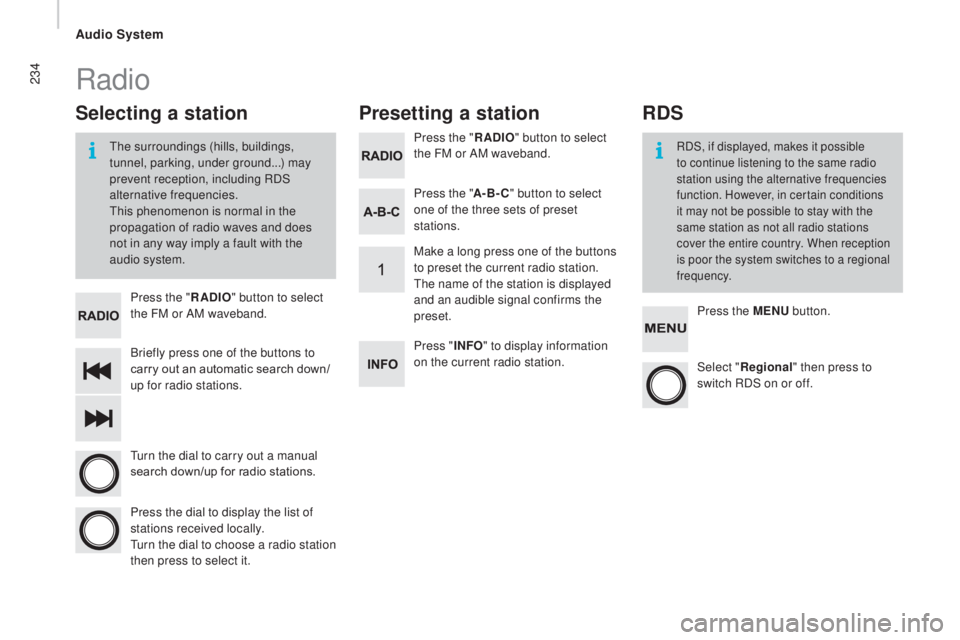
234
Briefly press one of the buttons to
carry out an automatic search down/
up for radio stations. Press the "
rAd
IO
" button to select
the FM or AM waveband.
Turn the dial to carry out a manual
search down/up for radio stations.
Press the dial to display the list of
stations received locally.
Turn the dial to choose a radio station
then press to select it. Press the "
rAd
IO
" button to select
the FM or AM waveband.
Press the ME
nu b
utton.
Press the "
A-B-
c" b
utton to select
one of the three sets of preset
stations.
Select "re gional" then press to
switch RDS on or off.
Make a long press one of the buttons
to preset the current radio station.
The name of the station is displayed
and an audible signal confirms the
preset.
Press "
InFO" t o display information
on the current radio station.
Presetting a station
Selecting a station
The surroundings (hills, buildings,
tunnel, parking, under ground...) may
prevent reception, including RDS
alternative frequencies.
This phenomenon is normal in the
propagation of radio waves and does
not in any way imply a fault with the
audio system.RDS, if displayed, makes it possible
to continue listening to the same radio
station using the alternative frequencies
function. However, in certain conditions
it may not be possible to stay with the
same station as not all radio stations
cover the entire country. When reception
is poor the system switches to a regional
frequency.
Radio
rdS
Audio System
Page 281 of 308

3
2
READY
TO GO
Starting and switching off
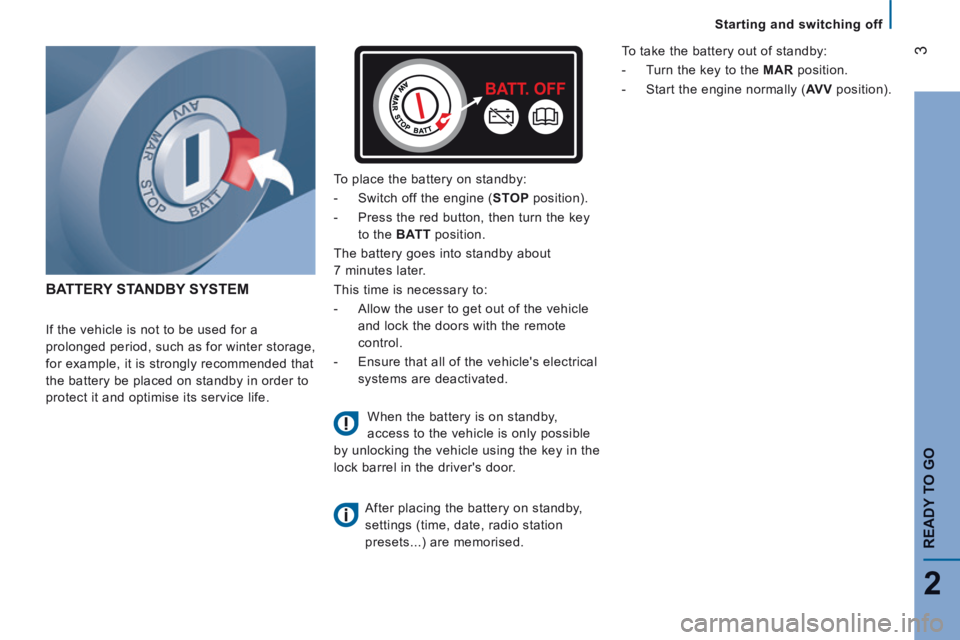
BATTERY STANDBY SYSTEM
If the vehicle is not to be used for a
prolonged period, such as for winter storage,
for example, it is strongly recommended that
the battery be placed on standby in order to
protect it and optimise its service life.
To place the battery on standby:
- Switch off the engine ( STOP position).
- Press the red button, then turn the key
to the BATT position.
The battery goes into standby about
7 minutes later.
This time is necessary to:
- Allow the user to get out of the vehicle
and lock the doors with the remote
control.
- Ensure that all of the vehicle's electrical
systems are deactivated.
When the battery is on standby,
access to the vehicle is only possible
by unlocking the vehicle using the key in the
lock barrel in the driver's door.
After placing the battery on standby,
settings (time, date, radio station
presets...) are memorised.
To take the battery out of standby:
- Turn the key to the MAR position.
- Start the engine normally ( AV V position).