2016 Citroen JUMPY instrument panel
[x] Cancel search: instrument panelPage 4 of 595

.
.
Jumpy _en_Chap00a_sommaire_ed01-2016
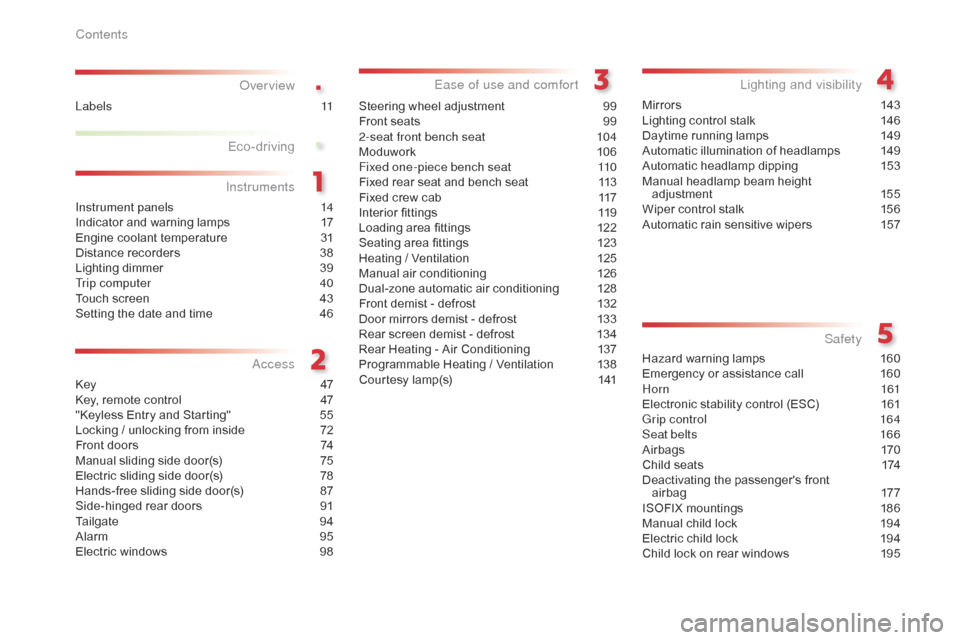
Over view
Instrument panels 14
Indicator and warning lamps 1 7
Engine coolant temperature
3
1
Distance recorders
3
8
Lighting dimmer
3
9
Trip computer
4
0
Touch screen
4
3
Setting the date and time
4
6
Key
47
K
ey, remote control
4
7
"Keyless Entry and Starting"
5
5
Locking / unlocking from inside
7
2
Front doors
7
4
Manual sliding side door(s)
7
5
Electric sliding side door(s)
7
8
Hands-free sliding side door(s)
87
S
ide-hinged rear doors
9
1
Tailgate
9
4
Alarm
9
5
Electric windows
9
8Steering wheel adjustment
9
9
Front seats
9
9
2-seat front bench seat
1
04
Moduwork
1
06
Fixed one-piece bench seat
1
10
Fixed rear seat and bench seat
1
13
Fixed crew cab 1 17
Interior fittings 1 19
Loading area fittings
1
22
Seating area fittings
1
23
Heating / Ventilation
1
25
Manual air conditioning
1
26
Dual-zone automatic air conditioning
1
28
Front demist - defrost
1
32
Door mirrors demist - defrost
1
33
Rear screen demist - defrost
1
34
Rear Heating - Air Conditioning
1
37
Programmable Heating / Ventilation
1
38
Courtesy lamp(s)
1
41Mir ror s
14
3
Lighting control stalk
1
46
Daytime running lamps
1
49
Automatic illumination of headlamps
1
49
Automatic headlamp dipping
1
53
Manual headlamp beam height adjustment 1 55
Wiper control stalk 1 56
Automatic rain sensitive wipers
1
57
Hazard warning lamps
1
60
Emergency or assistance call
1
60
Horn
161
Electronic stability control (ESC)
1
61
Grip control
1
64
Seat belts
1
66
Airbags
1
70
Child seats
1
74
Deactivating the passenger's front
airbag
1
77
ISOFIX mountings
1
86
Manual child lock
1
94
Electric child lock
1
94
Child lock on rear windows
1
95
Eco-driving
Instruments
Access Ease of use and comfort
Lighting and visibility
Safety
Labels 11
Contents
Page 9 of 595

7
Jumpy _en_Chap00b_vue-ensemble_ed01-2016
Locking/unlocking from inside 72-73
Electric sliding door(s) 7 8 - 86
Cabin / loading area selectivity
4
7- 48, 55
Electric child lock
1
94
Hazard warning lamps
1
60
Reinitialising the under-inflation detection
26
3-264
Deactivating Stop & Start
2
20
Deactivating
the DSC/ASR system
1
63
Adjusting the steering wheel
9
9
Horn
161
Head-up display
2
22-223
Instruments and controls (cont.)
Wiper control 1
56 -159
Trip computer 4 0 - 42
Memorising speeds
2
24
Speed limiter
2
29-231
Cruise control
2
32-235
Dynamic cruise control
2
36 -242
Instrument panel
1
4-16
Warning lamps
1
7-30
Coolant temperature
3
1
Service indicator
3
1-33
Oil level indicator
3
4
AdBlue
® range indicator 3 5 -37
Distance recorder 3 8
Gear shift indicator
2
08
Lighting dimmer
3
9
Trip computer
4
0 - 42
Setting the time and date
4
6
Fatigue detection
2
50-251
Electric windows
9
8
Adjusting the electric mirrors
1
43
Grip control
1
63, 164-165
Programmable heating / ventilation
1
38-140
Alarm
9
5-97
Manually adjusting the headlamp beam height
1
55
Lane departure warning system
24
8 -249
Blind spot monitoring system
2
52-254
Automatic headlamp dipping
1
53 -154 Setting the time and date
4
6
180º Rear vision
2
59 -261
Memorising speeds
2
24
Speed limit recognition 2 25 -228, 231, 234, 238
Collision Risk Alert 2 43 -245
Active Safety Brake
2
43, 246 -249
Deactivating Stop & Start
2
20
Lighting control
1
46 -151
Direction indicators
1
48
.
Over view
Page 14 of 595

12
Jumpy _en_Chap00c_eco-conduite_ed01-2016
Eco-driving is a range of everyday practices
that allow the motorist to optimise their fuel
consumption and CO
2 emissions.
Eco-driving
Optimise the use of your
gearbox
With a manual gearbox, move off gently and
change up without waiting. During acceleration
change up early.
With an automatic or electronic gearbox,
give preference to automatic mode and avoid
pressing the accelerator pedal heavily or
suddenly.
The gear shift indicator invites you to engage
the most suitable gear: as soon as the
indication is displayed in the instrument panel,
follow it straight away.
For vehicles fitted with an electronic or
automatic gearbox, this indicator appears only
in manual mode.
Drive smoothly
Maintain a safe distance between vehicles, use
engine braking rather than the brake pedal,
and press the accelerator progressively. These
practices contribute towards a reduction in fuel
consumption and CO
2 emissions and also help
to reduce the background traffic noise.
If your vehicle has cruise control, make use of
the system at speeds above 25 mph (40 km/h)
when the traffic is flowing well.
Control the use of your
electrical equipment
Switch off the demisting and defrosting controls,
if not automatic.
Switch off the heated seat as soon as possible.
Switch off the headlamps and front foglamps
when the level of light does not require
their
u
se.
Avoid running the engine before moving off,
particularly in winter; your vehicle will warm up
much faster while driving.
As a passenger, if you avoid connecting
your multimedia devices (film, music, video
game...), you will contribute towards limiting the
consumption of electrical energy, and so of fuel.
Disconnect your portable devices before
leaving the vehicle.
Before moving off, if the passenger compartment is
too warm, ventilate it by opening the windows and
air vents before using the air conditioning.
Above 30 mph (50 km/h), close the windows and
leave the air vents open.
Remember to make use of equipment that can
help keep the temperature in the passenger
compartment down (sunroof and window blinds...).
Switch off the air conditioning, unless it has
automatic regulation, as soon as the desired
temperature is attained.
Eco-driving
Page 16 of 595

14
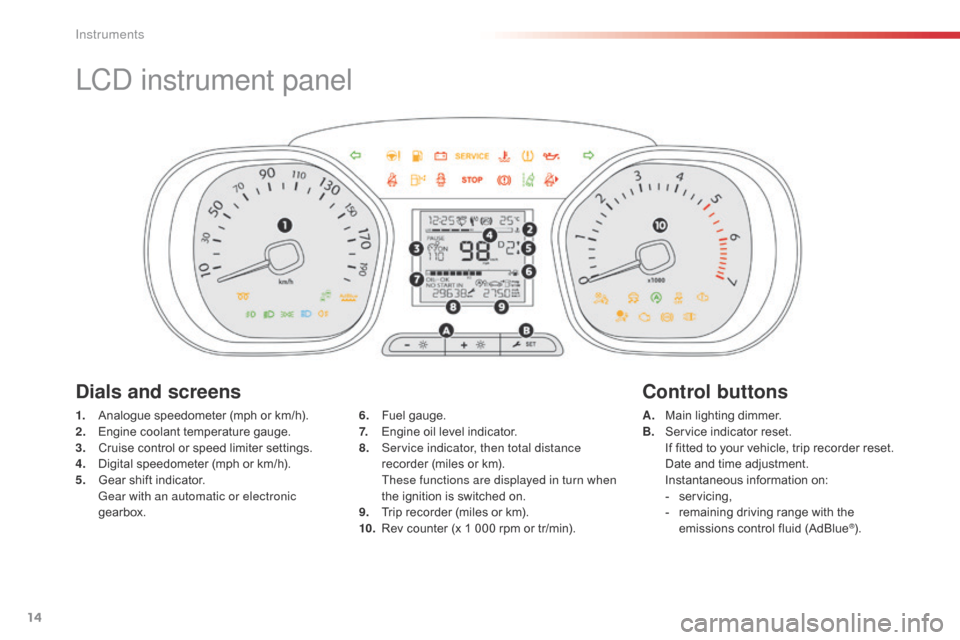
LCD instrument panel
1. Analogue speedometer (mph or km/h).
2. Engine coolant temperature gauge.
3.
C
ruise control or speed limiter settings.
4.
D
igital speedometer (mph or km/h).
5.
G
ear shift indicator.
G
ear with an automatic or electronic
gearbox. A. M
ain lighting dimmer.
B. S ervice indicator reset.
I
f fitted to your vehicle, trip recorder reset.
D
ate and time adjustment.
I
nstantaneous information on:
-
ser
vicing,
-
r
emaining driving range with the
emissions control fluid (AdBlue
®).
6.
F
uel gauge.
7.
E
ngine oil level indicator.
8.
S
ervice indicator, then total distance
recorder (miles or km).
T
hese functions are displayed in turn when
the ignition is switched on.
9.
T
rip recorder (miles or km).
10. R
ev counter (x 1 000 rpm or tr/min).
Dials and screens
Control buttons
Instruments
Page 17 of 595

15
Jumpy _en_Chap01_instruments-de-bord_ed01-2016
1. Analogue speedometer (mph or km/h).
2. Fuel gauge.
3.
E
ngine coolant temperature gauge.
4.
C
ruise control or speed limiter settings.
5.
D
igital speedometer (mph or km/h). A. S
ervice indicator reset. R
ecall of instantaneous information on:
-
ser
vicing,
-
r
emaining driving range with the
emissions fluid (AdBlue
®).
B. M
ain lighting dimmer.
C.
T
rip recorder reset.
6.
G
ear shift indicator.
G
ear with an automatic or electronic
gearbox.
7.
S
ervice indicator, then total distance
recorder (miles or km), trip recorder (miles
or km), display of messages, ...
8.
R
ev counter (x 1 000 rpm or tr/min).
Dials and screens Control buttons
LCD text instrument panel
1
Instruments
Page 18 of 595

16
Matrix instrument panel
1. Analogue speedometer (mph or km/h).
2. Fuel gauge.
3.
E
ngine coolant temperature gauge.
4.
C
ruise control or speed limiter settings.
5.
G
ear shift indicator.
G
ear with an automatic or electronic
gearbox. A. S
ervice indicator reset. A
lert log display.
R
ecall of information on:
-
ser
vicing,
-
r
emaining driving range with the
emissions fluid (AdBlue
®).
B. M
ain lighting dimmer.
C.
T
rip recorder reset.
6.
D
isplay area: alert or state of function
messages, trip computer, digital
speedometer (mph or km/h), ...
7.
S
ervice indicator, then total distance
recorder (miles or km). T
hese functions are displayed in turn when
the ignition is switched on.
8.
T
rip recorder (miles or km).
9.
R
ev counter (x 1 000 rpm or tr/min).
Dials and screens Control buttons
Instruments
Page 19 of 595

17
Jumpy _en_Chap01_instruments-de-bord_ed01-2016
Indicator and warning
lamps
Visual indicators informing the driver that
a system is in operation or is switched off
(indicator lamp), or has a fault (warning lamp).
When the ignition is switched on
Certain warning lamps come on for a few
seconds when the vehicle's ignition is
switched on.
When the engine is started, these same
warning lamps should go off.
If they remain on, before moving off, refer to the
information on the warning lamp concerned.
Associated warnings
Certain warning lamps may come on in one of
two modes: fixed (continuous) or flashing.
Only by relating the type of illumination to the
operation of the vehicle can it be determined
whether the situation is normal or a fault has
occurred. In the event of a fault, the illumination
of the warning lamp may be accompanied by
an audible signal and/or a message.
Warning lamps
When the engine is running or the vehicle is
being driven, illumination of one of the following
warning lamps indicates a fault which requires
action on the part of the driver.
Any fault resulting in the illumination of a
warning lamp must be investigated further
using the associated message.
If you encounter any problems, contact a
CITROËN dealer or a qualified workshop.
Operation indicator lamps
If one of the following indicator lamps comes on
in the instrument panel and/or instrument panel
screen, this confirms that the corresponding
system has come into operation.
Deactivation indicator lamps
If one of the following indicator lamps comes
on, this confirms that the corresponding system
has been switched off intentionally.
This is may be accompanied by an audible
signal and the display of a message.
1
Instruments
Page 21 of 595

19
Jumpy _en_Chap01_instruments-de-bord_ed01-2016
Warning / indicator lampStateCause Action / Observations
Seat belt(s)
not fastened /
unfastened fixed
or flashing
accompanied by an
audible signal. A seat belt has not been fastened or
has been unfastened.
Pull the strap then insert the tongue in the buckle.
* Depending on the country of sale. Battery charge
*fixed. The battery charging circuit has a
fault (dirty or loose terminals, slack or
cut alternator belt, ...). The warning lamp should go off when the engine is
started.
If it does not go off, contact a CITROËN dealer or a
qualified workshop.
Engine oil
pressure fixed.
There is a fault with the engine
lubrication system. You must stop as soon it is safe to do so.
Park, switch off the ignition and contact a CITROËN
dealer or a qualified workshop.
or Maximum
coolant
temperature
fixed with the needle
in the red zone.
The temperature of the cooling
system is too high. Stop as soon as it is safe to do so.
Wait until the engine has cooled down before topping-
up the level, if necessary.
If the problem persists, contact a CITROËN dealer or
a qualified workshop.
fixed (only with the
LCD instrument
panel).
1
Instruments