2016 CITROEN DS3 CABRIO light
[x] Cancel search: lightPage 43 of 450

41
Black panel
(comfort night driving
display)
When driving at night, this function allows certain displays in the instrument panel to be
s
witched off so as to reduce fatigue for the
d
river.
The
essential driving information, such as the
s
peed of the vehicle, warning lamps, cruise
c
ontrol or speed limiter information, remain
d
isplayed in the instrument panel.
Activation
F With the lighting on, press the left hand b
utton of the instrument panel several
t
imes to progressively reduce the
d
ashboard lighting level.
F
P
ress the button again to reduce the
l
ighting to the minimum level and switch off
t
he interior mood lighting.
F
P
ress the button again to activate the black
pan
el.
System
for
manual
adjustment
of
the
b
rightness
of
the
instruments
and
controls
to
s
uit
the
ambient
light
level.
Lighting dimmer
Activation
When the lighting is on:
F p ress the button to change the brightness
o
f the instruments and controls,
F
w
hen the level of brightness required is
r
eached, release the button.
deactivation
When the lighting is off, or in day mode on vehicles fitted with daytime running lamps,
p
ressing the button does not have any effect.
Monitoring
Page 45 of 450

43
Radio- Cd
With the Audio system switched on, once the "Radio- CD" menu has been selected you can
a
ctivate or deactivate the functions associated
w
ith use of the radio (RDS, REG), or the CD
(
introscan, shuffle, CD repeat).
For
more information on the "Radio- CD"
a
pplication, refer to the "Audio system" section.
Vehicle configuration
Once the " Vehicle Configuration" menu has been selected, you can activate or deactivate
t
he following equipment:
-
w
iper linked with reverse gear (refer to the
"
Visibility"
s
ection),
-
g
uide-me-home lighting (refer to the
"
Visibility"
s
ection),
-
p
arking sensors (refer to the "Driving"
s
ection).
Options
Once the "Options" menu has been selected, you can start diagnostics of the status of the
e
quipment (active, not active, faulty).
This menu is also used to reinitialise the tyre under-inflation detection system (refer to the
"
Safety"
s
ection).
Monitoring
Page 49 of 450

47
"Personalisation-
Configuration" menu
Once this menu has been selected, you can gain access to the following functions:
-
d
efine the vehicle parameters,
-
d
isplay configuration,
-
c
hoice of language.
Define the vehicle parameters
Once this menu has been selected, you can activate or deactivate the following equipment:
-
w
iper linked to reverse gear (refer to the
"
Visibility"
s
ection),
-
g
uide-me-home lighting and duration (refer
t
o the " Visibility" section), Example:
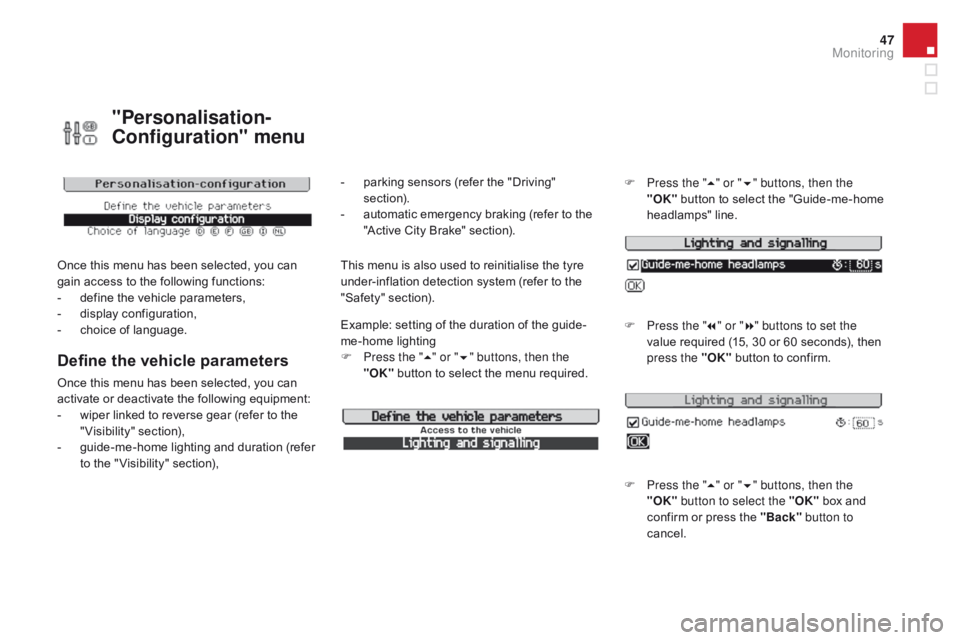
setting of the duration of the guide-
me-home
l
ighting
F
P
ress the "
5" or " 6" buttons, then the
"OK" button to select the menu required.F
P
ress the "
5" or " 6" buttons, then the
"OK"
button to select the "Guide-me-home
h
eadlamps"
l
ine.
F
P
ress the "
7" or " 8" buttons to set the
value required (15, 30 or 60 seconds), then
p
ress the "OK"
button to confirm.
F
P
ress the "5" or " 6" buttons, then the
"OK" button to select the "OK"
box and
c
onfirm or press the "Back" button to
cancel.
This menu is also used to reinitialise the tyre u nder-inflation detection system (refer to the
"
Safety"
s
ection).
-
p
arking sensors (refer the "Driving"
s
ection).
-
a
utomatic emergency braking (refer to the
"
Active City Brake" section).
Monitoring
Page 51 of 450

49
Touch screen tablet
This system gives access to:
- m enus for adjusting settings for vehicle
f
unctions and systems,
-
a
udio and display configuration menus,
-
a
udio system and telephone controls and
t
he display of associated information,
-
t
he display of alert messages,
-
t
he display of ambient temperature (a blue
s
now flake appears if there is a risk of ice),
-
t
he trip computer.
And,
depending on equipment, it allows:
-
t
he display of the visual parking sensors
i
nformation,
-
a
ccess to the controls for the navigation
s
ystem and Internet services, and the
d
isplay of associated information. After
a few moments with no action on
t
he secondary page, the primary page
i
s displayed automatically.
As
a safety measure, some functions
c
an only be viewed when stationary.
T
heir display is interrupted as soon as
t
he vehicle moves off.general operation
Recommendations
It is necessary to press firmly, particularly for "flick" gestures (scrolling through lists, moving
t
he
m
ap...).
A
light wipe is not enough.
The
screen does not recognise pressing with
m
ore than one finger.
This
technology allows use at all temperatures
a
nd when wearing gloves.
Do
not use pointed objects on the touch screen
t
ablet.
Do
not touch the touch screen tablet with wet
han
ds.
Uses a soft clean cloth to clean the touch
screen
t
ablet.
Principles
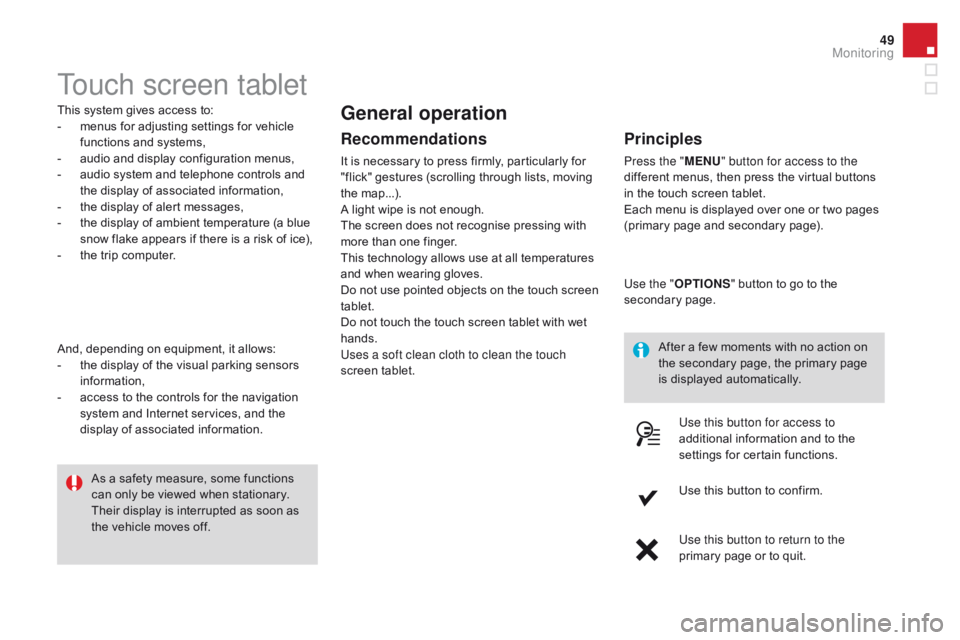
Press the " MEn U" button for access to the
different menus, then press the virtual buttons
i
n the touch screen tablet.
Each
menu is displayed over one or two pages
(
primary page and secondary page).
Use the " OPTIO
nS"
button to go to the
s
econdary
pag
e.
Use this button for access to
additional
information and to the
s
ettings for certain functions.
Use
this button to confirm.
Use this button to return to the
primary
page or to quit.
Monitoring
Page 53 of 450

51
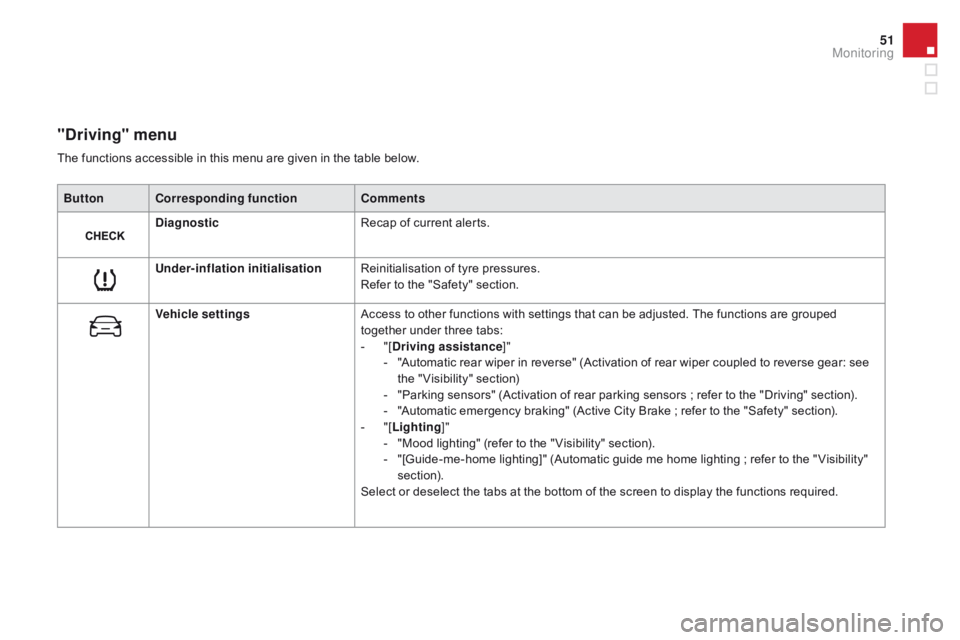
"driving" menu
ButtonCorresponding function Comments
di
agnostic Recap
of current alerts.
Under-inflation initialisation Reinitialisation
of tyre pressures.
Refer
to the "Safety" section.
Vehicle settings Access
to other functions with settings that can be adjusted. The functions are grouped
t
ogether under three tabs:
-
"
[
dr
iving assistance]"
-
"
Automatic rear wiper in reverse" (Activation of rear wiper coupled to reverse gear: see
t
he " Visibility" section)
-
"
Parking sensors" (Activation of rear parking sensors ; refer to the "Driving" section).
-
"
Automatic emergency braking" (Active City Brake ; refer to the "Safety" section).
-
"
[Lighting ]"
-
"
Mood lighting" (refer to the " Visibility" section).
-
"
[Guide-me-home lighting]" (Automatic guide me home lighting ; refer to the " Visibility"
s
ection).
Select
or deselect the tabs at the bottom of the screen to display the functions required.
The
functions accessible in this menu are given in the table below.
Monitoring
Page 63 of 450

61
F Press the closed padlock to lock t
he vehicle completely.
If
one of the doors or the boot is still
o
pen, the central locking does not take
p
lace.
When the vehicle is locked, if it is
u
nlocked inadvertently, it will lock itself
a
gain automatically after thirty seconds
u
nless a door or the boot is opened.
The folding and unfolding of the door
m
irrors using the remote control can be
d
eactivated by a CITROËN dealer or a
q
ualified
w
orkshop.
Folding the key
F First
press this button to fold the key.
If you do not press the button when
f
olding the key, there is a risk of
d
amage to the mechanism.
deadlocking using the remote
control
F Press the closed padlock again within f
ive seconds to deadlock the vehicle.
deadlocking using the key
F Turn the key to the left in the driver's door l
ock to lock the vehicle completely.
F
T
urn the key to the left again within
f
ive seconds to deadlock the vehicle.
Deadlocking
is confirmed by fixed lighting
o
f the direction indicators for approximately
t
wo seconds.
According
to version, the door mirrors fold at
t
he same time.
Deadlocking
renders the exterior and
i
nterior door controls inoperative.
It
also deactivates the manual central
c
ontrol button.
Therefore,
never leave anyone inside
t
he vehicle when it is deadlocked.This
is indicated by lighting of the courtesy
l
amps and flashing of the direction indicators
f
or a few seconds.
Locating your vehicle
F Press the closed padlock to l
ocate your locked vehicle in a
c
ar
par
k.
Access
Page 64 of 450

Following disconnection of the vehicle battery, replacement of the remote control battery or
i
n the event of a remote control malfunction,
y
ou can no longer unlock, lock or locate your
v
ehicle.
F
F
irst of all, use the key in the lock to unlock
o
r lock your vehicle.
F
T
hen, reinitialise the remote control.
If
the problem persists, contact a CITROËN
d
ealer as soon as possible.
Remote control problem
Reinitialisation
F Switch off the ignition.
F T urn the key to position 2 (Ignition).
F
P
ress the closed padlock immediately for a
f
ew seconds.
F
S
witch off the ignition and remove the key
f
rom the ignition switch.
The
remote control is fully operational again.
Changing the battery
Battery ref.: CR1620 / 3 volts.F U nclip the casing by inserting a coin at the
n
otch and rotating.
F
S
lide the flat battery out of its location.
F
S
lide the new battery into its location
o
bserving the original direction.
F
C
lip the casing in place, then the chrome
f
inisher.
F
R
einitialise the remote control.
If the battery is flat, you are
informed
by lighting of this warning
l
amp in the instrument panel, an audible signal
a
nd a message in the multifunction screen.
F
U
nfold the key.
F
R
elease the chrome finisher by pressing on
l
ug A.
F
M
aintain pressure on lug A and remove the
c
hrome finisher by sliding it off at 45°.
Page 84 of 450

These have one position for use (up) and a stowed position (down).
They
can also be removed.
To
remove a head restraint:
F
r
elease the backrest using control 1,
F
t
ilt the backrest 2 slightly for wards,
F
p
ull the head restraint upwards to the stop,
F
t
hen, press the lug A.
Rear head restraints
Never drive with the head restraints r
emoved; they must be in place and
c
orrectly
adj
usted.
Steering wheel ad justment
F When stationary , pull the control lever to
release the adjustment mechanism.
F
A
djust the height and reach to suit your
d
riving position.
F
P
ush the control lever to lock the
a
djustment
m
echanism.
As a safety precaution, these
operations
should only be carried out
w
ith the vehicle stationary.