2016 CITROEN DS3 CABRIO DAG ignition
[x] Cancel search: ignitionPage 245 of 458

243
DS3_en_Chap09_verifications_ed01-2015
Brake fluid level
Changing the fluid
Refer to the manufacturer's service schedule for details of the interval for this operation.
Fluid specification
The brake fluid must conform to the manufacturer's r ecommendations.
The
brake fluid level should be close
t
o the "MA X" mark. If it is not, check
t
he brake pad wear.
After
topping
up
the
oil,
the
check
when
s
witching
on
the
ignition
with
the
oil
level
i
ndicator
in
the
instrument
panel
is
not
valid
d
uring
the
30
minutes
after
topping
up.
Topping up the engine oil level
Refer to the "Petrol engine" or "Diesel engine" s ection for the location of the oil filler cap in the
engine
compartment of your vehicle.
F
U
nscrew the oil filler cap to reveal the filler
aperture.
F
A
dd oil in small quantities, avoiding any
s
pills on engine components (risk of fire).
F
W
ait a few minutes before checking the
l
evel again using the dipstick.
F
A
dd more oil if necessary.
F
A
fter checking the level, carefully refit the
o
il filler cap and the dipstick in its tube.
Engine oil change
Refer to the manufacturer's service schedule for details of the interval for this operation.
In
order to maintain the reliability of the engine
a
nd emission control system, never use
a
dditives in the engine oil.
Checks
Page 269 of 458

267
DS3_en_Chap11b_BTA_ed01-2015
Localised Assistance Call
If you purchased your vehicle outside
the CITROËN dealer network, we
i
nvite you to have a dealer check the
c
onfiguration of these services and, if
d
esired, modified to suit your wishes.
In
a multi-lingual country, configuration
i
s possible in the official national
language
of your choice.
For technical reasons, particularly
to
improve the quality of Telematic
s
ervices to customers, the
m
anufacturer reserves the right to
c
arry out updates to the vehicle's
on-board
telematic system.
Press
this
button
for
more
than
2
seconds
to
request
assistance
i
f
the
vehicle
breaks
down.
A
voice
message
confirms
that
t
he
call
has
been
started*.
Pressing
this
button
again
immediately
cancels
t
he
request.
The
cancellation
is
confirmed
by
a
voice
m
essage.
Operation of the system
When the ignition is switched o n, the green LED comes on for
3
seconds indicating that the
s
ystem is operating correctly.
If
the
orange
LED is on continuously: the
b
ackup
battery must be replaced.
In
either
case,
contact a CITROËN dealer.
If
the orange LED flashes: there
i
s a system fault.
*
T
hese
services are subject to conditions and
a
vailability.
C
onsult
a
CITROËN dealer.
Audio and Telematics
Page 323 of 458

1
19
321
DS3_en_Chap11c_SMEGplus_ed01-2015
The services available depend on
the network, the SIM card and the
c
ompatibility of the Bluetooth telephone
u
sed. Check the telephone manual and
w
ith your network provider for details of
t
he services available to you.
The
ability of the system to connect
w
ith only one profile depends on the
telephone.
The two profiles may both
c
onnect by default.
Visit
www.citroen.co.uk for more information
(
compatibility, additional help, ...).
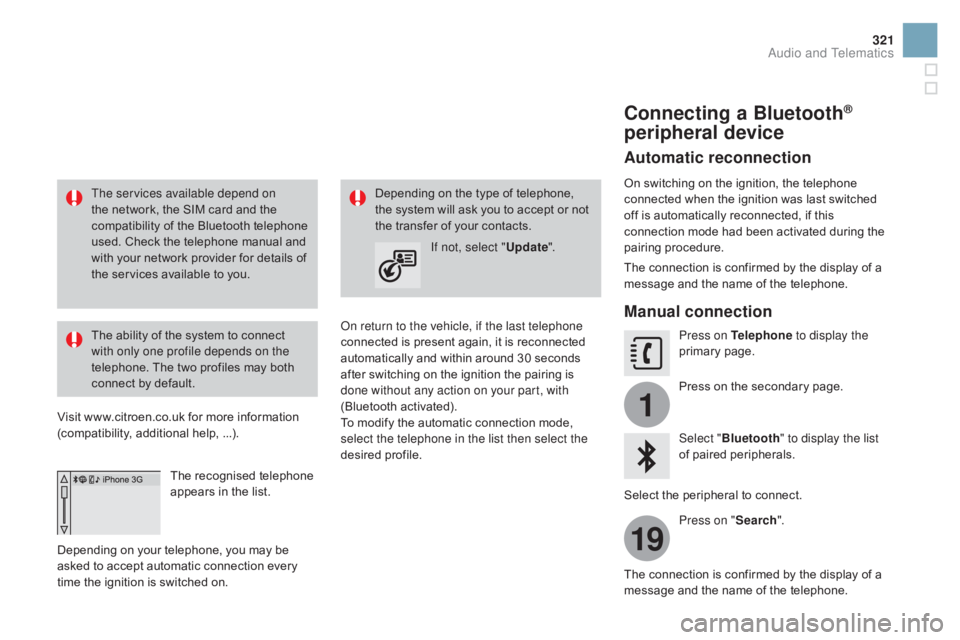
The
recognised telephone
a
ppears in the list.
Depending
on your telephone, you may be
a
sked
to accept automatic connection every
t
ime
the ignition is switched on. On return to the vehicle, if the last telephone
connected
is present again, it is reconnected
a
utomatically and within around 30 seconds
a
fter switching on the ignition the pairing is
d
one without any action on your part, with
(Bluetooth
a
ctivated).
To
modify the automatic connection mode,
s
elect the telephone in the list then select the
desired
p
rofile.
Depending
on the type of telephone, t
he system will ask you to accept or not
t
he transfer of your contacts.
If not, select " Update".
Connecting a Bluetooth®
peripheral device
Automatic reconnection
On switching on the ignition, the telephone c
onnected when the ignition was last switched
o
ff is automatically reconnected, if this
c
onnection mode had been activated during the
pa
iring
p
rocedure.
The
connection is confirmed by the display of a
m
essage and the name of the telephone.
Manual connection
Press on Telephone to display the
primary pag e.
Press
on the secondary page.
Select " Bluetooth " to display the list
of
paired peripherals.
Select
the peripheral to connect.
Press on " Search".
The
connection is confirmed by the display of a
m
essage
and the name of the telephone.
Audio and Telematics
Page 338 of 458

DS3_en_Chap11d_RD45_ed01-2015
Media
USB player
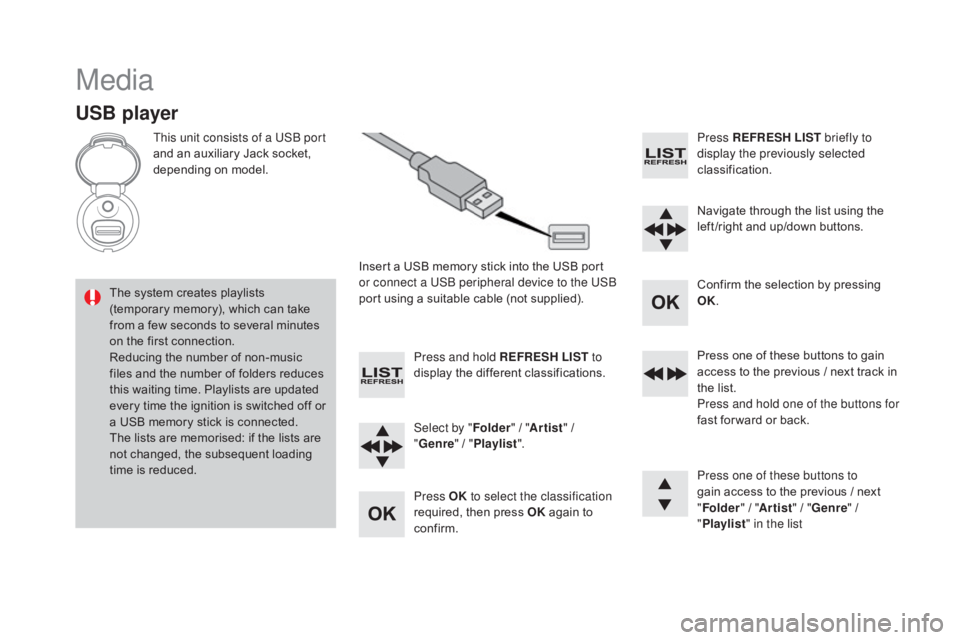
This unit consists of a USB port
and an auxiliary Jack socket,
d
epending on model.
Insert
a USB memory stick into the USB port
o
r connect a USB peripheral device to the USB
port
using a suitable cable (not supplied).
The
system creates playlists
(
temporary memory), which can take
f
rom
a
few seconds to several minutes
o
n
the
first connection.
Reducing
the number of non-music
f
iles
and the number of folders reduces
t
his
waiting time. Playlists are updated
e
very
time the ignition is switched off or
a
USB
memory stick is connected.
The
lists are memorised: if the lists are
n
ot
changed, the subsequent loading
t
ime
is
reduced. Press and hold REFRESH LIST
to
display
the different classifications.
Select by " Folder"
/ "Artist "
/
"ge
nre"
/
"Pl
aylist".
Press OK to select the classification
required,
then press OK
again to
c
onfirm. Press REFRESH LIST
briefly to
display the previously selected
classification.
Navigate
through the list using the
l
eft /right and up/down buttons.
Confirm
the selection by pressing
O
K.
Press
one of these buttons to gain
a
ccess to the previous / next track in
t
he list.
Press and hold one of the buttons for
fast
for ward or back.
Press one of these buttons to
gain
access to the previous / next
"Fo
lder"
/ "Artist "
/ "
ge
nre"
/
"Pl
aylist" in the list
Page 342 of 458

DS3_en_Chap11d_RD45_ed01-2015
Telephone
Pairing a Bluetooth® telephone
Screen C
(Available according to model and version)
As a safety measure and because they require prolonged attention on the part
o
f the driver, the operations for pairing
o
f the Bluetooth mobile telephone with
t
he Bluetooth hands-free system of
y
our audio equipment must be carried
o
ut with the vehicle stationary and the
ignition
o
n.
Go
to
www.citroen.co.uk for more information
(
compatibility, more help, ...).
Activate
the telephone's Bluetooth function
a
nd
ensure that it is "visible to all" (telephone
c
onfiguration). Press the ME
n
U
button. In
the menu, select:
- "Bluetooth : Telephone - Audio "
-
"Bluetooth configuration "
-
"Perform a Bluetooth search "
A
window is displayed with a message that a
s
earch is in progress.
The services available depend on
the
network, the SIM card and the
c
ompatibility of the Bluetooth device
u
sed.
Consult
your telephone's manual and
y
our operator to find out which services
are
available to you.
*
If
your telephone is fully compatible. The
first 4 telephones recognised are displayed
i
n this window.
The "Telephone"
menu permits access to the
f
ollowing functions in particular: "
dir
ectory" *,
" Calls list ", "Consult the paired equipment ".Select
the telephone to be connected from the l
ist. Only one telephone can be connected at
a
time.
A
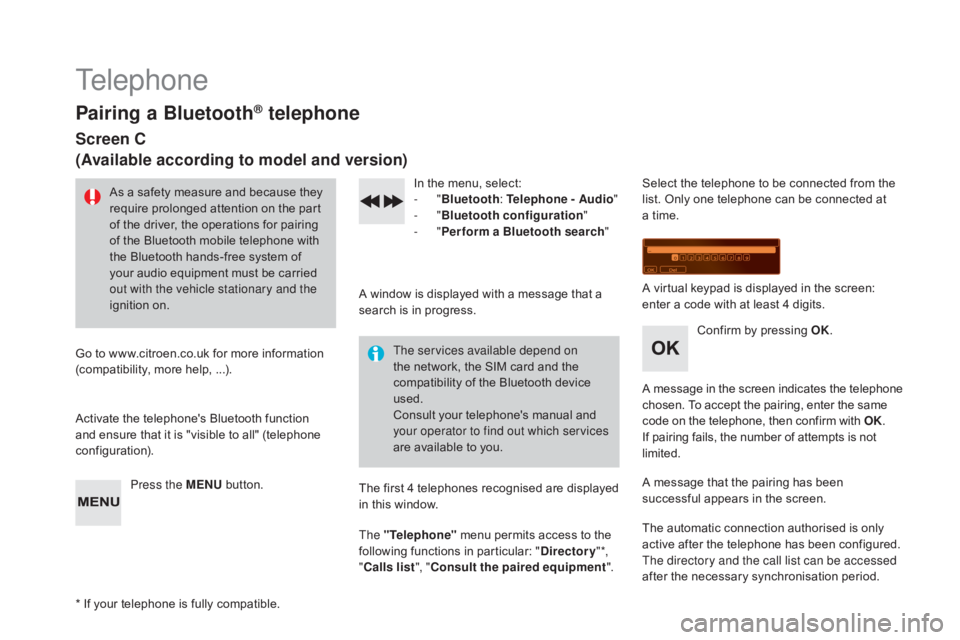
virtual keypad is displayed in the screen:
e
nter a code with at least 4 digits.
Confirm
by pressing OK.
A
message
in
the
screen
indicates
the
telephone
c
hosen. To accept the pairing, enter the same
c
ode on the telephone, then confirm with OK.
If
pairing fails, the number of attempts is not
l
imited.
A
message that the pairing has been
s
uccessful appears in the screen.
The
automatic connection authorised is only
a
ctive after the telephone has been configured.
The directory and the call list can be accessed
after
the necessary synchronisation period.
Page 359 of 458

357
DS3_en_Chap12_index-recherche_ed01-2015
EBA (Emergency braking assistance) .....15 0, 151
Eco-driving ...............................
......................14
Economy
mode
...............................
..............226
Electric window controls
................................. 64
E
lectronic brake force distribution (EBFD)
...15
0
Electronic
eng
ine
i
mmobiliser.................63, 101
Emergency
b
oot
r
elease
................................. 69
E
mergency braking system
..........................1
51
Emergency
c
all
..................................... 14
5, 26 6
Emergency
w
arning
lam
ps
...........................14
4
Emissions
control system, SCR
......3
3, 34, 188
Energy
economy mode
.................................2
26
Engine
c
ompartment
............................ 24
0, 241
Engine
c
ompartment
f
usebox
.......................2
19
Engine,
Diesel
......................... 2
4, 185, 241, 258
Engine
oil
...................................................... 2
42
Engine
oil level indicator
.........................3
9, 242
Engine,
petrol
....................... 1
85, 240, 250, 253
Environment
............... 1
4, 63, 90, 146, 194, 245
Equipment
se
ttings
.....................4
2, 45, 51, 343
Filling
with fuel
...................................... 18
4 -18 6
Fitting
a wheel
...............................
................205
Fittings,
boot
................................................... 96
F
lashing
in
dicators
........................................ 14
4
Foglamps,
f
ront
...............................
......13 2 , 2 11
Foglamps,
re
ar
...................................... 13
2, 213
Fragrance
c
artridge
........................................ 90
F
requency (radio)
................................. 29
4, 295
Front seats
..............................
..................72, 75
Fuel .......................................................... 14, 18 5
Fuel
c
onsumption
............................................ 14
F
uel filler flap
......................................... 18
4, 18 6
Gearbox, automatic ................1 4, 111, 225, 247
Gearbox, e lectronic ........1
4, 106, 116, 225, 247
Gearbox,
m
anual
.................... 1
4, 105, 116, 247
Gear
lever, automatic gearbox
.....................111
G
ear lever, manual gearbox
.........................10
5
Gear
selector,
electronic
ge
arbox
.............................. 1
06, 247
Gear
shift indicator
....................................... 11
5
Glove
box
........................................................ 93
G
rab
han
dles
............................................ 74
, 76
Halogen headlamps ......................................20 8
Hands-free kit .............................. .320, 321, 340
Hazard
w
arning
lam
ps
.................................. 14
4
Head restraints, front
...................................... 73
H
ead restraints, rear
....................................... 77
H
eated seats
...............................
....................73
Heating
................
............................... 83, 84, 86
Height
and reach adjustment,
steering
w
heel
..............................
................78
Hill start assist
............................................... 11
9
Horn ............................................................... 145
Fuel
gauge
........................................
18
, 20, 18 4
Fuel tank................................................
18 4, 18 6
Fusebox,
das
hboard
.....................................
2
17
Fuses
................
.............................................
216Indicators, direction
......................................
14
4
Inflating accessories (using the kit)
..............
19
8
Inflating tyres
..............................
............
14, 26 0
Instrument panel lighting
................................
41
In
strument
p
anels
...............................
......
18, 20
Instrument panel screen
...................
1
8, 20, 115
Interior
f
ittings
...........................................
9
2, 93
Interior lamp
...............................
...................
140
Interior
m
ood
l
ighting
....................................
1
41
Internet
...............
...................................
310, 311
ISOFIX
...............
....................................
178 -18 0
ISOFIX
m
ountings
................................. 178 , 18 0
Jack ............................................................... 200
Jack cable ............................................ 2
98, 337
JACK
socket
...............................
....94, 298, 337
Jukebox
...............
.......................................... 301
Keeping
children safe
...........1
59, 162, 166 -180
Key
in ignition warning
..................................10
3
Key
with remote control
....................6
0 - 63, 101
Labels, identification .....................................2 62
Lamps, front .......................................... 20
8, 210
Lamps,
re
ar
...............................
....................212
Alphabetical index
Page 377 of 458

3Access
In order to maintain the state of charge of the battery, it is recommended that the roof be operated with the engine running .
Operation of the roof is possible: - engine running, or - ignition on.
During operation of the roof with just the ignition on, starting the engine may cause the roof to stop, depending on the state of charge of the battery. To have the roof continue the operation, operate the control again after the engine has started.
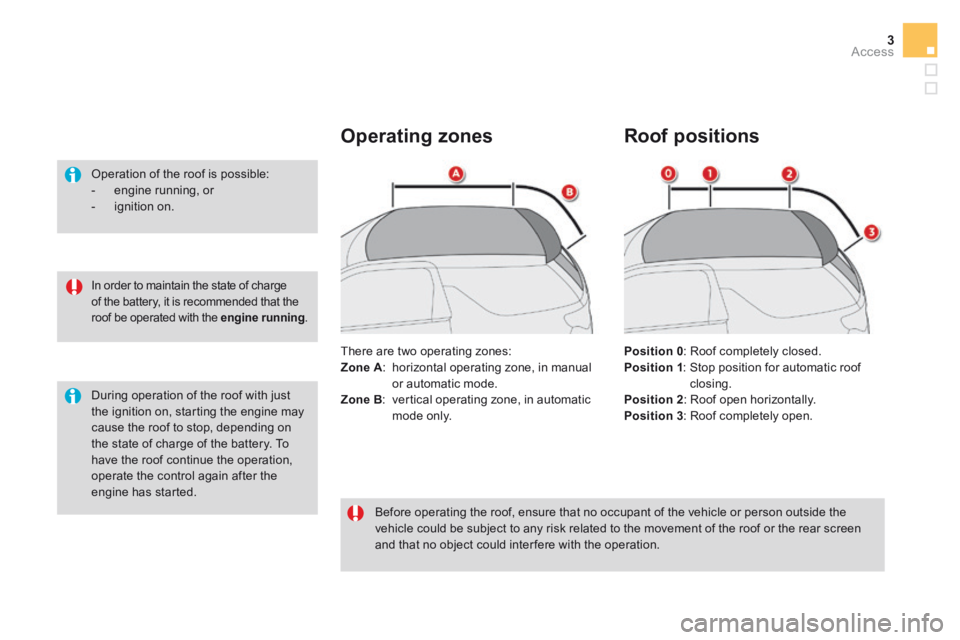
Operating zones
There are two operating zones: Zone A : horizontal operating zone, in manual or automatic mode. Zone B : vertical operating zone, in automatic mode only.
Before operating the roof, ensure that no occupant of the vehicle or person outside the vehicle could be subject to any risk related to the movement of the roof or the rear screen and that no object could inter fere with the operation.
Roof positions
Position 0 : Roof completely closed. Position 1 : Stop position for automatic roof closing. Position 2 : Roof open horizontally. Position 3 : Roof completely open.
Page 383 of 458

9Access
Precautions for use
Never place objects on the roof, whether open or closed.
In the event of prolonged storage of the vehicle outside, it is recommended that the roof be protected with a cover.
To avoid damaging the roof, do not open it under snowy or frosty conditions. Never use sharp tools to remove ice or accumulations of snow on the roof. Never use scrapers or aerosol products to remove ice that may have formed on the rear screen. Avoid operating the heated rear screen when the roof is completely open (risk of overheating).
To limit the creation of folds in the roof fabric, it is recommended that the roof not be left open for long periods. Operation of the vehicle's air conditioning system is not recommended while the roof is open.
Never place objects on the transverse roof support when the roof is open.
It is recommended that the roof be closed when the vehicle is left parked. Even if the roof is closed, it is prudent not to leave any valuable objects inside the vehicle. When you leave the vehicle, remove the ignition key to avoid any unwanted operation of the roof.
If your vehicle has a voice command system, this may not work as well when driving with the roof open.
Protection of the roof opening and closing electric motors: during repeated opening and closing of the roof, the electric motors may become too hot and then no longer allow the roof to be opened or closed. Allow the motors to cool down by not operating the roof for ten minutes.
Reinitialisation
Do not release the control during the reinitialisation procedure.
Operating
fault
In the event of an electrical fault, contact a CITROËN dealer or a qualified workshop.
If the automatic roof operation mode is lost, the system must be reinitialised. With the engine running , press and hold the control for closing the roof. After about 5 seconds, the roof closes
completely to position 0 . The roof is then reinitialised.