2016 Citroen C3 PICASSO RHD ignition
[x] Cancel search: ignitionPage 189 of 296

187
Changing a front or rear wiper blade
Removal
F Raise the corresponding wiper arm.
F U nclip the wiper blade and remove it.
Fitting
F At the front, check the size of the wiper blade as the shorter blade is fitted to the
passenger side of the vehicle.
F
P
ut the corresponding new wiper blade in
place and clip it.
F
F
old down the wiper arm carefully.
Before removing a front
wiper blade
F Within one minute after switching off the ignition, operate the wiper stalk to position
the wiper blades in the vertical position.
This position must be used in order to avoid
damaging the wiper blade and the bonnet.
After fitting a front wiper
blade
F Switch on the ignition.
F O perate the wiper stalk again to park the
wiper blades.
Procedure for replacing a worn wiper blade with a new one without the use of tools.
11
Practical information
Page 227 of 296

06
225
USING THE TELEPHONE
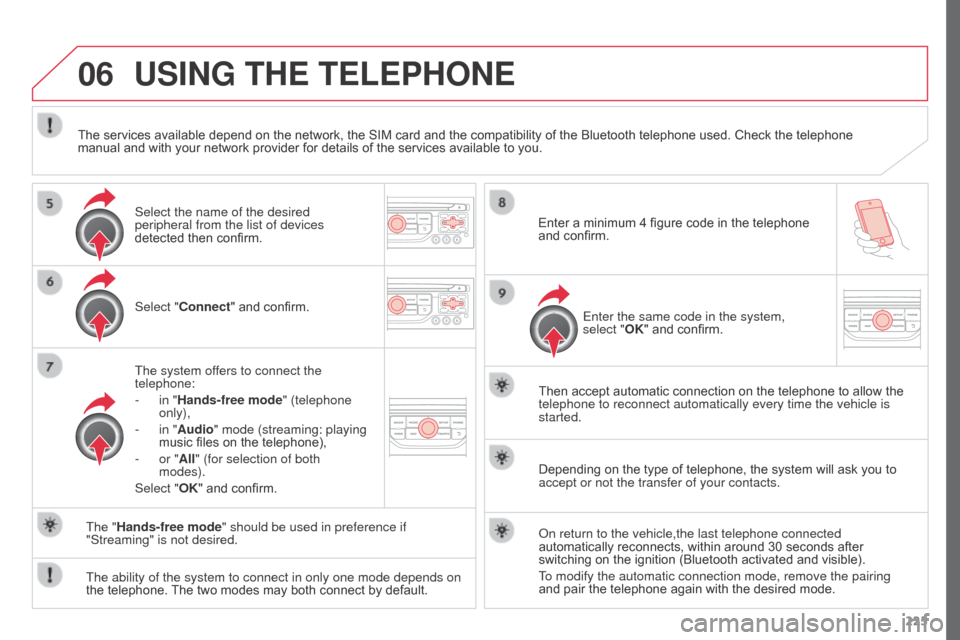
Select "Connect" and confirm.
The system offers to connect the
telephone:
-
in "
Hands-free mode" (telephone
only),
-
in "
Audio" mode (streaming: playing
music files on the telephone),
-
or "
All" (for selection of both
modes).
Select "OK" and confirm. Then accept automatic connection on the telephone to allow the
telephone to reconnect automatically every time the vehicle is
started.
The ability of the system to connect in only one mode depends on
the telephone. The two modes may both connect by default. The "Hands-free mode" should be used in preference if
"Streaming" is not desired.
The services available depend on the network, the SIM card and the compatibility of the Bluetooth telephone used. Check the telephone
manual and with your network provider for details of the services available to you.
Depending on the type of telephone, the system will ask you to
accept or not the transfer of your contacts.
On return to the vehicle,the last telephone connected
automatically reconnects, within around 30 seconds after
switching on the ignition (Bluetooth activated and visible).
To modify the automatic connection mode, remove the pairing
and pair the telephone again with the desired mode.
Enter a minimum 4 figure code in the telephone
and confirm.
Enter the same code in the system,
select "OK" and confirm.
Select the name of the desired
peripheral from the list of devices
detected then confirm.
Page 240 of 296

08
238Insert the CD in the player, insert the USB
memory stick in the USB player or connect the
USB peripheral to the USB port using a suitable
cable (not supplied).
The system builds playlists (in temporary
memory), an operation which can take from
a few seconds to several minutes at the first
connection.
Reduce the number of non-music files and the
number of folders to reduce the waiting time.
The playlists are updated every time the ignition
is switched off or connection of a USB memory
stick. However, the system memorises these
lists and if they are not modified, the loading
time will be shorter.
Play starts automatically after a period which
depends on the capacity of the USB memory
stick.
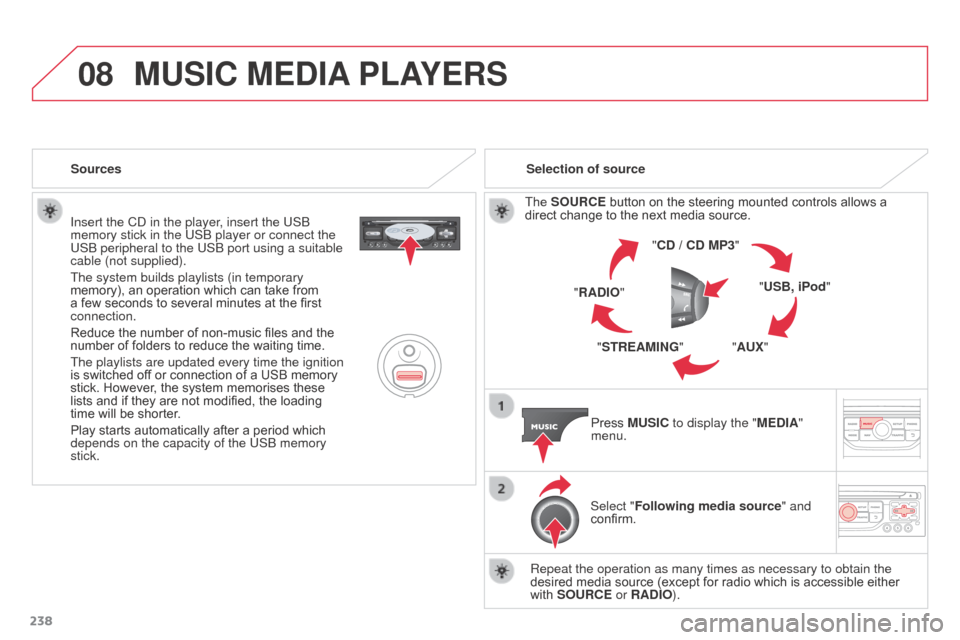
Selection of source
The SOURCE button on the steering mounted controls allows a
direct change to the next media source. "CD / CD MP3"
"USB, iPod"
"AUX"
"STREAMING"
"RADIO"
Press MUSIC to display the "MEDIA"
menu.
Select "Following media source " and
confirm.
Repeat the operation as many times as necessary to obtain the
desired media source (except for radio which is accessible either
with SOURCE or RADIO).
Sources
MUSIC MEDIA
PLAYERS
Page 264 of 296

05
262
USB PLAYER
The system puts together playlists (temporary memory) created
over a period which depends on the capacity of the USB device.
The other sources are available during this time.
The playlists are updated each time the ignition is switched off or
each time a USB memory stick is connected.
When connecting for the first time, the classification suggested
is by folder. When you reconnect, the classification selected
previously is retained.Connect the memory stick to the port, directly or
using a lead. If the audio equipment is switched
on, the USB source is detected as soon as it is
connected. Play begins automatically after a delay
which depends on the capacity of the USB memory
stick.
The file formats supported are .mp3 (mpeg1 layer
3 only)
and .wma (standard 9 only, 128 kbits/sec compression).
Certain playlist formats are supported (.m3u, ...).
On reconnection of the previous memory stick used,
play is resumed automatically with the last track
played.
This unit consists of a USB port and an auxiliary
Jack socket*. The audio files are transmitted
from a portable device - digital player or a USB
memory stick - to your Audio system and heard
via the vehicle's speakers.
USB memory stick or Apple
® player of
generation 5 or later:
-
Use only USB memory sticks formatted
F
AT32 (File Allocation Table),
-
the Apple® player lead is essential,
-
navigation through the file database is also
possible by means of the steering mounted
controls.
Using the USB PORT
Connecting a USB memory stick
Other Apple
® players of earlier generations and
players using the MTP protocol*:
-
play via Jack-Jack lead only (not supplied),
-
navigation through the file database is from
the portable device. *
Depending on vehicle.
Page 267 of 296

06
265
BLUETOOTH FUNCTIONS
As a safety measure and because they require prolonged attention
on the part of the driver, the operations for pairing of the Bluetooth
mobile telephone with the Bluetooth hands-free system of your
audio equipment must be carried out with the vehicle stationary
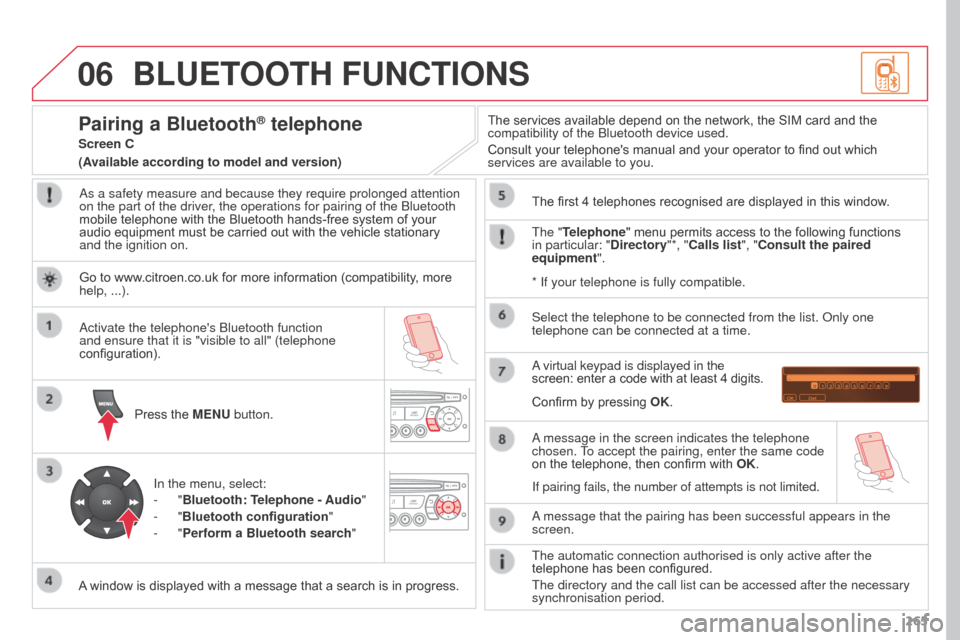
and the ignition on.Press the MENU button.
A window is displayed with a message that a search is in progress. Activate the telephone's Bluetooth function
and ensure that it is "visible to all" (telephone
configuration).
In the menu, select:
-
"Bluetooth: Telephone - Audio"
-
"Bluetooth configuration "
-
"Perform a Bluetooth search" The services available depend on the network, the SIM card and the
compatibility of the Bluetooth device used.
Consult your telephone's manual and your operator to find out which
services are available to you.
Pairing a Bluetooth® telephone
Screen C
The "Telephone" menu permits access to the following functions
in particular: "Directory"*, "Calls list", "Consult the paired
equipment". The first 4 telephones recognised are displayed in this window.
A virtual keypad is displayed in the
screen: enter a code with at least 4 digits.
Confirm by pressing OK.
A message that the pairing has been successful appears in the
screen. Select the telephone to be connected from the list. Only one
telephone can be connected at a time.
A message in the screen indicates the telephone
chosen. To accept the pairing, enter the same code
on the telephone, then confirm with OK.
The automatic connection authorised is only active after the
telephone has been configured.
The directory and the call list can be accessed after the necessary
synchronisation period.
(Available according to model and version)
*
If your telephone is fully compatible.
If pairing fails, the number of attempts is not limited.
Go to www.citroen.co.uk for more information (compatibility, more
help, ...).
Page 285 of 296

283
Pads, brake ................................................. 148
Paint colour code ........................................ 19 9
Panoramic glass sunroof
..............................67
Parcel shelf, rear
........................................... 92
P
arking brake ...................................... 125, 148
Parking sensors, rear ..................................13 6
Petrol
............................................................. 69
Plates, identification .................................... 19 9
Player, MP3 CD
................................... 237, 261
Players, music media
..................................236
Pockets, seat back
........................................ 87
Port, USB
............................................ 2
40, 262
Pressures, tyres
.................................. 153, 199
Pre-tensioning seat belts
............................117
Priming the fuel system
..............................141
Protecting
children
................................ 93 -106, 117, 119
Puncture
...................................................... 149
Radio
................................................... 233, 259
Range, AdBlue
............................................ 16 4
Reading lamps, rear
...................................... 81
Rear screen, demisting
.................................43
Recharging the battery
............................... 18
5
Reduction of electrical load
........................18 6
Regeneration of the particle filter
...............14
7
Reinitialising the electric windows
................62
P
R
Reinitialising the remote control ................... 59
R eminder, key in ignition .............................123
Remote control
........................................ 5
7- 6 0
Removing a wheel
...................................... 157
Removing the mat
......................................... 86
Replacing bulbs
................................... 16 9 -176
Replacing fuses
..............................
.....17 7-18 3
Replacing the air filter
.................................147
Replacing the oil filter
................................. 14
7
Replacing the passenger compartment filter
.................................... 147
Reservoir, screenwash
............................... 14
6
Resetting the service indicator
.....................24
Resetting the trip recorder
............................26
Rev counter
................................................... 10
Reversing camera
....................................... 13 8
Reversing lamp
................................... 17
4, 175
Risk areas (update)
..................................... 212
Roof bars
..................................................... 19
1
Running out of fuel (Diesel)
........................1
41
Safety, children
...................... 9
3 -106, 117, 119
Saturation of the particle filter (Diesel)
..................................................... 14
7
Scented air freshener
................................... 49
S
creen, colour and mapping ...............205, 244
Screen, monochrome
........244, 258, 268, 270
S
Screen, multifunction
(with audio system) .........................27, 30, 34
Screenwash
.................................................. 79
Screenwash, rear
.......................................... 79
SCR (Selective Catalytic Reduction)
..........162
Seat belts
....................................... 9
9, 114, 117
Seat, rear bench
........................................... 53
Seats, front
...............................
.....................50
Selector, gear
.............................................. 126
Serial number, vehicle
................................ 19
9
Service indicator
........................................... 22
Servicing
...............................
..........................8
Settings, equipment
..................27, 30, 34, 270
Sidelamps
...................................... 71, 171, 174
Side repeater
..............................
................173
Ski flap
..............................
............................89
Snow chains
................................................ 16
1
Socket, 12 volt accessory
.......................83, 85
Sockets, audio
....................240, 241, 262, 264
Speed limiter
............................................... 132
Speedometer
................................................ 10
Starting the engine
..................................... 123
Stay, bonnet
................................................ 140
Steering mounted controls, audio
......................................................... 257
Steering wheel, adjustment
..........................56
Storage
.................................................... 83, 90
Storage wells
................................................ 90
Stowing rings
................................................ 90
Sun visor
....................................................... 84
Switching off the engine
.............................12
3
Synchronising the remote control
.................59
Synthesiser, voice
....................................... 2
18
.
Alphabetical index
Page 294 of 296

Safety
110
C3Picasso_post-it_en_Chap08_securite_ed01-2015
Reinitialisation
It is necessary to reinitialise the system every time one or more tyre pressures are adjusted, and after changing one or more wheels.
Before reinitialising the system, ensure that the pressures of the four tyres are correct for the use of the vehicle and in line with the recommendations on the tyre pressure label. The under-inflation alert can only be relied on if the reinitialisation of the system has been done with the pressures in the four tyres correctly adjusted. The under-inflation detection system does not give a warning if a pressure is incorrect at the time of reinitialisation.
The system is reinitialised with the ignition on and the vehicle stationary, via the vehicle configuration menu.
Press the MENU button for access to the main menu. Press the " " or " " button to select the Veh conf ig menu, then confirm by pressing the OK button. Press the " " or " " button to select " Reinit inflat ", then confirm by pressing the OK button. Select " yes " or " no " then press OK . A message is displayed asking you to confirm the instruction. Confirm by pressing the OK button. Conform then quit the menu.
Press the MENU button for access to the main. Press the " " or " " button to select the menu, " Personalisation-configuration " then confirm by pressing the button OK . Press the " " or " " button to select the " Define vehicle parameters ", menu, then confirm by pressing the OK button. Press the " " or " " button to select the " Tyre pressures" , menu then the " Reinitialisation " menu, then confirm by pressing the OK button. A message confirms the reinitialisation.
The new pressure settings registered are considered to be reference values by the system.
Vehicles without audio or navigation system Vehicles with audio system