Page 32 of 292

30
C3Picasso_en_Chap02_ecran-multifonction_ed01-2015
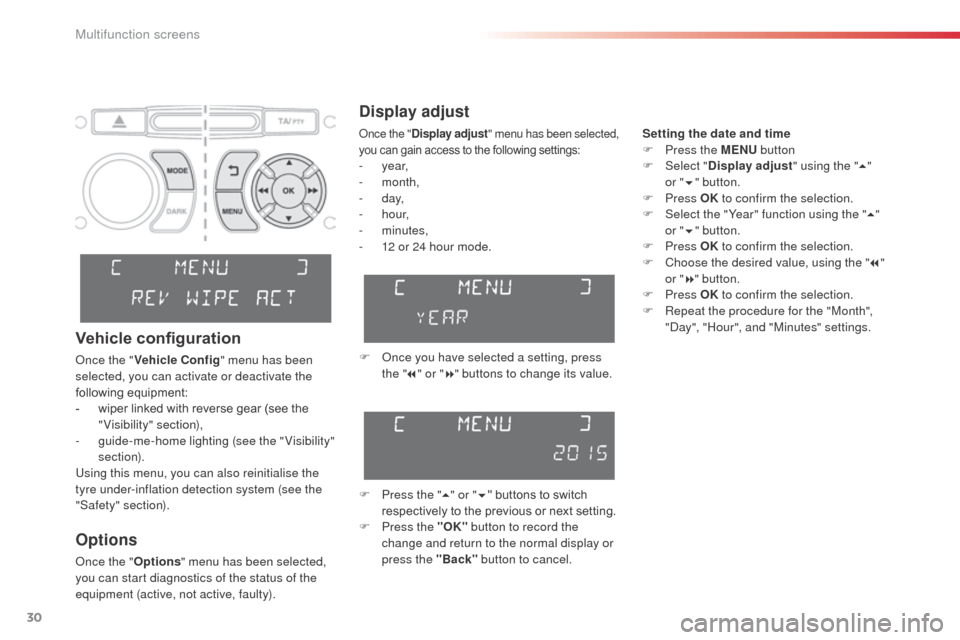
Display adjust
Setting the date and time
F P ress the MENU button
F
Sel
ect "Display adjust " using the "5"
or
"6 "
button.
F
Press OK to confirm the selection.
F
S
elect the "Year" function using the " 5"
or
"6 " button.
F
Press OK to confirm the selection.
F
C
hoose the desired value, using the " 7"
or
"8 " button.
F
Press OK to confirm the selection.
F
R
epeat the procedure for the "Month",
"Day", "Hour", and "Minutes" settings.
F
O
nce you have selected a setting, press
the " 7" or " 8" buttons to change its value.
F
P
ress the " 5" or " 6" buttons to switch
respectively to the previous or next setting.
F
P
ress the "OK" button to record the
change and return to the normal display or
press the "Back" button to cancel.
Options
Once the "Options" menu has been selected,
you can start diagnostics of the status of the
equipment (active, not active, faulty).
Vehicle configuration
Once the " Vehicle Config" menu has been
selected, you can activate or deactivate the
following equipment:
-
w
iper linked with reverse gear (see the
"Visibility" section),
-
g
uide-me-home lighting (see the " Visibility"
section).
Using this menu, you can also reinitialise the
tyre under-inflation detection system (see the
"Safety" section).
Once the " Display adjust " menu has been selected,
you can gain access to the following settings:
- year,
- month,
-
d ay,
-
h o u r,
-
minutes,
-
1
2 or 24 hour mode.
Multifunction screens
Page 35 of 292

33
C3Picasso_en_Chap02_ecran-multifonction_ed01-2015
Options
Once the "Options" menu has been selected,
you can start diagnostics of the status of the
equipment (active, not active, faulty).
Language
Once the " Languages " menu has been
selected, you can change the language used
by the display by selecting a new language
from the list offered.
Units
Once the " Units" menu has been selected,
you can change the units of the following
parameters:
-
t
emperature (°C or °F),
-
f
uel consumption (l/100 km, mpg or km/l).
The chosen language will also be used
by the eMyWay system colour screen. For safety reasons, configuration of the
multifunction screen by the driver must
only be done when stationary. Once the fuel consumption unit has
been changed to mpg, the information
relating to speed and distance also
changes to miles.
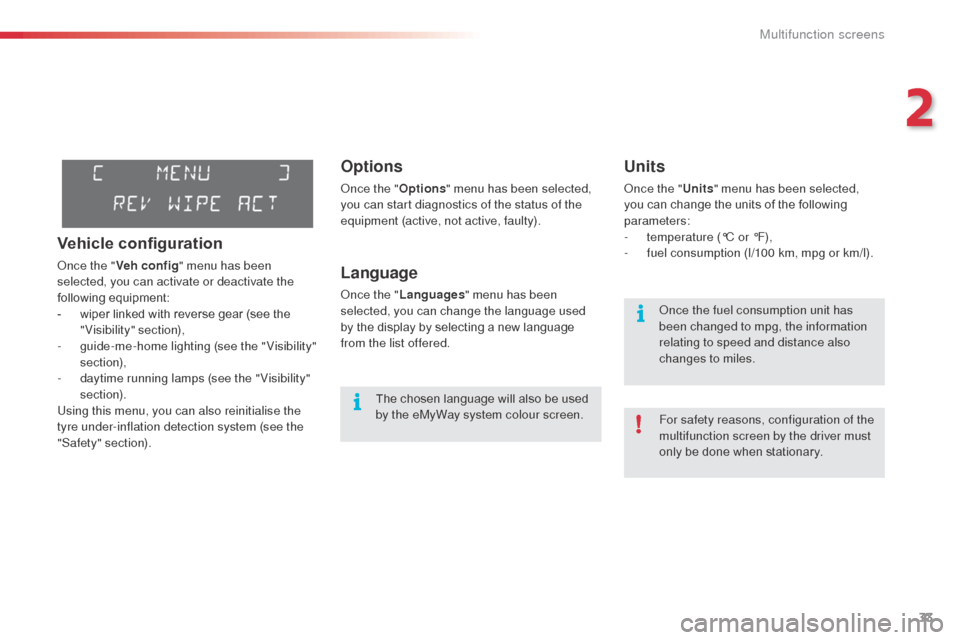
Vehicle configuration
Once the "Veh conf ig " menu has been
selected, you can activate or deactivate the
following equipment:
-
w
iper linked with reverse gear (see the
"Visibility" section),
-
g
uide-me-home lighting (see the " Visibility"
section),
-
d
aytime running lamps (see the " Visibility"
section).
Using this menu, you can also reinitialise the
tyre under-inflation detection system (see the
"Safety" section).
2
Multifunction screens
Page 40 of 292

38
C3Picasso_en_Chap02_ecran-multifonction_ed01-2015
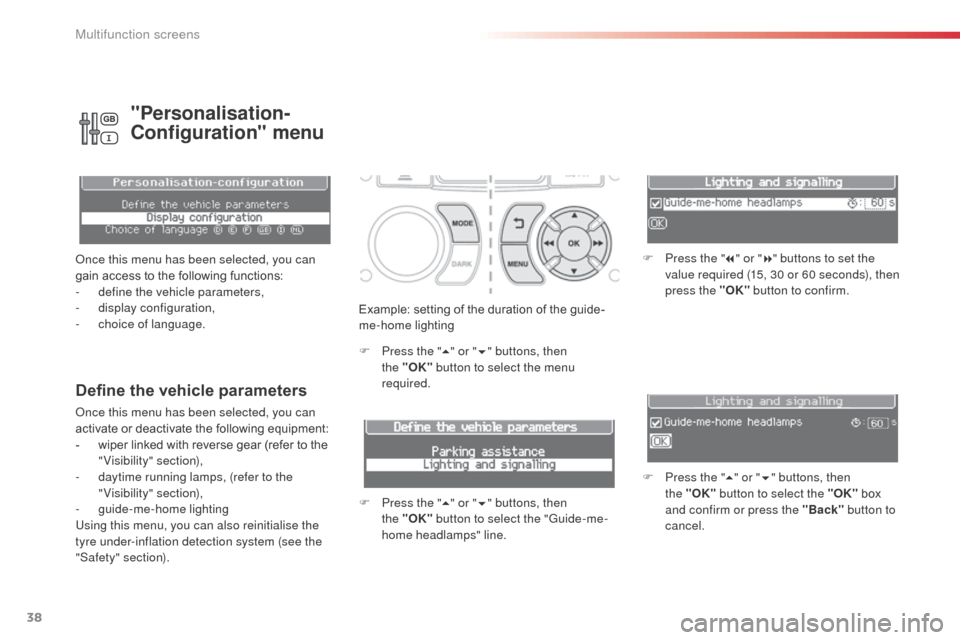
Example: setting of the duration of the guide-
me-home lighting
F
P
ress the " 5" or " 6" buttons, then
the
"OK" button to select the menu
required.
F
P
ress the " 5" or " 6" buttons, then
the
"OK" button to select the "Guide-me-
home headlamps" line. F
P
ress the "
7" or " 8" buttons to set the
value required (15, 30 or 60 seconds), then
press the "OK" button to confirm.
F
P
ress the "5" or " 6" buttons, then
the
"OK" button to select the "OK" box
and confirm or press the "Back" button to
cancel.
Define the vehicle parameters
Once this menu has been selected, you can
activate or deactivate the following equipment:
-
w
iper linked with reverse gear (refer to the
"Visibility" section),
-
d
aytime running lamps, (refer to the
"Visibility" section),
-
gu
ide-me-home lighting
Using this menu, you can also reinitialise the
tyre under-inflation detection system (see the
"Safety" section).
"Personalisation-
Configuration" menu
Once this menu has been selected, you can
gain access to the following functions:
-
d
efine the vehicle parameters,
-
d
isplay configuration,
-
c
hoice of language.
Multifunction screens
Page 48 of 292
46
C3Picasso_en_Chap03_confort_ed01-2015
Footwells.
Central and side vents.The air distribution can be
adapted by placing the dial in an
intermediate position.
2. Air flow adjustment
F Turn the dial from position 1
to position 5 to obtain a
comfortable air flow. Windscreen, side windows and
footwells.
F
T
urn the dial from blue
(cold) to red (hot) to adjust
the temperature to your
requirements. Windscreen and side windows.
1. Temperature adjustment
The heating / ventilation or air conditioning systems can only operate with the engine running.
3. Air distribution adjustment
Heating / Ventilation
Manual air
conditioning
F If you place the air flow control
in position 0 (deactivation of the
system), the temperature is no
longer maintained at a comfortable
level. However, a slight flow of air,
due to the movement of the vehicle,
can still be felt.
Comfort
Page 52 of 292

50
C3Picasso_en_Chap03_confort_ed01-2015
6. Air distribution adjustment
F Press one or more buttons to direct the air flow towards:
7. Air flow adjustment
F Turn this control to the left to decrease the air flow or to the
right to increase the air flow.
8. Air intake / Air recirculationF Turn the air flow control to the left until all of the indicator lamps go off.
This action switches off the air conditioning and
the ventilation.
Temperature related comfort is no longer
guaranteed but a slight flow of air, due to the
movement of the vehicle, can still be felt.
F
T
urn the air flow dial to the right or press the
"AUTO" button to reactivate the system with
the values set before it was switched off.
F
P
ress this button for recirculation
of the interior air. The indicator
lamp in the button comes on.
-
t
he windscreen and side windows
(demisting or defrosting),
-
t
he windscreen, the side windows and the
vents,
-
t
he windscreen, the side windows, the
vents and the footwells,
-
t
he vents and the footwells,
-
t
he vents,
-
t
he footwells,
-
t
he windscreen, the side windows and the
footwells.
The air flow indicator lamps, between the two
fans, come on progressively in relation to the
value requested. F
A
s soon as possible, press this button
again to permit the intake of outside air and
prevent the formation of condensation. The
indicator lamp on the button switches off.
9. Mono-zone / Dual-zone
F Press this button to equalise the comfort value on the
passenger's side with that on
the driver's side (mono zone).
The indicator lamp in the button
comes on.
Air recirculation enables the passenger compartment
to be isolated from exterior odours and smoke.
Avoid prolonged operation in interior
air recirculation mode or driving for
long periods with the system off (risk of
condensation and deterioration of the
air quality).
Switching the system off
Comfort
Page 59 of 292

57
C3Picasso_en_Chap03_confort_ed01-2015
Mirrors
The mirror glass is electrically adjustable.
A lamp located under the mirror shell provides
lighting for the driver's and front passenger's
entry and exit.
This exterior lighting comes on when the
vehicle is unlocked or a door is opened and
stays on for a timed period.
Folding
F From outside: lock the vehicle using the remote control or the key.
F
F
rom inside: with the ignition on, pull the
control A in the central position rear wards.
Unfolding
F From outside: unlock the vehicle using the remote control or the key.
F
F
rom inside: with the ignition on, pull the
control A in the central position rear wards.
Adjustment
F Move control A to the right or to the left to select the corresponding mirror.
F
M
ove control B in all four directions to
adjust.
F
R
eturn control A to the central position. If the mirrors are folded using control A
,
they will not unfold when the vehicle is
unlocked. Pull again on control A .
The folding and unfolding of the door
mirrors using the remote control can be
deactivated by a CITROËN dealer or a
qualified workshop.
Never fold or unfold the electric folding
mirrors manually.
The objects observed are, in reality,
closer than they appear.
Take this into account in order to
correctly judge the distance of vehicles
approaching from behind.
Door mirrors
3
Comfort
Page 60 of 292

58
C3Picasso_en_Chap03_confort_ed01-2015
Adjustment
F Adjust the mirror so that the glass is directed correctly in the "day" position.
Manual day/night model
Day / night position
F Pull the lever to change to the "night" anti-dazzle position.
F
P
ush the lever to change to the normal
"day" position.
Rear view mirror
Adjustable mirror providing a central rear ward view.
Equipped with an anti-dazzle system, which darkens the mirror glass and reduces the nuisance to
the driver caused by the sun, headlamps from other vehicles...
Steering wheel adjustment
F When stationary , pull the control lever to
release the adjustment mechanism.
F
A
djust the height and reach to suit your
driving position.
F
P
ush the control lever to lock the
adjustment mechanism.
As a safety measure, the mirrors should
be adjusted to reduce the "blind spot". As a safety measure, these operations
should only be carried out with the
vehicle stationary.
Automatic day/night model
By means of a sensor, which measures the
light from the rear of the vehicle, this system
automatically and progressively changes
between the day and night uses.
In order to ensure optimum visibility
during your manoeuvres, the mirror
lightens automatically when reverse
gear is engaged.
Comfort
Page 61 of 292

59
C3Picasso_en_Chap04_ouverture_ed01-2015
Remote control key
System which permits central unlocking or locking of the vehicle using the door lock or from a distance. It is also used to locate and start the vehicle, as
well as providing protection against theft.
Unfolding the key
F First press this button to unfold the key.
Unlocking the vehicle
F Press the open padlock to unlock the vehicle.
Unlocking using the key
F Turn the key to the left in the driver's door lock to unlock the vehicle.
Unlocking is confirmed by rapid flashing of
the direction indicators for approximately
two
seconds.
According to version, the door mirrors unfold
at
the same time.
Unlocking using the remote
control
Locking the vehicle
F Press the closed padlock to lock the vehicle.
Locking using the key
F Turn the key to the right in the driver's door lock to lock the vehicle completely.
Locking using the remote control
If one of the doors or the boot is still
open, the central locking does not take
place.
When the vehicle is locked, if it
is unlocked inadvertently, it will
automatically lock itself again after
thirty seconds unless a door or the boot
is open.
The folding and unfolding of the door
mirrors using the remote control can be
deactivated by a CITROËN dealer or a
qualified workshop.
Locking is confirmed by fixed lighting of
the direction indicators for approximately
two
seconds.
According to version, the door mirrors fold at
the same time.
4
Access