2016 CHEVROLET SILVERADO capacities
[x] Cancel search: capacitiesPage 371 of 533
Chevrolet Silverado Owner Manual (GMNA-Localizing-U.S./Canada/Mexico-
9159338) - 2016 - crc - 10/21/15
370 Vehicle Care
Checking Engine Oil
It is a good idea to check the engine
oil level at each fuel fill. In order to
get an accurate reading, the vehicle
must be on level ground. The
engine oil dipstick handle is a loop.
SeeEngine Compartment Overview
0 364 for the location of the engine
oil dipstick.
If a low oil message displays on the
DIC, it is important to park on level
ground to accurately measure the
oil level on the dipstick. Idling the
vehicle on steep grades for a long
time can influence the level sensing
accuracy.
Obtaining an accurate oil level
reading is essential:
1. If the engine has been running recently, turn off the engine and
allow several minutes for the oil
to drain back into the oil pan.
Checking the oil level too soon
after engine shutoff will not
provide an accurate oil level
reading.{Warning
The engine oil dipstick handle
may be hot; it could burn you.
Use a towel or glove to touch the
dipstick handle.
2. Pull out the dipstick and wipe it with a clean paper towel or
cloth, then push it back in all
the way. Remove it again,
keeping the tip down, and
check the level.
When to Add Engine Oil
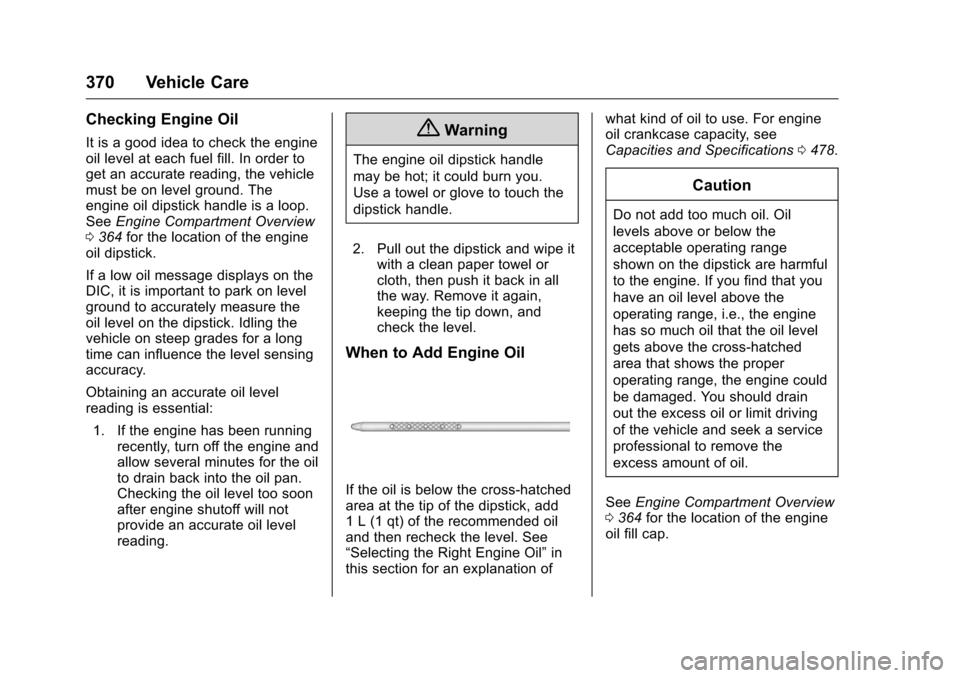
If the oil is below the cross-hatched
area at the tip of the dipstick, add
1 L (1 qt) of the recommended oil
and then recheck the level. See
“Selecting the Right Engine Oil” in
this section for an explanation of what kind of oil to use. For engine
oil crankcase capacity, see
Capacities and Specifications
0478.
Caution
Do not add too much oil. Oil
levels above or below the
acceptable operating range
shown on the dipstick are harmful
to the engine. If you find that you
have an oil level above the
operating range, i.e., the engine
has so much oil that the oil level
gets above the cross-hatched
area that shows the proper
operating range, the engine could
be damaged. You should drain
out the excess oil or limit driving
of the vehicle and seek a service
professional to remove the
excess amount of oil.
See Engine Compartment Overview
0 364 for the location of the engine
oil fill cap.
Page 388 of 533
Chevrolet Silverado Owner Manual (GMNA-Localizing-U.S./Canada/Mexico-
9159338) - 2016 - crc - 10/21/15
Vehicle Care 387
Caution
Continuing to drive with worn-out
brake pads could result in costly
brake repair.
Some driving conditions or climates
can cause a brake squeal when the
brakes are first applied or lightly
applied. This does not mean
something is wrong with the brakes.
Properly torqued wheel nuts are
necessary to help prevent brake
pulsation. When tires are rotated,
inspect brake pads for wear and
evenly tighten wheel nuts in the
proper sequence to torque
specifications in Capacities and
Specifications 0478.
Brake linings should always be
replaced as complete axle sets.
Brake Pedal Travel
See your dealer if the brake pedal
does not return to normal height,
or if there is a rapid increase in
pedal travel. This could be a sign
that brake service may be required.
Replacing Brake System Parts
Always replace brake system parts
with new, approved replacement
parts. If this is not done, the brakes
may not work properly. The braking
performance expected can change
in many other ways if the wrong
replacement brake parts are
installed or parts are improperly
installed.
Brake Fluid
The brake master cylinder reservoir
is filled with DOT 3 brake fluid. See
Engine Compartment Overview
0 364 for the location of the
reservoir. There are only two reasons why the
brake fluid level in the reservoir may
go down:
.
Normal brake lining wear. When
new linings are installed, the
fluid level goes back up.
. A fluid leak in the brake
hydraulic system. Have the
brake hydraulic system fixed.
With a leak, the brakes will not
work well.
Always clean the brake fluid
reservoir cap and the area around
the cap before removing it.
Do not top off the brake fluid.
Adding fluid does not correct a leak.
If fluid is added when the linings are
worn, there will be too much fluid
when new brake linings are
installed. Add or remove fluid, as
necessary, only when work is done
on the brake hydraulic system.
Page 425 of 533
Chevrolet Silverado Owner Manual (GMNA-Localizing-U.S./Canada/Mexico-
9159338) - 2016 - crc - 10/21/15
424 Vehicle Care
When installing dual wheels,
check that the vent holes in the
inner and outer wheels on each
side are lined up.
Adjust the front and rear tires to
the recommended inflation
pressure on the Tire and
Loading Information label after
the tires have been rotated. See
Tire Pressure0416 and Vehicle
Load Limits 0272.
Check that all wheel nuts are
properly tightened. See “Wheel
Nut Torque” underCapacities
and Specifications 0478.
{Warning
Rust or dirt on a wheel, or on the
parts to which it is fastened, can
make wheel nuts become loose
after time. The wheel could come
off and cause an accident. When
changing a wheel, remove any
rust or dirt from places where the
wheel attaches to the vehicle. In
(Continued)
Warning (Continued)
an emergency, a cloth or a paper
towel can be used; however, use
a scraper or wire brush later to
remove all rust or dirt.
Lightly coat the inner diameter of
the wheel hub opening with
wheel bearing grease after a
wheel change or tire rotation to
prevent corrosion or rust
build-up. Do not get grease on
the flat wheel mounting surface
or on the wheel nuts or bolts.
Reset the Tire Pressure Monitor
System (TPMS), if the vehicle
has one. SeeTire Pressure
Monitor Operation 0418.
Check that the spare tire, if the
vehicle has one, is stored
properly. Push, pull, and then try
to rotate or turn the tire. If it
moves, tighten the cable. See “Storing a Flat or Spare Tire and
Tools”
underTire
Changing 0432.
When It Is Time for New
Tires
Factors, such as maintenance,
temperatures, driving speeds,
vehicle loading, and road conditions
affect the wear rate of the tires.
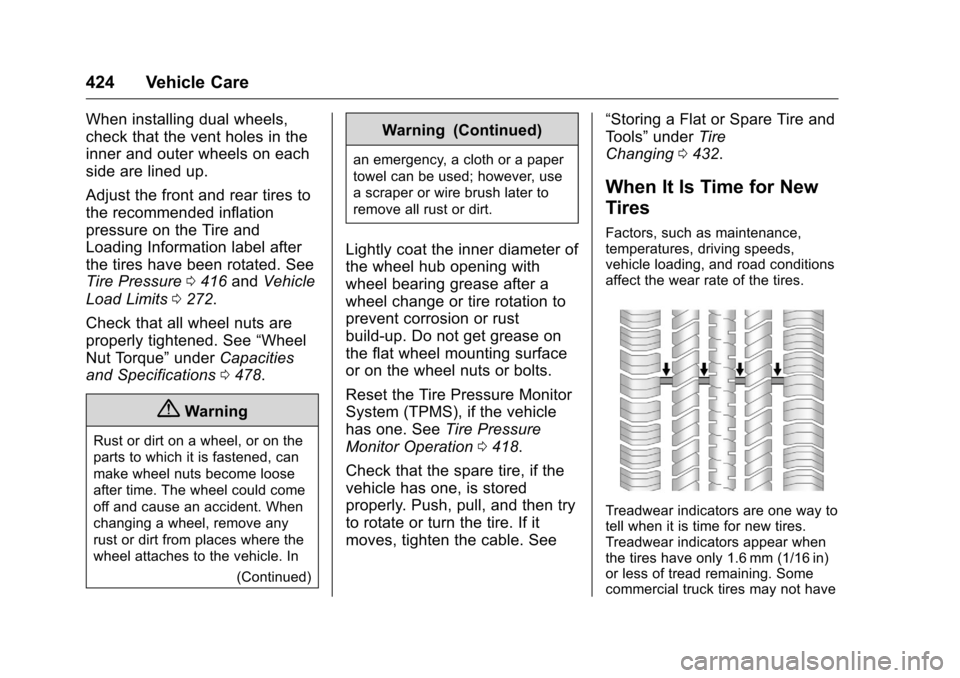
Treadwear indicators are one way to
tell when it is time for new tires.
Treadwear indicators appear when
the tires have only 1.6 mm (1/16 in)
or less of tread remaining. Some
commercial truck tires may not have
Page 430 of 533

Chevrolet Silverado Owner Manual (GMNA-Localizing-U.S./Canada/Mexico-
9159338) - 2016 - crc - 10/21/15
Vehicle Care 429
Wheel Alignment and Tire
Balance
The tires and wheels were aligned
and balanced at the factory to
provide the longest tire life and best
overall performance. Adjustments to
wheel alignment and tire balancing
are not necessary on a regular
basis. Consider an alignment check
if there is unusual tire wear or the
vehicle is significantly pulling to one
side or the other. Some slight pull to
the left or right, depending on the
crown of the road and/or other road
surface variations such as troughs
or ruts, is normal. If the vehicle is
vibrating when driving on a smooth
road, the tires and wheels may need
to be rebalanced. See your dealer
for proper diagnosis.
Wheel Replacement
Replace any wheel that is bent,
cracked, or badly rusted or
corroded. If wheel nuts keep coming
loose, the wheel, wheel bolts and
wheel nuts should be replaced.
If the wheel leaks air, replace it.Some aluminum wheels can be
repaired. See your dealer if any of
these conditions exist.
Your dealer will know the kind of
wheel that is needed.
Each new wheel should have the
same load-carrying capacity,
diameter, width, offset and be
mounted the same way as the one it
replaces.
Replace wheels, wheel bolts, wheel
nuts, or Tire Pressure Monitor
System (TPMS) sensors with new
GM original equipment parts.
{Warning
Using the wrong replacement
wheels, wheel bolts, or wheel
nuts can be dangerous. It could
affect the braking and handling of
the vehicle. Tires can lose air,
and cause loss of control, causing
a crash. Always use the correct
wheel, wheel bolts, and wheel
nuts for replacement.
Caution
The wrong wheel can also cause
problems with bearing life, brake
cooling, speedometer or
odometer calibration, headlamp
aim, bumper height, vehicle
ground clearance, and tire or tire
chain clearance to the body and
chassis.
Whenever a wheel, wheel bolt,
or wheel nut is replaced on a dual
wheel setup, check the wheel nut
torque after 160,1 600, and
10 000 km (100,1,000, and
6,000 mi) of driving. For proper
torque, see “Wheel Nut Torque”
under Capacities and
Specifications 0478.
See If a Tire Goes Flat 0431 for
more information.
Page 439 of 533
Chevrolet Silverado Owner Manual (GMNA-Localizing-U.S./Canada/Mexico-
9159338) - 2016 - crc - 10/21/15
438 Vehicle Care
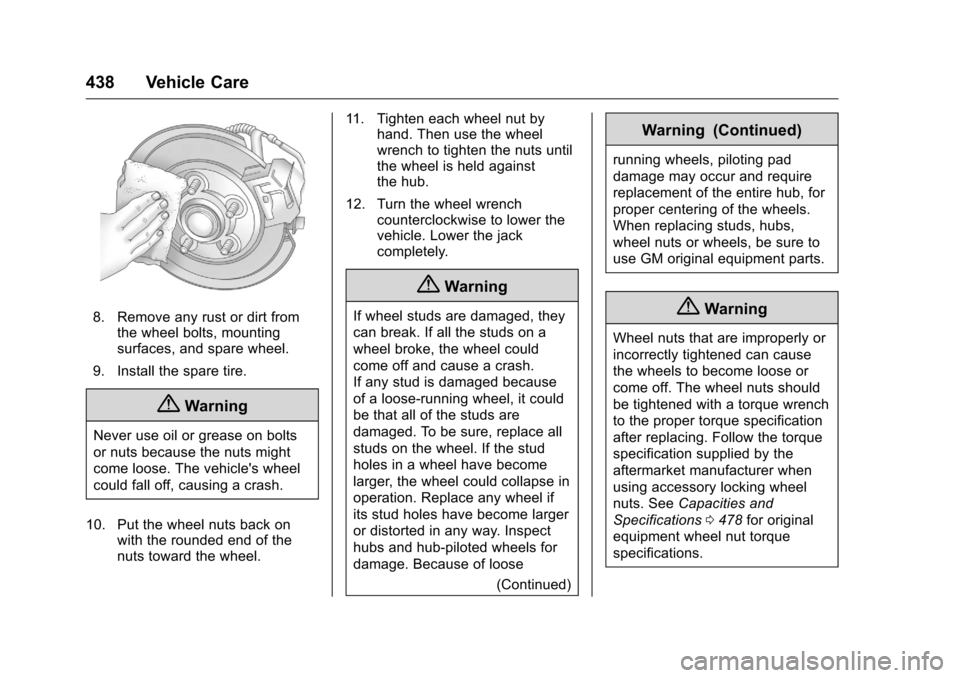
8. Remove any rust or dirt fromthe wheel bolts, mounting
surfaces, and spare wheel.
9. Install the spare tire.
{Warning
Never use oil or grease on bolts
or nuts because the nuts might
come loose. The vehicle's wheel
could fall off, causing a crash.
10. Put the wheel nuts back on with the rounded end of the
nuts toward the wheel. 11. Tighten each wheel nut by
hand. Then use the wheel
wrench to tighten the nuts until
the wheel is held against
the hub.
12. Turn the wheel wrench counterclockwise to lower the
vehicle. Lower the jack
completely.
{Warning
If wheel studs are damaged, they
can break. If all the studs on a
wheel broke, the wheel could
come off and cause a crash.
If any stud is damaged because
of a loose-running wheel, it could
be that all of the studs are
damaged. To be sure, replace all
studs on the wheel. If the stud
holes in a wheel have become
larger, the wheel could collapse in
operation. Replace any wheel if
its stud holes have become larger
or distorted in any way. Inspect
hubs and hub‐piloted wheels for
damage. Because of loose
(Continued)
Warning (Continued)
running wheels, piloting pad
damage may occur and require
replacement of the entire hub, for
proper centering of the wheels.
When replacing studs, hubs,
wheel nuts or wheels, be sure to
use GM original equipment parts.
{Warning
Wheel nuts that are improperly or
incorrectly tightened can cause
the wheels to become loose or
come off. The wheel nuts should
be tightened with a torque wrench
to the proper torque specification
after replacing. Follow the torque
specification supplied by the
aftermarket manufacturer when
using accessory locking wheel
nuts. SeeCapacities and
Specifications 0478 for original
equipment wheel nut torque
specifications.
Page 440 of 533
Chevrolet Silverado Owner Manual (GMNA-Localizing-U.S./Canada/Mexico-
9159338) - 2016 - crc - 10/21/15
Vehicle Care 439
Caution
Improperly tightened wheel nuts
can lead to brake pulsation and
rotor damage. To avoid expensive
brake repairs, evenly tighten the
wheel nuts in the proper
sequence and to the proper
torque specification. See
Capacities and Specifications
0478 for the wheel nut torque
specification.
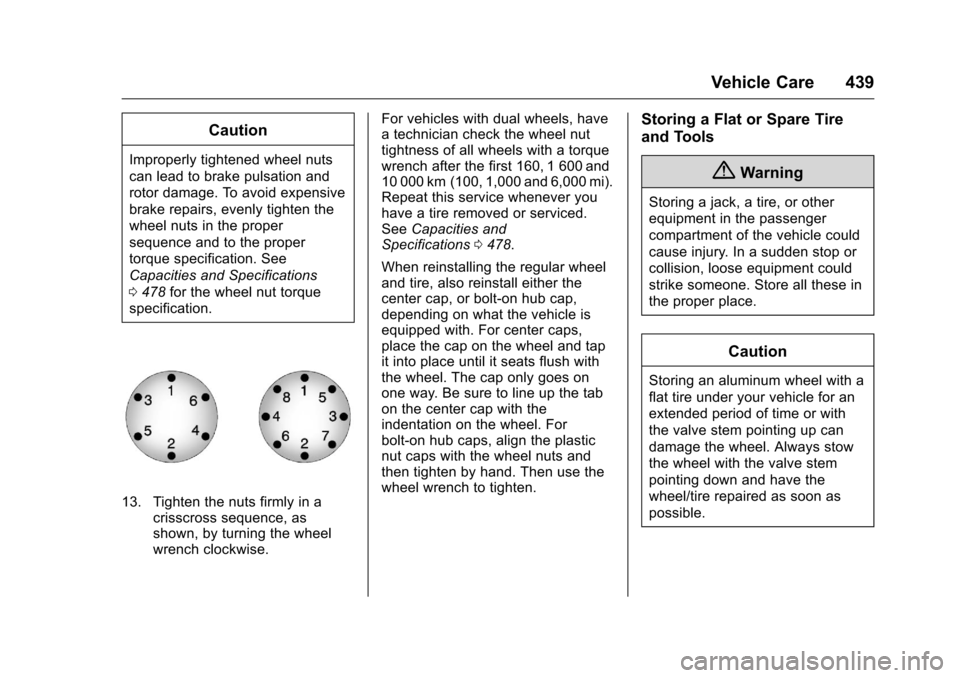
13. Tighten the nuts firmly in a crisscross sequence, as
shown, by turning the wheel
wrench clockwise. For vehicles with dual wheels, have
a technician check the wheel nut
tightness of all wheels with a torque
wrench after the first 160, 1 600 and
10 000 km (100, 1,000 and 6,000 mi).
Repeat this service whenever you
have a tire removed or serviced.
See
Capacities and
Specifications 0478.
When reinstalling the regular wheel
and tire, also reinstall either the
center cap, or bolt-on hub cap,
depending on what the vehicle is
equipped with. For center caps,
place the cap on the wheel and tap
it into place until it seats flush with
the wheel. The cap only goes on
one way. Be sure to line up the tab
on the center cap with the
indentation on the wheel. For
bolt-on hub caps, align the plastic
nut caps with the wheel nuts and
then tighten by hand. Then use the
wheel wrench to tighten.
Storing a Flat or Spare Tire
and Tools
{Warning
Storing a jack, a tire, or other
equipment in the passenger
compartment of the vehicle could
cause injury. In a sudden stop or
collision, loose equipment could
strike someone. Store all these in
the proper place.
Caution
Storing an aluminum wheel with a
flat tire under your vehicle for an
extended period of time or with
the valve stem pointing up can
damage the wheel. Always stow
the wheel with the valve stem
pointing down and have the
wheel/tire repaired as soon as
possible.
Page 478 of 533

Chevrolet Silverado Owner Manual (GMNA-Localizing-U.S./Canada/Mexico-
9159338) - 2016 - crc - 10/21/15
Technical Data 477
Technical Data
Vehicle Identification
Vehicle IdentificationNumber (VIN) . . . . . . . . . . . . . . . 477
Service Parts Identification Label . . . . . . . . . . . . . . . . . . . . . . . . 477
Vehicle Data
Capacities andSpecifications . . . . . . . . . . . . . . . 478
Engine Drive Belt Routing . . . . 481
Vehicle Identification
Vehicle Identification
Number (VIN)
This legal identifier is in the front
corner of the instrument panel, on
the left side of the vehicle. It can be
seen through the windshield from
outside. The VIN also appears on
the Vehicle Certification and Service
Parts labels and certificates of title
and registration.
Engine Identification
The eighth character in the VIN is
the engine code. This code
identifies the vehicle's engine,
specifications, and replacement
parts. See “Engine Specifications”
under Capacities and Specifications
0 478 for the vehicle's engine code.
Service Parts
Identification Label
This label, on the inside of the glove
box, has the following information:
.
Vehicle Identification
Number (VIN).
. Model designation.
. Paint information.
. Production options and special
equipment.
Do not remove this label from the
vehicle.
Page 479 of 533

Chevrolet Silverado Owner Manual (GMNA-Localizing-U.S./Canada/Mexico-
9159338) - 2016 - crc - 10/21/15
478 Technical Data
Vehicle Data
Capacities and Specifications
The following approximate capacities are given in metric and English conversions. SeeRecommended Fluids and
Lubricants 0472.
If the vehicle has a diesel engine, see the Duramax diesel supplement.
Application Capacities
Metric English
Air Conditioning Refrigerant For the air conditioning system refrigerant type and charge amount, see the refrigerant label under thehood. See your dealer for more information.
Cooling System
4.3L V6 1500 Series 15.1 L 15.9 qt
5.3L V8 1500 Series 15.7 L 16.6 qt
6.0L V8 2500 Series and 3500 Series 16.1 L 17.0 qt
6.2L V8 1500 Series 15.7 L 16.6 qt
Engine Oil with Filter 4.3L V6 5.7 L 6.0 qt
5.3L V8; 6.2L V8 7.6 L 8.0 qt
6.0L V8 5.7 L 6.0 qt