2016 CHEVROLET ORLANDO lights
[x] Cancel search: lightsPage 135 of 372
Black plate (1,1)Chevrolet Orlando Owner Manual - 2013 - CRC - 6/5/12
Lighting 6-1
Lighting
Exterior Lighting
Exterior Lamp Controls . . . . . . . . 6-1
Headlamp High/Low-BeamChanger . . . . . . . . . . . . . . . . . . . . . 6-2
Flash-to-Pass . . . . . . . . . . . . . . . . . 6-2
Daytime Running Lamps (DRL) . . . . . . . . . . . . . . . . 6-2
Automatic Headlamp System . . . . . . . . . . . . . . . . . . . . . . 6-3
Hazard Warning Flashers . . . . . 6-4
Turn and Lane-Change Signals . . . . . . . . . . . . . . . . . . . . . . 6-4
Front Fog Lamps . . . . . . . . . . . . . . 6-5
Interior Lighting
Instrument Panel Illumination Control . . . . . . . . . . . . . . . . . . . . . . 6-6
Courtesy Lamps . . . . . . . . . . . . . . 6-6
Dome Lamps . . . . . . . . . . . . . . . . . 6-6
Reading Lamps . . . . . . . . . . . . . . . 6-6
Lighting Features
Entry Lighting . . . . . . . . . . . . . . . . . 6-7
Exit Lighting . . . . . . . . . . . . . . . . . . . 6-7
Battery Power Protection . . . . . . 6-7
Exterior Lighting
Exterior Lamp Controls
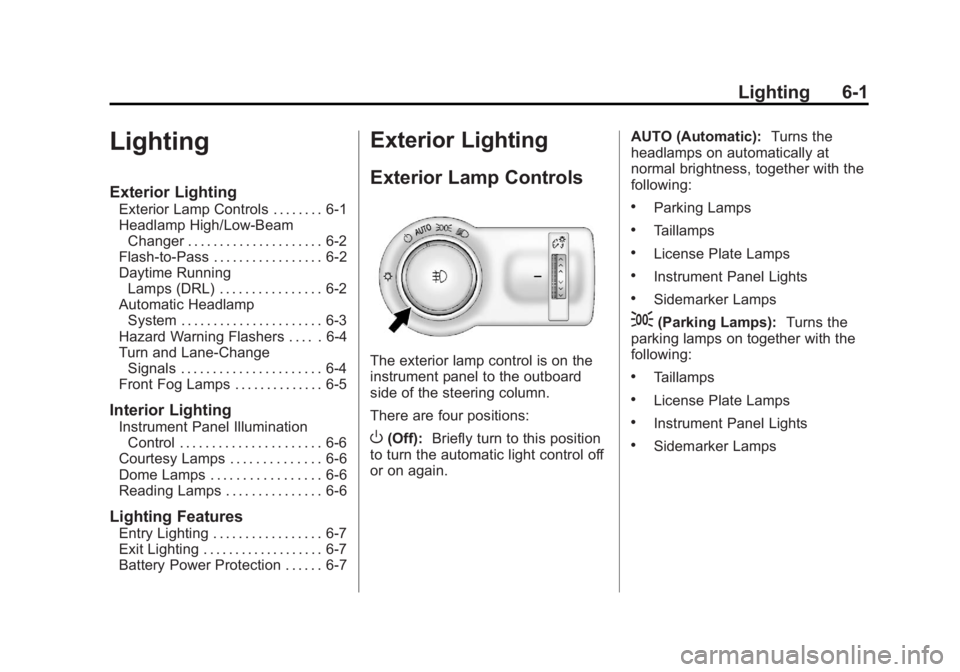
The exterior lamp control is on the
instrument panel to the outboard
side of the steering column.
There are four positions:
O(Off): Briefly turn to this position
to turn the automatic light control off
or on again. AUTO (Automatic):
Turns the
headlamps on automatically at
normal brightness, together with the
following:
.Parking Lamps
.Taillamps
.License Plate Lamps
.Instrument Panel Lights
.Sidemarker Lamps
;(Parking Lamps): Turns the
parking lamps on together with the
following:
.Taillamps
.License Plate Lamps
.Instrument Panel Lights
.Sidemarker Lamps
Page 136 of 372
Black plate (2,1)Chevrolet Orlando Owner Manual - 2013 - CRC - 6/5/12
6-2 Lighting
5(Headlamps):Turns the
headlamps on together with the
lamps listed below. A warning chime
sounds if the driver door is opened
when the ignition switch is off and
the headlamps are on.
.Parking Lamps
.Taillamps
.License Plate Lamps
.Instrument Panel Lights
.Sidemarker Lamps
#(Front Fog Lamps): For
vehicles with fog lamps, press to
turn the lamps on or off.
See Front Fog Lamps on page 6‑5.
When the lights are on,
;will be
lit. See Lamps On Reminder on
page 5‑20.
Headlamp High/
Low-Beam Changer
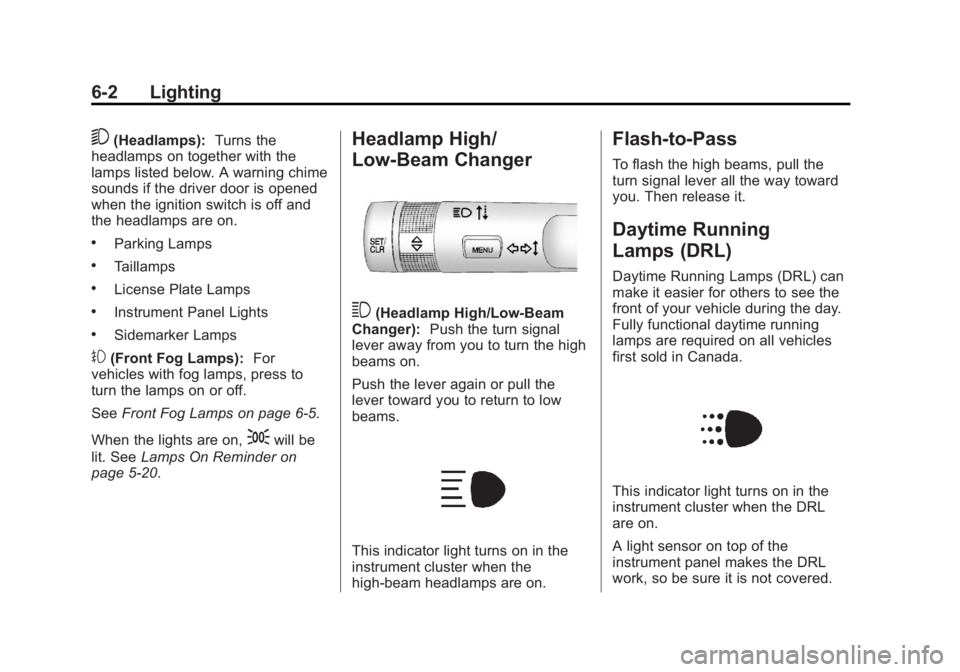
3(Headlamp High/Low-Beam
Changer): Push the turn signal
lever away from you to turn the high
beams on.
Push the lever again or pull the
lever toward you to return to low
beams.
This indicator light turns on in the
instrument cluster when the
high-beam headlamps are on.
Flash-to-Pass
To flash the high beams, pull the
turn signal lever all the way toward
you. Then release it.
Daytime Running
Lamps (DRL)
Daytime Running Lamps (DRL) can
make it easier for others to see the
front of your vehicle during the day.
Fully functional daytime running
lamps are required on all vehicles
first sold in Canada.
This indicator light turns on in the
instrument cluster when the DRL
are on.
A light sensor on top of the
instrument panel makes the DRL
work, so be sure it is not covered.
Page 138 of 372
Black plate (4,1)Chevrolet Orlando Owner Manual - 2013 - CRC - 6/5/12
6-4 Lighting
Lights On with Wipers
If the windshield wipers are
activated in daylight with the
engine on, and the exterior lamp
control is in AUTO, the headlamps,
parking lamps, and other exterior
lamps come on. The transition time
for the lamps coming on varies
based on wiper speed. When the
wipers are not operating, these
lamps turn off. Move the exterior
lamp control to
Por;to disable
this feature.
Hazard Warning Flashers
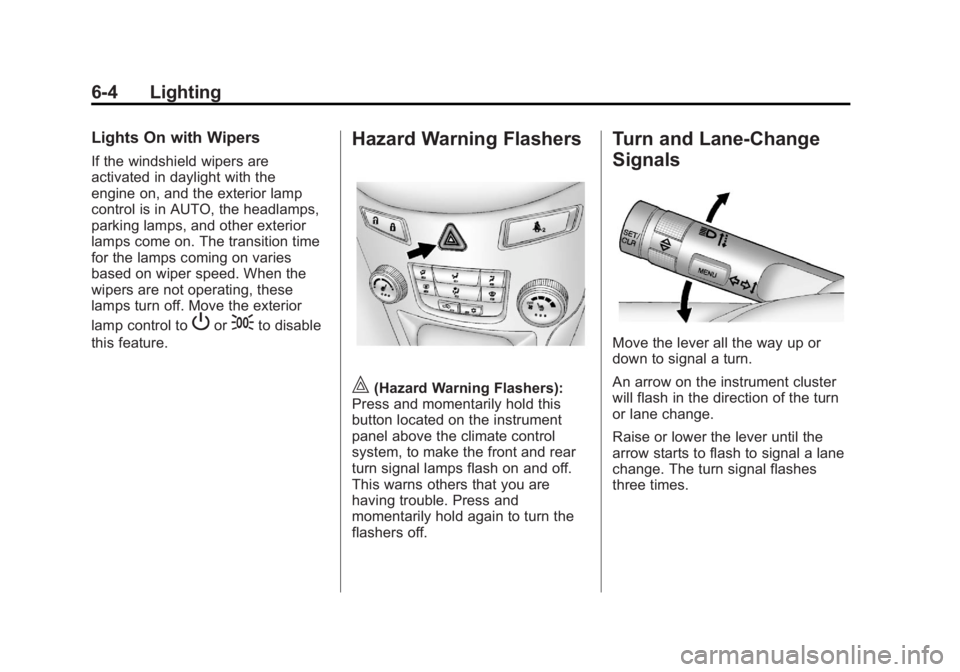
|(Hazard Warning Flashers):
Press and momentarily hold this
button located on the instrument
panel above the climate control
system, to make the front and rear
turn signal lamps flash on and off.
This warns others that you are
having trouble. Press and
momentarily hold again to turn the
flashers off.
Turn and Lane-Change
Signals
Move the lever all the way up or
down to signal a turn.
An arrow on the instrument cluster
will flash in the direction of the turn
or lane change.
Raise or lower the lever until the
arrow starts to flash to signal a lane
change. The turn signal flashes
three times.
Page 141 of 372
Black plate (7,1)Chevrolet Orlando Owner Manual - 2013 - CRC - 6/5/12
Lighting 6-7
Lighting Features
Entry Lighting
The headlamps, parking lamps, and
taillamps turn on briefly, when the
Remote Keyless Entry (RKE)
Kis
pressed. After about 30 seconds the
exterior lamps turn off. Entry lighting
can be disabled manually by
changing the ignition out of the OFF
position, or by pressing the RKE
Q
button.
This feature can be changed. See
Vehicle Personalization on
page 5‑30.
Exit Lighting
The headlamps, taillamps, parking
lamps, back‐up lamps, and license
plate lamps come on at night, or in
areas with limited lighting, when the
driver door is opened. The dome
lamps also come on when a door is
opened after the ignition is changed
to the OFF position.
The exterior lights and dome lamps
remain on after the driver door is
open for a set amount of time, then
automatically turn off.
The exterior lights turn off
immediately by turning the exterior
lamps control off.
This feature can be changed. See
Vehicle Personalization on
page 5‑30.
Battery Power Protection
The battery saver feature is
designed to protect the vehicle's
battery.
If some interior lamps are left on
and the ignition is turned off, the
battery rundown protection system
automatically turns the lamp off after
some time.
Page 179 of 372
Black plate (5,1)Chevrolet Orlando Owner Manual - 2013 - CRC - 6/5/12
Climate Controls 8-5
on, see“Climate and Air Quality”
under Vehicle Personalization on
page 5‑30.
Rear Window Defogger
=(Rear Window Defogger):
Press to turn the rear window
defogger on or off.
The rear window defogger turns off
automatically after about
10 minutes. If turned on again it
runs for about five minutes before
turning off.
The rear window defogger can be
set to automatic operation; see
“Climate and Air Quality” under
Vehicle Personalization on
page 5‑30. When auto rear defog is
selected, the rear window defogger
turns on automatically when the
interior temperature is cold and the
outside temperature is about 4°C
(40°F) and below. The auto rear
defogger turns off automatically
after about 10 minutes. At higher
speeds, the rear window defogger
may stay on continuously. For vehicles with heated outside
rearview mirrors, they turn on when
the rear window defogger button is
on and help to clear fog or frost from
the surface of the mirrors. See
Heated Mirrors on page 2‑12.
Notice:
Do not try to clear frost
or other material from the inside
of the front windshield and rear
window with a razor blade or
anything else that is sharp. This
may damage the rear window
defogger grid and affect the
radio's ability to pick up stations
clearly. The repairs would not be
covered by the vehicle warranty.
Heated Seats (If Equipped): Press
to turn the heated seats on or off.
See Heated Front Seats on
page 3‑6.
Remote Start Climate Control
Operation: For vehicles with the
remote vehicle start feature, the
climate control system may run
when the vehicle is started remotely.
The system uses the driver ’s
previous settings to heat or cool the inside of the vehicle. The rear defog
may come on during remote start
based on cold ambient conditions.
The rear defog indicator light does
not come on during a remote start.
If the vehicle has front heated seats,
they may come on during a remote
start. The heated seat indicator
lights do not come on during a
remote start. See
Remote Vehicle
Start on page 2‑5 andHeated Front
Seats on page 3‑6.
Sensors
The solar sensor, located on top of
the instrument panel near the
windshield, monitors the solar heat.
The climate control system uses
the sensor information to adjust
the temperature, fan speed,
recirculation, and air delivery mode
for best comfort.
If the sensor is covered, the
automatic climate control system
may not work properly.
Page 195 of 372
Black plate (15,1)Chevrolet Orlando Owner Manual - 2013 - CRC - 6/5/12
Driving and Operating 9-15
Do not turn the engine off when the
vehicle is moving. This will cause a
loss of power assist in the brake
and steering systems and disable
the airbags.
If the vehicle must be shut off in an
emergency:
1. Brake using a firm and steadypressure. Do not pump the
brakes repeatedly. This may
deplete power assist, requiring
increased brake pedal force.
2. Shift the vehicle to neutral. This can be done while the vehicle is
moving. After shifting to neutral,
firmly apply the brakes and steer
the vehicle to a safe location.
3. Come to a complete stop. Shift to P (Park) with an automatic
transmission, or Neutral with a
manual transmission. Turn the
ignition to LOCK/OFF.
4. Set the parking brake. See Parking Brake on page 9‑27.{WARNING
Turning off the vehicle while
moving may cause loss of power
assist in the brake and steering
systems and disable the airbags.
While driving, only shut the
vehicle off in an emergency.
If the vehicle cannot be pulled over,
and must be shut off while driving,
turn the ignition to ACC/
ACCESSORY.
2 (ACC/ACCESSORY): This
position provides power to some of
the electrical accessories. It unlocks
the steering wheel. To move the key
from ACC/ACCESSORY to LOCK/
OFF, the shift lever must be in
P (Park).
3 (ON/RUN): The ignition switch
stays in this position when the
engine is running. This position can
be used to operate the electrical
accessories, as well as to display
some warning and indicator lights. This position can also be used for
service and diagnostics, and to
verify the proper operation of the
malfunction indicator lamp as may
be required for emission inspection
purposes.
The battery could be drained if the
key is left in the ACC/ACCESSORY
or ON/RUN position with the engine
off. The vehicle might not restart if
the battery is allowed to drain for an
extended period of time.
4 (START):
This position starts the
engine. When the engine starts,
release the key. The ignition switch
will return to ON/RUN for normal
driving.
A warning tone sounds when the
driver door is opened and the key is
in the ignition. If the key becomes
difficult to turn, see Keys on
page 2‑1.
Page 210 of 372
Black plate (30,1)Chevrolet Orlando Owner Manual - 2013 - CRC - 6/5/12
9-30 Driving and Operating
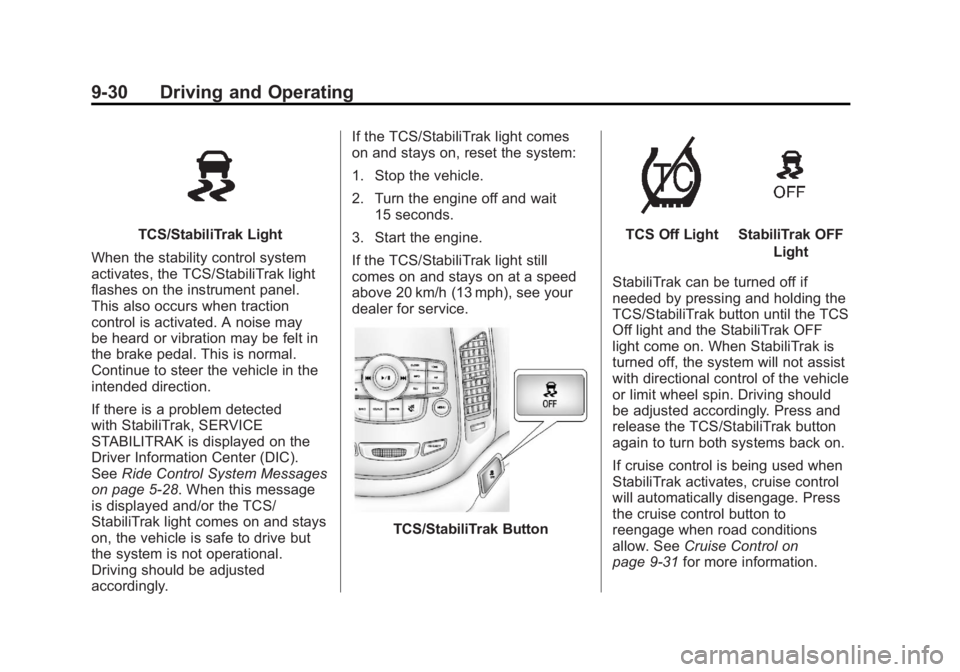
TCS/StabiliTrak Light
When the stability control system
activates, the TCS/StabiliTrak light
flashes on the instrument panel.
This also occurs when traction
control is activated. A noise may
be heard or vibration may be felt in
the brake pedal. This is normal.
Continue to steer the vehicle in the
intended direction.
If there is a problem detected
with StabiliTrak, SERVICE
STABILITRAK is displayed on the
Driver Information Center (DIC).
See Ride Control System Messages
on page 5‑28. When this message
is displayed and/or the TCS/
StabiliTrak light comes on and stays
on, the vehicle is safe to drive but
the system is not operational.
Driving should be adjusted
accordingly. If the TCS/StabiliTrak light comes
on and stays on, reset the system:
1. Stop the vehicle.
2. Turn the engine off and wait
15 seconds.
3. Start the engine.
If the TCS/StabiliTrak light still
comes on and stays on at a speed
above 20 km/h (13 mph), see your
dealer for service.
TCS/StabiliTrak Button
TCS Off LightStabiliTrak OFF Light
StabiliTrak can be turned off if
needed by pressing and holding the
TCS/StabiliTrak button until the TCS
Off light and the StabiliTrak OFF
light come on. When StabiliTrak is
turned off, the system will not assist
with directional control of the vehicle
or limit wheel spin. Driving should
be adjusted accordingly. Press and
release the TCS/StabiliTrak button
again to turn both systems back on.
If cruise control is being used when
StabiliTrak activates, cruise control
will automatically disengage. Press
the cruise control button to
reengage when road conditions
allow. See Cruise Control on
page 9‑31 for more information.
Page 217 of 372
Black plate (37,1)Chevrolet Orlando Owner Manual - 2013 - CRC - 6/5/12
Driving and Operating 9-37
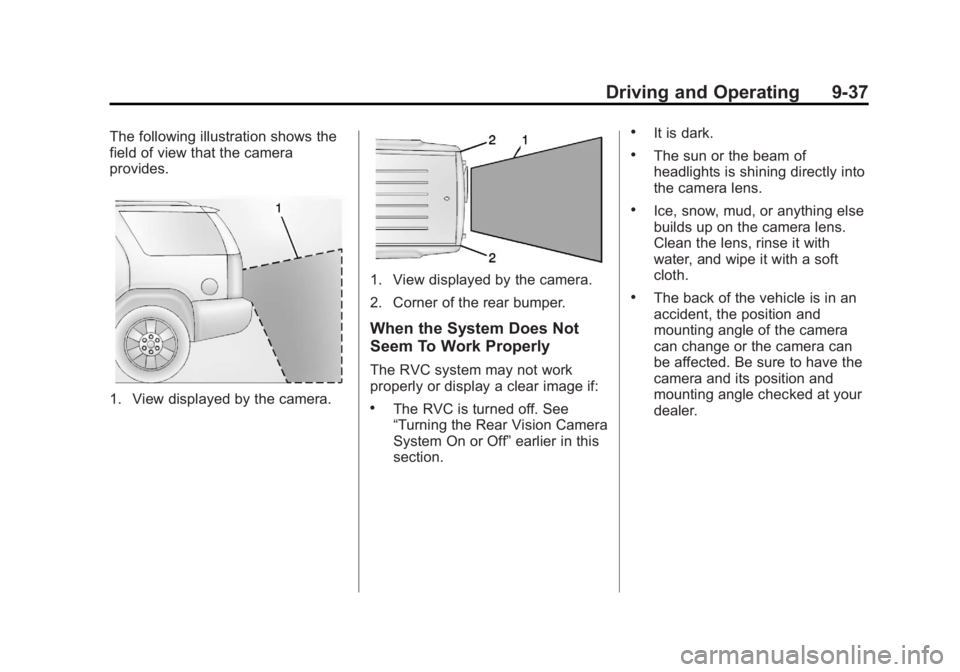
The following illustration shows the
field of view that the camera
provides.
1. View displayed by the camera.
1. View displayed by the camera.
2. Corner of the rear bumper.
When the System Does Not
Seem To Work Properly
The RVC system may not work
properly or display a clear image if:
.The RVC is turned off. See
“Turning the Rear Vision Camera
System On or Off”earlier in this
section.
.It is dark.
.The sun or the beam of
headlights is shining directly into
the camera lens.
.Ice, snow, mud, or anything else
builds up on the camera lens.
Clean the lens, rinse it with
water, and wipe it with a soft
cloth.
.The back of the vehicle is in an
accident, the position and
mounting angle of the camera
can change or the camera can
be affected. Be sure to have the
camera and its position and
mounting angle checked at your
dealer.