2016 CHEVROLET MALIBU display
[x] Cancel search: displayPage 36 of 420
Chevrolet Malibu Owner Manual (GMNA-Localizing-U.S./Canada/Mexico-
9087641) - 2016 - crc - 9/3/15
Keys, Doors, and Windows 35
When all additional transmitters
are programmed, press and
hold ENGINE START/STOP for
12 seconds to exit
programming mode.
6. Put the key back into the transmitter.
Programming without a
Recognized Transmitter
If there are no currently recognized
transmitters available, follow this
procedure to program up to eight
transmitters. This feature is not
available in Canada. This procedure
will take approximately 30 minutes
to complete. The vehicle must be off
and all of the transmitters to be
programmed must be with you. 1. Remove the key lock cylinder cap on the driver door handle.
See Door Locks 038
ii. Insert
the vehicle key of the
transmitter into the key lock
cylinder on the outside of the
driver door and turn the key
counterclockwise five times
within 10 seconds. The Driver Information Center
(DIC) displays REMOTE
LEARN PENDING,
PLEASE WAIT.
2. Wait for 10 minutes until the DIC displays PRESS ENGINE
START BUTTON TO LEARN
and then press ENGINE
START/STOP.
The DIC displays will again
show REMOTE LEARN
PENDING, PLEASE WAIT.
3. Repeat Step 2 two additional times. After the third time, all
previously known transmitters
will no longer work with the
vehicle. Remaining transmitters
can be relearned during the
next steps.
The DIC display should now
show READY FOR REMOTE
# 1.
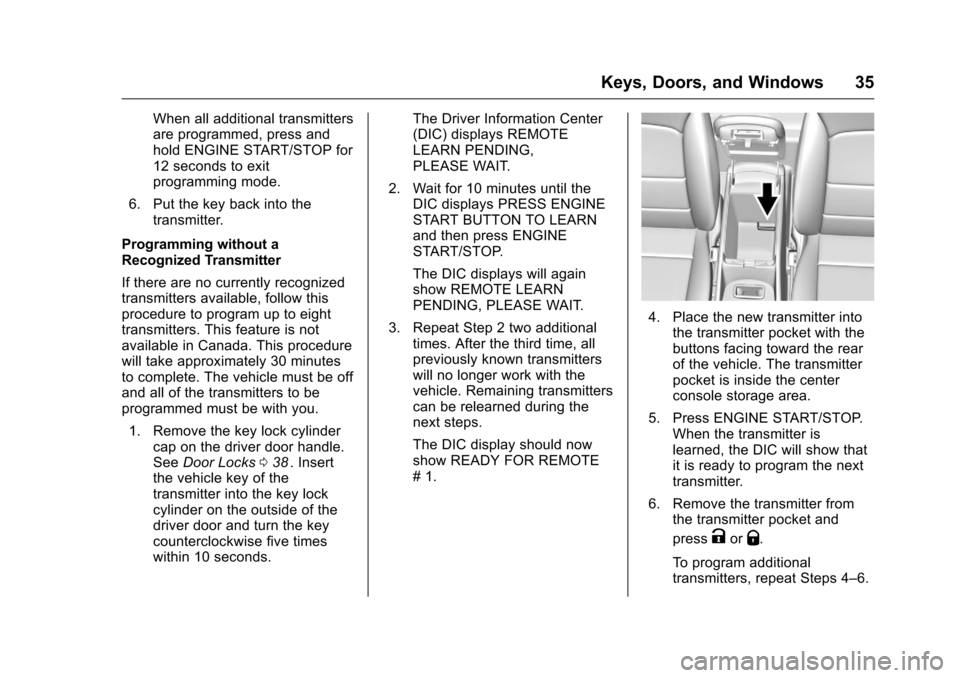
4. Place the new transmitter intothe transmitter pocket with the
buttons facing toward the rear
of the vehicle. The transmitter
pocket is inside the center
console storage area.
5. Press ENGINE START/STOP. When the transmitter is
learned, the DIC will show that
it is ready to program the next
transmitter.
6. Remove the transmitter from the transmitter pocket and
press
KorQ.
To program additional
transmitters, repeat Steps 4–6.
Page 37 of 420
Chevrolet Malibu Owner Manual (GMNA-Localizing-U.S./Canada/Mexico-
9087641) - 2016 - crc - 9/3/15
36 Keys, Doors, and Windows
When all additional transmitters
are programmed, press and
hold the ENGINE START/
STOP for 12 seconds to exit
programming mode.
7. Return the key back into the transmitter.
Starting the Vehicle with a Low
Transmitter Battery
While trying to start the vehicle,
if the transmitter battery is weak or if
there is interference with the signal,
the DIC may display NO REMOTE
DETECTED or NO REMOTE KEY
WAS DETECTED PLACE KEY IN
TRANSMITTER POCKET THEN
START YOUR VEHICLE. The
REPLACE BATTERY IN REMOTE
KEY message may also be
displayed at this time.
To start the vehicle:
1. Open the center console and place the transmitter in the
transmitter pocket with the
buttons facing the rear of the
vehicle. 2. With the vehicle in P (Park) or
N (Neutral), press the brake
pedal and press ENGINE
START/STOP. See Starting the
Engine 0228
ii.
Replace the transmitter battery
as soon as possible.
Battery Replacement
Replace the battery if the REPLACE
BATTERY IN REMOTE KEY
message displays in the DIC. See
Key and Lock Messages 0139
ii.
Caution
When replacing the battery, do
not touch any of the circuitry on
the transmitter. Static from your
body could damage the
transmitter.
The battery is not rechargeable. To
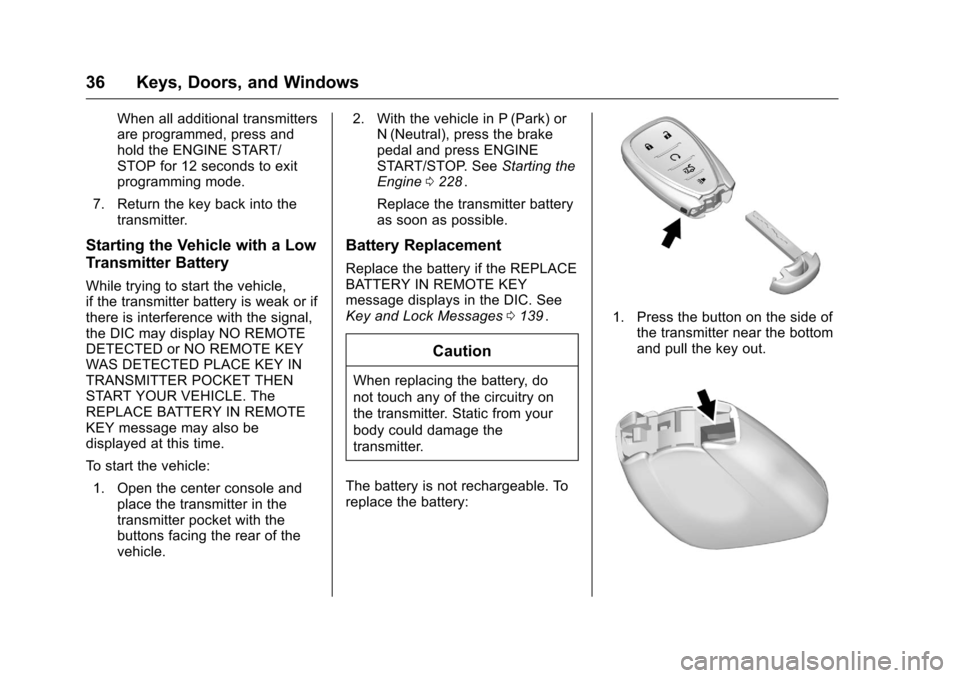
replace the battery:
1. Press the button on the side of the transmitter near the bottom
and pull the key out.
Page 60 of 420
Chevrolet Malibu Owner Manual (GMNA-Localizing-U.S./Canada/Mexico-
9087641) - 2016 - crc - 9/3/15
Seats and Restraints 59
In some vehicles the Driver ID may
be displayed for the first few ignition
cycles if the vehicle’s driver has
changed.
Easy Exit Recall
If programmed on in the vehicle
personalization menu, the easy exit
feature automatically recalls the
previously stored exit position when
exiting the vehicle. See“Storing
Memory Positions” previously in this
section. See also Vehicle
Personalization 0145
ii.
Easy exit recall automatically
activates when one of the following
occurs:
. The vehicle is turned off and the
driver door is opened within a
short time.
. The vehicle is turned off with the
driver door open.
To stop recall movement, press one
of the memory, driver seat, outside
mirror, or power tilt and telescoping
steering column controls. Obstructions
If something has blocked the driver
seat and/or power tilt and
telescoping steering column (if
equipped) while recalling a memory
position, the recall may stop.
Remove the obstruction. Then do
one of the following:
.
If automatically or manually
recalling the stored memory
position, press and hold the
appropriate manual control for
two seconds. Try recalling again
by pressing the appropriate
memory button.
. If automatically recalling the
position, press and hold the
appropriate manual control for
the memory item that is not
recalling for two seconds. Try
recalling again by opening the
driver door and pressing
Kon
the RKE transmitter.
. If recalling the exit position,
press and hold the appropriate
manual control for the exit
feature not recalling for
two seconds. Then try recalling
the exit position again. If the memory position is still not
recalling, see your dealer for
service.
Heated and Ventilated
Front Seats
{Warning
If you cannot feel temperature
change or pain to the skin, the
seat heater may cause burns. To
reduce the risk of burns, people
with such a condition should use
care when using the seat heater,
especially for long periods of
time. Do not place anything on
the seat that insulates against
heat, such as a blanket, cushion,
cover, or similar item. This may
cause the seat heater to
overheat. An overheated seat
heater may cause a burn or may
damage the seat.
Page 76 of 420
Chevrolet Malibu Owner Manual (GMNA-Localizing-U.S./Canada/Mexico-
9087641) - 2016 - crc - 9/3/15
Seats and Restraints 75
vehicle's sensing system may shut
down the high voltage system.
When this occurs, the high voltage
battery is disconnected and the
vehicle is not charging the 12-volt
battery or the electrical system. The
vehicle may start but it shuts down
once the 12-volt battery is depleted.
The airbag readiness light and/or
the 12-volt battery warning light are
displayed. Before the vehicle can be
operated again, it must be serviced
at your dealer.
In many crashes severe enough to
inflate the airbag, windshields are
broken by vehicle deformation.
Additional windshield breakage may
also occur from the front outboard
passenger airbag.
.Airbags are designed to inflate
only once. After an airbag
inflates, you will need some new
parts for the airbag system.
If you do not get them, the
airbag system will not be there
to help protect you in another
crash. A new system will include
airbag modules and possibly other parts. The service manual
for the vehicle covers the need
to replace other parts.
. The vehicle has a crash sensing
and diagnostic module which
records information after a
crash. See Vehicle Data
Recording and Privacy 0395
iiand Event Data Recorders
0 396ii.
. Let only qualified technicians
work on the airbag systems.
Improper service can mean that
an airbag system will not work
properly. See your dealer for
service.
Passenger Sensing
System
The vehicle has a passenger
sensing system for the front
outboard passenger position. The
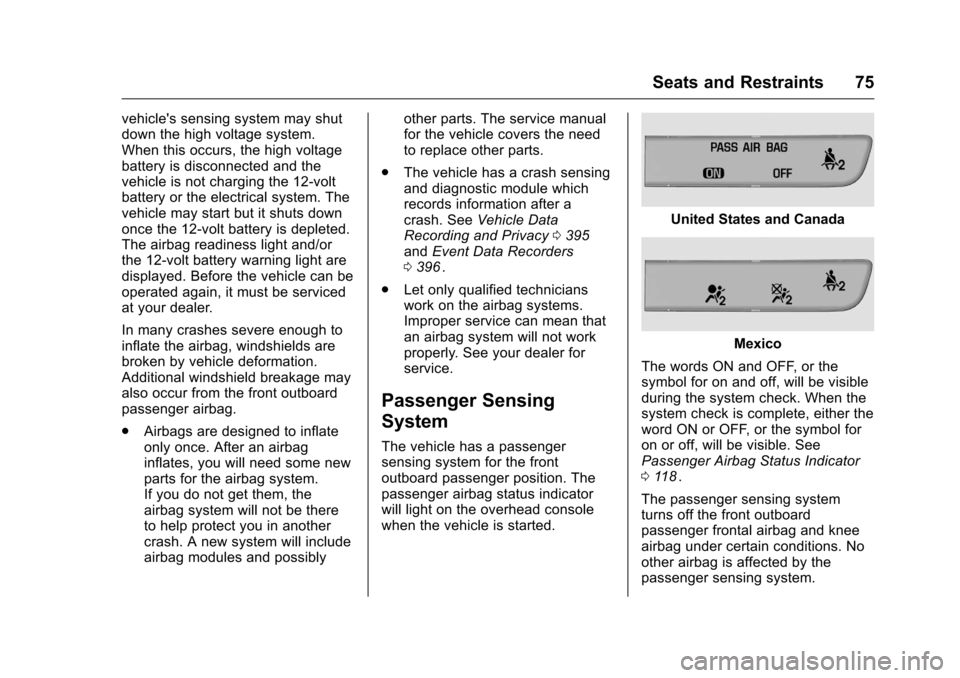
passenger airbag status indicator
will light on the overhead console
when the vehicle is started.
United States and Canada
Mexico
The words ON and OFF, or the
symbol for on and off, will be visible
during the system check. When the
system check is complete, either the
word ON or OFF, or the symbol for
on or off, will be visible. See
Passenger Airbag Status Indicator
0 118
ii.
The passenger sensing system
turns off the front outboard
passenger frontal airbag and knee
airbag under certain conditions. No
other airbag is affected by the
passenger sensing system.
Page 103 of 420
Chevrolet Malibu Owner Manual (GMNA-Localizing-U.S./Canada/Mexico-
9087641) - 2016 - crc - 9/3/15
102 Instruments and Controls
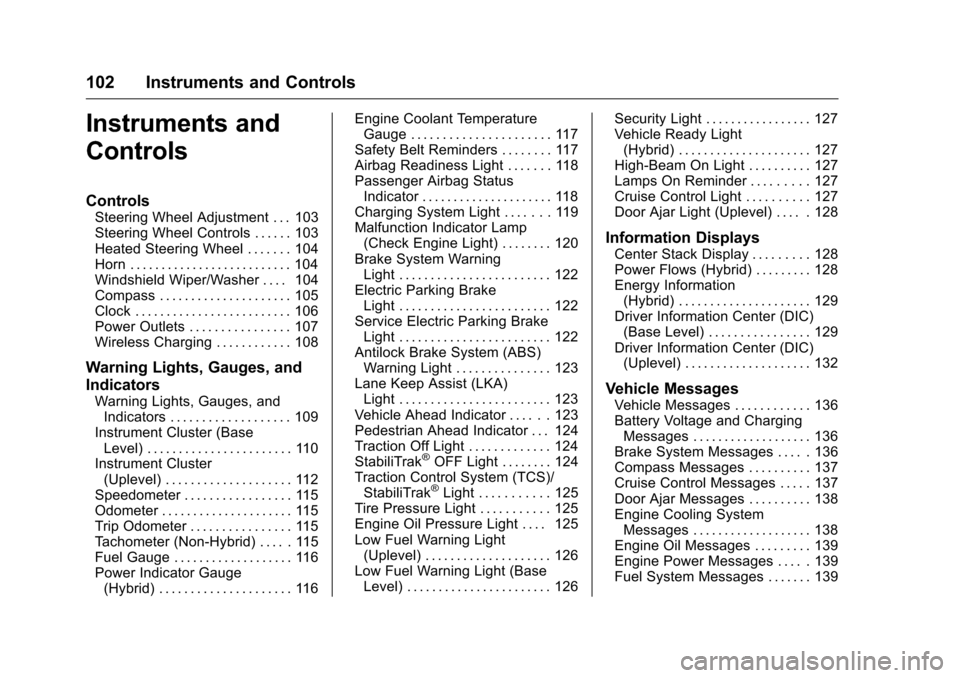
Instruments and
Controls
Controls
Steering Wheel Adjustment . . . 103
Steering Wheel Controls . . . . . . 103
Heated Steering Wheel . . . . . . . 104
Horn . . . . . . . . . . . . . . . . . . . . . . . . . . 104
Windshield Wiper/Washer . . . . 104
Compass . . . . . . . . . . . . . . . . . . . . . 105
Clock . . . . . . . . . . . . . . . . . . . . . . . . . 106
Power Outlets . . . . . . . . . . . . . . . . 107
Wireless Charging . . . . . . . . . . . . 108
Warning Lights, Gauges, and
Indicators
Warning Lights, Gauges, andIndicators . . . . . . . . . . . . . . . . . . . 109
Instrument Cluster (Base Level) . . . . . . . . . . . . . . . . . . . . . . . 110
Instrument Cluster
(Uplevel) . . . . . . . . . . . . . . . . . . . . 112
Speedometer . . . . . . . . . . . . . . . . . 115
Odometer . . . . . . . . . . . . . . . . . . . . . 115
Trip Odometer . . . . . . . . . . . . . . . . 115
Tachometer (Non-Hybrid) . . . . . 115
Fuel Gauge . . . . . . . . . . . . . . . . . . . 116
Power Indicator Gauge (Hybrid) . . . . . . . . . . . . . . . . . . . . . 116 Engine Coolant Temperature
Gauge . . . . . . . . . . . . . . . . . . . . . . 117
Safety Belt Reminders . . . . . . . . 117
Airbag Readiness Light . . . . . . . 118
Passenger Airbag Status Indicator . . . . . . . . . . . . . . . . . . . . . 118
Charging System Light . . . . . . . 119
Malfunction Indicator Lamp (Check Engine Light) . . . . . . . . 120
Brake System Warning Light . . . . . . . . . . . . . . . . . . . . . . . . 122
Electric Parking Brake Light . . . . . . . . . . . . . . . . . . . . . . . . 122
Service Electric Parking Brake Light . . . . . . . . . . . . . . . . . . . . . . . . 122
Antilock Brake System (ABS) Warning Light . . . . . . . . . . . . . . . 123
Lane Keep Assist (LKA) Light . . . . . . . . . . . . . . . . . . . . . . . . 123
Vehicle Ahead Indicator . . . . . . 123
Pedestrian Ahead Indicator . . . 124
Traction Off Light . . . . . . . . . . . . . 124
StabiliTrak
®OFF Light . . . . . . . . 124
Traction Control System (TCS)/ StabiliTrak
®Light . . . . . . . . . . . 125
Tire Pressure Light . . . . . . . . . . . 125
Engine Oil Pressure Light . . . . 125
Low Fuel Warning Light (Uplevel) . . . . . . . . . . . . . . . . . . . . 126
Low Fuel Warning Light (Base Level) . . . . . . . . . . . . . . . . . . . . . . . 126 Security Light . . . . . . . . . . . . . . . . . 127
Vehicle Ready Light
(Hybrid) . . . . . . . . . . . . . . . . . . . . . 127
High-Beam On Light . . . . . . . . . . 127
Lamps On Reminder . . . . . . . . . 127
Cruise Control Light . . . . . . . . . . 127
Door Ajar Light (Uplevel) . . . . . 128
Information Displays
Center Stack Display . . . . . . . . . 128
Power Flows (Hybrid) . . . . . . . . . 128
Energy Information (Hybrid) . . . . . . . . . . . . . . . . . . . . . 129
Driver Information Center (DIC) (Base Level) . . . . . . . . . . . . . . . . 129
Driver Information Center (DIC) (Uplevel) . . . . . . . . . . . . . . . . . . . . 132
Vehicle Messages
Vehicle Messages . . . . . . . . . . . . 136
Battery Voltage and Charging
Messages . . . . . . . . . . . . . . . . . . . 136
Brake System Messages . . . . . 136
Compass Messages . . . . . . . . . . 137
Cruise Control Messages . . . . . 137
Door Ajar Messages . . . . . . . . . . 138
Engine Cooling System Messages . . . . . . . . . . . . . . . . . . . 138
Engine Oil Messages . . . . . . . . . 139
Engine Power Messages . . . . . 139
Fuel System Messages . . . . . . . 139
Page 105 of 420
Chevrolet Malibu Owner Manual (GMNA-Localizing-U.S./Canada/Mexico-
9087641) - 2016 - crc - 9/3/15
104 Instruments and Controls
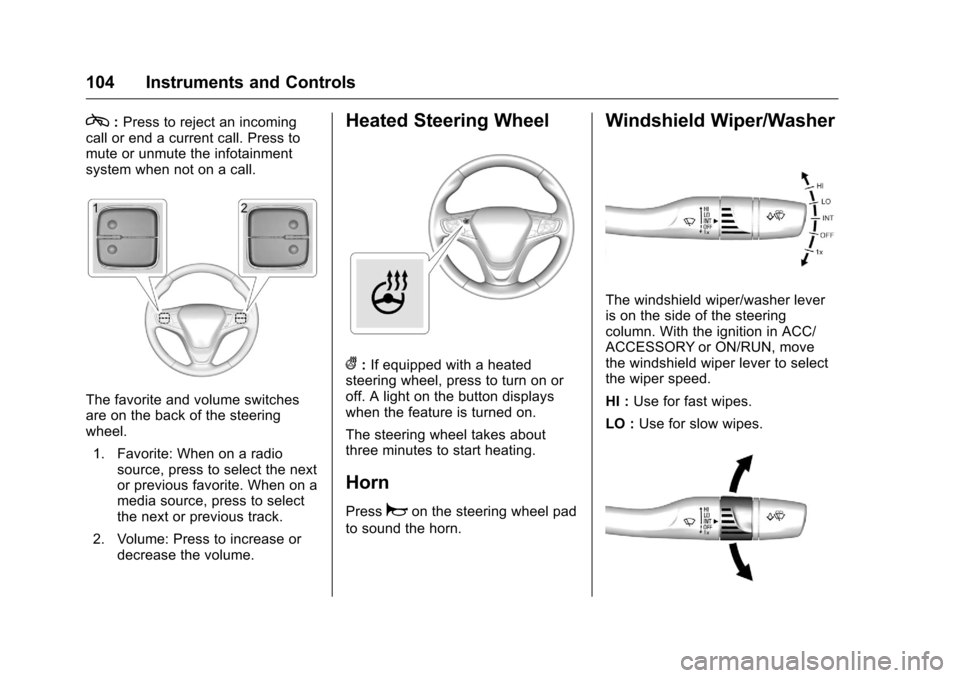
c:Press to reject an incoming
call or end a current call. Press to
mute or unmute the infotainment
system when not on a call.
The favorite and volume switches
are on the back of the steering
wheel.
1. Favorite: When on a radio source, press to select the next
or previous favorite. When on a
media source, press to select
the next or previous track.
2. Volume: Press to increase or decrease the volume.
Heated Steering Wheel
(:If equipped with a heated
steering wheel, press to turn on or
off. A light on the button displays
when the feature is turned on.
The steering wheel takes about
three minutes to start heating.
Horn
Pressaon the steering wheel pad
to sound the horn.
Windshield Wiper/Washer
The windshield wiper/washer lever
is on the side of the steering
column. With the ignition in ACC/
ACCESSORY or ON/RUN, move
the windshield wiper lever to select
the wiper speed.
HI : Use for fast wipes.
LO : Use for slow wipes.
Page 106 of 420
Chevrolet Malibu Owner Manual (GMNA-Localizing-U.S./Canada/Mexico-
9087641) - 2016 - crc - 9/3/15
Instruments and Controls 105
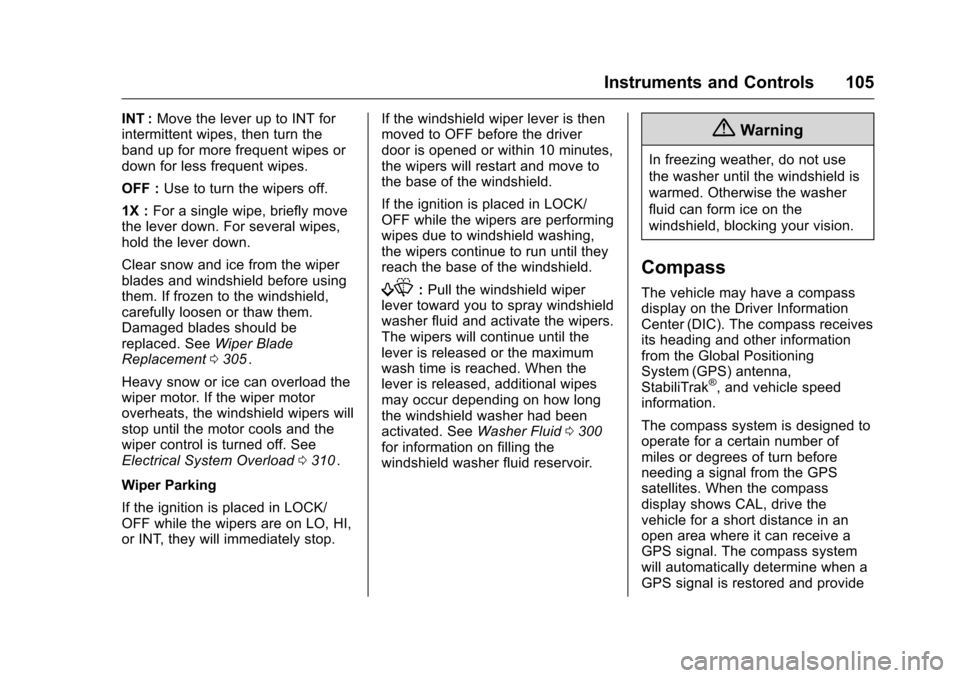
INT :Move the lever up to INT for
intermittent wipes, then turn the
band up for more frequent wipes or
down for less frequent wipes.
OFF : Use to turn the wipers off.
1X : For a single wipe, briefly move
the lever down. For several wipes,
hold the lever down.
Clear snow and ice from the wiper
blades and windshield before using
them. If frozen to the windshield,
carefully loosen or thaw them.
Damaged blades should be
replaced. See Wiper Blade
Replacement 0305
ii.
Heavy snow or ice can overload the
wiper motor. If the wiper motor
overheats, the windshield wipers will
stop until the motor cools and the
wiper control is turned off. See
Electrical System Overload 0310
ii.
Wiper Parking
If the ignition is placed in LOCK/
OFF while the wipers are on LO, HI,
or INT, they will immediately stop. If the windshield wiper lever is then
moved to OFF before the driver
door is opened or within 10 minutes,
the wipers will restart and move to
the base of the windshield.
If the ignition is placed in LOCK/
OFF while the wipers are performing
wipes due to windshield washing,
the wipers continue to run until they
reach the base of the windshield.
f:
Pull the windshield wiper
lever toward you to spray windshield
washer fluid and activate the wipers.
The wipers will continue until the
lever is released or the maximum
wash time is reached. When the
lever is released, additional wipes
may occur depending on how long
the windshield washer had been
activated. See Washer Fluid0300
iifor information on filling the
windshield washer fluid reservoir.
{Warning
In freezing weather, do not use
the washer until the windshield is
warmed. Otherwise the washer
fluid can form ice on the
windshield, blocking your vision.
Compass
The vehicle may have a compass
display on the Driver Information
Center (DIC). The compass receives
its heading and other information
from the Global Positioning
System (GPS) antenna,
StabiliTrak
®, and vehicle speed
information.
The compass system is designed to
operate for a certain number of
miles or degrees of turn before
needing a signal from the GPS
satellites. When the compass
display shows CAL, drive the
vehicle for a short distance in an
open area where it can receive a
GPS signal. The compass system
will automatically determine when a
GPS signal is restored and provide
Page 107 of 420
Chevrolet Malibu Owner Manual (GMNA-Localizing-U.S./Canada/Mexico-
9087641) - 2016 - crc - 9/3/15
106 Instruments and Controls
a heading again. SeeCompass
Messages 0137iifor the messages
that may be displayed for the
compass.
Clock
Radio without Touchscreen
The infotainment system controls
are used to access the time and
date settings through the menu
system. See Operation0173
iion
how to use the menu system.
Setting the Time and Date
1. Press MENU, then select Settings
2. Select Time and Date.
3. Select Set Time or Set Date.
4. Turn MENU to change the value.
5. Press MENU to select the next value.
6. Turn MENU to change the value. 7. To exit without saving, press
BACK at any time or to save
and return to the Time and
Date menu, press MENU
multiple times.
Auto Set
When Auto Set is enabled, the time
cannot be manually set.
From the Set Time or Set
Date menu:
1. Press the preset button under Auto Set.
2. Turn MENU to select Off (Manual) or On-Cell Network,
then press MENU to select it
and return to the Time and
Date menu.
3. To exit without saving, press BACK at any time.
Setting the 12/24 Hour Format
From the Set Time menu:
1. Press the preset button under 12-24 HR to change between
12 hour and 24 hour modes.
2. To return to the Time and Date menu, press BACK at any time.
Radio with Touchscreen
The infotainment system controls
are used to access the time and
date settings through the menu
system. See Operation0173
iion
how to use the menu system.
Setting the Time and Date
When Auto Set is enabled the time
cannot be manually set.
1. Press
{, then touch Settings.
2. Touch Time and Date, then Set Time or Set Date.
3. Touch + or −to adjust the
value.
4. Touch
RorQto adjust AM or
PM for 12 hour format.
5. Touch
0to return to the
Time and Date menu.
Auto Set
1. Press{, then touch Settings.
2. Touch Time and Date, then Auto Set.
3. Select from the available selections.